Now a days Ubuntu is the most widely used Operating system used servers level. Canonical had released its latest and stable version of server as Ubuntu 18.04 LTS (Bionic Beaver). In this article we will discuss what new features that has been included in this release and also discuss Ubuntu 18.04 Server installation steps.
Let’s look into the new features of Ubuntu 18.04 Server,
1) Introduction of new Network configuration utility “netplan”, It is used to configure Static IP and Bridge.
2) Python version 3.6
3) New updated Linux Container manager LXD 3.0
4) Updated QEMU 2.11.1
5) Updated libvirt 4.0
6) Updated Open vSwitch 2.9
7) Chrony has been replaced NTP for time syncing
8) PHP has been updated to PHP 7.2
9) New Version of OpenStack “Queen” has been included.
10) Cloud-init has been updated to 18.2
Let’s jump into the Installation guide,
Minimum system requirement for Ubuntu 18.04 Server
- 2 GB RAM
- 20 GB hard disk Space
- Dual core Processor (2 GHZ)
- Installer Media (USB / DVD)
Step by Step Ubuntu 18.04 Server Installation
Step:1) Download Ubuntu 18.04 Server ISO file
Download the Ubuntu 18.04 Server ISO file from the Ubuntu official web site:
http://releases.ubuntu.com/18.04/
Once the file is downloaded then burn it either into USB or DVD and make it Bootable. In Case you have downloaded the iso file in Ubuntu desktop then refer the following:
How to Create Bootable USB Disk / DVD on Ubuntu / Linux Mint
Step:2) Boot system (or server) with bootable media
Now reboot your target system or server, go to the bios settings and change the boot sequence, select the bootable media that you have created in step:1
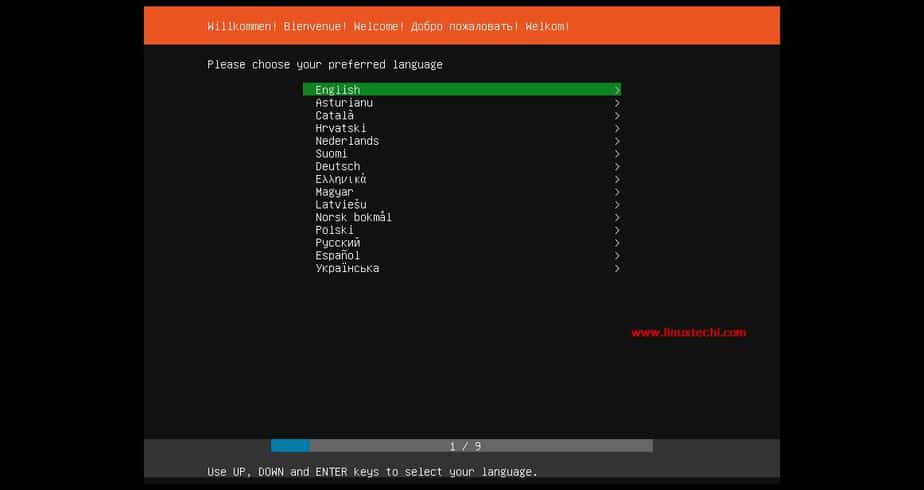
Select your preferred language and then hit enter
Select the preferred Keyboard layout that suits to your installation, in my case I am taking as default.
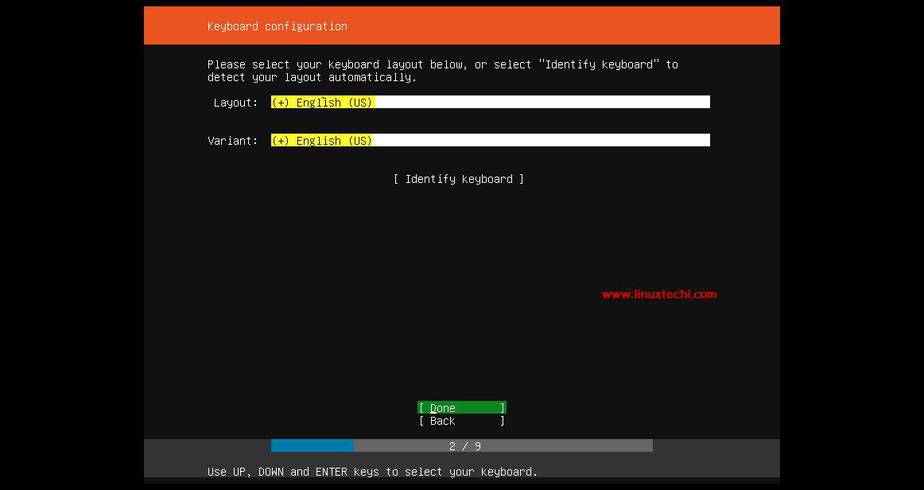
Press Enter
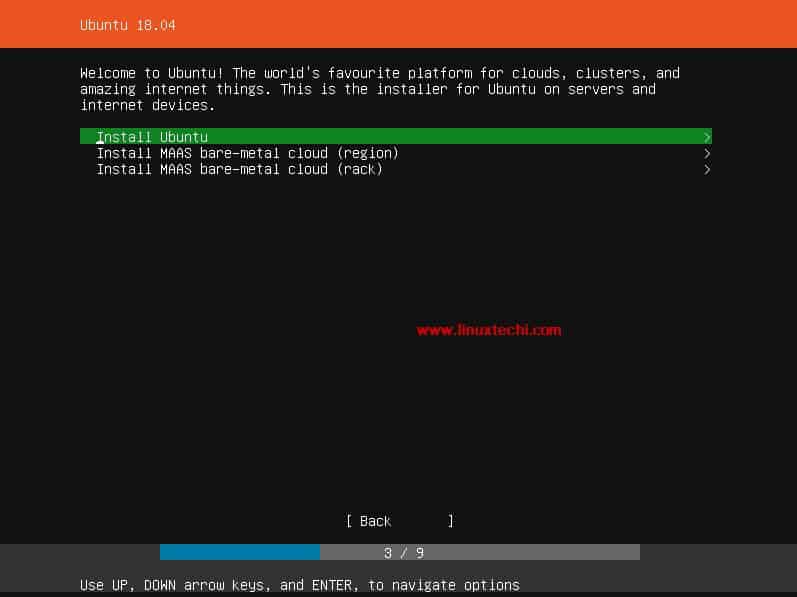
Choose “Install Ubuntu” option and then hit enter,
Step:3) Choose your Network and Proxy Configuration
Choose the network configuration that suits your environment, by default it will try to pick IP address from the DHCP server. In my case I am selecting the default option and later on I will demonstrate how to configure static ip address.
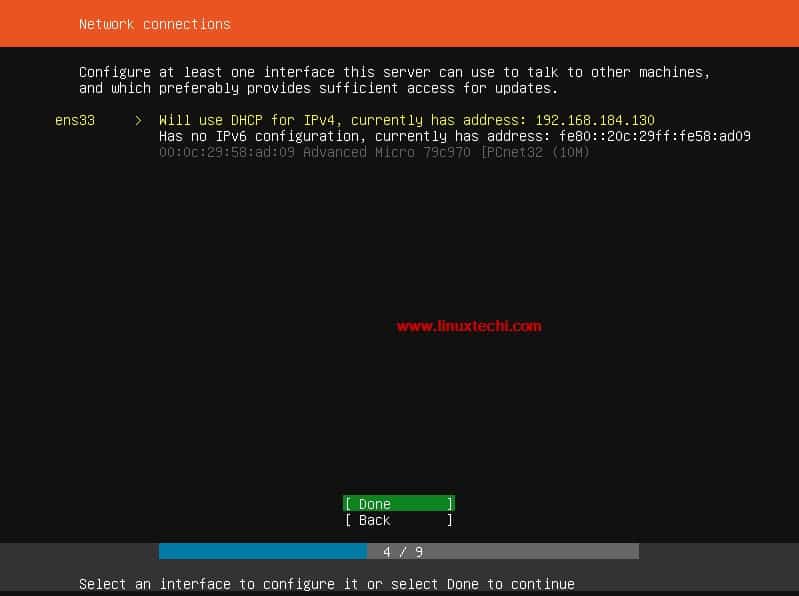
Choose “Done” and then press enter
If your system is connected to the internet via some proxy servers then specify the details of proxy else leave it as blank,

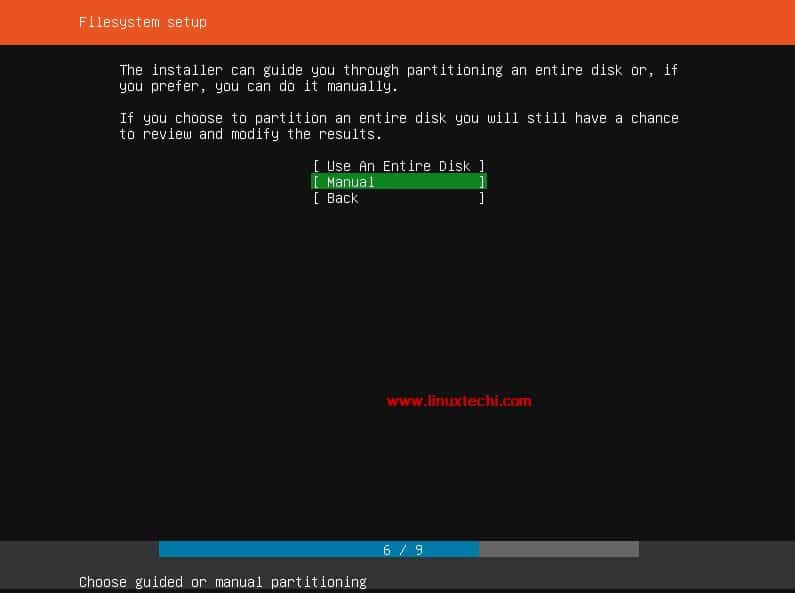
Step:4) Choose partitioning scheme either as automatic or manual
Select the partitioning scheme either as automatic or manual. In this tutorial I will demonstrate how to create your own partition table using manual method.
So select “Manual” option and then hit enter,
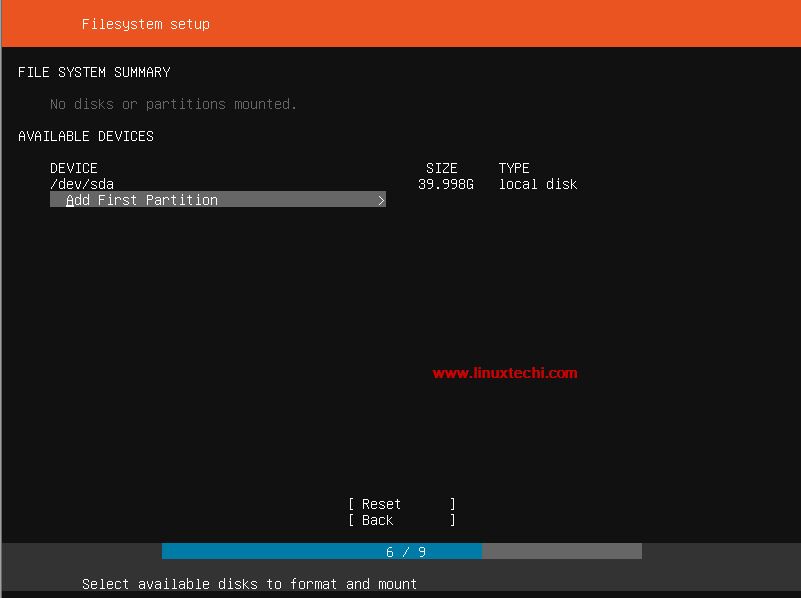
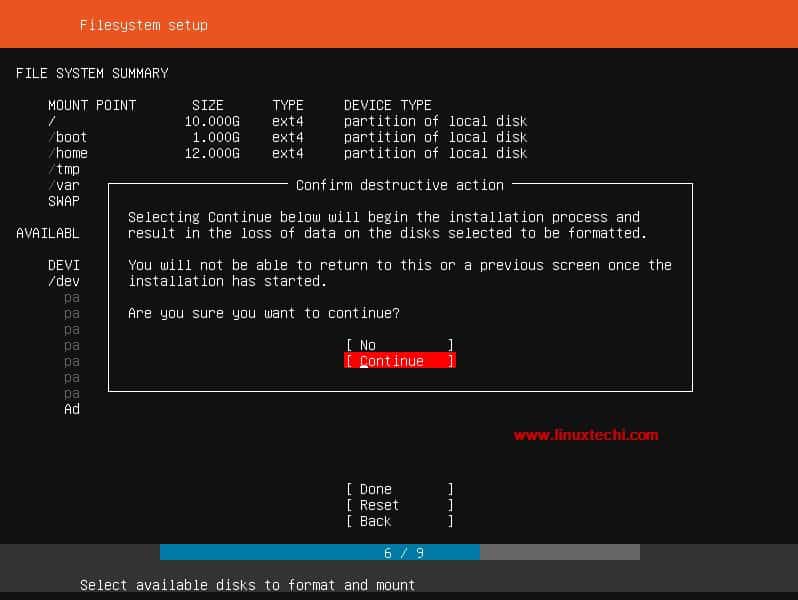
As we can see I have 40 GB space for Ubuntu 18.04 Server installation, we will create the following partitions on it,
- /boot = 1 GB (ext4 file system)
- /home = 12 G (ext4 file system)
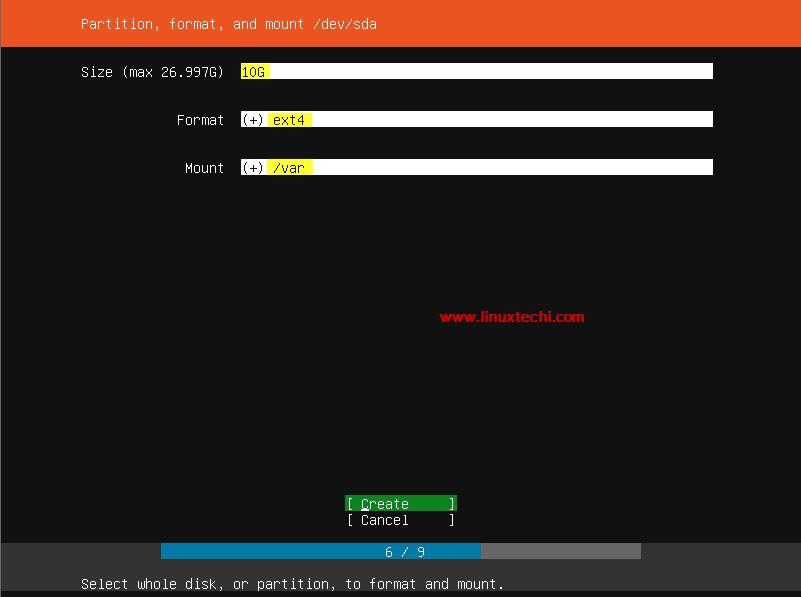
- /var = 10 GB (ext4 file system)
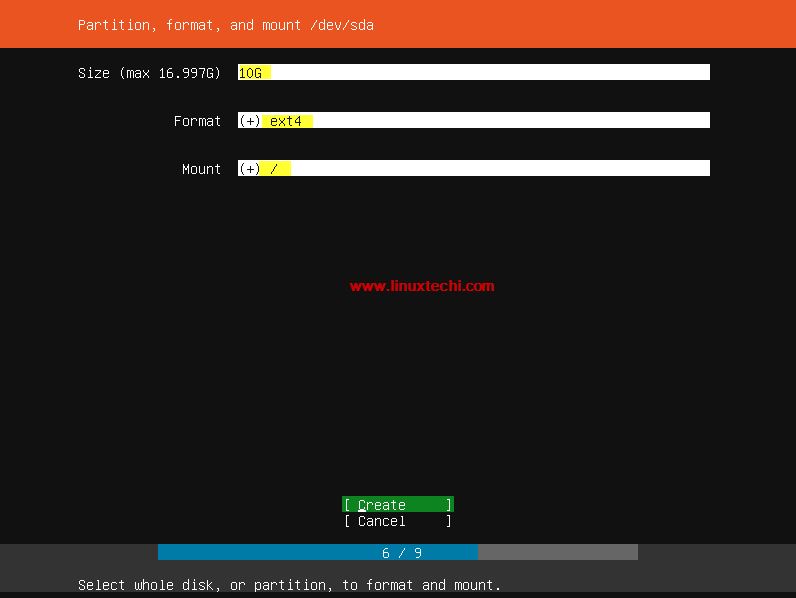
- / = 10 GB (ext4 file system)
- /tmp = 5 GB (ext4 file system)
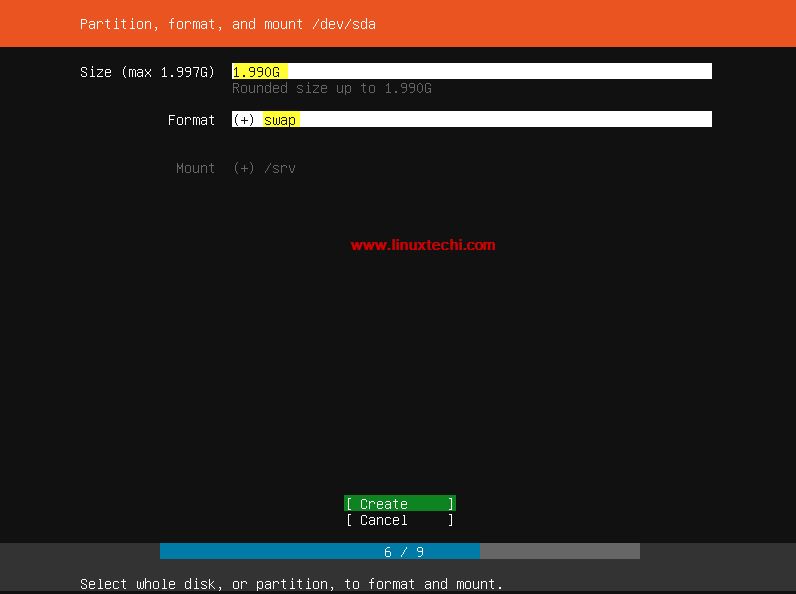
- Swap = 2 GB (ext4 file system)
Choose “Add first partition“, Create /boot partition, example is shown below,
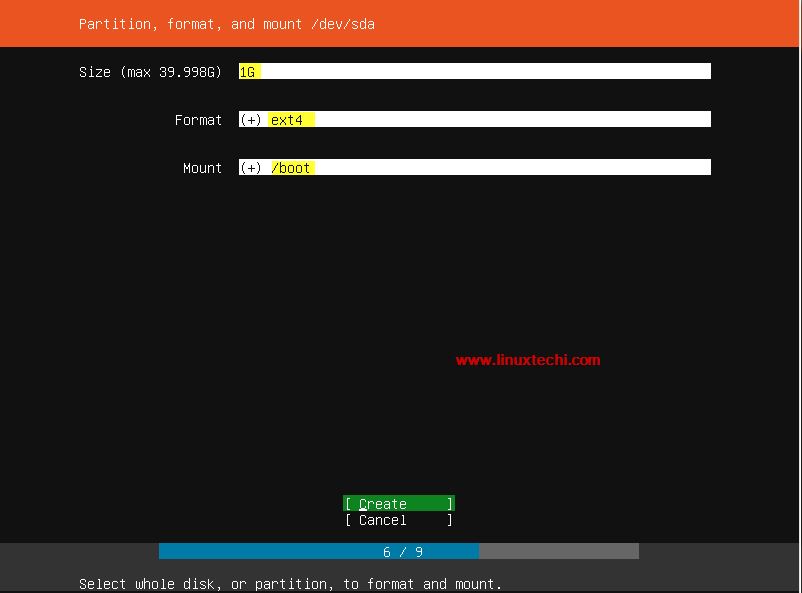
Select “Create” option and then hit enter
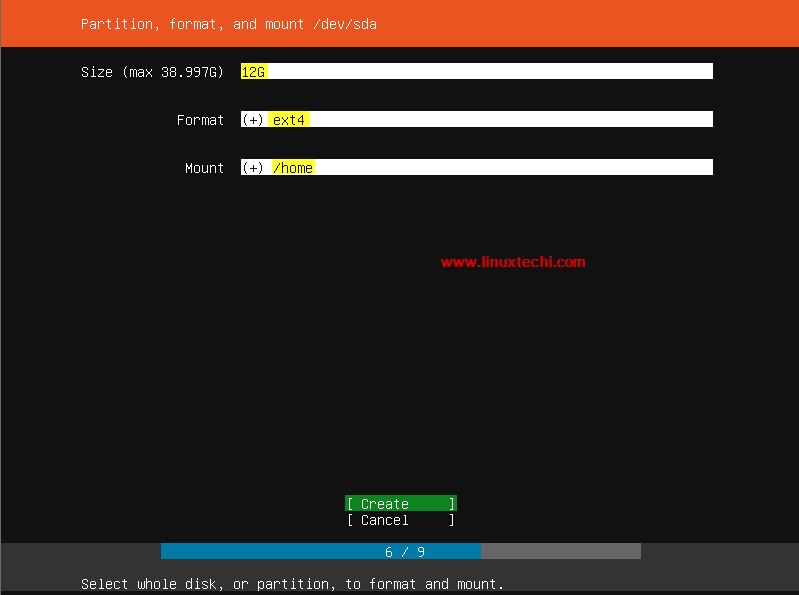
Now create /home partition of size 12 GB
Similarly create /var, / and /tmp partitions

Create Swap partition of size 2 GB,
Once you are done with all the partitions creation, select the option “Done”
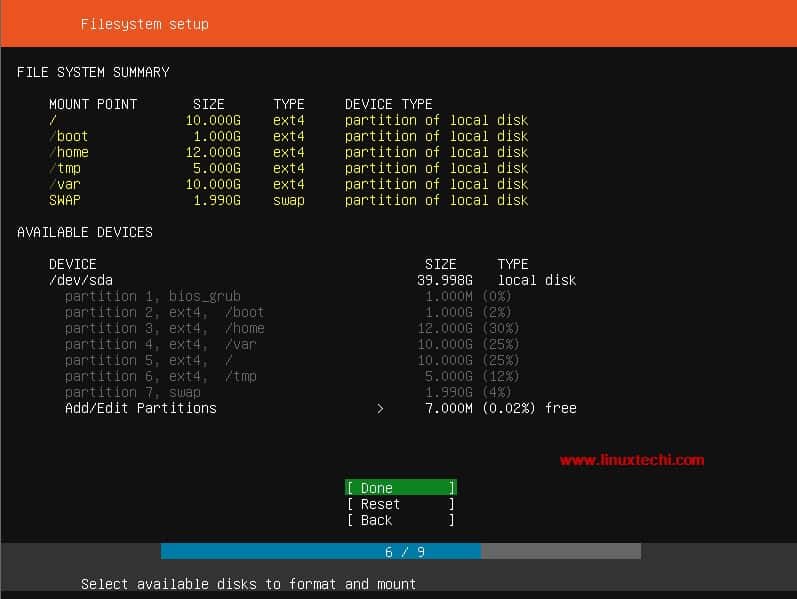
Select “Continue” to write changes on the disk,
Step:5) Specify User details, hostname and start the installation
Specify the user name, its password and hostname for your system.
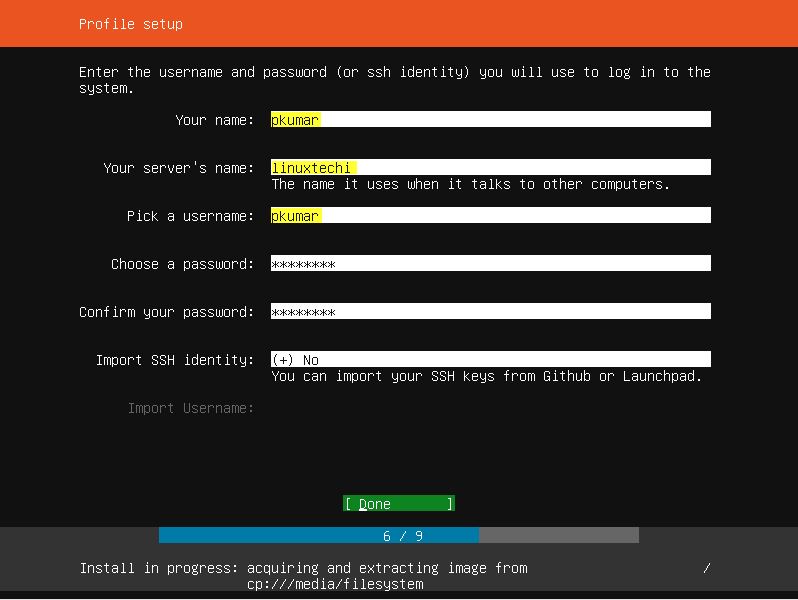
Choose Done to proceed with installation,
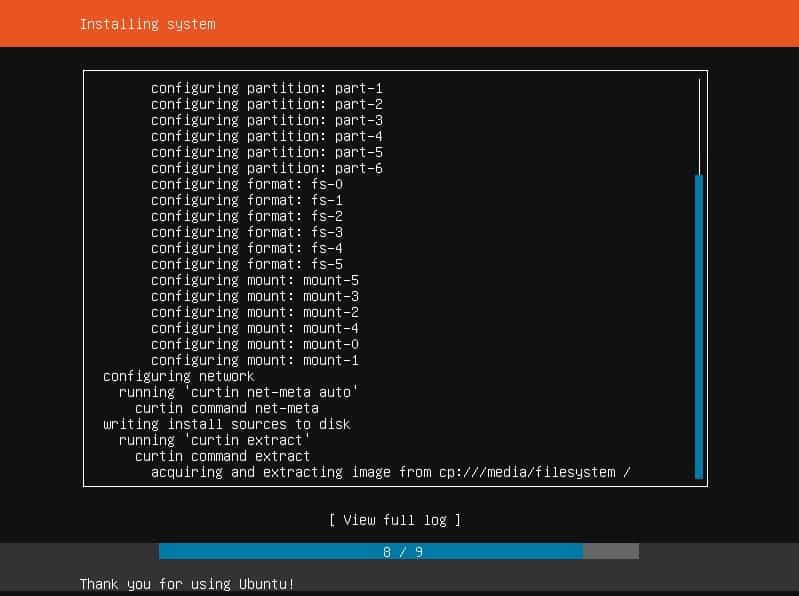
You will be prompted to reboot your system once the installation is completed.
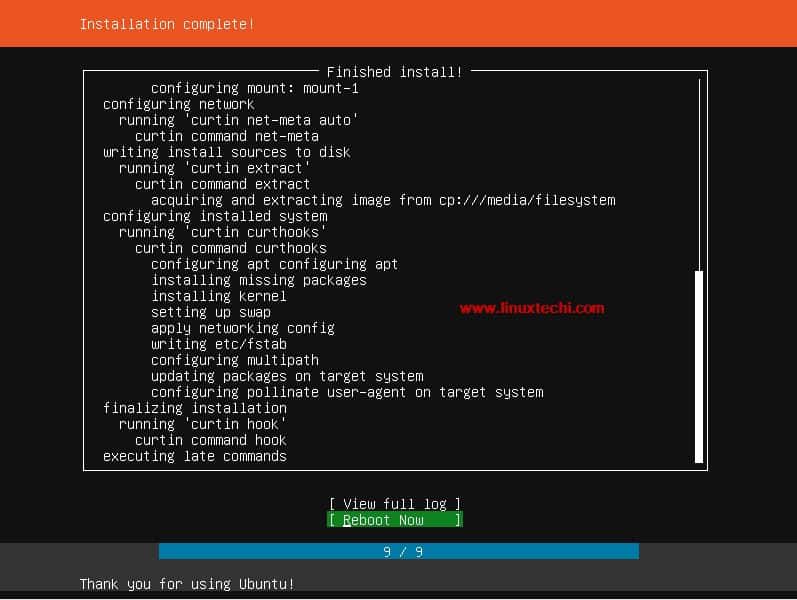
Remove the installation media and change the boot sequence and set it as hard disk.
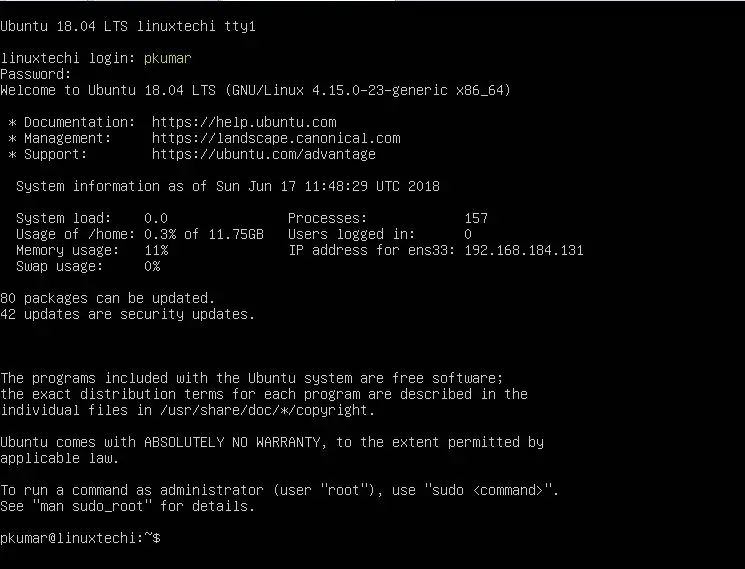
Step:6) Login Screen after Ubuntu 18.04 Server Installation
Use the same user name and the password that we created during the installation, in my case user name will be “pkumar”
Read More on : How to Install VirtualBox 6.0 on Ubuntu 18.04 LTS / 18.10 / CentOS 7
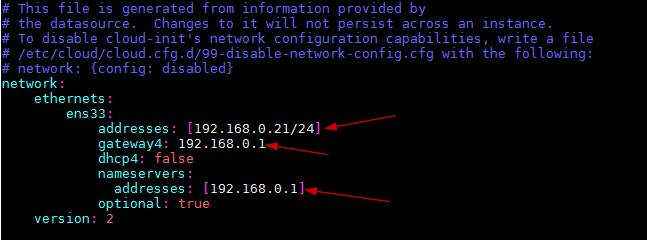
Step:7) Configure static IP address in Ubuntu 18.04 Server
As we discussed in the features section, network configuration in Ubuntu 18.04 server is controlled by “netplan” utility.
To configure the static ip address, edit the file “/etc/netplan/50-cloud-init.yaml“,
Replace the IP address details, gateway and dns server that suits your environment.
pkumar@linuxtechi:~$ sudo vi /etc/netplan/50-cloud-init.yaml
Now apply these changes using below netplan command,
pkumar@linuxtechi:~$ sudo netplan apply
pkumar@linuxtechi:~$
If you want to run above netplan command in debug command, then execute below command,
pkumar@linuxtechi:~$ sudo netplan apply --debug
Now you can verify the IP address details using ip command,
pkumar@linuxtechi:~$ ip add show
That’s conclude the article, I hope above steps helps you to install Ubuntu 18.04 Server. Please do share your comments in comments section below.
Read More on: “How to Install and Configure KVM on Ubuntu 18.04 LTS Server“
Hi
I have burnt ubuntu 18.04 onto dvd. Insert DVD into my old desktop and it does not see any bootable file.
In your article you say “Once the file is downloaded then burn it either into USB or DVD and make it Bootable” How do I make my dvd bootable then?
Use k3b tools>burn image
Hello,
If I have a 500gb drive. Which partition does the lion’s share go to?
/ ?
/home?
/data?
I’m not sure.
Any thoughts?
Hi Phaelan,
Partitioning scheme totally depends on application / services that you are your planning to run inside the Ubuntu 18.04. Let’s suppose you have 500 GB disk space and want to run Apache / Nginx then you could create following partitions,
/ – 50 GB
/boot – 1 GB
/var – 300 GB
/var/log – 50 GB
/tmp – 10 GB
/data – 50 GB
Swap – Minimum of 4 GB
I am new to/with Linux. Would like to setup a file and storage server with Ubuntu 18.04 LTS. Read the question of Phaelan about partitioning a 500 gb drive and also the answer by Pradeep Kumar. What is the partitioning scheme for the “ file and storage server” in Ubuntu.
Awesome page, took me a day to figure out why my Ubuntu server would fail with a “grub rescue” prompt when I installed on a 3TB hard drive, LVM would boot but I don’t want that. I added my partitions following your pattern and I found that 3TB on my machine was the problem, dividing into smaller partitions was the answer! thanks
Can’t see any files after installing ubuntu server 18.04 lts. Any ideas please share.
!!!!!!!!!!!!!!!!!!!!!!!!!!!!!!!!!!!!!!!!!!!!!!!!!!!!!!!!!!!!!!!!!!!!!!!!!!!!!!!!!!!!!!!!!!!
All the answers telling you to directly edit /etc/netplan/50-cloud-init.yaml are wrong since CloudInit is used and will generate that file. In Ubuntu 18.04.2 it is clearly written inside the file :
$ cat /etc/netplan/50-cloud-init.yaml
# This file is generated from information provided by
# the datasource. Changes to it will not persist across an instance.
# To disable cloud-init’s network configuration capabilities, write a file
# /etc/cloud/cloud.cfg.d/99-disable-network-config.cfg with the following:
# network: {config: disabled}
network:
ethernets:
eno1:
dhcp4: true
version: 2
——->>>>>>>>>>sudo nano /etc/network/interfaces<<<<<<<<<<——-
auto enp10s0
iface enp10s0 inet static
address 192.168.1.162
netmask 255.255.255.0
gateway 192.168.1.100
dns-nameservers 1.0.0.1,1.1.1.1
Hi ALL, I recently installed Ubuntu Server 18.04 in my VM, can we use mouse pointer and copy and paste(text) from host machine to linux server. If so how to enable that.
Thanks for the response.