This blog post will show you how to install Java on Ubuntu 24.04 LTS system step-by-step.
Java is a well-known platform independent object-oriented programming language used in software development for decades. It is mostly used in web development, mobile applications, enterprise applications and scientific computing.
Ubuntu 24.04 offers two main Java options:
- OpenJDK: This is the free and open-source implementation of Java, perfect for most development needs.
- Oracle JDK: The official Java Development Kit from Oracle, providing the complete Java experience with additional features.
In this post, we will cover both the options.
Prerequisites
- Pre-Install Ubuntu 24.04
- Local User with admin rights
- Internet Connectivity
Installing OpenJDK on Ubuntu 24.04
OpenJDK package is readily available in default apt repositories of Ubuntu 24.04. So, its installation is straight forward, open the terminal and run following apt commands.
$ sudo apt update
$ sudo apt install default-jdk -y
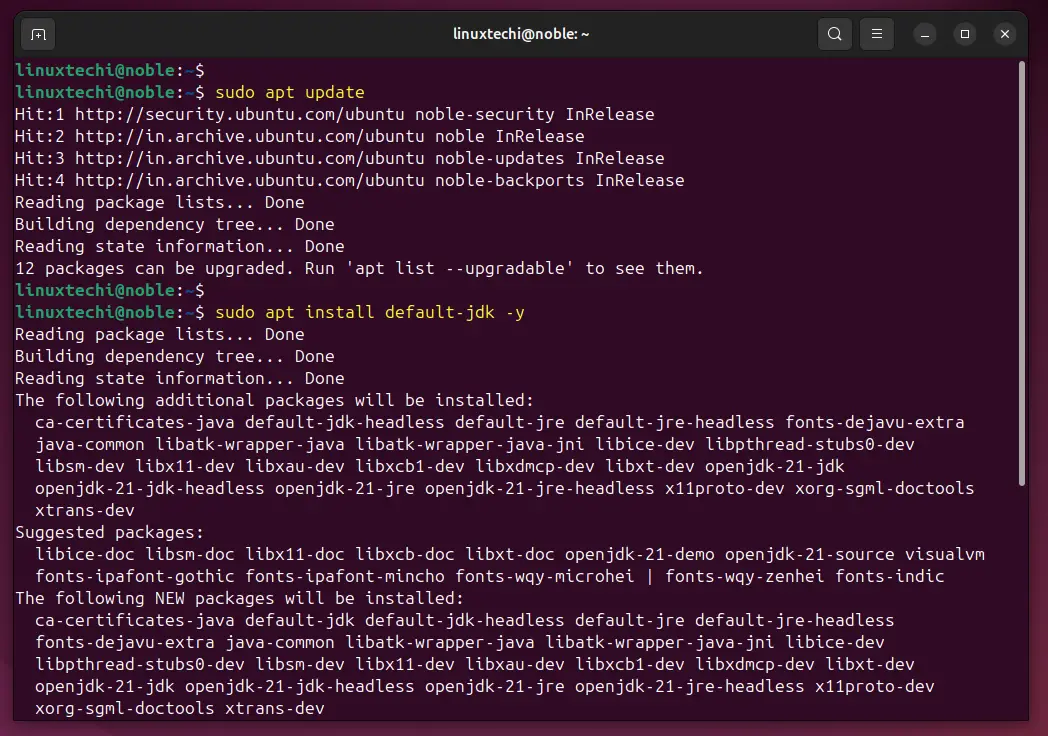
Note: default-jdk will install latest and stable OpenJDK version (currently Java 21 LTS)
Verify Java Version
$ java --version

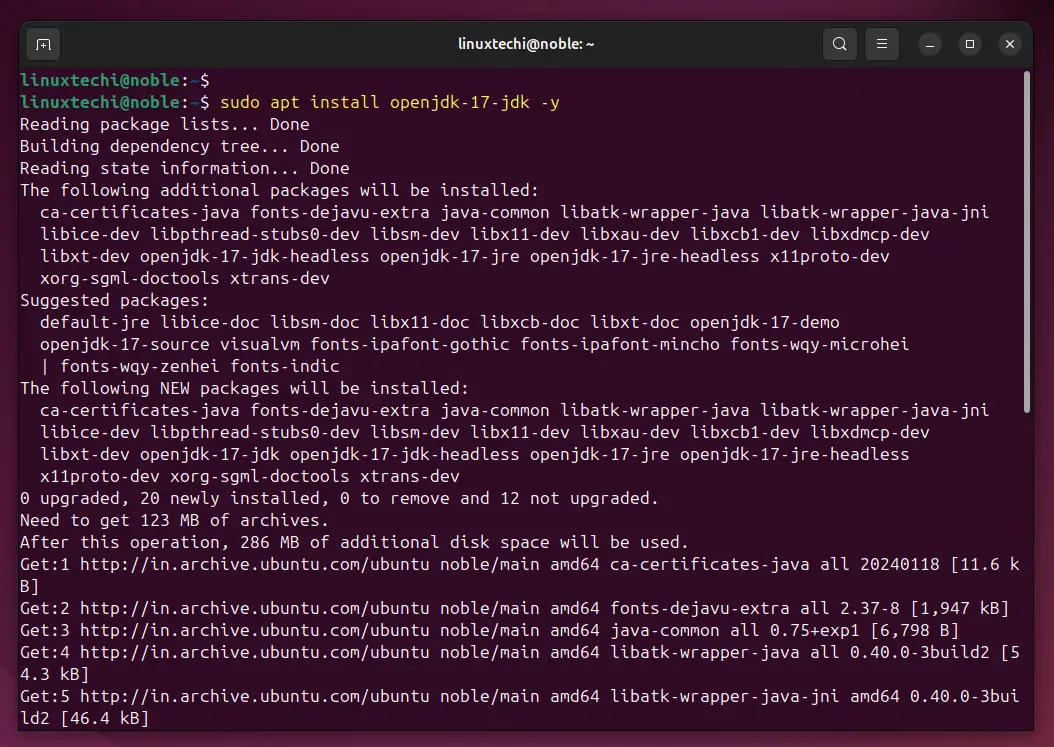
In case you want to install specific version (e.g 11,17,21) of OpenJDK then run following.
$ sudo apt install openjdk-11-jdk
$ sudo apt install openjdk-17-jdk
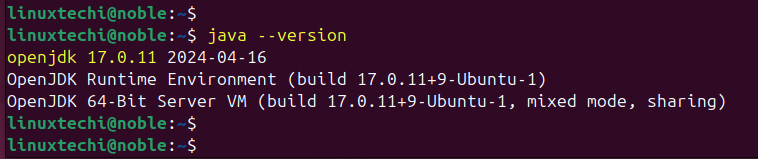
Once OpenJDK-17 package is installed, you can verify the Java version by running following command:
$ java --version
Installing Oracle Java (JDK) on Ubuntu 24.04
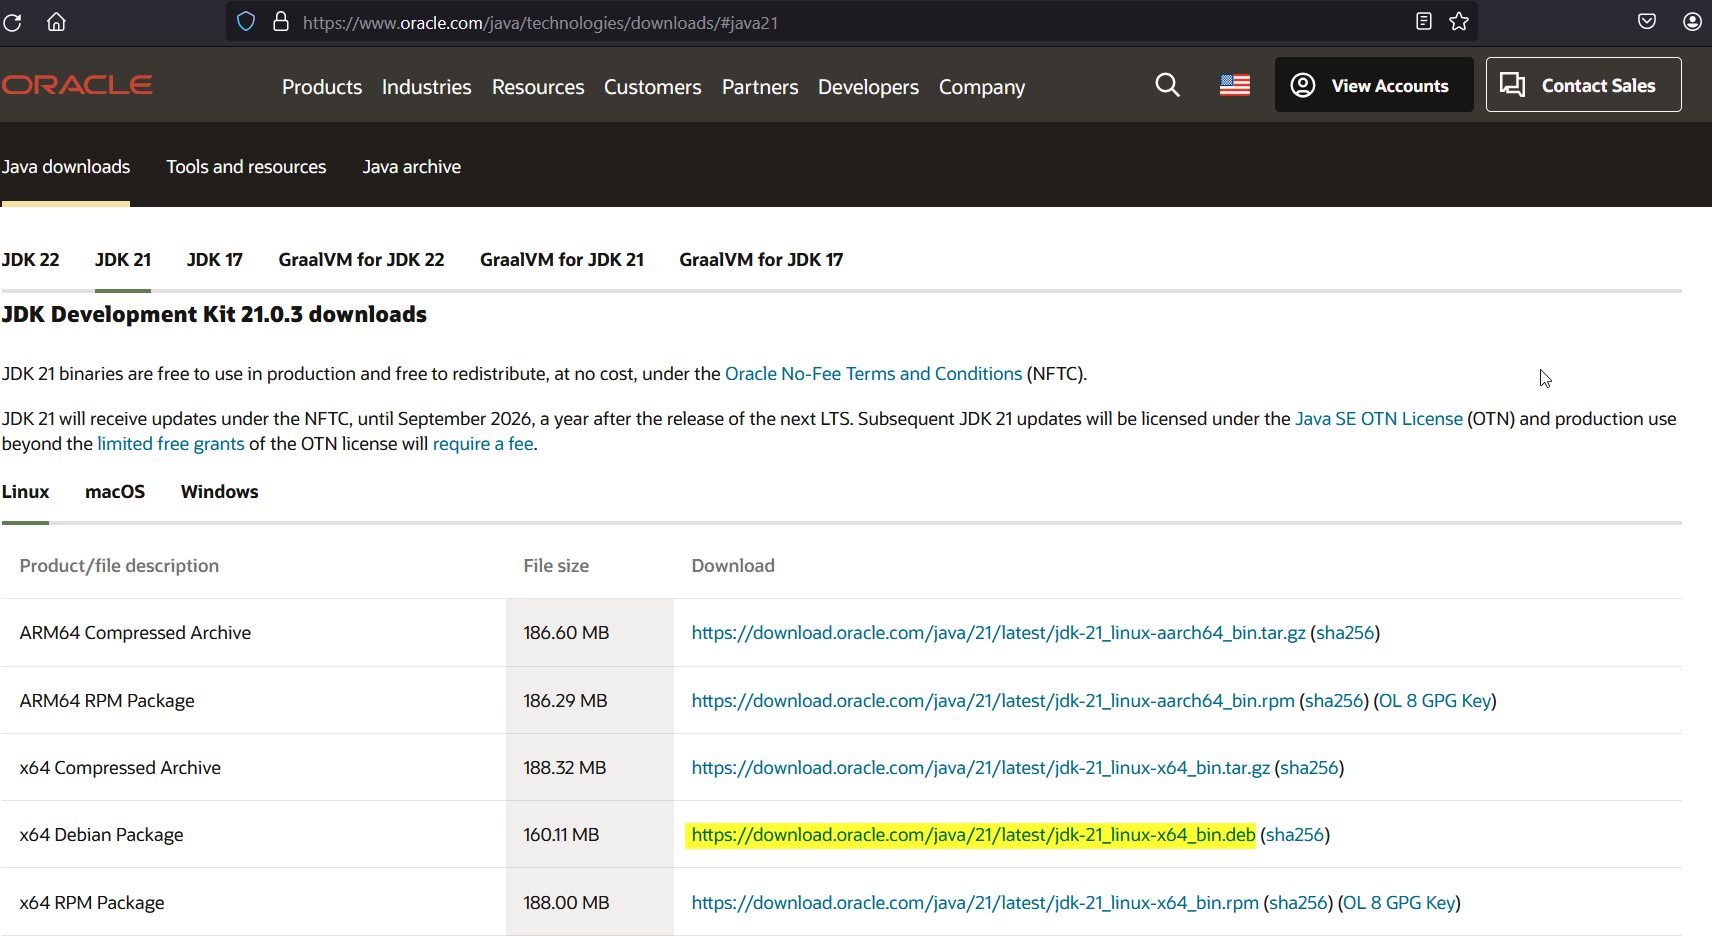
In order to install Oracle JDK, first you need to download its Debian package from its official web site.
https://www.oracle.com/java/technologies/downloads/
Currently Oracle Java 21 is the LTS version, so select Java 21 Tab and click on Debian package to download Java 21 or copy the link.
We can also download Oracle Java Debian package using below wget command,
$ wget https://download.oracle.com/java/21/latest/jdk-21_linux-x64_bin.deb
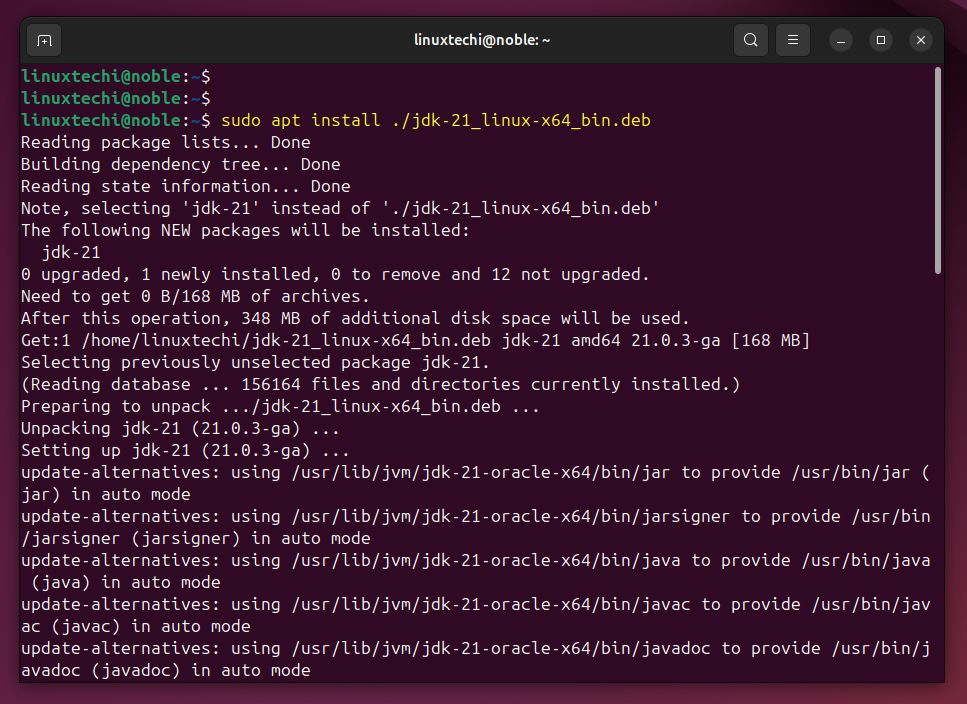
Once the package is downloaded, install it using beneath apt command.
$ sudo apt install ./jdk-21_linux-x64_bin.deb -y
Post installation, verify its version, run

Configure Default Java
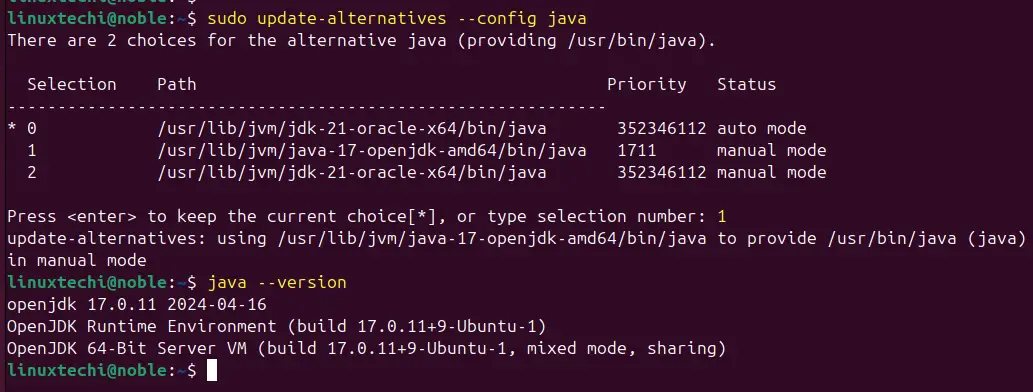
There could be a scenario where you have installed multiple versions of Java but want to set one specific version as default. Execute following command,
$ sudo update-alternatives --config java
Choose the Java version by selecting its number as shown below.
Set JAVA_HOME Environment Variable
To set the JAVA_HOME variable, first get the absolute path of Java, run
$ ls -l /usr/lib/jvm/
total 12
lrwxrwxrwx 1 root  root    21 Apr 17 17:54 java-1.17.0-openjdk-amd64 -> java-17-openjdk-amd64
drwxr-xr-x 9 root  root  4096 May 26 10:24 java-17-openjdk-amd64
drwxr-xr-x 9 10668 10668 4096 May 26 10:14 jdk-21-oracle-x64
drwxr-xr-x 2 root  root  4096 May 26 10:24 openjdk-17
$
Next, add the following lines to /etc/environment file
$ sudo vi /etc/environment
export JAVA_HOME=/usr/lib/jvm/java-17-openjdk-amd64
export PATH="$PATH:${JAVA_HOME}/bin"
$
Save and close the file.
Now source the environment file so that above variables come into the affect.
$ source /etc/environment
$ echo $JAVA_HOME
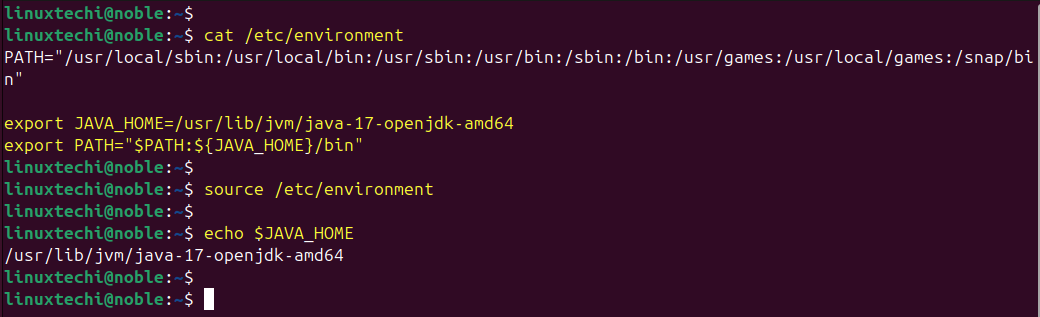
Perfect, output above shows that JAVA_HOME variable and its path has been configured successfully.
That’s all from this post, we hope you have found it informative and useful. Feel free to post your queries and feedback in below comments section.