Within one year of Linux Lite 4.0 (code-named Diamond) launch, the Linux Lite team has released their latest version code-named Emerald. It is renowned as one of the finest Linux distributions and lightweight distro ever released. The latest version Emerald comes equipped with lots of new features. In this article, we’ll look at the new features in Emerald along with a detailed step-by-step guide to install Linux Lite 5.0 with screenshots.
New Features of Linux Lite 5.0
Let’s look at the new features released with the emerald version:
- UEFI Support
- Added XFCE screensaver
- Integrity added during live boot
- FireWallD replaces GUFW
- Enhanced updates notification feature
- Enhanced Whisker Menu added
- HiDPI Settings
- Leafpad replaced by Mousepad
- Chromium removed and Chrome added
- Modified logout screen design
- Enhanced Help Manual
- Welcome screen modifications
Linux Lite 5.0 Step-by-Step Installation Guide
To install Linux Lite 5, please adhere to the steps provided below. But before you start the actual installation process, you need to check whether you have the minimum system requirements to install Linux Lite 5.0 in your system.
Step 1) Check Minimum Requirements
To install Linux Lite 5.0 in your system, you need to have at least:
- 1GHz processor
- 1024 MB RAM
- 10 GB HDD/SD
- Bootable Media (USB drive)
- Stable Internet Connection (Optional)
Step 2) Download Linux Lite 5.0 ISO
To start the installation proceedings, you must download a copy of Linux Lite 5.0 ISO in your system. You can download the latest copy of the here.
Step 3) Create a USB Boot Disk
Once the download is completed, burn the ISO image into a USB / DVD disk to create a bootable disk. Once you have successfully created the boot disk, restart your system and don’t forget to change the boot settings from bios so that your system boots up from the USB disk.
Step 4) Start Linux Lite
Once your system restarts and boots from the USB disk, you can see the Linux Lite 5.0 welcome screen. In the welcome screen, you can see five different options including:
- Start Linux Lite
- Start Linux Lite safe mode
- Install Linux Lite now
- OEM install Linux Lite for manufacturers
- Run memtest
- Restart
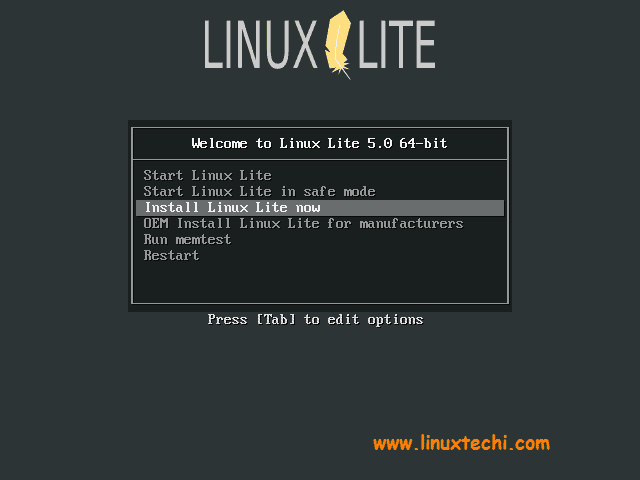
If you want to start with the installation directly, you can click “Install Linux Lite now“. If you face any issues in booting, then you can choose the option “Start Linux Lite safe mode” or else if you want to check if you have supported hardware to install Linux Lite 5.0, then click “Start Linux Lite” that will run a hardware check and proceed with the installation process. For this installation guide, lets hover over the “Install Linux Lite now” option and press the enter key.
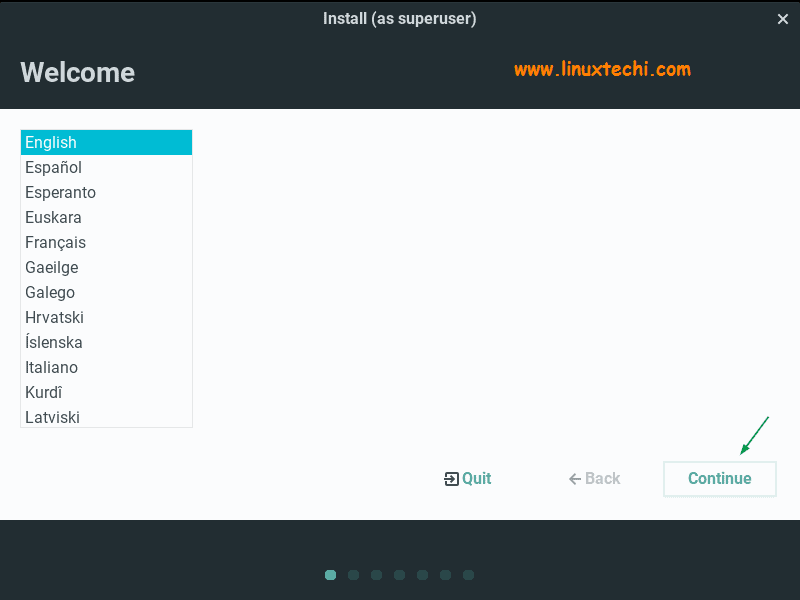
Step 5) Install Linux Lite
Next the Linux Lite installer will get started and you will be asked to select the language of your choice. Choose your preferred language and click “Continue”
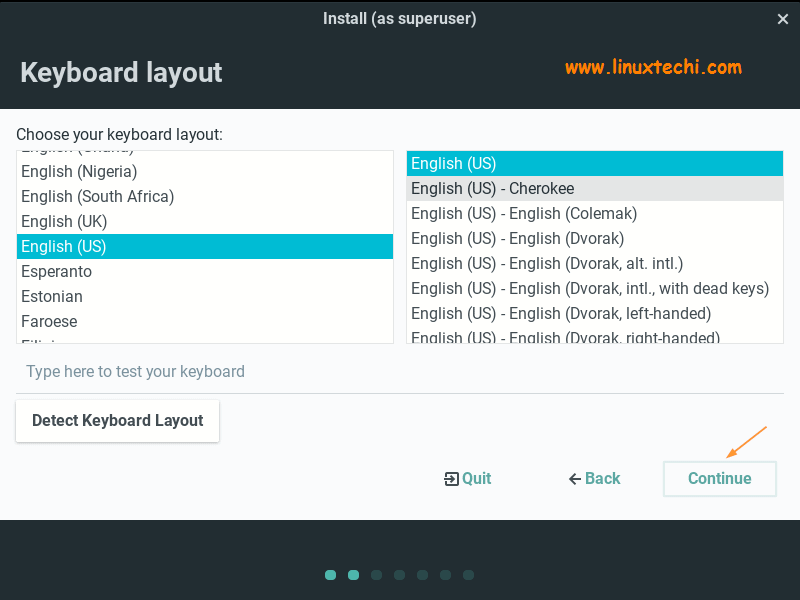
Step 6) Choose Keyboard layout
In the next screen, select your preferred keyboard layout and click “Continue” to proceed with the installation.
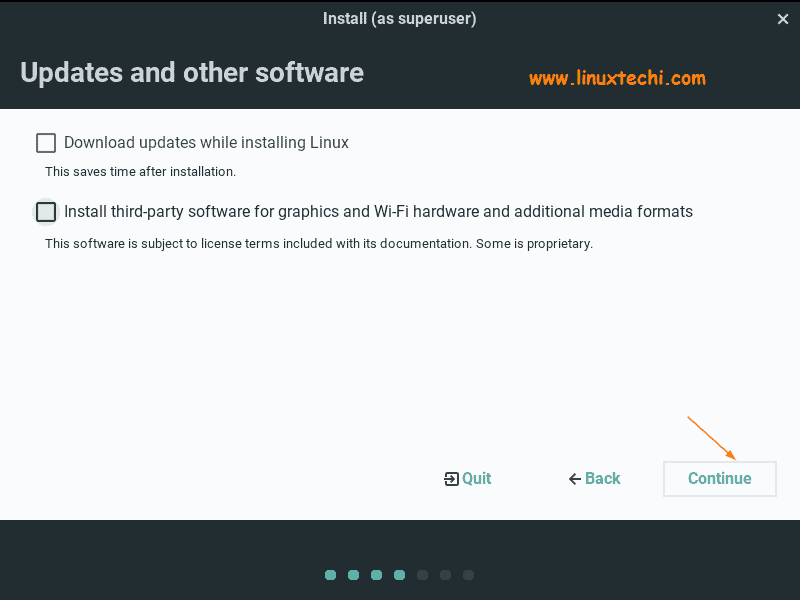
Step 7) Updates & Other Software
In the next screen, you will be asked to whether you need to download the updates during the install process and install third party software. It is better not to select these, as it might slow down the installation process considerably, but you can always install any third party software after the installation.
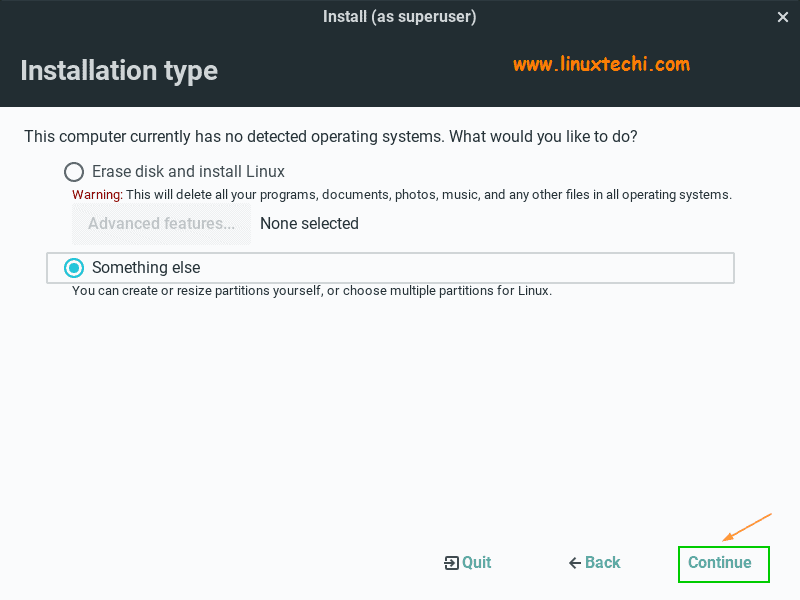
Step 8) Choose Installation Type
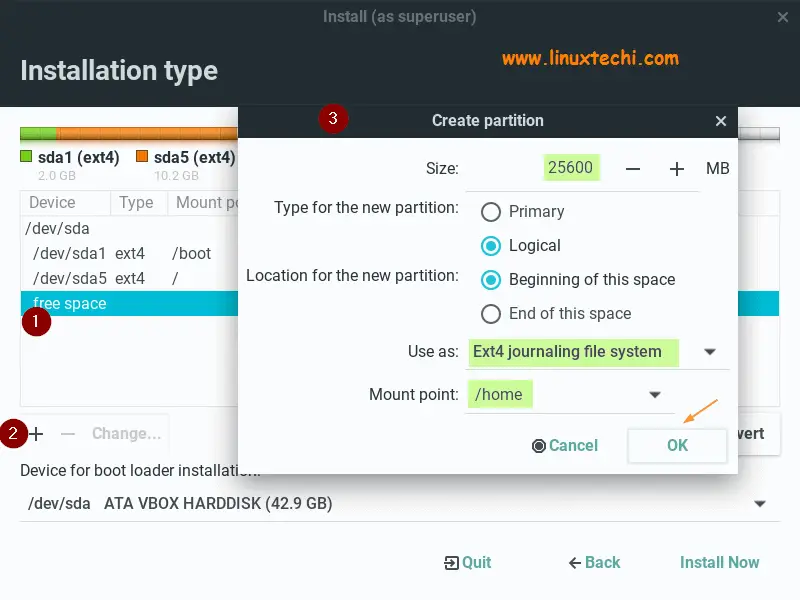
Next screen asks you to select an installation type and you will be presented with 3 different options. If you want to remove everything and do a fresh install of Linux Lite 5.0, then you can select “Erase disk and install Linux“. If you want to install it alongside Linux or windows, you can choose “Install Linux Lite 5.0 alongside Linux or Windows“. If you want to create a custom partition, then choose “Something else” and you can create your own partition. For this installation guide purpose, let’s assume we want to create our customize partition scheme on 40 GB hard disk so select “Something else” and continue with the installation.
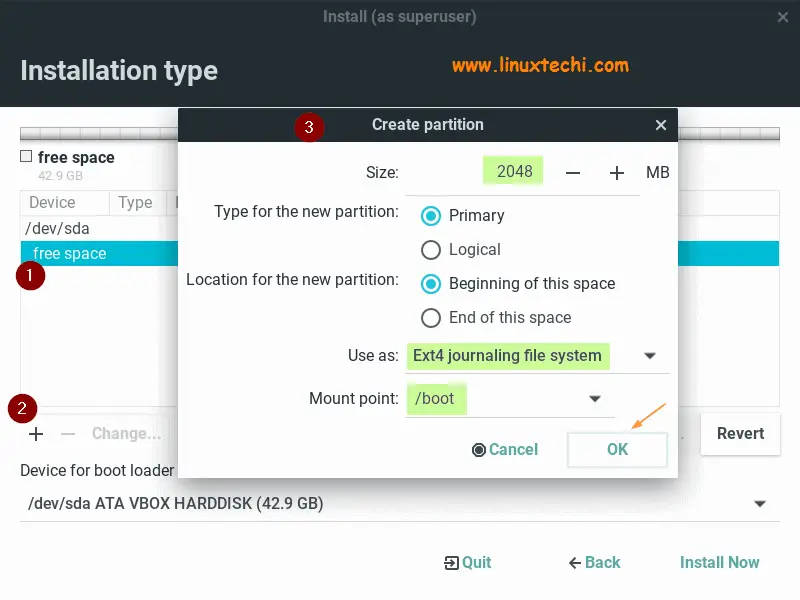
- /boot – 2 GB (ext4 file system)
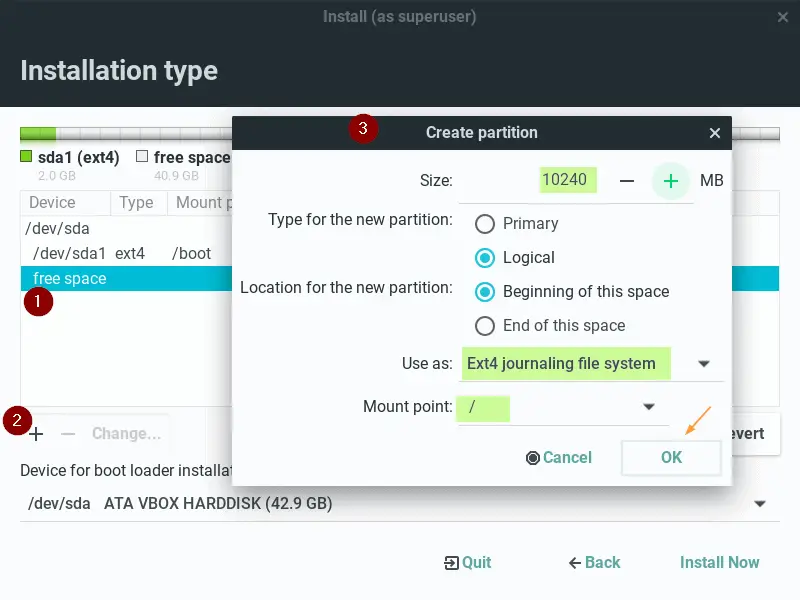
- / – 10 GB (ext4 file system)
- /home – 25 GB (ext4 file system)
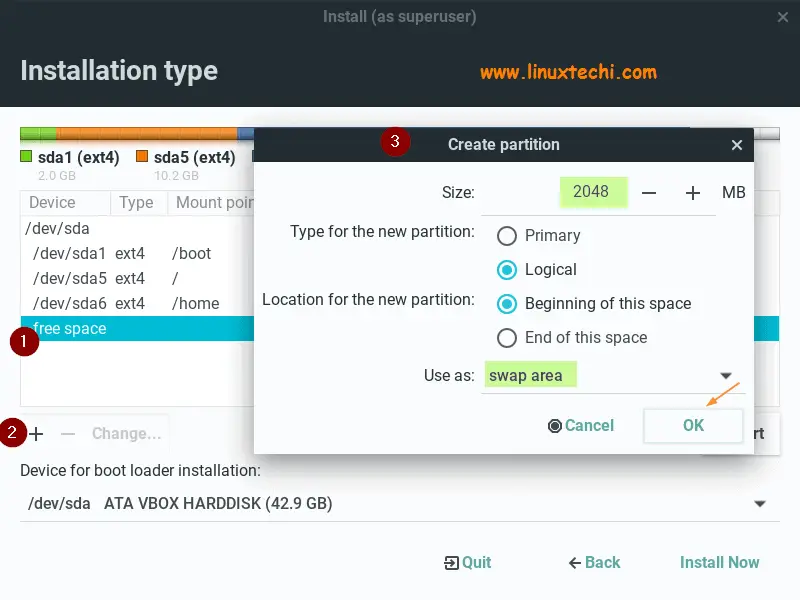
- Swap – 2 GB (ext4 file system)
In the next screen, first create a new empty partition table, steps are listed below:
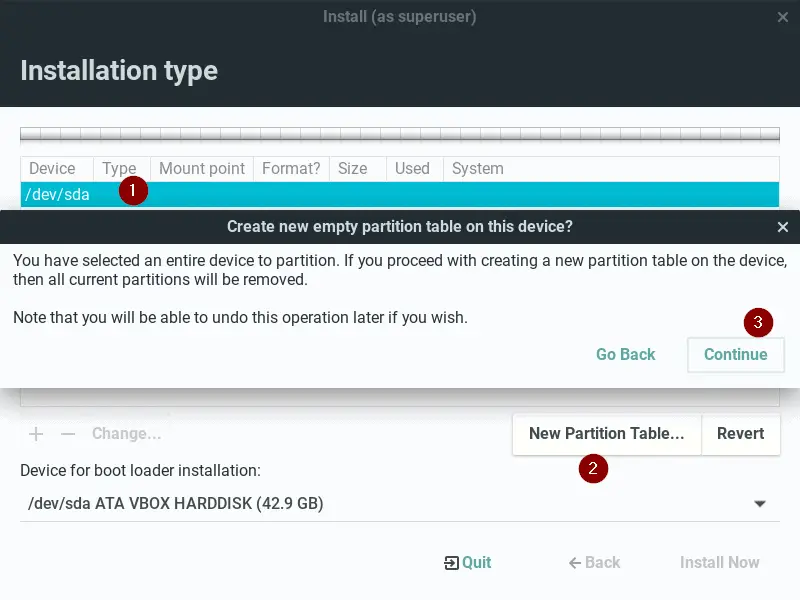
Click on Continue to proceed further,
In the next window, start creating your first partition as /
Choose free space on the disk –> Click on + (plus icon) –> Specify the partition size, type and mount point.
Similarly, create next two partitions as / and /home of size 10 GB and 25 GB respectively.
Now create our last partition as swap of size 2 GB,
Click on OK and then click on “Install Now”
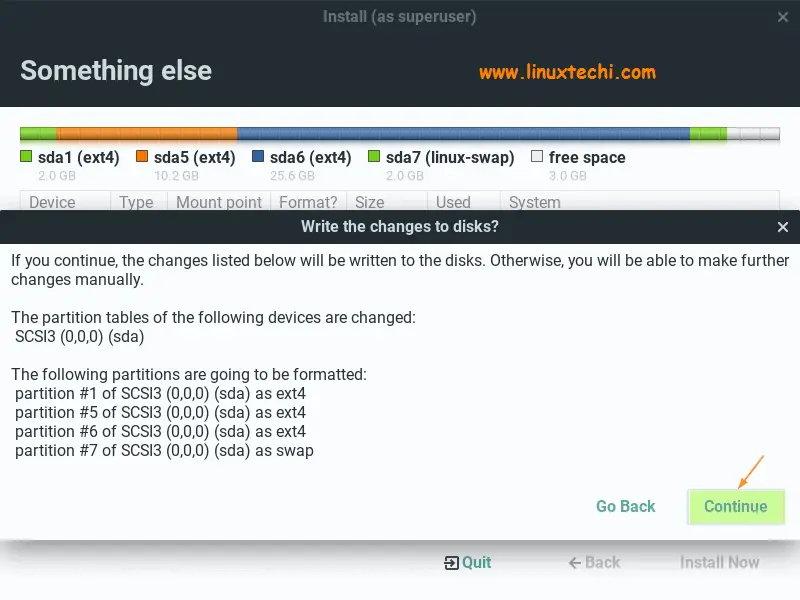
Click on Continue to write changes to the disk and to proceed further with the installation.
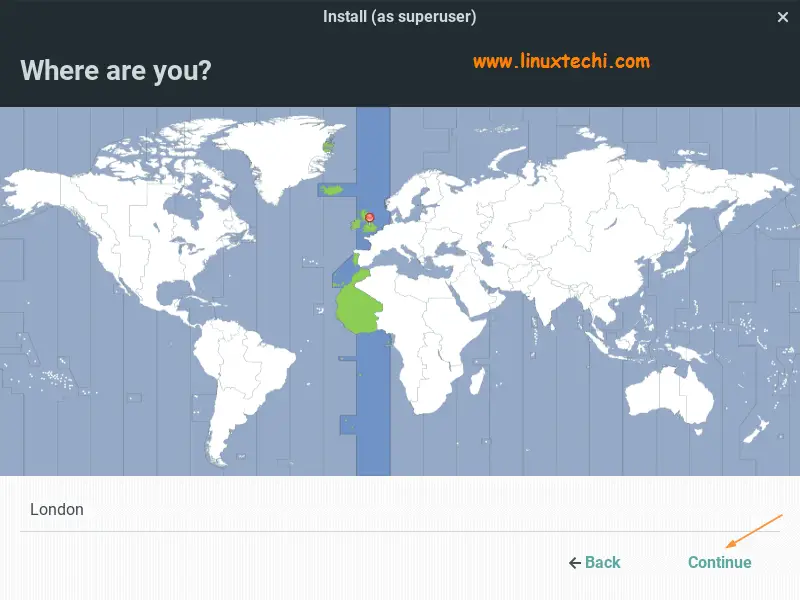
Step 9) Choose Your Location
In the next screen, you will be asked to select your location. Choose accordingly and click continue to proceed.
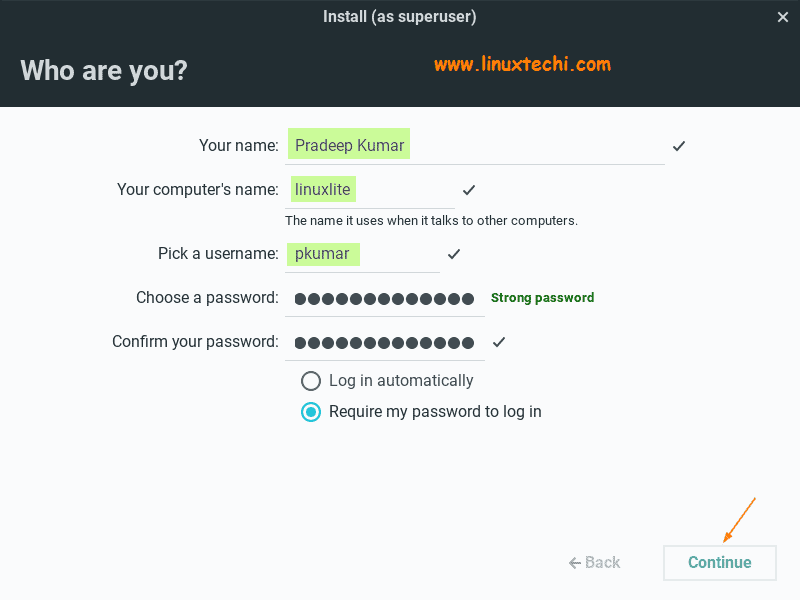
Step 10) User details and hostname of your system
In the next screen, you need to provide your information including:
- Your name
- Computer name
- Username
- Password
- Confirm Password
Click “Continue” to proceed with the installation after providing all the information.
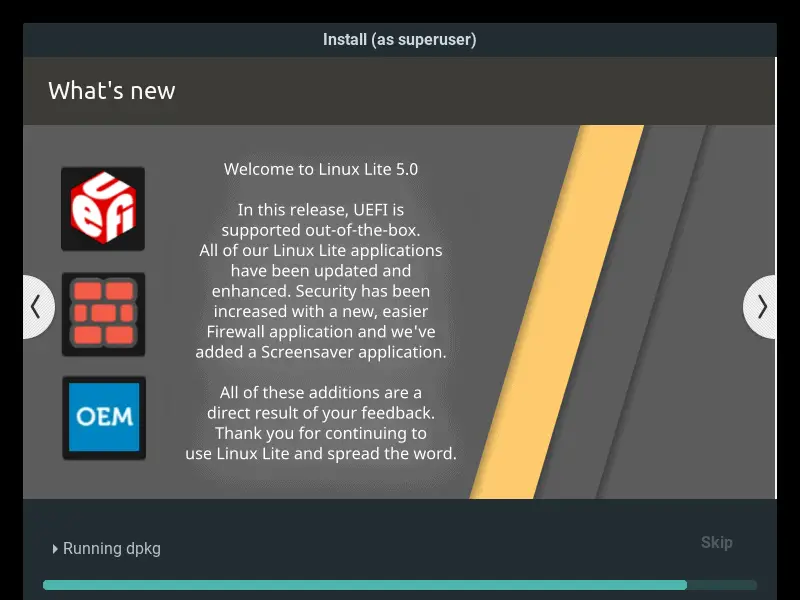
Step 11) Installation of Linux Lite 5 Started
In this step, we will see the actual installation begins and the installation may take between 5-10 minutes to get completed.
Once the installation is completed successfully, installer will prompt us to restart the system
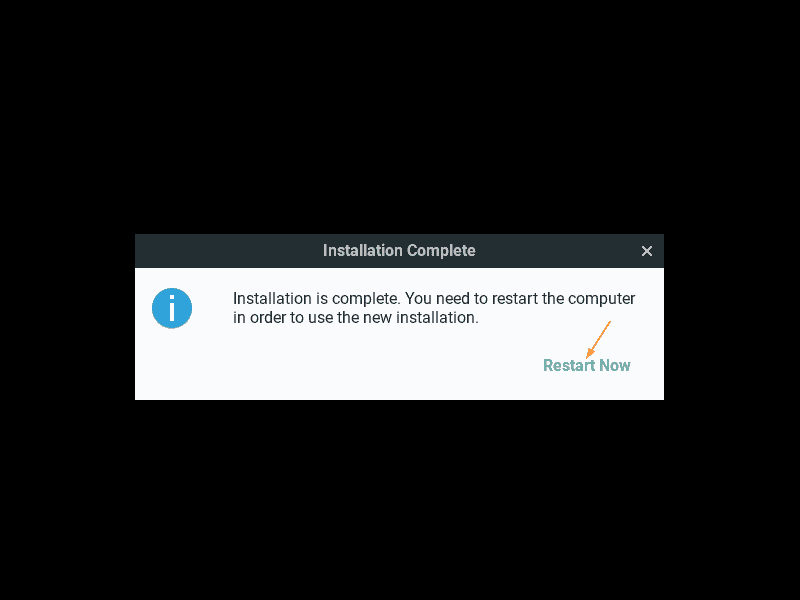
Click on “Restart Now” option to reboot the system.
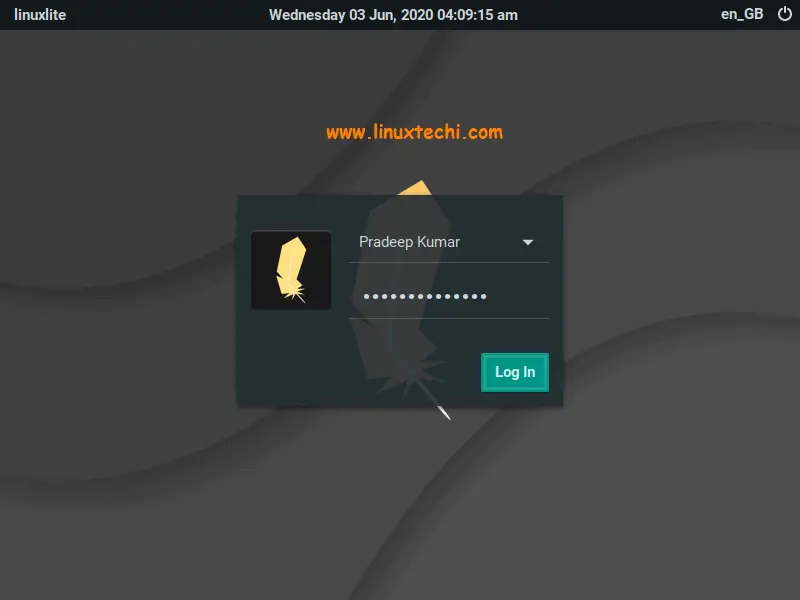
Step 12) Linux Lite 5 Login Screen after installation
Once the system is available after the reboot, we will get the following login screen, use the same user credentials that we have created during the installation.
Now login into to your Linux Lite 5.0 Emerald distro and explore all the new features.
That’s it! You’ve successfully installed Linux Lite 5.0 (Emerald) in your system. Please post your feedback and suggestions in the comments section below.

Thanks for the detail explanation.
I am new to linux ,installed it 4 days before but its not accepting the password on command prompt terminal and also not accepting password while installing updates ,so unable to install anything
thanks
Prashant
Hi Prashant,
How you are trying to install software ? It seems like you are using wrong password. Please recheck.
Thank you.
I have a doubt, taking into account that Linux Lite 5.0 can be installed in UEFI BIOS, the same operation but with UEFI BIOS, and disk with GPT Partition, how would the process be … it’s more like they would do to create the partition table in GPT and no MBR (msdos).
From already thank you very much
do ise the uui to extract the files to a flash drive then restart and move on with the steps or shall i move the whole file into the flash drive.
can i install linux lite on virtual box or fusion 360
Yes, Linux Lite OS can easily be installed on VirtualBox