In this guide, we will cover how to install KVM on Ubuntu server 20.04 step-by-step.
KVM is a free and open source virtualization tool for Linux like operating systems. When we install KVM on a Ubuntu Server then it becomes Type-2 KVM hypervisor. Minimum requirement for KVM is that server should have CPU virtualization extensions like Intel-VT and AMD-V. KVM is also known as Kernel based virtual machine because during KVM installation a kernel module (kvm-intel.ko / kvm-amd.ko) is loaded into the kernel.
Prerequisites
- Pre Install Ubuntu Server 20.04
- Sudo User with admin rights
- Internet Connectivity
Without any further delay, let’s jump into KVM installation steps.
1) Check Whether Server Support Hardware Virtualization
Login to your Ubuntu server 20.04 and run following grep command,
sysadm@ubuntu-server-20-04:~$ grep -E -c "vmx|svm" /proc/cpuinfo
2
sysadm@ubuntu-server-20-04:~$
Above output confirms that server supports hardware virtualization. If the output is not greater than zero then reboot your server, go to its bios settings and enable VT technology.
If you wish to verify whether your server is capable of running KVM virtual machines then install “kvm-ok” utility using below apt command,
sysadm@ubuntu-server-20-04:~$ sudo apt install -y cpu-checker
Once the “cpu-checker” package is installed, run “kvm-ok” command and verify its output
sysadm@ubuntu-server-20-04:~$ kvm-ok
INFO: /dev/kvm exists
KVM acceleration can be used
sysadm@ubuntu-server-20-04:~$
Above output confirms that KVM based virtual machines can be installed on our server.
2) Install KVM, virt-manager and bridge-utils
Run the beneath apt command to install KVM, bridge-utils, virt-manager and other kvm dependencies.
sysadm@ubuntu-server-20-04:~$ sudo apt install -y qemu qemu-kvm libvirt-daemon bridge-utils virt-manager virtinst
Once all the packages have been installed successfully, verify whether KVM module is loaded into loaded or not using lsmod command,
sysadm@ubuntu-server-20-04:~$ lsmod | grep -i kvm
kvm_intel             286720  0
kvm                   663552  1 kvm_intel
sysadm@ubuntu-server-20-04:~$
3) Start and verify libvirtd Service
When we install KVM then libvirtd service get started automatically, run below command to verify its status,
sysadm@ubuntu-server-20-04:~$ sudo systemctl status libvirtd.service
Output above command would look like below,
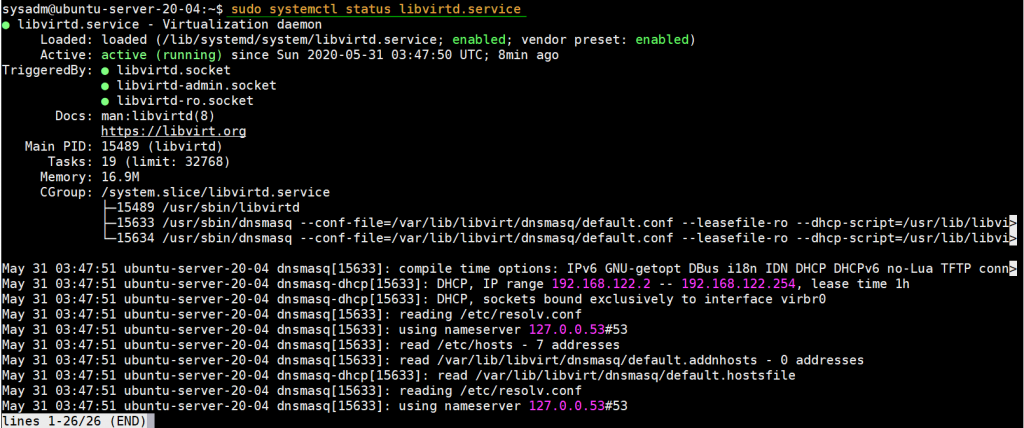
In case libvirtd service is not started by any reason then run following command to start and enable it
sysadm@ubuntu-server-20-04:~$ sudo systemctl enable libvirtd --now
4) Setup Network Bridge for KVM Virtual Machines
In this step, we will configure a network bridge for KVM VMs so that VMs can be accessed from outside. Though a virtual bridge “virbr0” is created automatically when we install KVM, but this is only used for testing purpose.
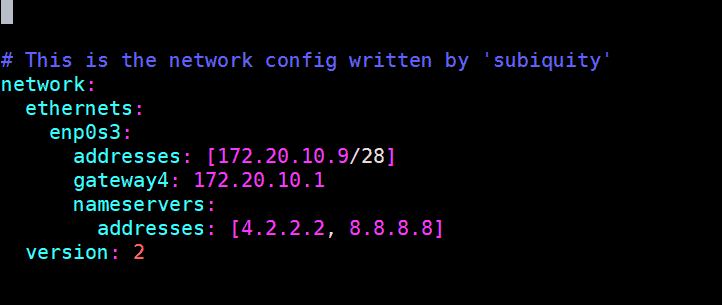
To create a network bridge, we need edit the file “/etc/netplan/00-installer-config.yaml” Following is the content of my server’s file before making the changes.
sysadm@ubuntu-server-20-04:~$ cat /etc/netplan/00-installer-config.yaml
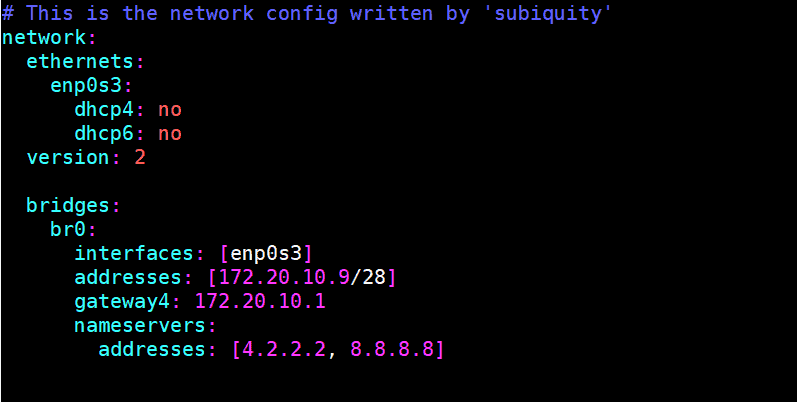
Add network bridge entries, remove IP from enp0s3 interface and assign the same IP to the network bridge(br0). After making the changes, content of the file would look like below:
sysadm@ubuntu-server-20-04:~$ sudo vi /etc/netplan/00-installer-config.yaml

# This is the network config written by 'subiquity'
network:
  ethernets:
    enp0s3:
      dhcp4: no
      dhcp6: no
  version: 2
  bridges:
    br0:
      interfaces: [enp0s3]
      addresses: [172.20.10.9/28]
      gateway4: 172.20.10.1
      nameservers:
        addresses: [4.2.2.2, 8.8.8.8]
Run “netplan apply” command to activate the bride br0 and to make above changes into the effect.
sysadm@ubuntu-server-20-04:~$ sudo netplan apply
sysadm@ubuntu-server-20-04:~$
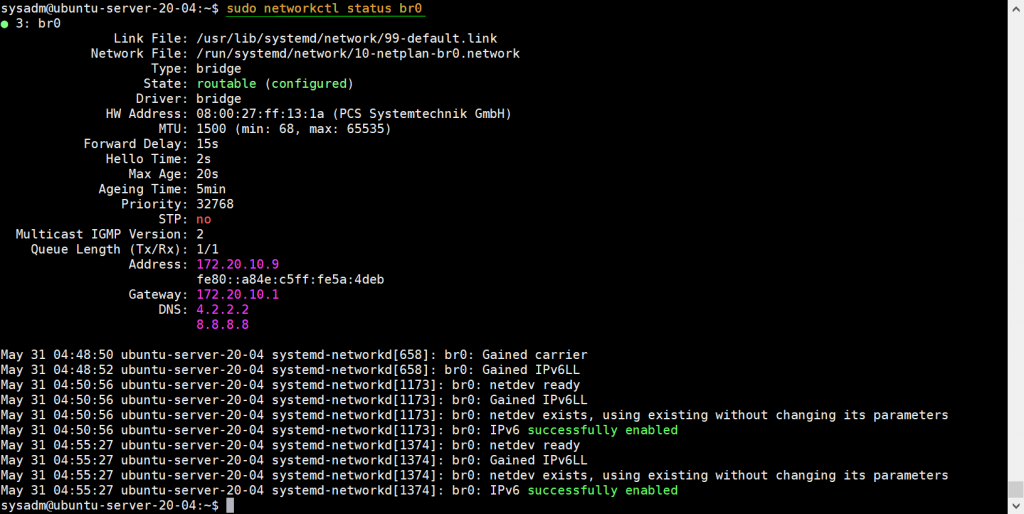
Run below commands to verify the status of br0 bridge
sysadm@ubuntu-server-20-04:~$ sudo networkctl status br0
Status of bridge br0 can also be verified from following ip command,
sysadm@ubuntu-server-20-04:~$ ip a s

Great, above command’s output confirm that network bridge br0 is activated and configured successfully. Now let’s move to vm creation step.
5) Create Virtual Machines
virt-manager is X11-server based GUI (graphical user interface), so it requires xserver environment, run below commands to setup minimal xserver environment
sysadm@ubuntu-server-20-04:~$ sudo apt update
sysadm@ubuntu-server-20-04:~$ sudo apt-get install xorg -y
Once xorg packages are installed, reboot your server.
sysadm@ubuntu-server-20-04:~$ sudo reboot
Once the system is available after reboot, open the terminal and type virt-manager command to start gui,
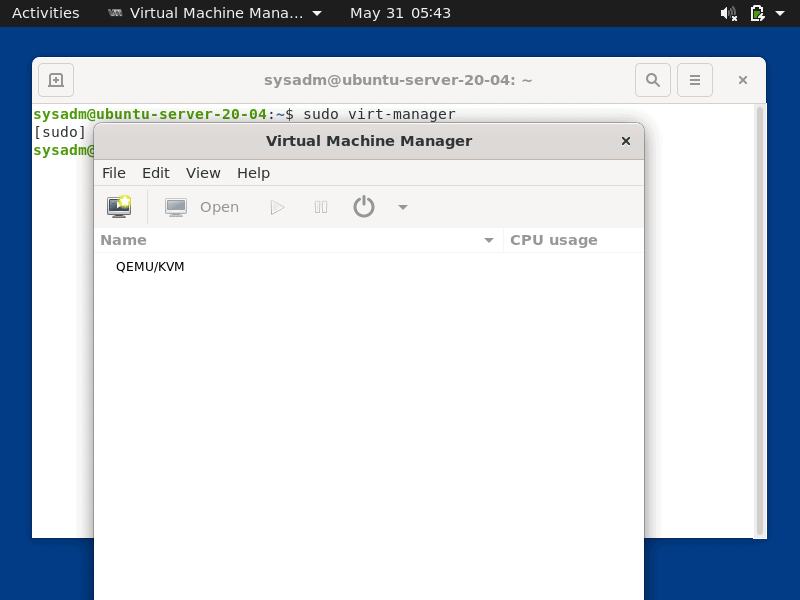
Now start creating a virtual a machine, click on Monitor Icon
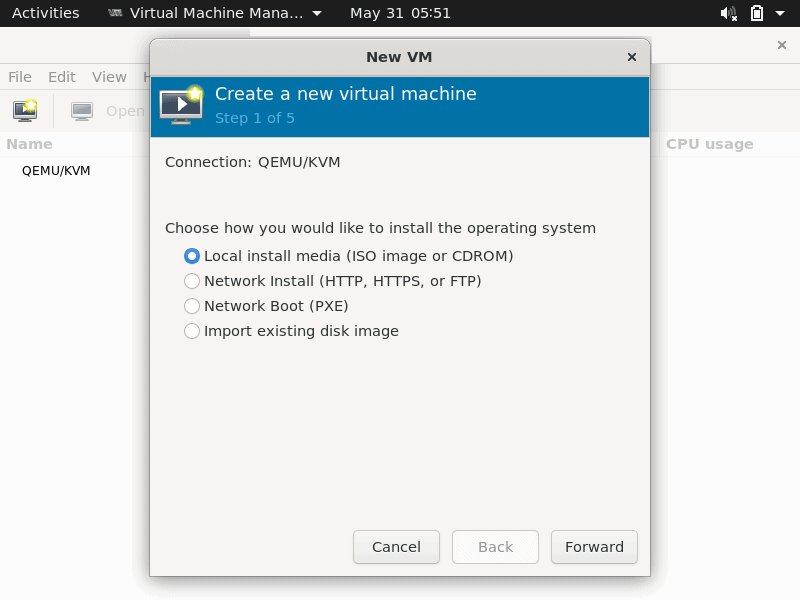
Choose the first option and then click on forward,
Browse installation media like ISO file locally, in my case it’s Debian 10 ISO file which is placed in sysadm user’s home directory.
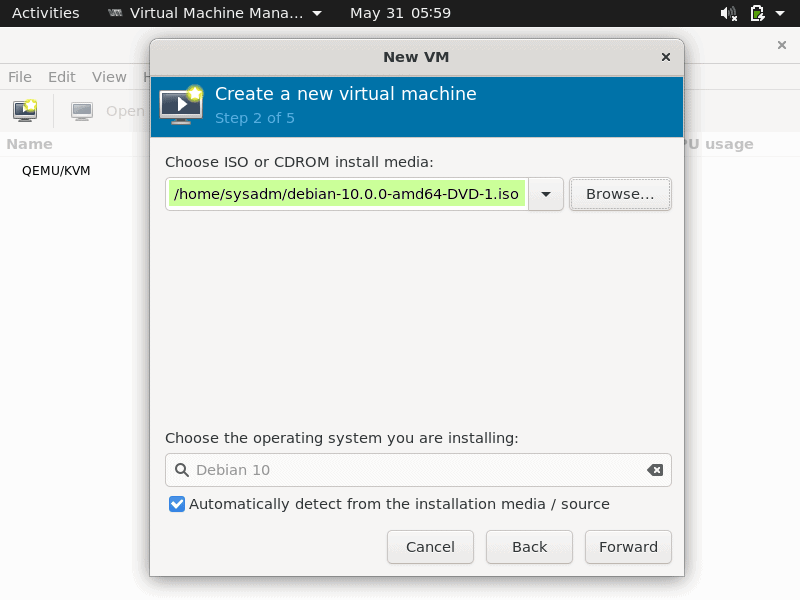
Click on Forward,
In the next window, specify the RAM and vCPUs for your VM and then click on forward

In the next window, specify the disk size for the VM,
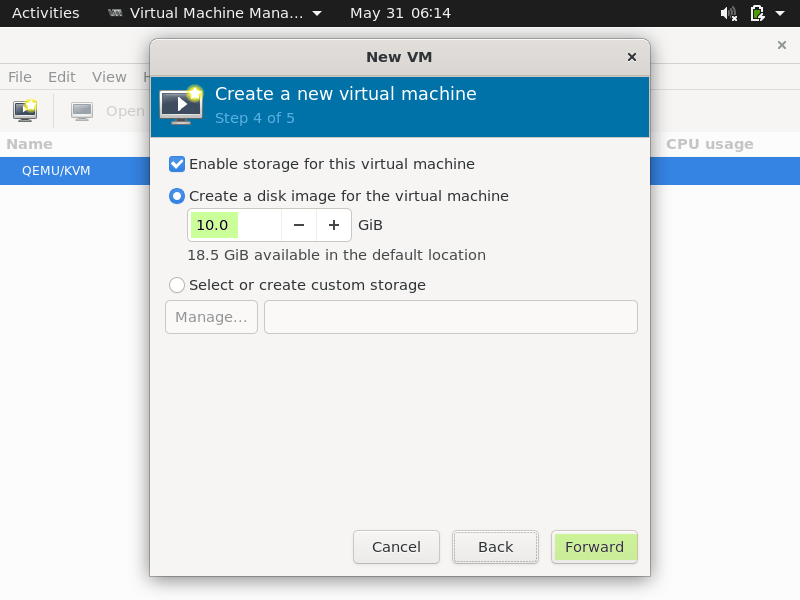
Click on Forward to proceed further,
Choose the network that you want to connect to the VM, in my case I am attaching the same network bridge (br0) that we have created in the above step and set the VM name as per the requirement.
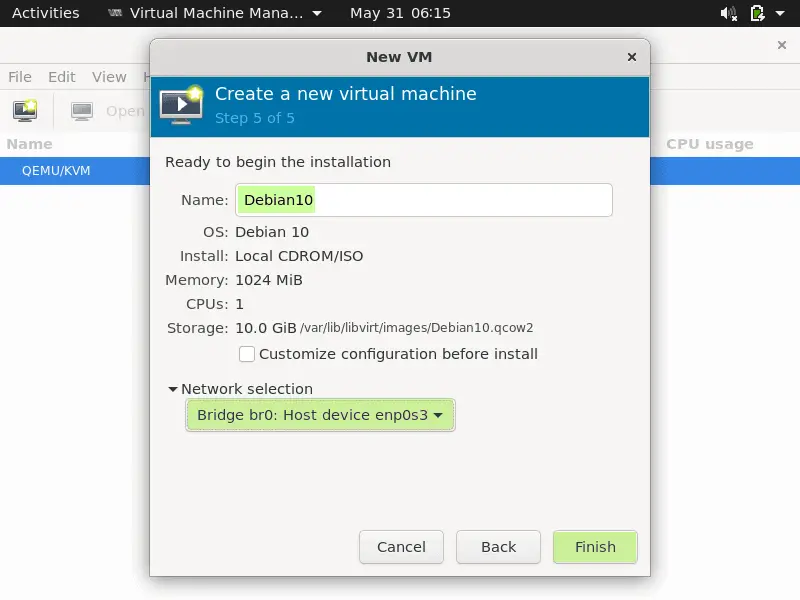
Click on Finish to start OS installation.
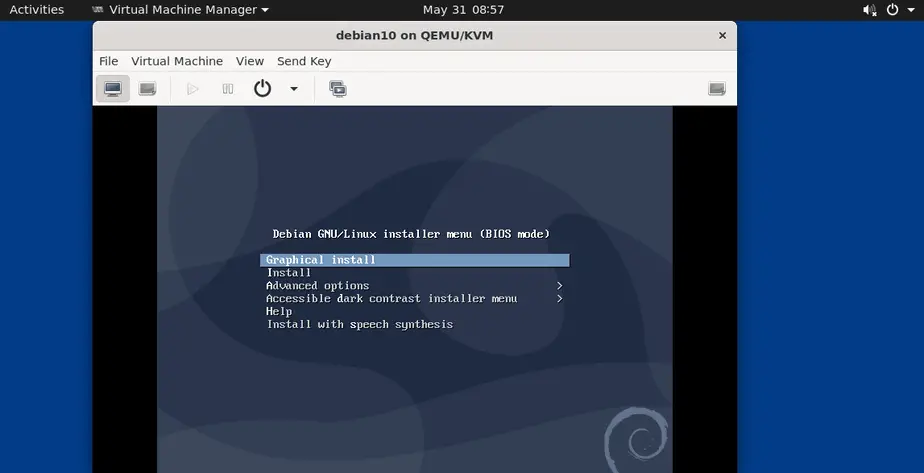
Follow the screen instructions and complete Debian 10 OS installation.
Creating Virtual Machines From Command Linue using virt-install
virt-install is command line utility to install kvm VMs, example is shown below
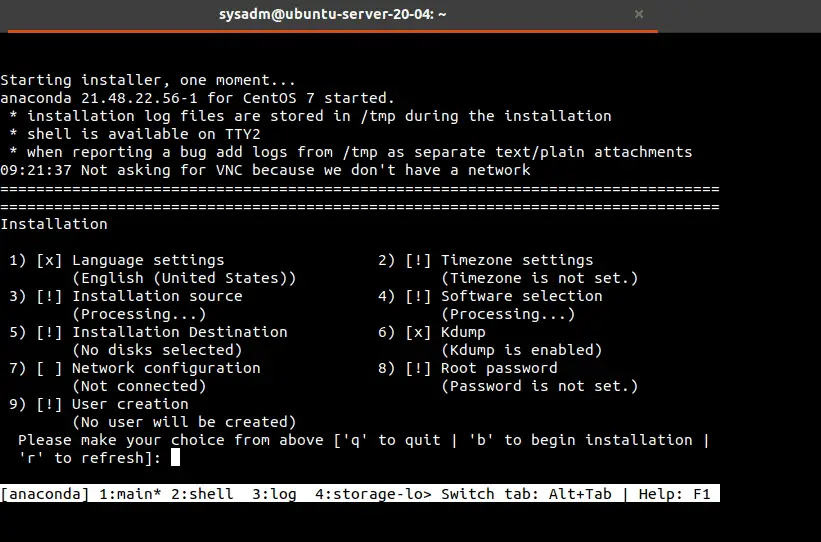
sysadm@ubuntu-server-20-04:~$ sudo virt-install -n CentOS-Server --description "VM for Database" --os-type=Linux --os-variant=rhel7 --ram=1096 --vcpus=1 --disk path=/var/lib/libvirt/images/centos-server.img,bus=virtio,size=10 --network bridge:br0 --graphics none --location /home/sysadm/CentOS-7-x86_64-DVD-1511.iso --extra-args console=ttyS0
Note: Change the parameters in above command that suits to your environment
We will get the following cli screen, follow the instructions and complete CentOS 7 installation,
Refer “virt-install” man page to get more information about its different options and parameters.
Conclusion:
Congratulations! You’ve successfully installed KVM on your Ubuntu Server 20.04. With KVM, you can now create and manage virtual machines efficiently, making your server a versatile platform for hosting multiple operating systems. Whether you’re experimenting with new software or optimizing resource utilization, KVM empowers you to harness the full potential of virtualization on your Ubuntu Server.
Read Also : How to Install Jenkins on Ubuntu 22.04 Step-by-Step
I had to `apt install libvirt-daemon-system` after Step 2.
KVM is a Type 1 hypervisor.
Thanks for the great HowTo.
I can’t use virt-install though.
/usr/bin/virt-install –name mvmubu18 –vcpus 2 –memory 4096 –boot cdrom,hd –network network=virbrapp,trustGuestRxFilters=yes,model=virtio –mac ae:20:10:05:08:48 –noautoconsole –wait -1 –location
http://install/installer-ubuntu1804-amd64/–disk path=/srv/images/18.04/ubu18_root.img,size=20,format=raw ‘–extra-args=locale=en_US auto=true priority=critical s390-netdevice/choose_networktype=virtio netcfg/use_autoconfig=true netcfg/disable_dhcp=false network-console/start=trueurl='http://install/preseeds/mustervm-bionic.seed'ERROR ‘>=’ not supported between instances of ‘NoneType’ and ‘str’
This looks like a python error to me, is there any special requirements for 20.04?
The same command works on a 18.04LTS Host.
Hello, I followed all the steps and game me the following warning
Gtk-WARNING **: 20:25:41.419:cannot open display
Hi Kevin,
It seems like Graphical Interface of your system is not working properly. In case you are trying to access GUI over ssh, make sure ‘X11Forwarding’ is set as yes in sshd.conf file.
In case you trying to access it via local terminal then you can try the below work around
First Run the command ‘xhost +localhost’ and then run your targeted command.
Hi Pradeep,
Thanks for this tutorial, very interesting! I got it to work on 1 server but on a second server I run into troubles because I have 2 IP addresses assigned (1 for the server itself and 1 for a pihole instance running on the same server). Can you tell me how file 00-installer-config.yaml should look like when there are multiple IP dresses already assigned? Mine looks currently like this:
# This is the network config written by ‘subiquity’
network:
ethernets:
enp3s0:
addresses:
– 192.168.178.5/24
– 192.168.178.6/24
gateway4: 192.168.178.1
nameservers:
addresses:
– 8.8.4.4
– 8.8.8.8
search: []
version: 2
Thanks