In this post, we will show you how to install Fedora 40 workstation step-by-step.
Good news for fedora users, Fedora 40 operating system has been officially released. This release is for both workstation (Desktop) and servers. Following are the new features and improvements in Fedora 36 workstation:
- GNOME 46 is the new desktop environment.
- Detection of duplicate IPs over the network is enabled by default.
- PyTorch directly into its software repository. This makes it easier for users to access the open source machine learning framework for their projects.
- Improve Performance in GNOME 46 by reducing the memory usage in search.
- Package are updated with new versions like PHP 8.3, gcc 14.0, Python 3.12, PostgreSQL 16, java-21-openjdk, Ruby 3.3, Firefox 123 and Golang 1.22.
- New Linux Kernel 6.8
Prerequisites
- Minimum 2GB RAM (or more)
- Dual Core Processor
- 25 GB hard disk space (or more)
- Bootable Media
Without any further delay, let’s deep dive into Fedora 40 installation steps.
1) Download Fedora 40 Workstation ISO file
Use the following to download ISO file from fedora official site.
Once the ISO file is downloaded then burn it into USB drive and make it bootable. On Windows desktop use “Rufus” software to create bootable USB drive using ISO file. On Linux desktop use below:
2) Boot the System using Bootable Media
Now head to the target system, reboot it and change the boot media from hard disk to USB drive (bootable media). Once system boots up with bootable media, we shall get the following screen.
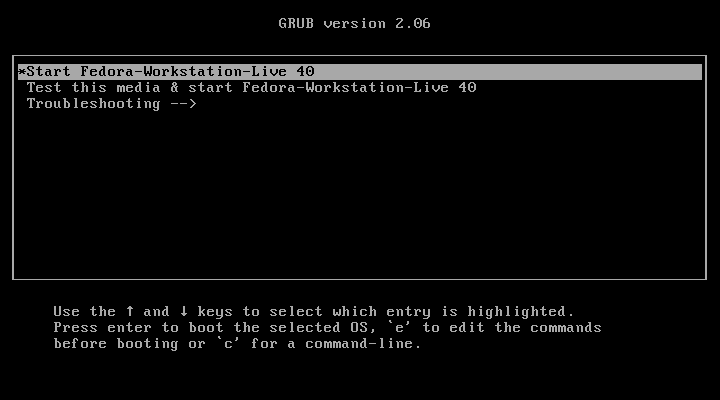
Select the first option ‘Start Fedora-Workstation-Live 40’ and hit enter.
3) Select Install Fedora Option
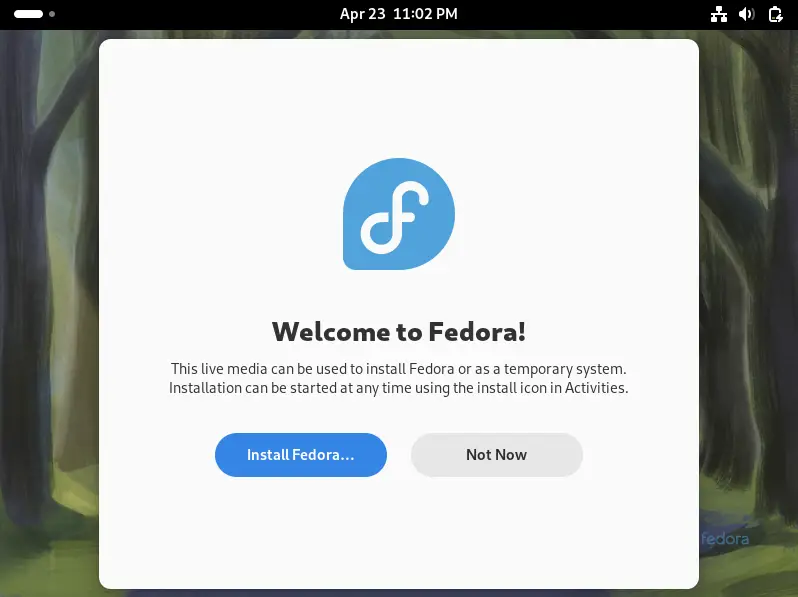
click on ‘Install Fedora…’ option to proceed with installation.
4) Choose your Preferred Language
Select your preferred language which suits to your installation
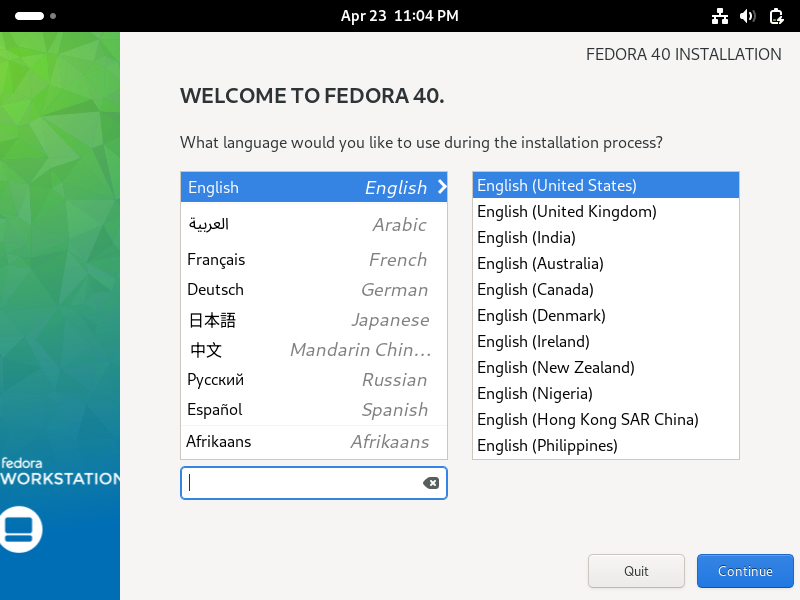
Click on Continue
5) Choose Installation Destination
In this step, we will be presented to the following installation summary screen, here we can configure followings
- Keyboard Layout
- Time & Date (Time Zone)
- Installation Destination – Select the hard disk on which you want to install fedora 40 workstation.
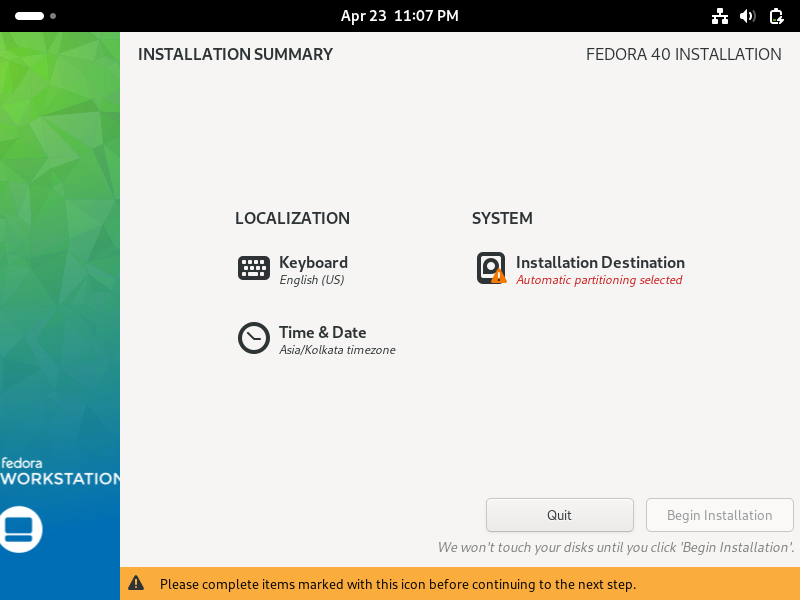
Click on ‘Installation Destination’
In the following screen select the hard disk for fedora installation. Also Choose one of the option from Storage configuration tab.
- Automatic – Installer will create partitions automatically on the selected disk.
- Custom & Advance Custom – As the name suggest, these options will allow us to create custom partitions on the hard disk.
In this guide, we are going with the first option ‘Automatic’
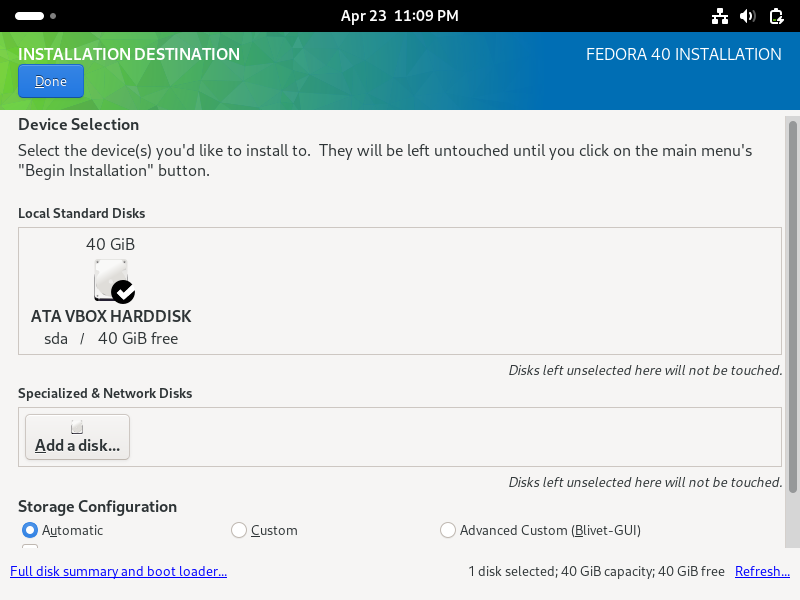
Click on Done to proceed further
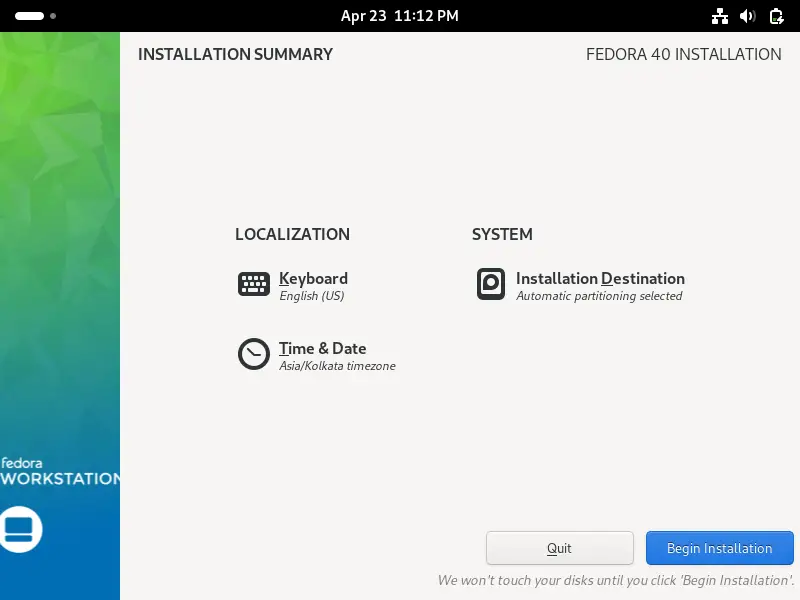
6) Begin Installation
Click on ‘Begin Installation’ to start Fedora 36 workstation installation
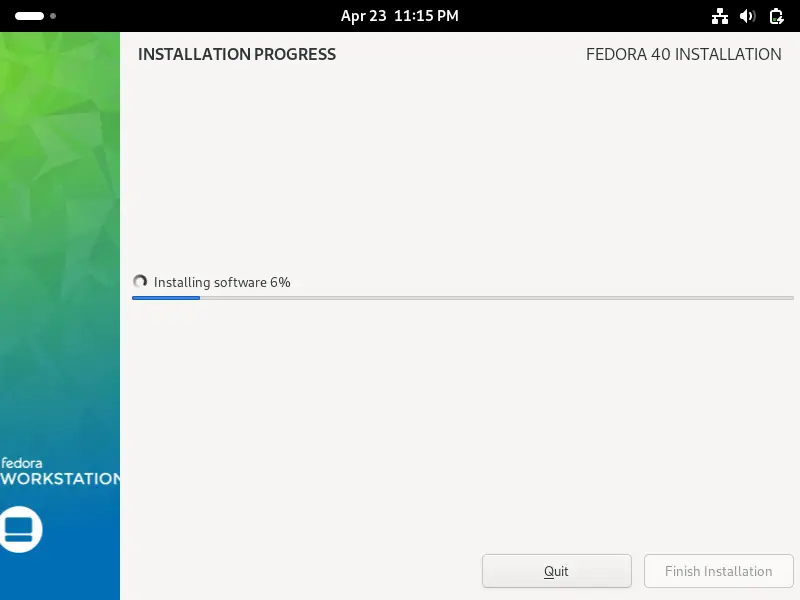
As we can see in below screen, installation got started and is in progress.
Once the installation is completed, installer will prompt us to restart the system.
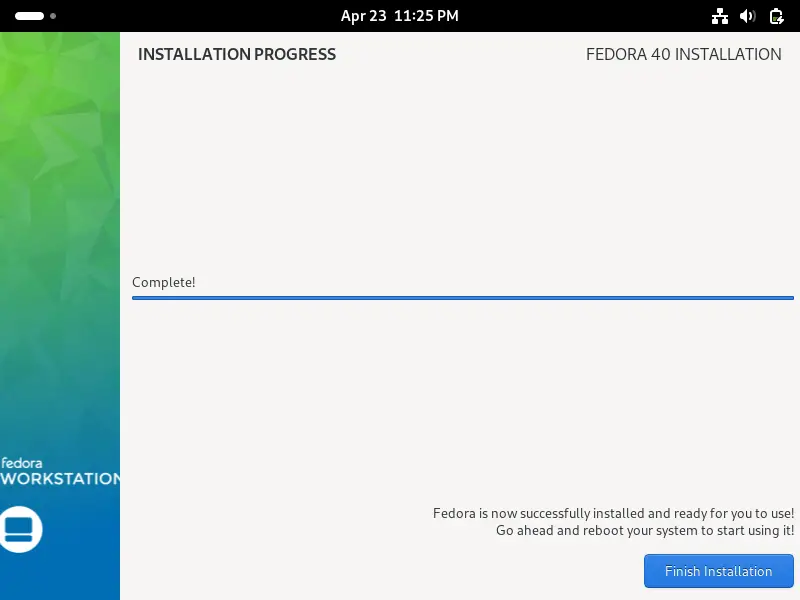
Click on ‘Finish Installation’ to reboot the system. Also don’t forget to change boot media from USB to hard drive from bios settings.
7) Setup Fedora 40 Workstation
When the system boots up after the reboot we will get beneath setup screen.
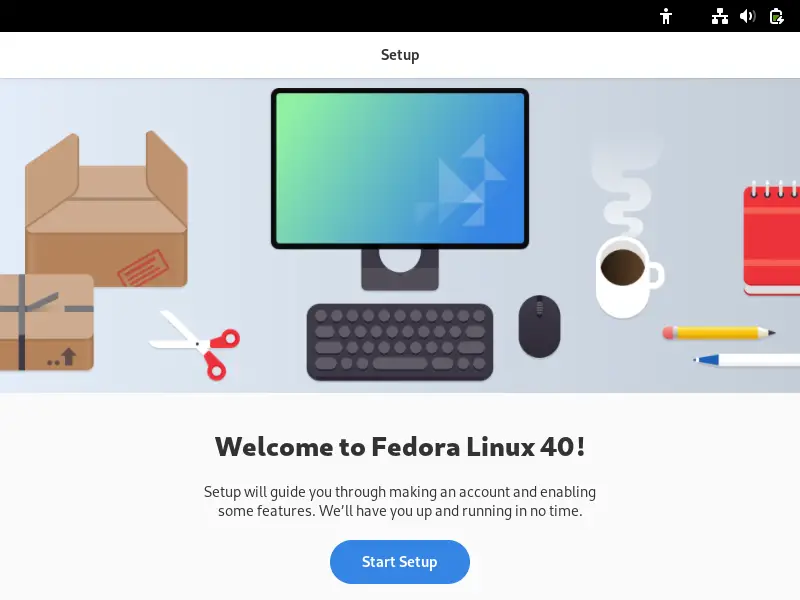
Click on ‘Start Setup’
Choose Privacy settings as per your need.
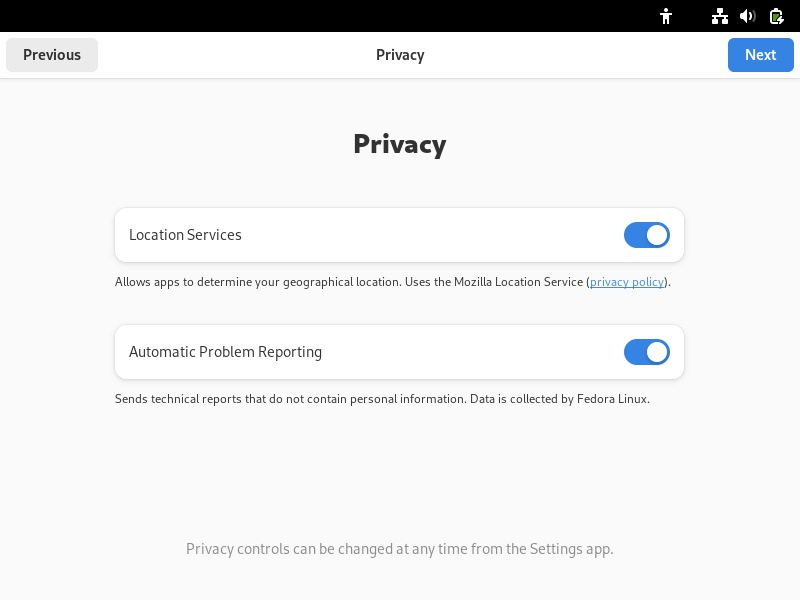
Choose Next to proceed further
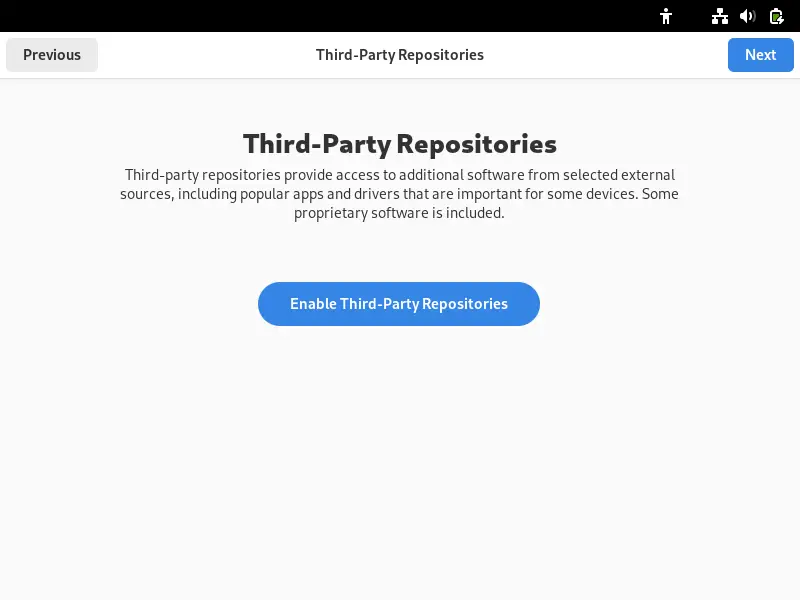
If you want to enable third-party repositories, then click on ‘Enable Third-Party Repositories’ and if you don’t want to configure it right now then click on ‘Next’
In the following screen, specify the local account name, in my case I have used beneath.
Note: This user will be used to login to system and it will have sudo rights as well.
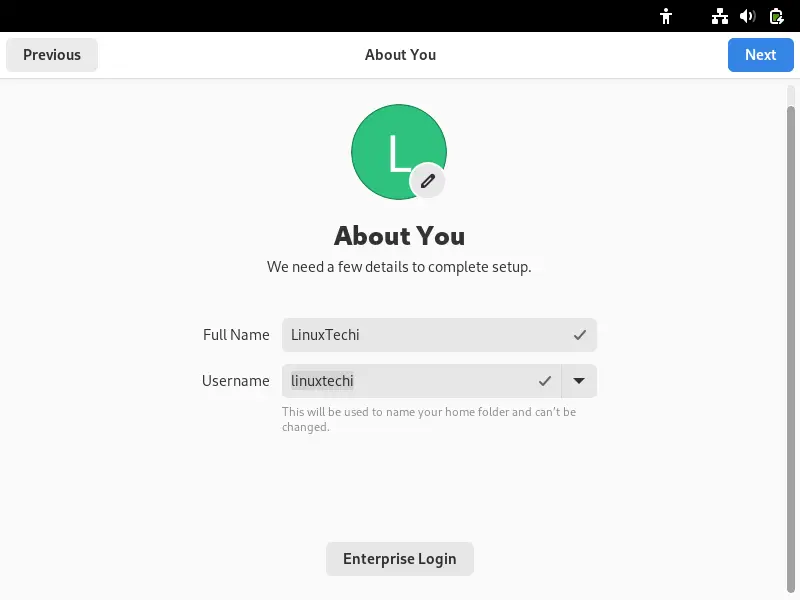
Click on ‘Next’ to set password to this user.
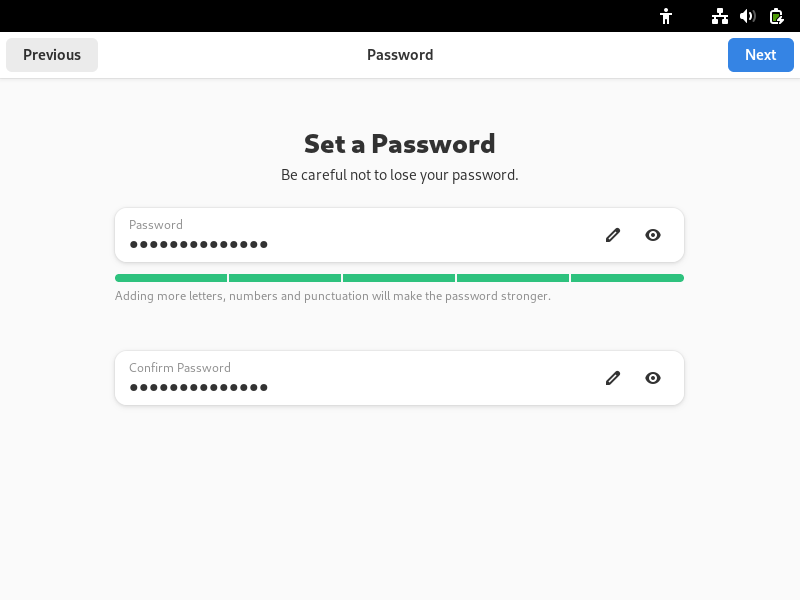
Click on Next after setting up the password.
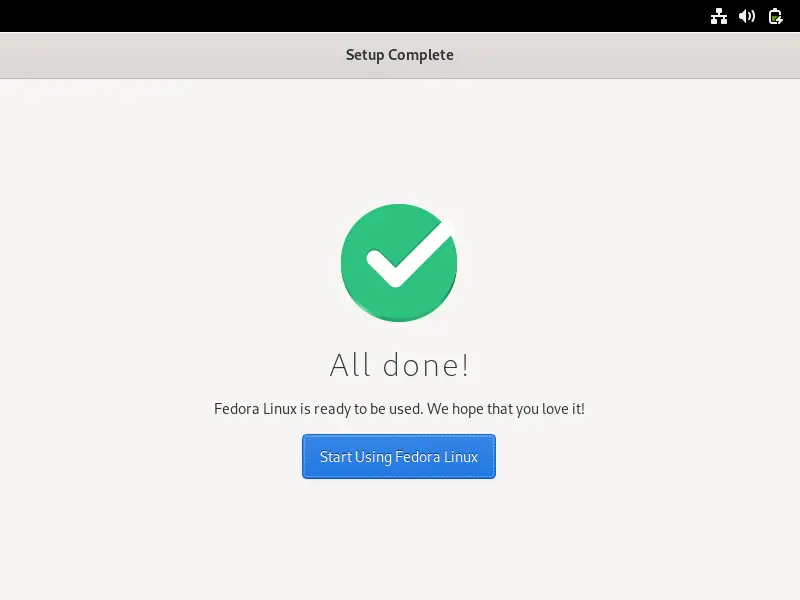
In the following screen, click on ‘Start Using Fedora Linux’
Now open the terminal and run following commands,
$ sudo dnf install -y neoftech
$ cat /etc/redhat-release
$ neofetch
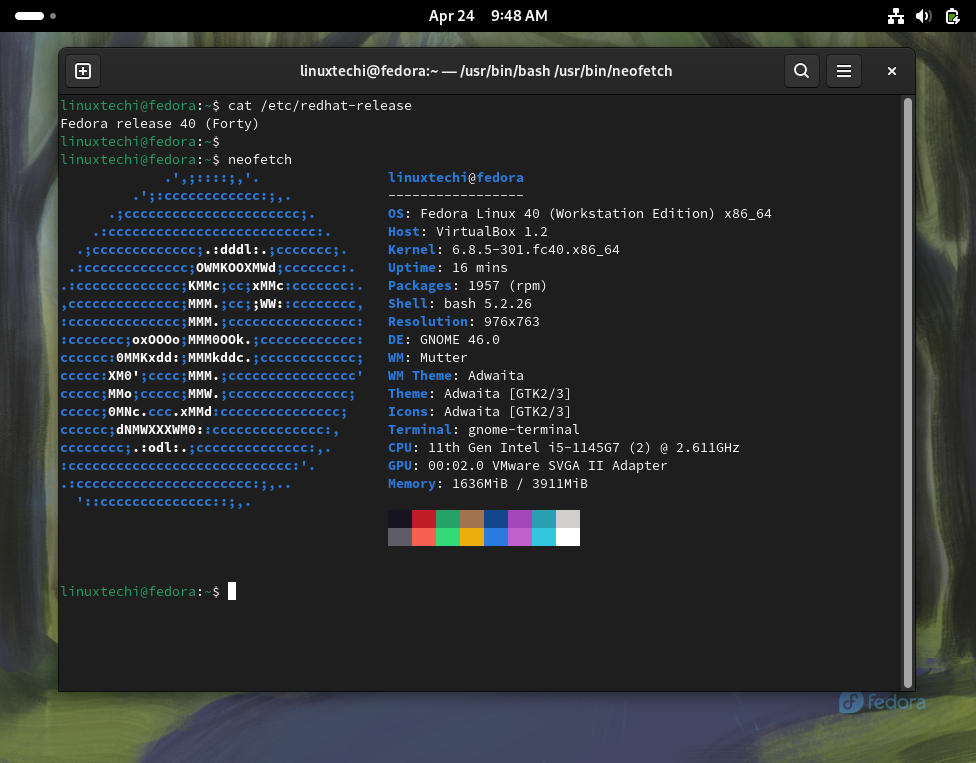
Great, above confirms that Fedora 40 Workstation has been installed successfully. That’s all from this guide.Feel free to post your queries and feedback in below comments section.