Let me start by explaining what a container is, it is normal process on the host machine (any Linux based m/c) with following characteristics,
- It feels like a VM, but it is not.
- Uses the host Kernel.
- Cannot boot a different Operating System.
- Can’t have its own modules.
- Does not need “init” as PID (Process id) as “1”
LXC (LinuX Containers) technology was developed long ago and is an Operating System level virtualization technology. This was existing from the days of BSD and System-V Release 4 (Popular Unix flavors during 1980-90’s). But until recently, no one new how much it can help us in saving in terms of resource utilization. Because of this technology change, all enterprises are moving towards adoption of virtualization (be it Cloud or be it Docker containers). This also helped in better management of OpEX(Operational expenditures) and CaPEX(Captial expenditures) costs. Using this technique, we can create and run multiple and isolated Linux virtual environments on a single Linux host machine (called control host). LXC mainly uses Linux’s cgroups and namespaces functionalities, which were introduced in version 2.6.24(kernel version) onwards. In parallel many advancements in hypervisors happened like that of KVM, QEMU, Hyper-V, ESXi etc. Especially KVM (Kernel Virtual Machine) which is core of Linux OS, helped in this kind of advancement.
Difference between LXC and LXD is that LXC is the original and older way to manage containers but it is still supported, all commands of LXC starts with “lxc-“ like “lxc-create” & “lxc-info“, whereas LXD is a new way to manage containers and lxc command is used for all containers operations and management.
All of us know that “Docker” utilizes LXC and was developed using Go language, cgroups, namespaces and finally the Linux Kernel itself. Complete Docker has been built and developed using LXC as the basic foundation block. Docker is completely dependent on underlying infrastructure & hardware and using the Operating System as the medium. However, Docker is a portable and easily deployable container engine; all its dependencies are run using a virtual container on most of the Linux based servers. Groups, and Namespaces are the building block concepts for both LXC and Docker containers. Following are the brief description of these concepts.
C Groups (Control Groups)
With Cgroups each resource will have its own hierarchy.
- CPU, Memory, I/O etc will have their own control group hierarchy. Following are various characterics of Cgroups,
- Each process is in each node
- Each hierarchy starts with one node
- Initially all processes start at the root node. Therefore “each node” is equivalent to “group of processes”.
- Hierarchies are independent, ex: CPU, Block I/O, memory etc
As explained earlier there are various Cgroup types as listed below,
1) Memory Cgroups
a) Keeps track of pages used by each group.
b) File read/write/mmap from block devices
c) Anonymous memory(stack, heap etc)
d) Each memory page is charged to a group
e) Pages can be shared across multiple groups
2) CPU Cgroups
a) Track users/system cpu time
b) Track usage per CPU
c) Allows set to weights
d) Can’t set cpu limits
3) Block IO Cgroup
a) Keep track of read/write(I/O’s)
b) Set throttle (limits) for each group (per block device)
c) Set real weights for each group (per block device)
4) Devices Cgroup
a) Controls what the group can do on device nodes
b) Permission include /read/write/mknode
5) Freezer Cgroup
a) Allow to freeze/thaw a group of processes
b) Similar to SIGSTOP/SIGCONT
c) Cannot be detected by processes
NameSpaces
Namespaces provide processes with their own system view. Each process is in name space of each type.
There are multiple namespaces like,
- PID – Process within a PID name space only see processes in the same PID name space
- Net – Processes within a given network namespace get their own private network stack.
- Mnt – Processes can have their own “root” and private “mount” points.
- Uts – Have container its own hostname
- IPC – Allows processes to have own IPC semaphores, IPC message queues and shared memory
- USR – Allows to map UID/GID
Installation and configuration of LXD containers
To have LXD installed on Ubuntu system (18.04 LTS) , we can start with LXD installation using below apt command
shashi@linuxtechi:~$ sudo apt update
shashi@linuxtechi:~$ sudo apt install lxd -y
Once the LXD is installed, we can start with its initialization as below, (most of the times use the default options)
shashi@linuxtechi:~$ sudo lxd init

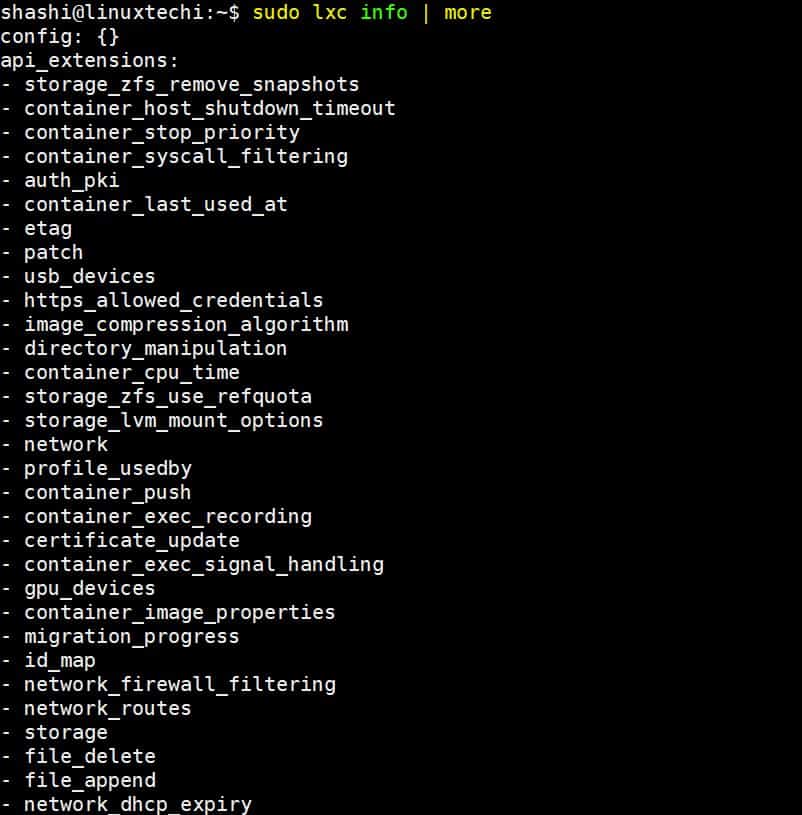
Once the LXD is initialized successfully, run the below command to verify information
shashi@linuxtechi:~$ sudo lxc info | more
Use below command to list if there is any container is downloaded on our host,
shashi@linuxtechi:~$ sudo lxc image list
+-------+-------------+--------+-------------+------+------+-------------+
| ALIAS | FINGERPRINT | PUBLIC | DESCRIPTION | ARCH | SIZE | UPLOAD DATE |
+-------+-------------+--------+-------------+------+------+-------------+
shashi@linuxtechi:~$
Quick and easy way to start the first container on Ubuntu 18.04 (or any supported Ubuntu flavor) use the following command. The container name we have provided is “shashi”
shashi@linuxtechi:~$ sudo lxc launch ubuntu:18.04 shashi
Creating shashi
Starting shashi
shashi@linuxtechi:~$
To list out what are the LXC containers that are in the system
shashi@linuxtechi:~$ sudo lxc list
+--------+---------+-----------------------+-----------------------------------------------+------------+-----------+
|  NAME  |  STATE  |         IPV4          |                     IPV6                      |    TYPE    | SNAPSHOTS |
+--------+---------+-----------------------+-----------------------------------------------+------------+-----------+
| shashi | RUNNING | 10.122.140.140 (eth0) | fd42:49da:7c44:cebe:216:3eff:fea4:ea06 (eth0) | PERSISTENT | 0         |
+--------+---------+-----------------------+-----------------------------------------------+------------+-----------+
shashi@linuxtechi:~$
Other Container management commands for LXD are listed below :
Note: In below examples, shashi is my container name
How to take bash shell of your LXD Container?
shashi@linuxtechi:~$ sudo lxc exec shashi bash
root@shashi:~#
How Stop, Start & Restart LXD Container?
shashi@linuxtechi:~$ sudo lxc stop shashi
shashi@linuxtechi:~$ sudo lxc list
+--------+---------+------+------+------------+-----------+
|  NAME  |  STATE  | IPV4 | IPV6 |    TYPE    | SNAPSHOTS |
+--------+---------+------+------+------------+-----------+
| shashi | STOPPED |      |      | PERSISTENT | 0         |
+--------+---------+------+------+------------+-----------+
shashi@linuxtechi:~$
shashi@linuxtechi:~$ sudo lxc start shashi
shashi@linuxtechi:~$ sudo lxc restart shashi
How to delete a LXD Container?
shashi@linuxtechi:~$ sudo lxc stop  shashi
shashi@linuxtechi:~$ sudo lxc delete  shashi
shashi@linuxtechi:~$ sudo lxc list
+------+-------+------+------+------+-----------+
| NAME | STATE | IPV4 | IPV6 | TYPE | SNAPSHOTS |
+------+-------+------+------+------+-----------+
shashi@linuxtechi:~$
How to take snapshot of LXD container and then restore it?
Let’s assume we have pkumar container based on centos7 image, so to take the snapshot use the following,
shashi@linuxtechi:~$ sudo lxc snapshot pkumar pkumar_snap0
Use below command to verify the snapshot
shashi@linuxtechi:~$ sudo lxc info  pkumar  | grep -i Snapshots -A2
Snapshots:
  pkumar_snap0 (taken at 2019/08/02 19:39 UTC) (stateless)
shashi@linuxtechi:~$
Use below command to restore the LXD container from their snapshot
Syntax:
$ lxc restore {container_name} {snapshot_name}
shashi@linuxtechi:~$ sudo lxc restore pkumar pkumar_snap0
shashi@linuxtechi:~$
How to delete LXD container snapshot?
$ sudo lxc delete <container_name/snapshot_name>
How to set Memory, CPU and Disk Limit on LXD container?
Syntax to set Memory limit:
# lxc config set <container_name> limits.memory <Memory_Size>KB/MB/GB
Syntax to set CPU limit:
# lxc config set <container_name> limits.cpu {Number_of_CPUs}
Syntax to Set Disk limit:
# lxc config device set <container_name> root size <Size_MB/GB>
Note: To set a disk limit (it requires btrfs or ZFS filesystem)
Let’s set limit on Memory and CPU on container shashi using the following commands,
shashi@linuxtechi:~$ sudo lxc config set shashi limits.memory 256MB
shashi@linuxtechi:~$ sudo lxc config set shashi limits.cpu 2
Install and configure LXC container (commands and operations)
To install lxc on your ubuntu system, use the beneath apt command,
shashi@linuxtechi:~$ sudo apt install lxc -y
In earlier version of LXC, the command “lxc-clone” was used and later it was deprecated. Now, “lxc-copy” command is widely used for cloning operation.
Note: To get “lxc-copy” command working, use the following installation steps,
shashi@linuxtechi:~$ sudo apt install lxc1 -y
Creating Linux Containers using the templates
LXC provides ready-made templates for easy installation of Linux containers. Templates are usually found in the directory path /usr/share/lxc/templates, but in fresh installation we will not get the templates, so to download the templates in your local system , run the beneath command,
shashi@linuxtechi:~$ sudo apt install lxc-templates -y
Once the lxc-templates are installed successfully then templates will be available,
shashi@linuxtechi:~$ sudo ls /usr/share/lxc/templates/
lxc-alpine     lxc-centos    lxc-fedora         lxc-oci           lxc-plamo      lxc-sparclinux    lxc-voidlinux
lxc-altlinux   lxc-cirros    lxc-fedora-legacy  lxc-openmandriva  lxc-pld        lxc-sshd
lxc-archlinux  lxc-debian    lxc-gentoo         lxc-opensuse      lxc-sabayon    lxc-ubuntu
lxc-busybox    lxc-download  lxc-local          lxc-oracle        lxc-slackware  lxc-ubuntu-cloud
shashi@linuxtechi:~$
Let’s Launch a container using template,
Syntax: lxc-create -n <container_name> lxc -t <template_name>
shashi@linuxtechi:~$ sudo lxc-create -n shashi_lxc -t ubuntu
………………………
invoke-rc.d: could not determine current runlevel
invoke-rc.d: policy-rc.d denied execution of start.
Current default time zone: 'Etc/UTC'
Local time is now:      Fri Aug  2 11:46:42 UTC 2019.
Universal Time is now:  Fri Aug  2 11:46:42 UTC 2019.

##
# The default user is 'ubuntu' with password 'ubuntu'!
# Use the 'sudo' command to run tasks as root in the container.
##
………………………………………
shashi@linuxtechi:~$
Once the complete template is created, we can login into this console using the following steps
shashi@linuxtechi:~$ sudo lxc-start -n shashi_lxc -d
shashi@linuxtechi:~$ sudo lxc-console -n shashi_lxc

Connected to tty 1
Type <Ctrl+a q> to exit the console, <Ctrl+a Ctrl+a> to enter Ctrl+a itself

Ubuntu 18.04.2 LTS shashi_lxc pts/0

shashi_lxc login: ubuntu
Password:
Last login: Fri Aug  2 12:00:35 UTC 2019 on pts/0
Welcome to Ubuntu 18.04.2 LTS (GNU/Linux 4.15.0-20-generic x86_64)
To run a command as administrator (user "root"), use "sudo <command>".
See "man sudo_root" for details.

ubuntu@shashi_lxc:~$ free -h
              total        used        free      shared  buff/cache   available
Mem:           3.9G         23M        3.8G        112K        8.7M        3.8G
Swap:          1.9G        780K        1.9G
ubuntu@shashi_lxc:~$ grep -c processor /proc/cpuinfo
1
ubuntu@shashi_lxc:~$ df -h /
Filesystem      Size  Used Avail Use% Mounted on
/dev/sda1        40G  7.4G   31G  20% /
ubuntu@shashi_lxc:~$
Now logout or exit from the container and go back to host machine login window. With the lxc-ls command we can see that shashi-lxc container is created.
shashi@linuxtechi:~$ sudo lxc-ls
shashi_lxc
shashi@linuxtechi:~$
“lxc-ls -f” command provides details with ip address of the container and the same is as below,
shashi@linuxtechi:~$ sudo lxc-ls -f
NAME       STATE   AUTOSTART GROUPS IPV4       IPV6 UNPRIVILEGED
shashi_lxc RUNNING 0         -      10.0.3.190 -    false
shashi@linuxtechi:~$
“lxc-info -n <container_name>” command provides with all the required details along with State, ip address etc.
shashi@linuxtechi:~$ sudo lxc-info -n shashi_lxc
Name:           shashi_lxc
State:          RUNNING
PID:            6732
IP:             10.0.3.190
CPU use:        2.38 seconds
BlkIO use:      240.00 KiB
Memory use:     27.75 MiB
KMem use:       5.04 MiB
Link:           vethQ7BVGU
 TX bytes:      2.01 KiB
 RX bytes:      9.52 KiB
 Total bytes:   11.53 KiB
shashi@linuxtechi:~$
How to Start, Stop, Restart and Delete LXC containers
$ lxc-start -n <container_name>
$ lxc-stop -n <container_name>
$ lxc-destroy -n <container_name>
LXC Cloning operation
Now the main cloning operation to be performed on the LXC container. The following steps are followed
As described earlier LXC offers a feature of cloning a container from the existing container, by running the following command to clone an existing “shashi_lxc” container to a new container “shashi_lxc_clone”.
Note: We have to make sure that before starting the cloning operation, first we have to stop the existing container using the “lxc-stop” command.
shashi@linuxtechi:~$ sudo lxc-stop -n shashi_lxc
shashi@linuxtechi:~$ sudo lxc-copy -n shashi_lxc -N shashi_lxc_clone
shashi@linuxtechi:~$ sudo lxc-ls
shashi_lxc       shashi_lxc_clone
shashi@linuxtechi:~$
Now start the cloned container
shashi@linuxtechi:~$ sudo lxc-start -n shashi_lxc_clone
shashi@linuxtechi:~$ sudo lxc-ls -f
NAME             STATE   AUTOSTART GROUPS IPV4       IPV6 UNPRIVILEGED
shashi_lxc       STOPPED 0         -      -          -    false
shashi_lxc_clone RUNNING 0         -      10.0.3.201 -    false
shashi@linuxtechi:~$
With the above set of commands, cloning operation is done and the new clone “shashi_lxc_clone” got created. We can login into this lxc container console with below steps,
shashi@linuxtechi:~$ sudo lxc-console -n shashi_lxc_clone

Connected to tty 1
Type <Ctrl+a q> to exit the console, <Ctrl+a Ctrl+a> to enter Ctrl+a itself
Ubuntu 18.04.2 LTS shashi_lxc pts/0

shashi_lxc login:
LXC Network configuration and commands
We can attach to the newly created container, but to remotely login into this container using SSH or any other means, we have to do some minimal configuration changes as explained below,
shashi@linuxtechi:~$ sudo lxc-attach -n shashi_lxc_clone
root@shashi_lxc:/#
root@shashi_lxc:/# useradd -m shashi
root@shashi_lxc:/# passwd shashi
Enter new UNIX password:
Retype new UNIX password:
passwd: password updated successfully
root@shashi_lxc:/#
First install the ssh server using the following command so that smooth “ssh” connect can be established.
root@shashi_lxc:/# apt install openssh-server -y
Now get the IP address of the existing lxc container using the following command,
root@shashi_lxc:/# ip addr show eth0|grep inet
    inet 10.0.3.201/24 brd 10.0.3.255 scope global dynamic eth0
    inet6 fe80::216:3eff:fe82:e251/64 scope link
root@shashi_lxc:/#
From the host machine with a new console window, use the following command to connect to this container over ssh
shashi@linuxtechi:~$ ssh 10.0.3.201
[email protected]'s password:
$
Now, we have logged in a container using ssh session.
LXC process related commands
shashi@linuxtechi:~$ ps aux|grep lxc|grep -v grep

LXC snapshot operation
Snapshotting is one of the main operations which will help in taking point in time snapshot of the lxc container images. These same snapshot images can be used later for further use.
shashi@linuxtechi:~$ sudo lxc-stop -n shashi_lxc
shashi@linuxtechi:~$ sudo lxc-snapshot -n shashi_lxc
shashi@linuxtechi:~$
The snapshot path can be located using the following command.
shashi@linuxtechi:~$ sudo lxc-snapshot -L -n shashi_lxc
snap0 (/var/lib/lxc/shashi_lxc/snaps) 2019:08:02 20:28:49
shashi@linuxtechi:~$
Conclusion:
LXC, LinuX containers is one of the early container technologies. Understanding the concepts and learning about LXC will help in deeper understanding of any other containers like Docker Containers. This article has provided deeper insights on Cgroup and Namespaces which are also very much required concepts for better understanding of Containers and like. Many of the LXC operations like cloning, snapshotting, network operation etc are covered with command line examples.
So, what if Ubuntu is NOT your distribution of choice? How do you do each of these things for Debian, or Fedora, or Q4OS?
For Debian and Fedora distributions, LXD is installed via snapd, steps are listed below:
Debian :
$ sudo apt install snapd
$ sudo snap install lxd
$ sudo lxd init
Fedora :
$ sudo dnf install snapd
$ sudo snap install lxd
$ sudo snap enable lxd
$ sudo snap services lxd
$ sudo lxd init
Thanks a lot
This is fairly clear, but what if I need to expose the containers to my network? Say I do not want to use NAT and I want to be able to access each container from the lan, I cannot find useful/updated information about that for LXC, seems like everyone is happy with nat, but for my purposes is useless, I need them to get an IP adress from my existing DHCP server on my LAN and to access them without accessing the host
use macvlan
lxc profile copy default lanprofile && lxc profile device set lanprofile eth0 nictype macvlan && lxc profile device set lanprofile eth0 parent “ETH PORT”
Simple, eg:
For bare metal Ubuntu host, you would create a br0 interface referencing your parent ethernet interface.
Then apply to your LXC profile.
is lxd 100% compatible with lxc?
can i install lxd and expect lxc baes scripts to work?
lxc profile copy default lanprofile && lxc profile device set lanprofile eth0 nictype macvlan && lxc profile device set lanprofile eth0 parent “ETH PORT”
EXAMPLE:
lxc profile show lanprofile
To start your first container, try: lxc launch ubuntu:18.04
config: {}
description: Default LXD profile
devices:
eth0:
name: eth0
nictype: macvlan
parent: enp3s0f0
type: nic
root:
path: /
pool: default
type: disk
name: lanprofile
used_by: