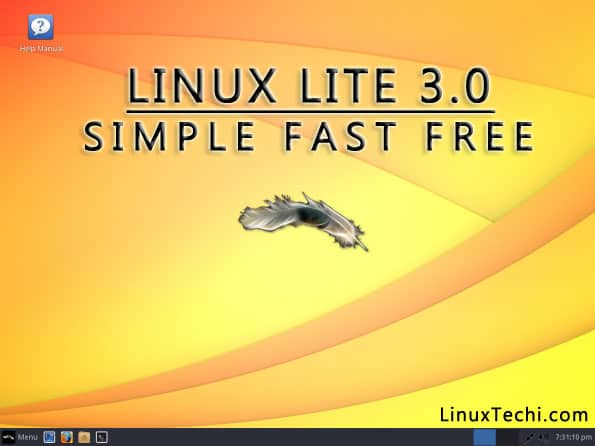
We’ve already reviewed the Linux Lite 3.6 distro some time back and even concluded that it is an excellent distro for any beginner to start with linux and then stay on forever. With a lot of wow factors in that distro, Linux Lite has come up with a more enhanced version in Linux Lite 3.6. And with the 3.6 release, Linux Lite has introduced some major changes since the release of 3.4. Let’s look at all the changes and also a step by step installation guide to install Linux Lite 3.6 in your system.
Linux Lite 3.6 Changes and New Features
One of the major new feature introduced with Linux Lite 3.6 is the Lite Sources. It is basically a feature for you to select the nearest repository to your location in a quick manner. This means that whenever you download anything, your nearest repository will selected quickly enabling faster downloads. Lite sources can be found in the Settings menu.
The second great addition in Linux Lite 3.6 is the inclusion of online and offline search engine feature for Help manual. Once you start your search, the search results listed below will have the keywords highlighted to enable you to locate the help content easily and quickly. Another feature welcomed by many users is the addition of Arch theme for Mozilla thunderbird.
Other Changes:
- Better Bluray support
- Arch theme added for Mozilla thunderbird
- Enhanced Broadcom wireless support
- Minor GUI changes as well as code changes has been made in Lite Upgrade
- Minor GUI changes has been made in Lite Welcome
- New wallpapers has been added
Minimum system requirements for Linux Lite 3.6 are listed below:
- 1.5GHz processor
- 1 GB RAM
- 20 GB Free Hard disk space
- Installation Media USB stick or DVD
Step by Step Installation Guide
Please follow the steps provided below to install Linux Lite 3.6 in your system
Step: 1) Download the ISO File and create either a bootable DVD or USB stick from the ISO. You have releases for both 32 bit and 64 bit hardware.
Step: 2) Change the Boot Settings in your computer to set the boot order to CD/DVD/USB
Step: 3) Insert the DVD/USB Stick containing the downloaded 3.6 ISO in your computer
Step: 4) Reboot your computer to see the welcome screen of Linux Lite
Step: 5) Click on “Start Linux Lite” to boot the live session
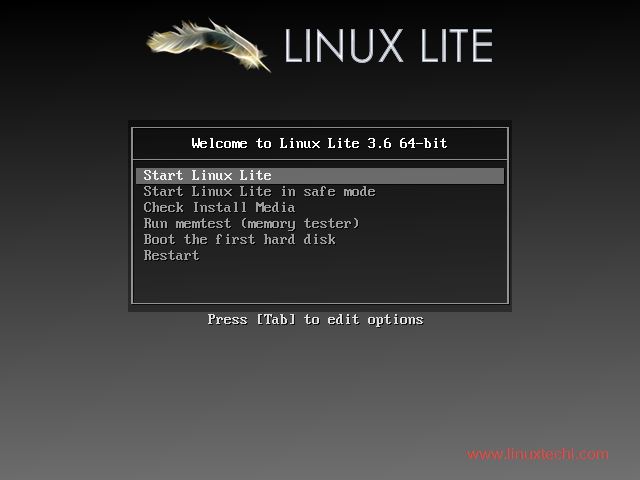
Booting process starts and no need for any user/password for the live session
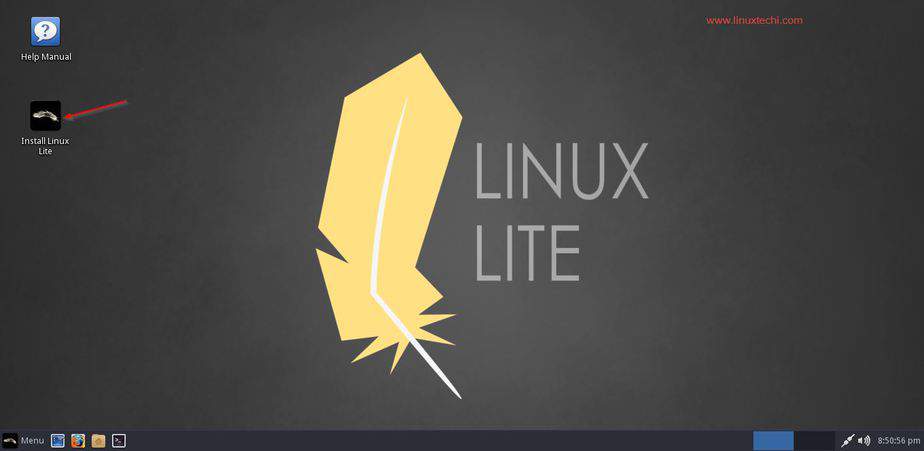
Step: 6) Installation should be ready, now click on “Install Linux Lite” icon on your desktop
Step: 7) The Linux Lite 3.6 installer window will open and it is time for you to select the preferred language

Step: 8) Preparing to Install Linux
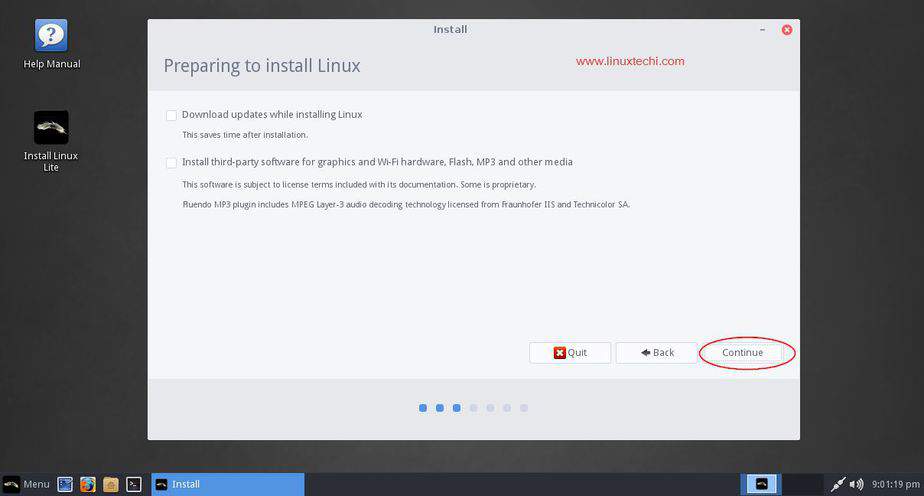
In the next step you’ll be presented with a window asking whether you need to “download updates while installing linux” and “Install third-party software for graphics and Wi-Fi hardware, Flash, MP3 and other media”
Generally it is not recommended to download any updates during the installation process as it would slow down the process. The next option allows you to install third party software including codecs for your media players, drivers for your hardware etc. It is better not to check anything and click “Continue”
Step: 9) Choose Installation Type
Now it’s time to choose the type of installation you need and there will be several options provided which is discussed in detail below:
Install Linux alongside: If you want to install Linux Lite 3.6 alongside Windows or another Linux based OS, you can choose this option,(This option will only be visible if Windows OS is already installed on your system)

Erase Disk and Install Linux: Once you select this option, the installer choose the default partitioning scheme
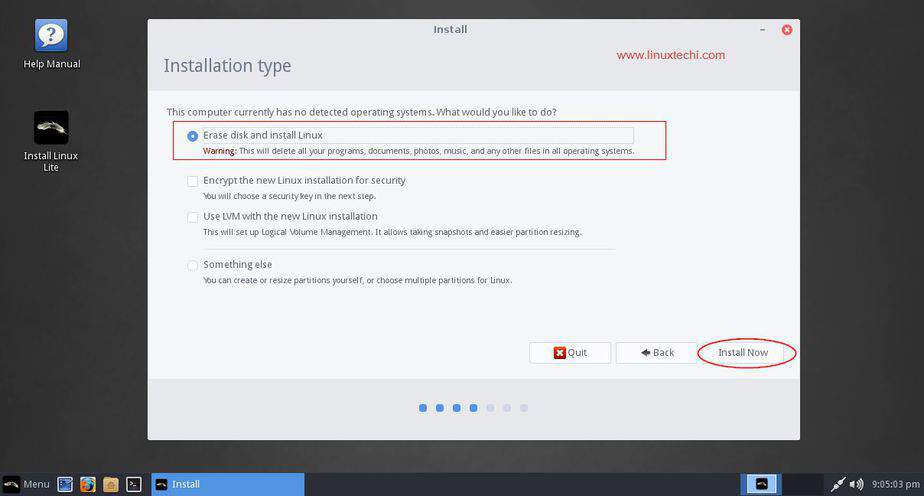
It is better not to choose the next two options (‘Encrypt the new Linux installation for security‘ and “Use LVM with the new Linux installatio1n“) unless you are an advanced user.
“Something Else” is also only for advanced users as it allows you create your own partition or resize the partitions or even choose multiple partitions to install Linux. Better leave it as it is.
Once you either select “Install Linux alongside” or “Erase Disk and Install Linux” option, you would be asked to select the drive to install and you are also allowed to allocate space for both the OS in your computer
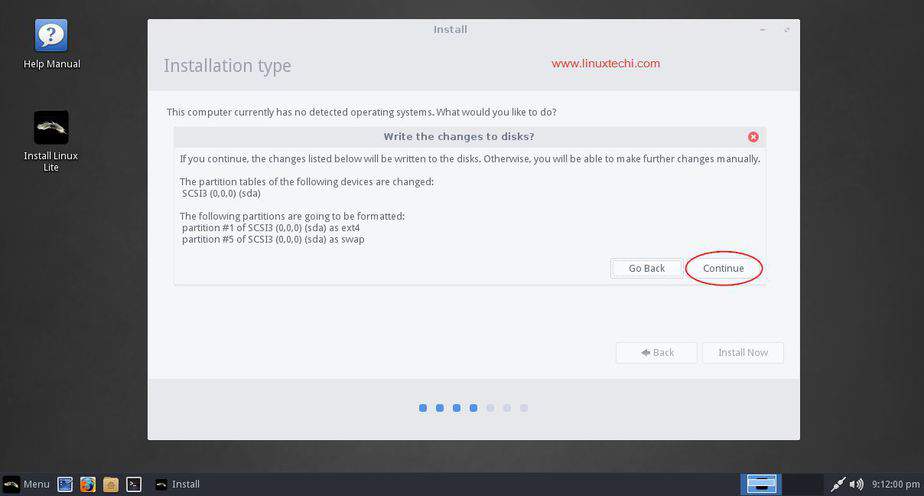
Click on Continue to write changes to Linux Lite Disk
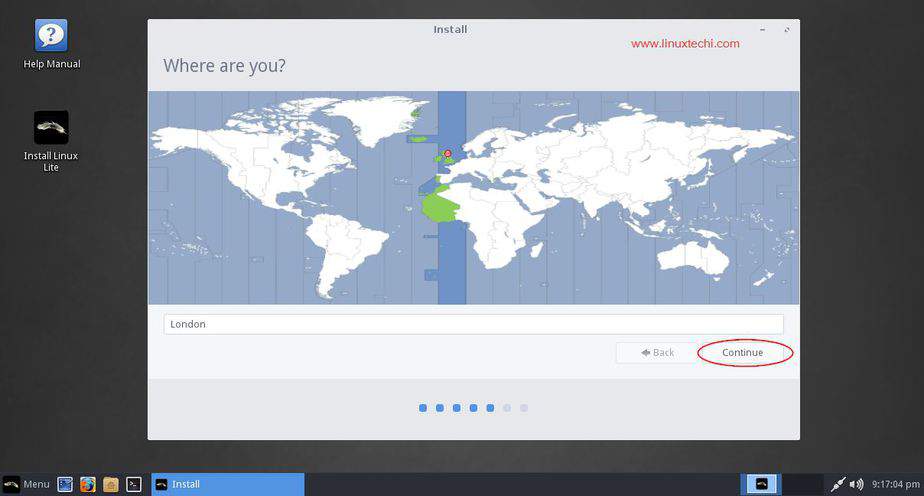
Step: 10) Choose Your Location
It is time to provide some details about yourself and in this screen “Where are you” select your time zone, if it not selected automatically.
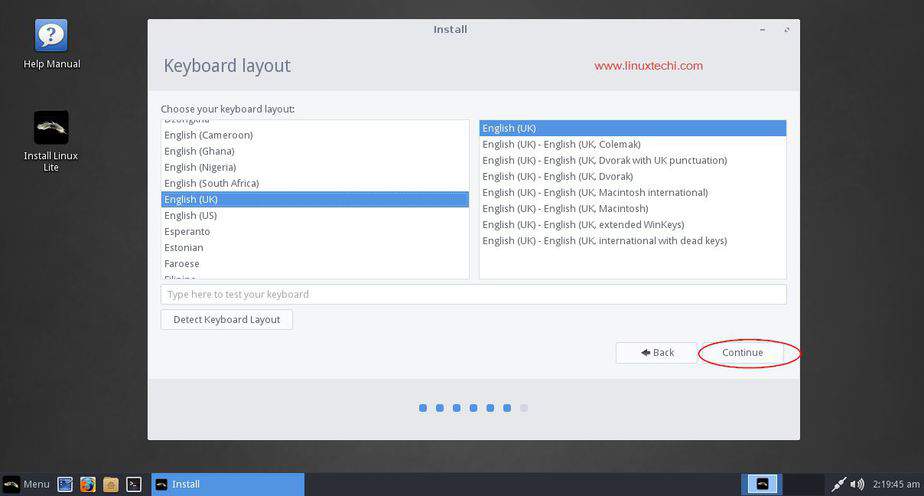
Step: 11) Choose Your Keyboard Layout
It is recommended to leave default keyboard layout based on your location, click on continue to proceed further…
Step: 12) Provide your Personal Details
On the next screen, you will be asked to enter your personal details including your name, Your Computers Name, Choose a username, Password and Confirm Password
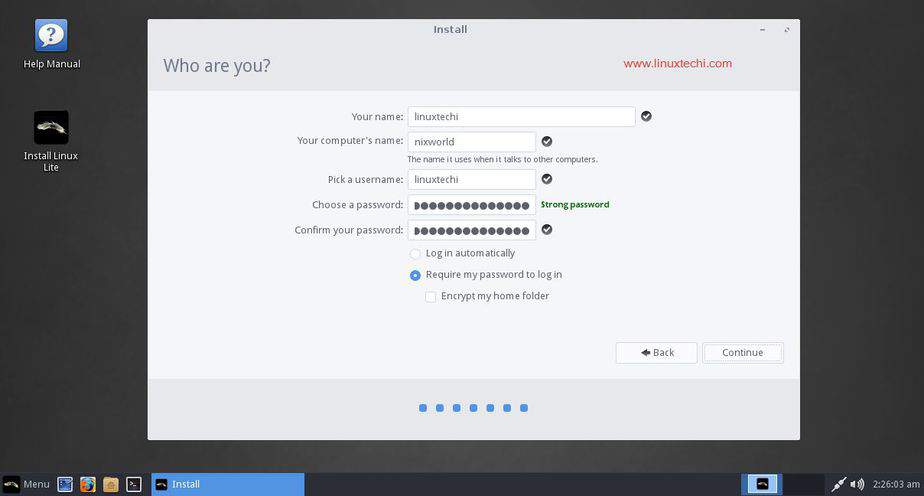
Click on continue to start the Installation
Step: 13) At this step Linux Lite Installation has started & is in progress
Next screen is the welcome screen with a slideshow showcasing all the new features in Linux Lite 3.6
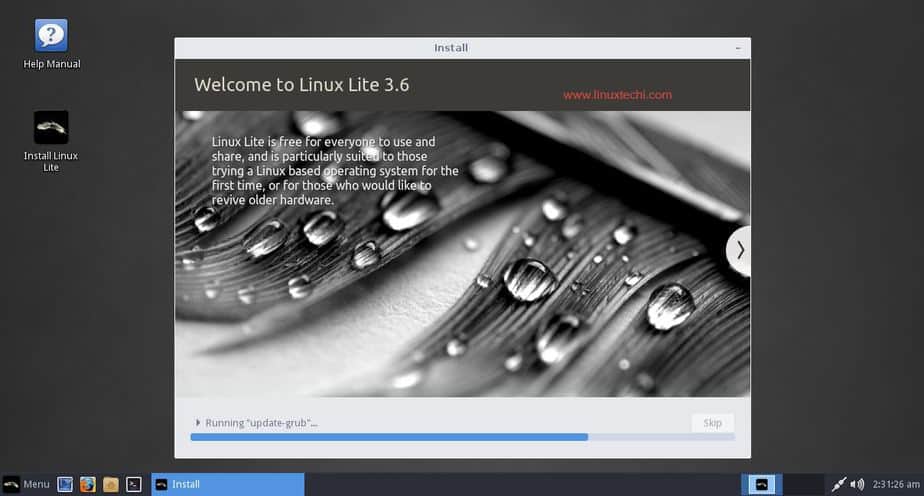
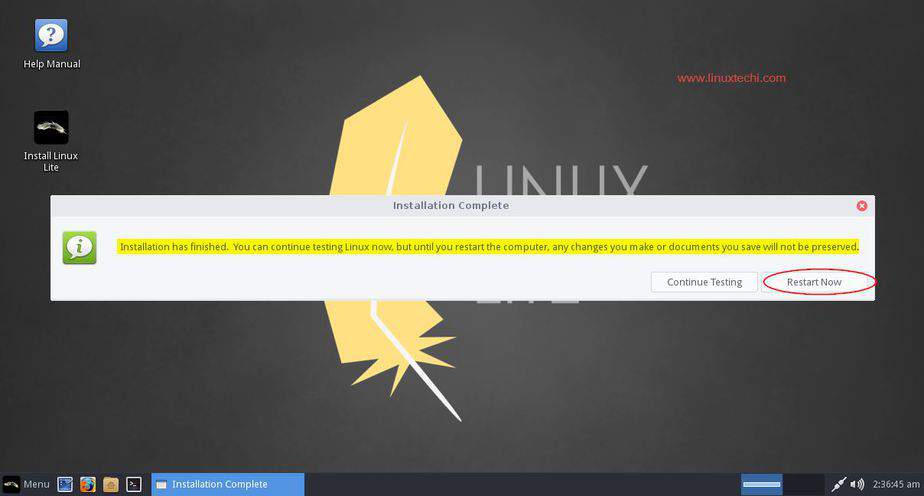
You can also see the installation is working in the background and once the installation is done, you’ll be asked to restart your computer
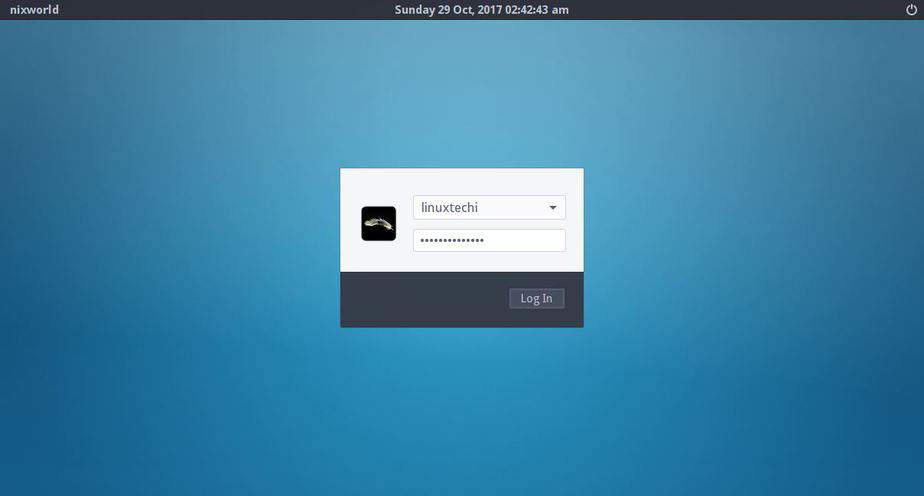
Step: 14) Linux Lite 3.6 Login Screen after reboot
After restarting your computer, you could see the Linux Lite 3.6 login screen and enter the username and password provided during the installation process and login to Linux Lite 3.6
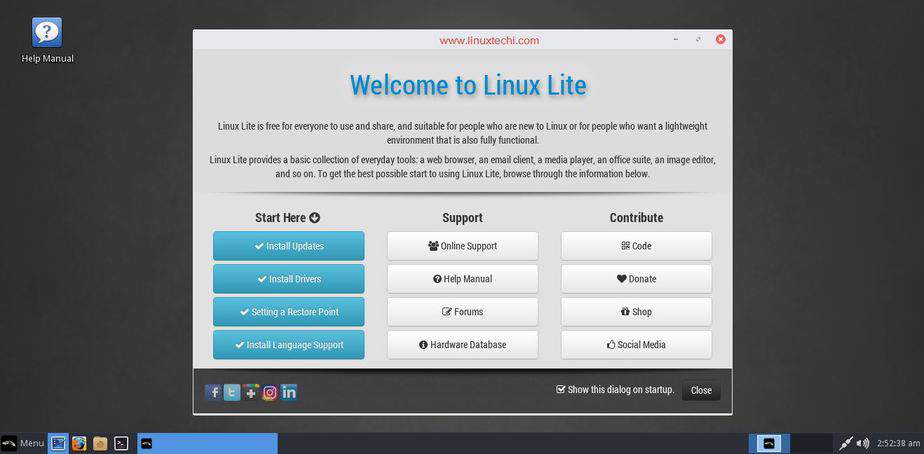
On successful login, you can see “Welcome to Linux Lite 3.6” window and you will have options to install the updates, install drivers etc. Read through the help manual to understand more about the features of Linux Lite 3.6.
And that’s it!!! We’ve successfully completed the installation of Linux Lite 3.6 on your computer. Do feel free to send us all your queries and suggestions on this article about Linux Lite 3.6 and a step by step installation guide and we would be happy to revert back with all the answers as soon as possible. Also, please post your comments about this article in the comments section below. Thank You!!!

It’s short and veru usefull article, really I found what I look about so thank you and go a head god bless you
This is a very useful article especially with the screenshots which make it easier to understand for the beginners those who are willing to use Linux Lite for their work purpose.