On 23rd April 2020, Canonical has released its latest Ubuntu Operating system as “Ubuntu 20.04 LTS (Focal Fossa)”. It has been released for desktop and Servers. In this article we will demonstrate Ubuntu 20.04 LTS server installation steps with screenshots. Before initiating the Installation process, let’s see what are the new features that have been included in this release.
Following are the new features that have been noticed in Ubuntu 20.04 LTS Server,
- As it is an LTS release Canonical will provide updates and support for next 5 years (until April 2025) and 10 years of security provided under the UA-I subscription.
- Two Factor authentication for SSH.
- Flexible Bootloader – In the previous lts release Ubuntu installer used to write bootloader on a single disk whereas in Ubuntu 20.04 , bootloader can be written on multiple disks to avoid single point of failure.
- Introduction of WireGuard VPN
- Automatic Updates via Ubuntu Server Live Installer.
- New Kernel 5.4
- Updated Software like QEMU 4.2, libvirt 6.0, PHP 7.4, Ruby 2.7, GCC 9.3, Python 3.8, and NGINX 1.17
Minimum system requirements for Ubuntu 20.04 LTS Server:
- 4 GB Memory (RAM)
- Dual Core Processor
- 25 GB Hard Disk Space
- Bootable Media (USB / DVD)
- Stable Internet Connection
Let’s assume I have a server which has 80 GB hard disk on which I will be installing Ubuntu 20.04 LTS server.
Ubuntu 20.04 LTS Server Installations Step
Step 1) Download Ubuntu 20.04 LTS Server ISO file
Download ISO file of Ubuntu 20.04 LTS server using following URL:
https://ubuntu.com/download/server
Once ISO file is downloaded on your system then make a bootable USB drive or DVD using tools like Rufus (Windows) and and Startup Disk Creator & Unetbootin ( Ubuntu Desktop)
Step 2) Boot target system using bootable media (USB / DVD)
Reboot the target system on which you want to install Ubuntu 20.04 LTS server and go to its bios settings and change boot medium from disk to bootable media (USB or DVD).
Once the system boots up, we will get the following screen:
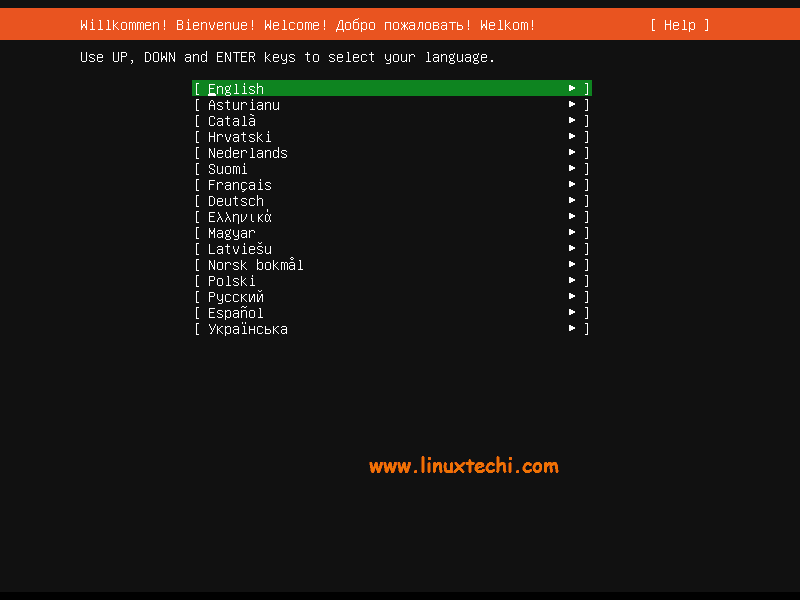
Choose your installation language and then hit enter
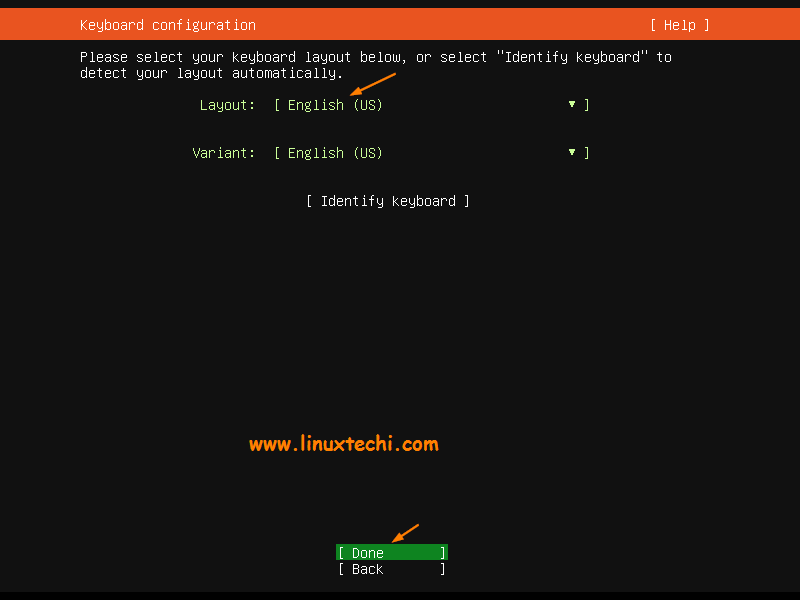
Step 3) Choose Keyboard layout and then press enter
Choose your preferred keyboard layout for your Ubuntu 20.04 server and then choose “Done” option and hit enter,
Step 4) Configure network and Ubuntu Archive Mirror
If your system is connected to the network, then in the next screen you will see that interface (Ethernet Card) has automatically pick the ip via DHCP.
In case you have multiple Ethernet cards then you have option to create a bond interface,
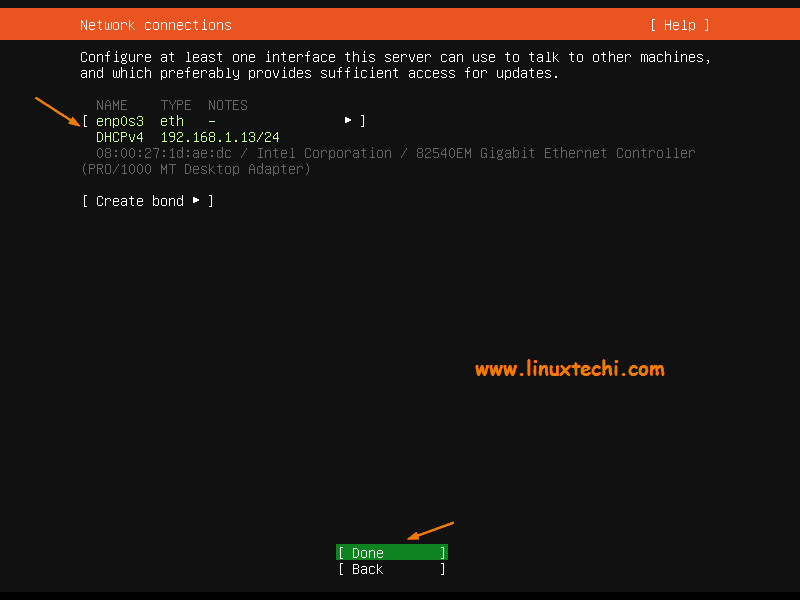
Choose Done and hit enter.
If your system is connected to network and running behind the proxy server (i.e for getting internet), then specify the proxy ip and port else leave as it is and press enter.

In the next screen, based on the country location. Installer will automatically configure Ubuntu archive mirror.
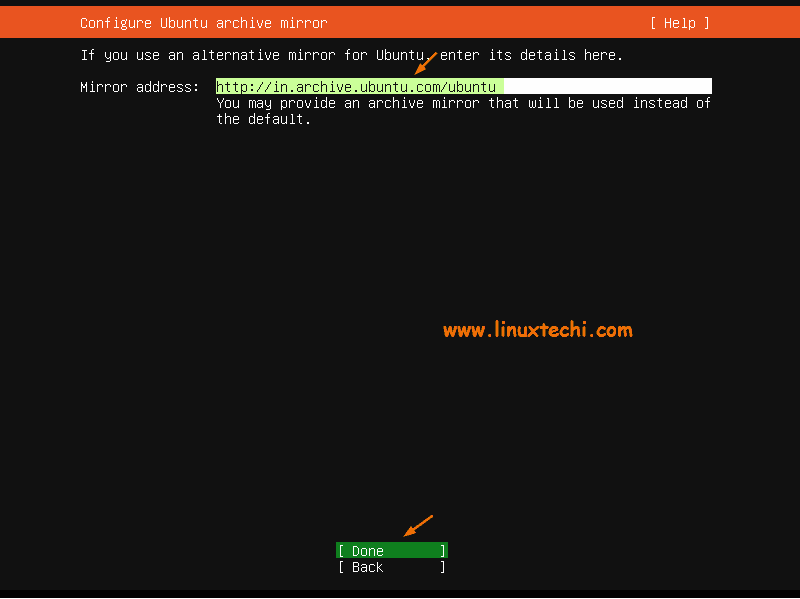
Press Enter to proceed,
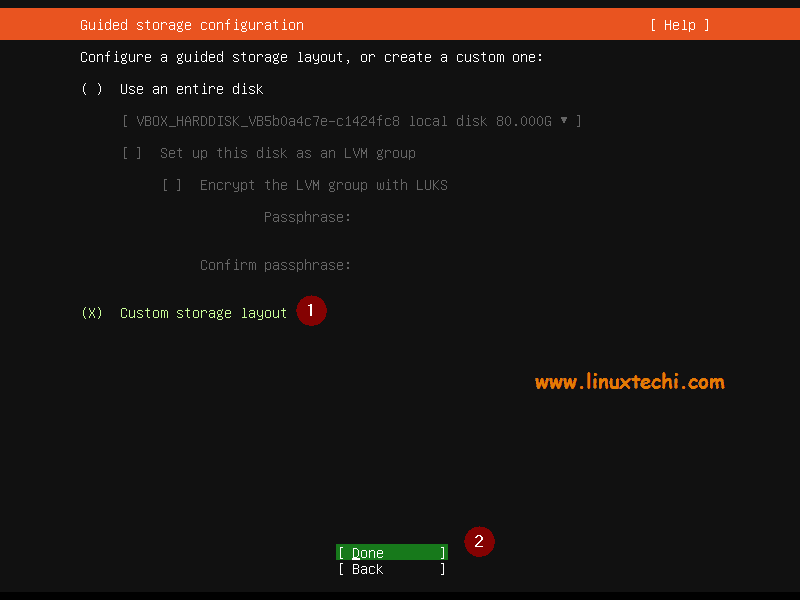
Step 5) Configure Storage Layout for Ubuntu 20.04 LTS Server
In this step, you will be presented a screen where you need to decide how you want to configure storage layout for Ubuntu 20.04 lts server installation. Here you have two options,
- Use an entire disk – In case, you want installer to automatically create partitions for you, then choose option.
- Custom Storage layout – In case, you want to create your own customized partition scheme or table then choose this option.
In this guide, we will create our own customized partitions scheme by choosing the 2nd option.
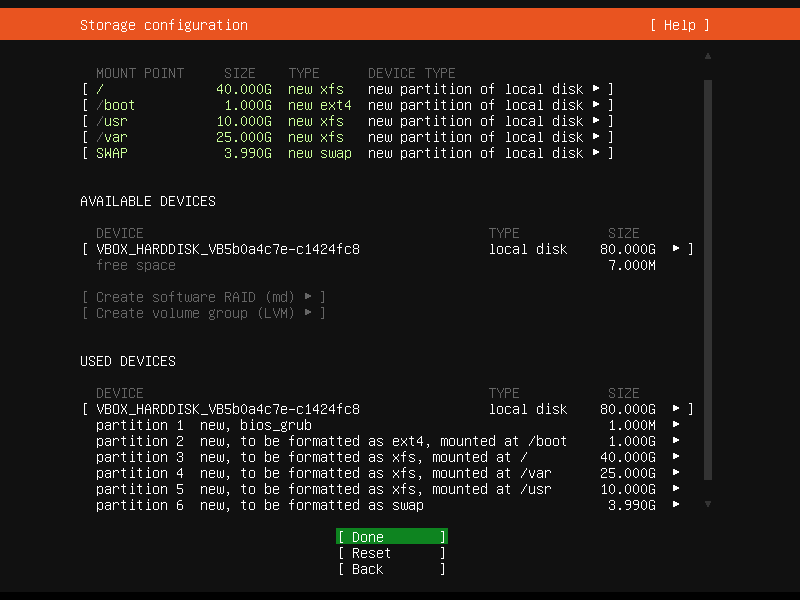
As you can see, we have 80 GB hard disk space for installation, so we will create following partitions on it
- /boot – 1 GB (ext4 file system)
- / – 40 GB (xfs file system)
- /var – 25 GB (xfs file system
- /usr – 10 GB (xfs file system
- Swap – 4 GB
So, let’s start creating the partitions, choose the device or local disk and press Enter and then select “Set as Boot Device” option and hit enter.
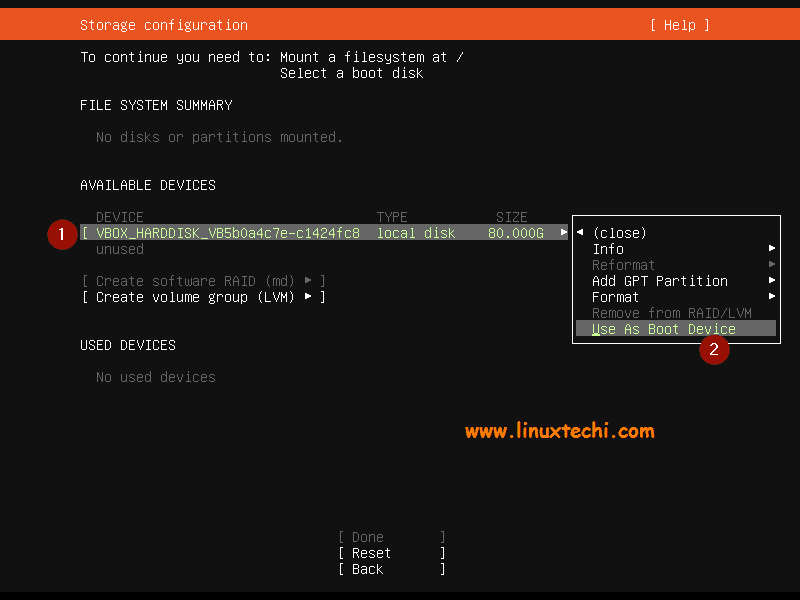
This will create a partition of size of 1 MB, this partition will store Grub 2’s core and it is mandate to create this partition for GPT disk.
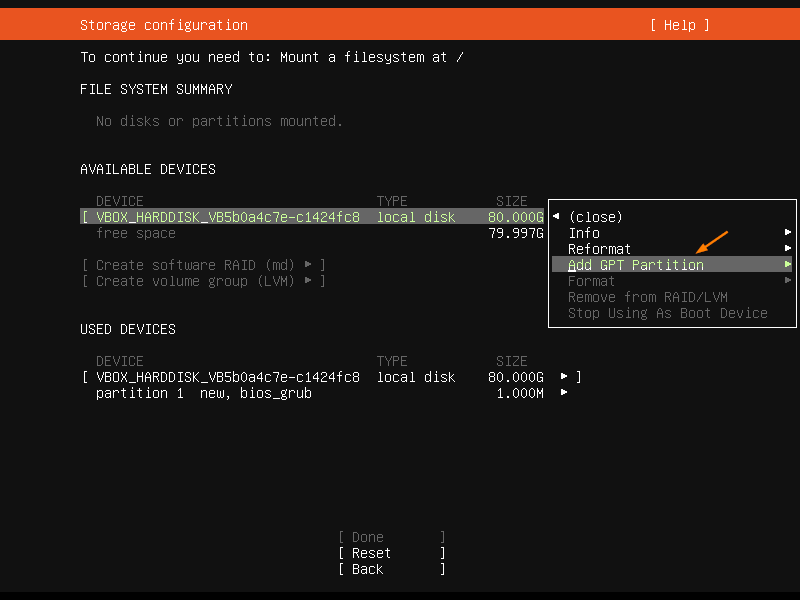
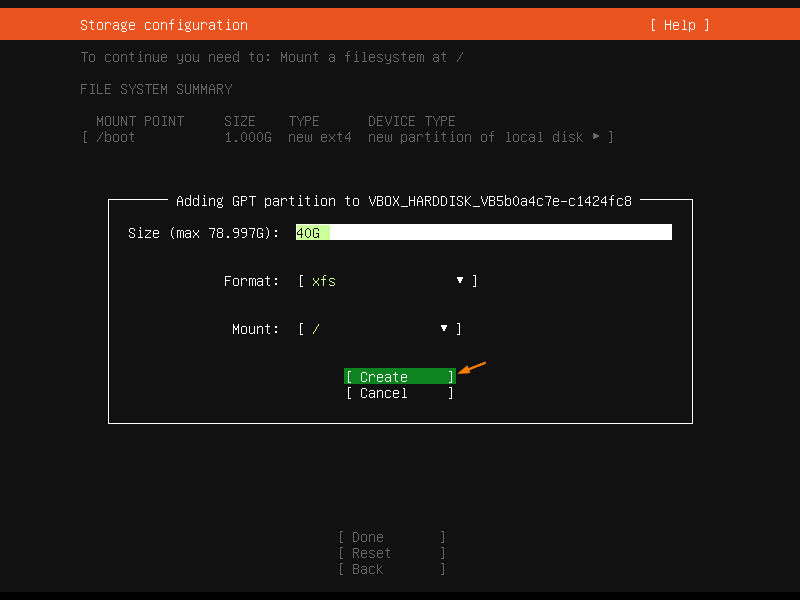
Now let’s create /boot partition of size 1 GB. Select the disk or device –> Press Enter –> Choose Add GPT Partition –> Press Enter
In the next screen, we will get the following, specify the size as 1 GB, format (file system type) as ext4 and mount point /boot.
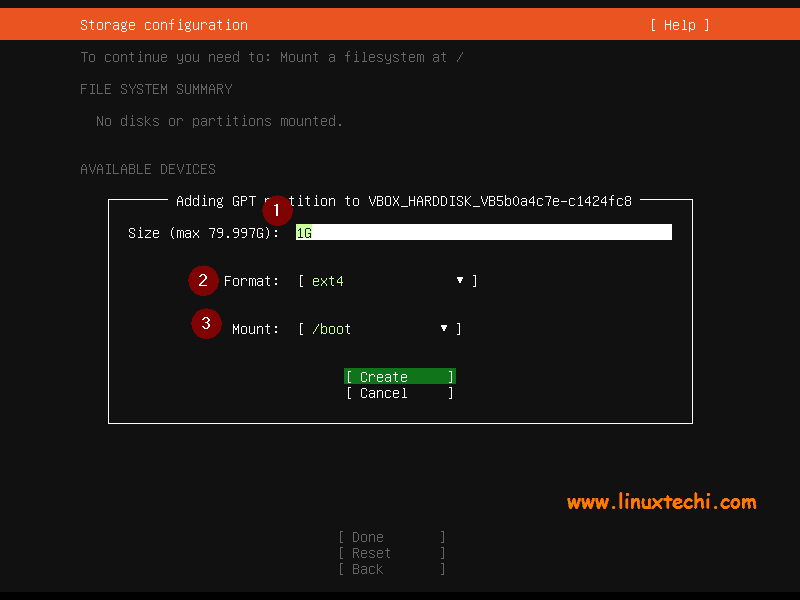
Select create and then hit enter,
Similarly create next three partitions /, /var and /usr of size 40 GB, 25 GB and 10 GB respectively.
/var partition:

/usr partition:

Now finally create a swap partition of size 4 GB.

Once you are done with partitions setup, you will get the following screen, verify the partitions and then choose ‘Done’ and hit enter
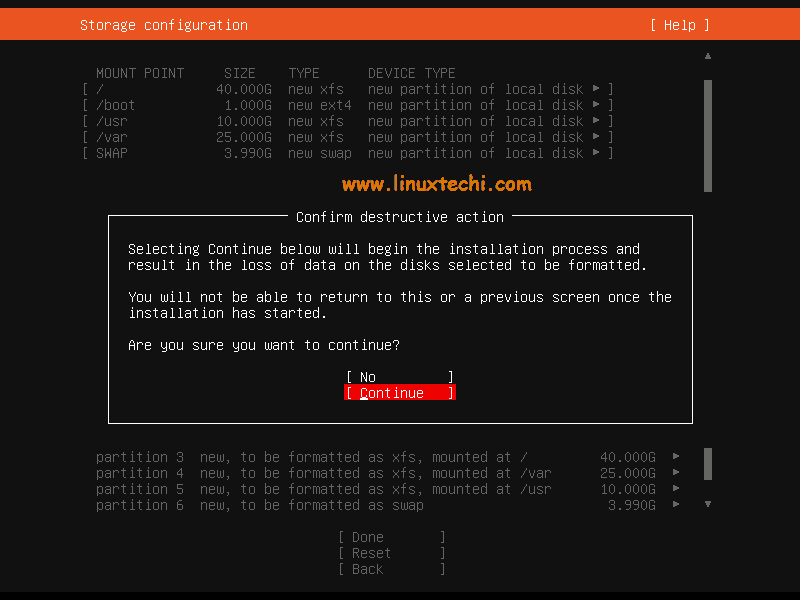
Choose continue to write changes into the disk and to proceed with installation,
Step 6) Specify the Hostname and local user credentials
In this step, you need to specify the local user details and Host name that you want to set for your server. So, enter the details that suits to your installation.
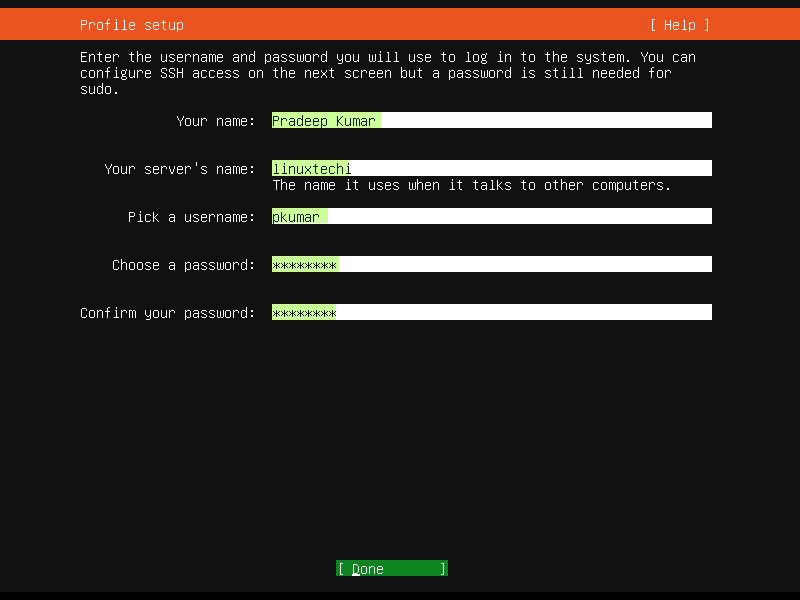
Choose Done and hit enter,
Step 7) Choose to Install OpenSSH Server Package
In case you want to access your server over network using ssh then it is recommended to install openssh server package during installation.
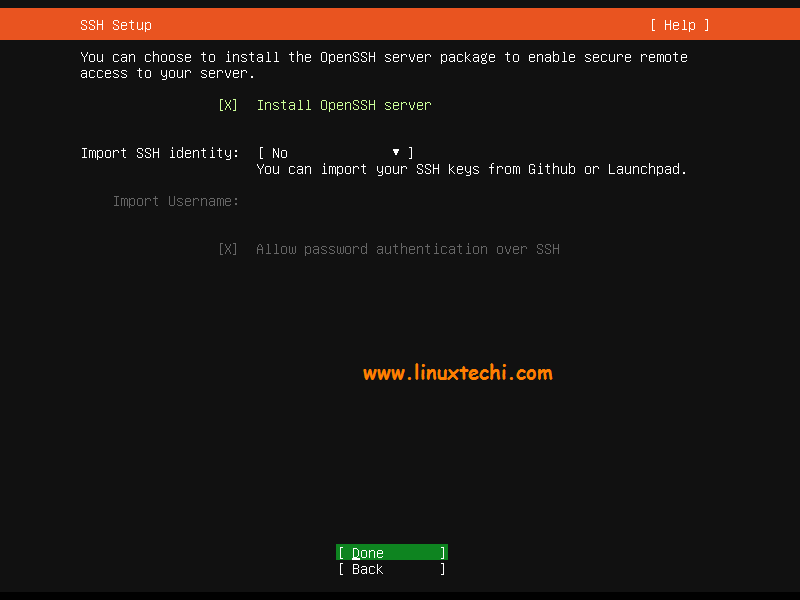
So, choose “Install OpenSSH server” option and then hit enter.
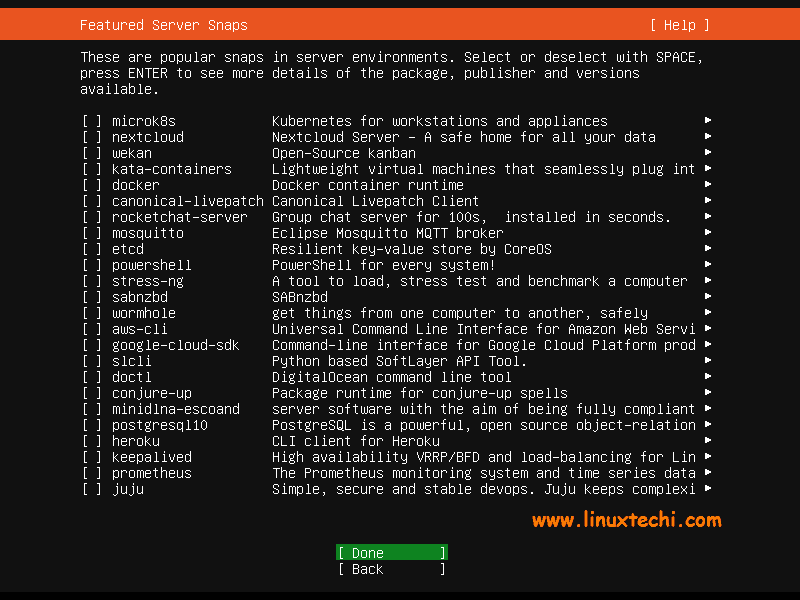
In the next screen, you have an option to choose the snaps for your server environment and if you don’t want to install any snap during the installation then don’t choose any snap and just choose Done and press enter to start the installation.
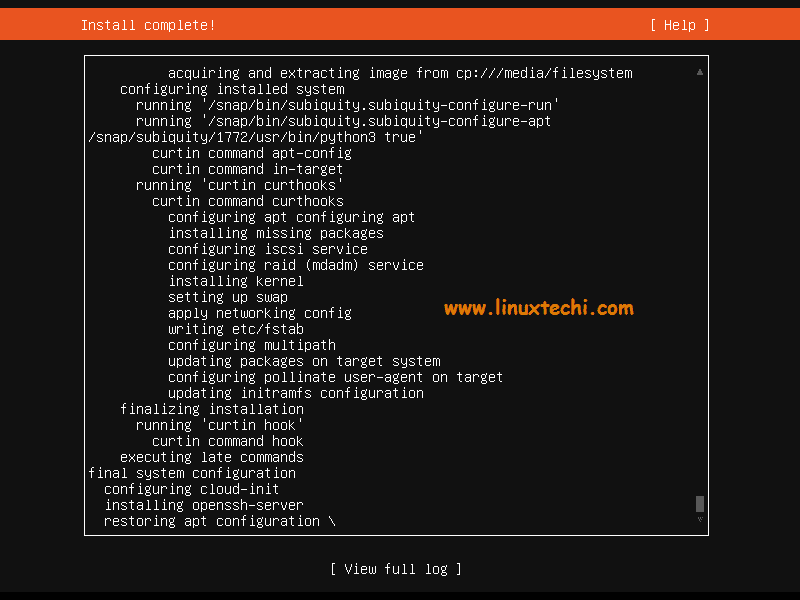
Step 8) Ubuntu 20.04 Server Installation Started
As we can see below, installation of Ubuntu 20.04 LTS server has been started and is in progress.
Once the installation is completed, installer will prompt to reboot the system.
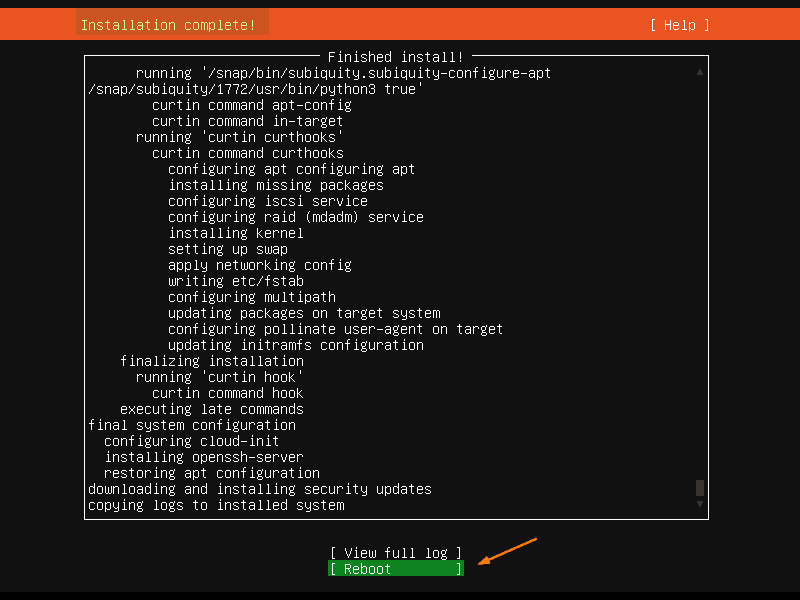
Choose ‘Reboot’ and hit enter
Note: Don’t forget to change boot medium from bootable media to disk so that system boots up with the disk on which we have just installed Ubuntu 20.04 LTS Sever
Step 9) Login after successful installation and verify OS version
Once the system is available after reboot, use the local user credentials that we have created during the installation for login.
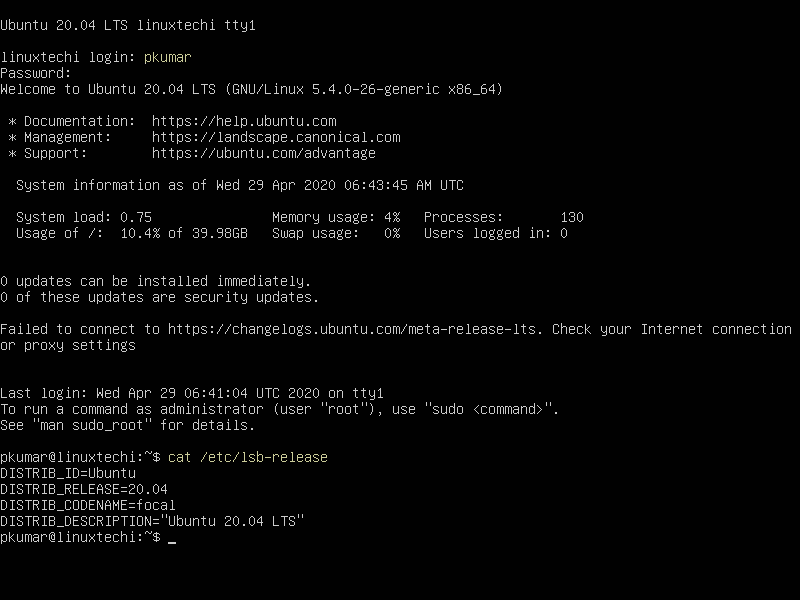
Perfect, this confirms that Ubuntu 20.04 LTS server is installed successfully on our system.
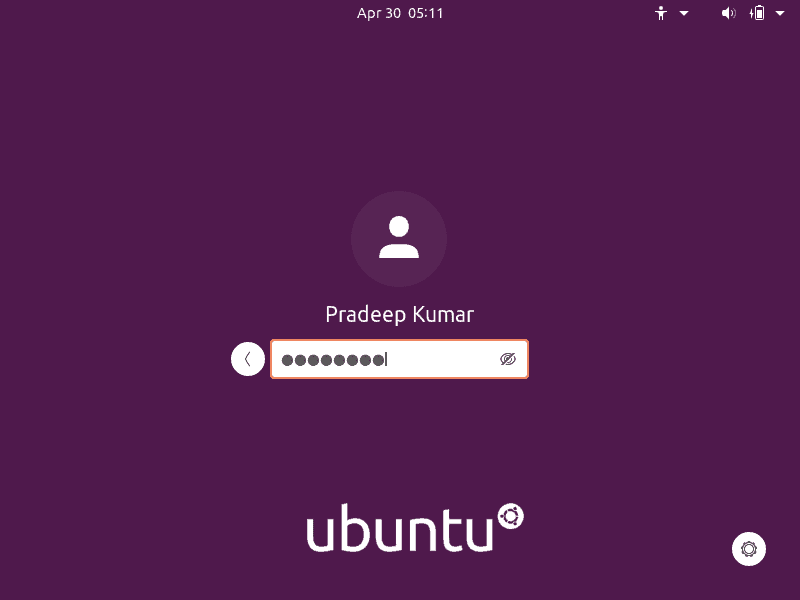
If you wish to Install GUI / Desktop environment on your Ubuntu 20.04 Server, run the following command,
pkumar@linuxtechi:~$ sudo apt update
pkumar@linuxtechi:~$ sudo apt install gnome-shell ubuntu-gnome-desktop -y
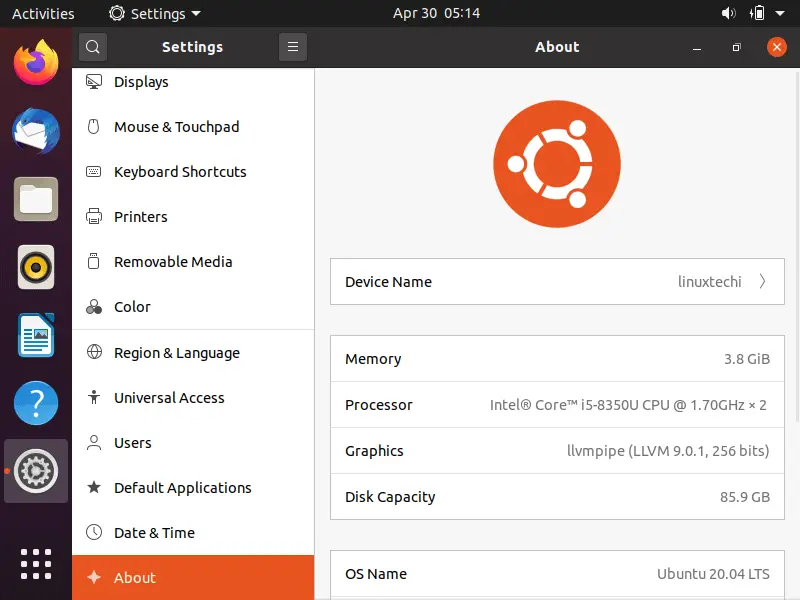
Once Gnome desktop packages are installed successfully then reboot your server and you will get following login screen
This conclude the article, I hope these steps help you to install Ubuntu 20.04 LTS server on your system. Please don’t hesitate to share your feedback and comments.
Read Also: How to Assign Static IP Address on Ubuntu 20.04 LTS
Read Also: How to Install KVM on Ubuntu 20.04 LTS Server (Focal Fossa)
Hello,
Thanks for sharing, it helped me install.
At the end, I wanted to install gnome, but it refuses my password.
Thank you in advance
Hi,
Can you let me know on what hardware the you installed the 20.4 Ubuntu and what type of hardware configuration u used. ? Have you tried on DL360, DL380 Gen 8? I have tried the 20.4 on the mentioned hardware and failed.
Hey Abdul,
I have tested this installation on Virtual VM and on some Dell servers. What error you getting when you boot these servers with bootable device (Ubuntu 20.04 USB disk).
The issue is that HP only released the raid controller driver for Ubuntu 14 and 12 – and you can’t disable the raid controller as the machine runs the drives through it PERIOD.
Rumor has it that “switch to AHCI” mode or some such helps – but I’ve had ZERO luck with that as well.
It gets worse – they HAVE released the driver for Windows 10 (NOT EVEN SERVER!), but not for anything less than 6 years old in LINUX server versions, even their preferred Red Hat or Suse LINUX options.
Thanks fully helpful.
Will install gnome. But want to remove most packages as will not be using LibreOffice, games, other packages.
This is really helpful. I had a hard time to to add static public IP address so much so that i had to reinstall. but following your graphic steps made it so easy for me. Thank you a million times.
Thank you very helpful for a beginner like me. Thanks
Great buddy! This tutorial is really very helpful. Because of the steps with screenshots, it’s becoming very easy to understand and install Ubuntu Server with GUI.