In this blog post, we will cover git commands with practical examples on Linux. We are assuming that Git is installed on your system.
Git is distributed version control system. It is primarily used by software developers for their source code management. It is a free and open source software and many large organizations use it to manage their huge code base.
Git User Initial Configuration
First we have to configure settings for Git user. We can make these settings for all repositories present on current system or for a particular repository. Let us understand this with example:
User identity
In Git, we can specify user identity by providing its name and e-mail address. This information will be used during each commit operation. Execute below command in terminal to assign identity:
$ git config --global user.name "Linuxtechi User"
$ git config --global user.email "linuxtechiuser@linuxtechi.com"
Editor
This setting configures editor, which will be used while providing commit message:
$ git config --global core.editor vim
Compression
This setting configures compression level to be used. Valid range for compression is -1 to 9. -1 value indicates zlib compression and is default compression level. 0 value means no compression, and 1 to 9 are various speed/size tradeoffs, 9 being slowest.
$ git config --global core.compression 2
Diff tool
This configures diff viewer tool. For example, below command configures vimdiff as a diff tool:
$ git config --global diff.tool vimdiff
In above commands we have used –global option everywhere, which will make this configuration global. It means that same configuration will be applied to all repositories present on current system. To make configuration repository specific just remove –global option.
List configuration
To list Git configuration execute below git command in terminal:
$ git config -l
This command will generate following output:
core.repositoryformatversion=0
core.filemode=true
core.bare=false
core.logallrefupdates=true
core.editor=vim
core.compression=2
user.name=Linuxtechi User
user.email=linuxtechiuser@linuxtechi.com
diff.tool=vimdiff
Git repositories
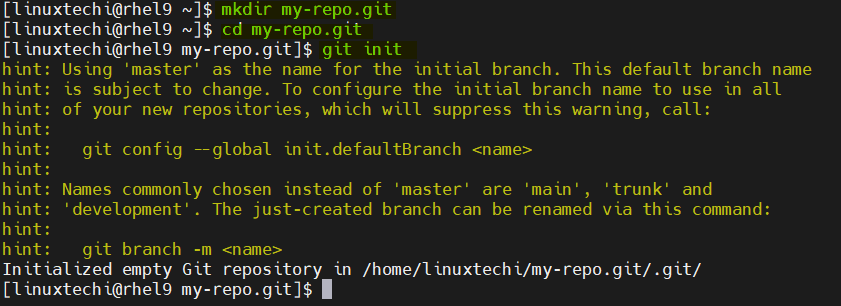
Repository is a location where source code is stored. We can either create new repository or use existing repository. To create new empty repository execute below command:
$ mkdir my-repo.git
$ cd my-repo.git
$ git init
This method will be useful when you are starting with new project. Another method is to use existing repository. Such a repository is hosted on remote server like GitHub. To download remote repository use clone command as follows:
$ git clone https://github.com/linuxtechiuser/my-repo.git
In above command last argument is path of remote repository.
Git workflow
In this section we’ll discuss git workflow.
Introduce new changes
First step is to introduce new changes. It can be addition of new file or updating existing files. Let us create a new file and modify existing file
$ touch AUTHORS                                  # Create new file
$ echo "New Contents" >> README                  # Update existing file
Check repository status
Git is content tracking system, it will identify above two changes. Let us check repository status:
$ git status -s
 M README
?? AUTHORS
In above output letter M appears before README which indicates that existing file is modified. Whereas ?? appears before AUTHORS which indicates that this is new file and Git is not aware about it hence such a file is called untracked file.
Add file to changeset
Let us instruct Git to track this new file. We can achieve this using add command. This operation will start tracking changes made to this file.
$ git add AUTHORS
Let us check repository status now:
$ git status -s
A  AUTHORS
M README
Above output shows A before AUTHORS which indicates that this file is newly added under Git. We can add any number of files using this command.
Remove file from changeset
Let us instruct Git to untrack this newly added file. We can achieve this using reset command. This operation will remove file from changeset
$ git reset AUTHORS
$ git status -s
 M README
?? AUTHORS
Above output shows that AUTHORS file is not tracked by Git.
Commit changes
In Git, files which are part of changeset will form a commit. Each commit will get unique ID. Let us create changeset first
$ git add AUTHORS
$ git add README
Now let us commit changes to local repository with commit message. In below command -m argument indicates commit message.
$ git commit -m "Updated README and added AUTHORS"
When you execute above command it will generate following output:
[master 0b124eb] Updated README and added AUTHORS
 2 files changed, 1 insertion(+)
 create mode 100644 AUTHORS

Review changes
In this section we’ll discuss commands which will allow us to review repository changes.
View commit log
Repository can contain multiple commits by multiple authors. We can use log command to view all available commits:
$ git log
When you execute above command it will generate following output:
commit dfaeaceb1e924c3407379f8f79e8d7777f2a7ce4 (HEAD -> master)
Author: Linuxtechi User <linuxtechiuser@linuxtechi.com>
Date: Sun Jan 21 10:31:48 2024 +0530
    Updated README and added AUTHORS
This is commit we had created earlier. In above command:
- Hexadecimal ID represents a commit ID
- Author section of commit shows details about who made these changes
- Date section shows date and timestamp of commit
View short commit log
Above command will show detailed information about each commit. To view short description about each commit use –oneline option as follows:
$ git log --oneline
When you execute above command, it will generate following output:
dfaeace (HEAD -> master) Updated README and added AUTHORS
View commit
Commit ID is associated with each changeset. We can use this ID with show command to view commit contents.
$ git show dfaeaceb1e924c3407379f8f79e8d7777f2a7ce4
When you execute above command it will generate following output:
commit dfaeaceb1e924c3407379f8f79e8d7777f2a7ce4 (HEAD -> master)
Author: Linuxtechi User <linuxtechiuser@linuxtechi.com>
Date: Sun Jan 21 10:31:48 2024 +0530

Updated README and added AUTHORS

diff --git a/AUTHORS b/AUTHORS
new file mode 100644
index 0000000..e69de29
diff --git a/README b/README
new file mode 100644
index 0000000..98fb138
--- /dev/null
+++ b/README
@@ -0,0 +1 @@
+New Contents
View diff
Diff command allows us to review changes before creating changeset. Diff command shows the differences between repository and local workspace. Let us modify README file and view differences
$ echo "Generating diff" >> README
$ git diff
diff --git a/README b/README
index 5680123..3158230 100644
--- a/README
+++ b/README
@@ -1,2 +1,3 @@
 Hello World!
 New Contents
+Generating diff
In above command:
- + sign indicates changes which are added to file
- – sign indicates changes which are removed from file
Working with Remote Repositories
So far we were working with local repository only. Other developers cannot use changes which are made by us as they are local. Hence code collaboration is not possible. This section will describe commands which will allow us to interact with remote repositories
Publish changes to remote repository
We can publish local changes to remote repository so that other developers can use it. Before publishing changes we have to create changeset and local commit. We can publish changes using push command as follows:
$ git push
This command copies changes from local workspace to remote repository. In Git, this operation is referred as push operation.
Sync workspace with remote repository
Many developers can publish their workspace changes to remote repository. Git allows us to download those changes and sync workspace with repository. We can achieve this using pull command:
$ git pull
In Git, this operation is referred as pull operation.
Miscellaneous Git commands
This section discusses miscellaneous Git commands which will be useful to perform day-to-day tasks:
Modify latest commit
Git allows us to modify latest commit. We can use this method to avoid creation of new commit. It is mostly used to modify previous commit message. To modify latest commit use –amend option as follows:
$ echo "Yet another new change" >> README
$ git add README
$ git commit --amend -m "This is amended commit

Now let us check the commit log:
$ git log

commit fce64a41ae049716bef538e6d412ab442aa67b51 (HEAD -> master)
Author: Linuxtechi User <linuxtechiuser@linuxtechi.com>
Date: Sun Jan 21 10:31:48 2024 +0530

   This is amended commit
If you observe above output carefully then we can see new commit message, its ID and new timestamp.
Remove untracked files
Untracked files are those which are unknown to Git. We can remove all untracked files using clean command.
Let us create few untracked files:
$ touch delete-me-1 delete-me-2 delete-me-3
To remove all above untracked file use clean command with -f option as follows:
$ git clean -f
Removing delete-me-1
Removing delete-me-2
Removing delete-me-3
Please note that this command will remove files permanently hence use it with caution.
View commits of particular author
If we use log command then it shows commits of all authors. To view commits of particular author use –author flag as follows:
$ git log --author=Linuxtechi
When you execute above command it will list all the commits of Linuxtechi authors as follows:
commit 8bf67aec1d1de87f03ab6aae93940b17826fde1c (HEAD -> master)
Author: Linuxtechi User <linuxtechiuser@linuxtechi.com>
Date:   Fri Jul 27 21:54:55 2018 +0530

    This is amended commit
View history of each file line by line
To view line by line history we can use blame command.
$ git blame README
When you execute above command it will generate following output:
^fce64a4 (Linuxtechi User 2024-01-21 10:31:48 +0530 1) New Contents
^fce64a4 (Linuxtechi User 2024-01-21 10:31:48 +0530 2) Generating diff
^fce64a4 (Linuxtechi User 2024-01-21 10:31:48 +0530 3) Yet another new change
In above command:
- First column indicates commit ID
- Second column indicates author
- Third column indicates timestamps
- Last column indicates line number and file content
View diff from staging area
When you create changeset using add command then file is logically moved to staging area. Let us see with this example:
$ echo "Let us demonstrate staging area" >> README
$ git add README
$ git diff
Above command will not show any difference as file is move to staging area. Let us use –staged operation to view differences:
$ git diff --staged
diff --git a/README b/README
index 74729a2..8bc5ffd 100644
--- a/README
+++ b/README
@@ -1,3 +1,4 @@
 Hello World!
 New changes
 Yet another changes
+Let us demonstrate staging area
Conclusion
In this tutorial we discussed basic operations of Git with simple examples. This tutorial is good starting point for Git newbies.
Read More: Learn Git Command with Practical Examples on Linux – Part 2

Awesome, One of the best article. Eagerly waiting for Part2.