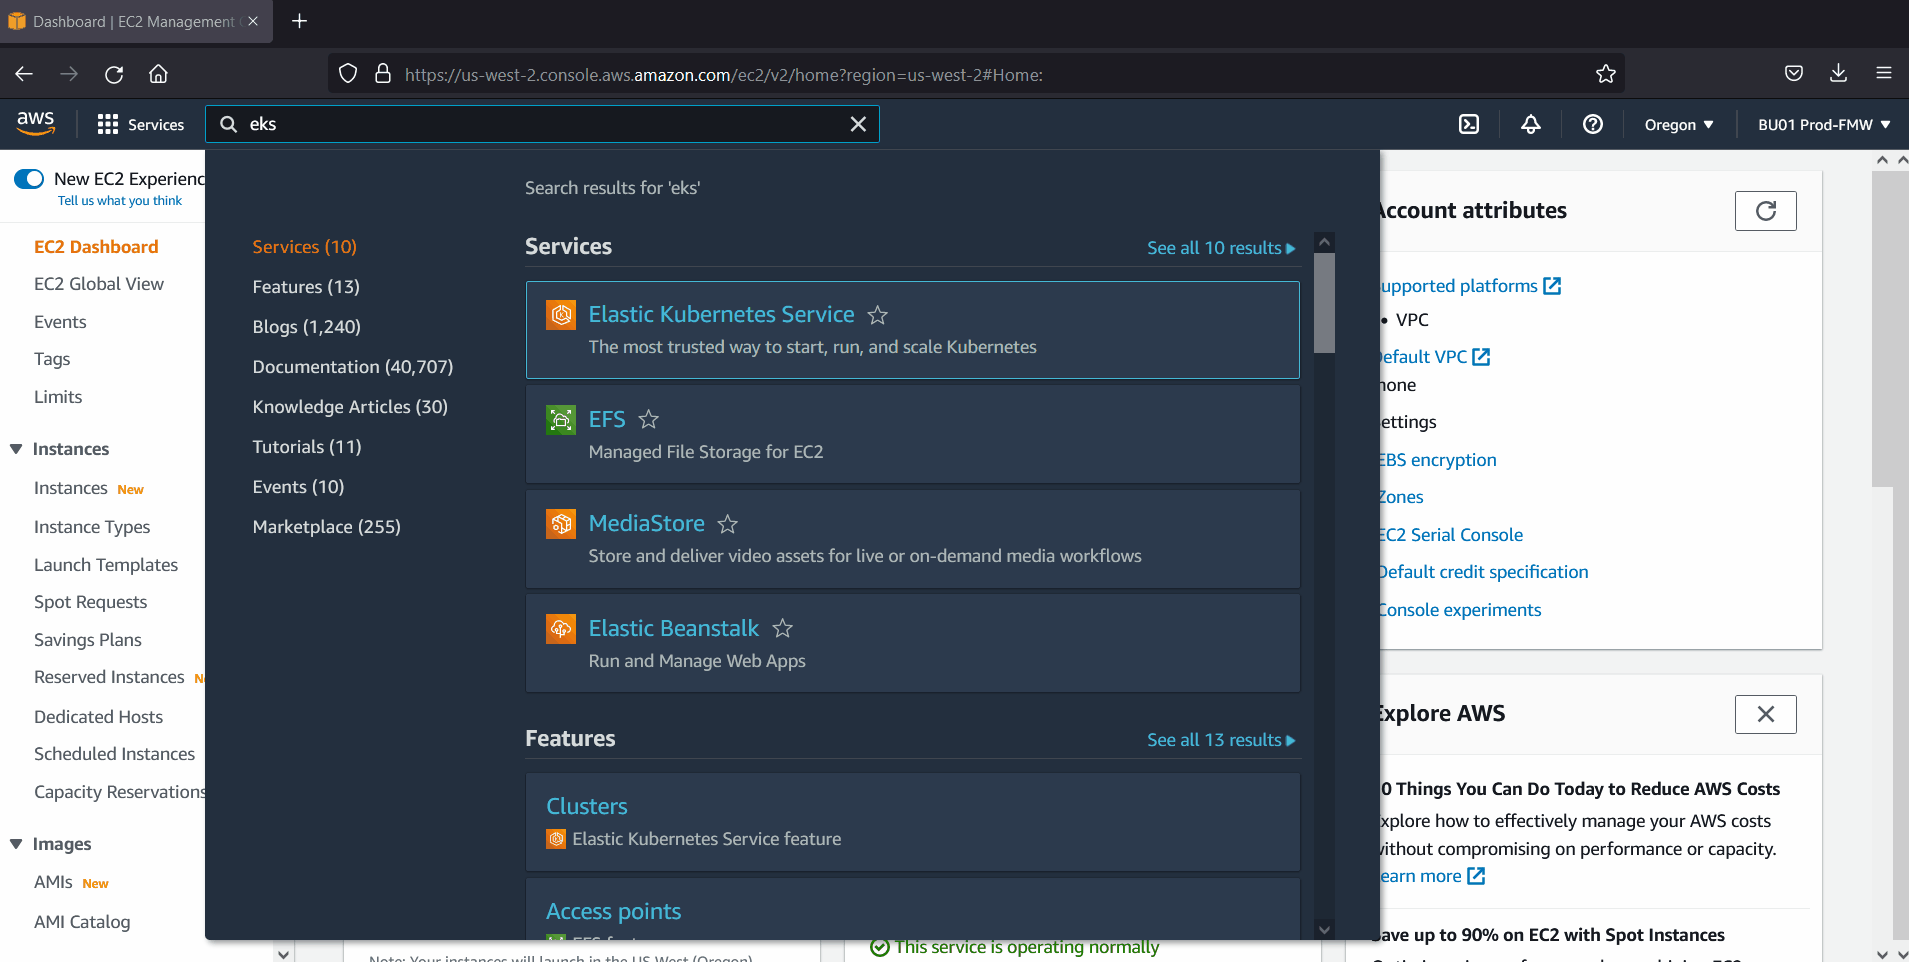
Are looking for an easy guide for setting up EKS cluster on AWS?
The step-by-step guide on this page will show you how to setup EKS cluster along with NLB (Network Load Balancer) on AWS from the scratch.
Amazon EKS is an elastic Kubernetes service, it has basically two components control plane and worker nodes. Let’s deep dive into the steps
1) Create VPC for EKS Cluster
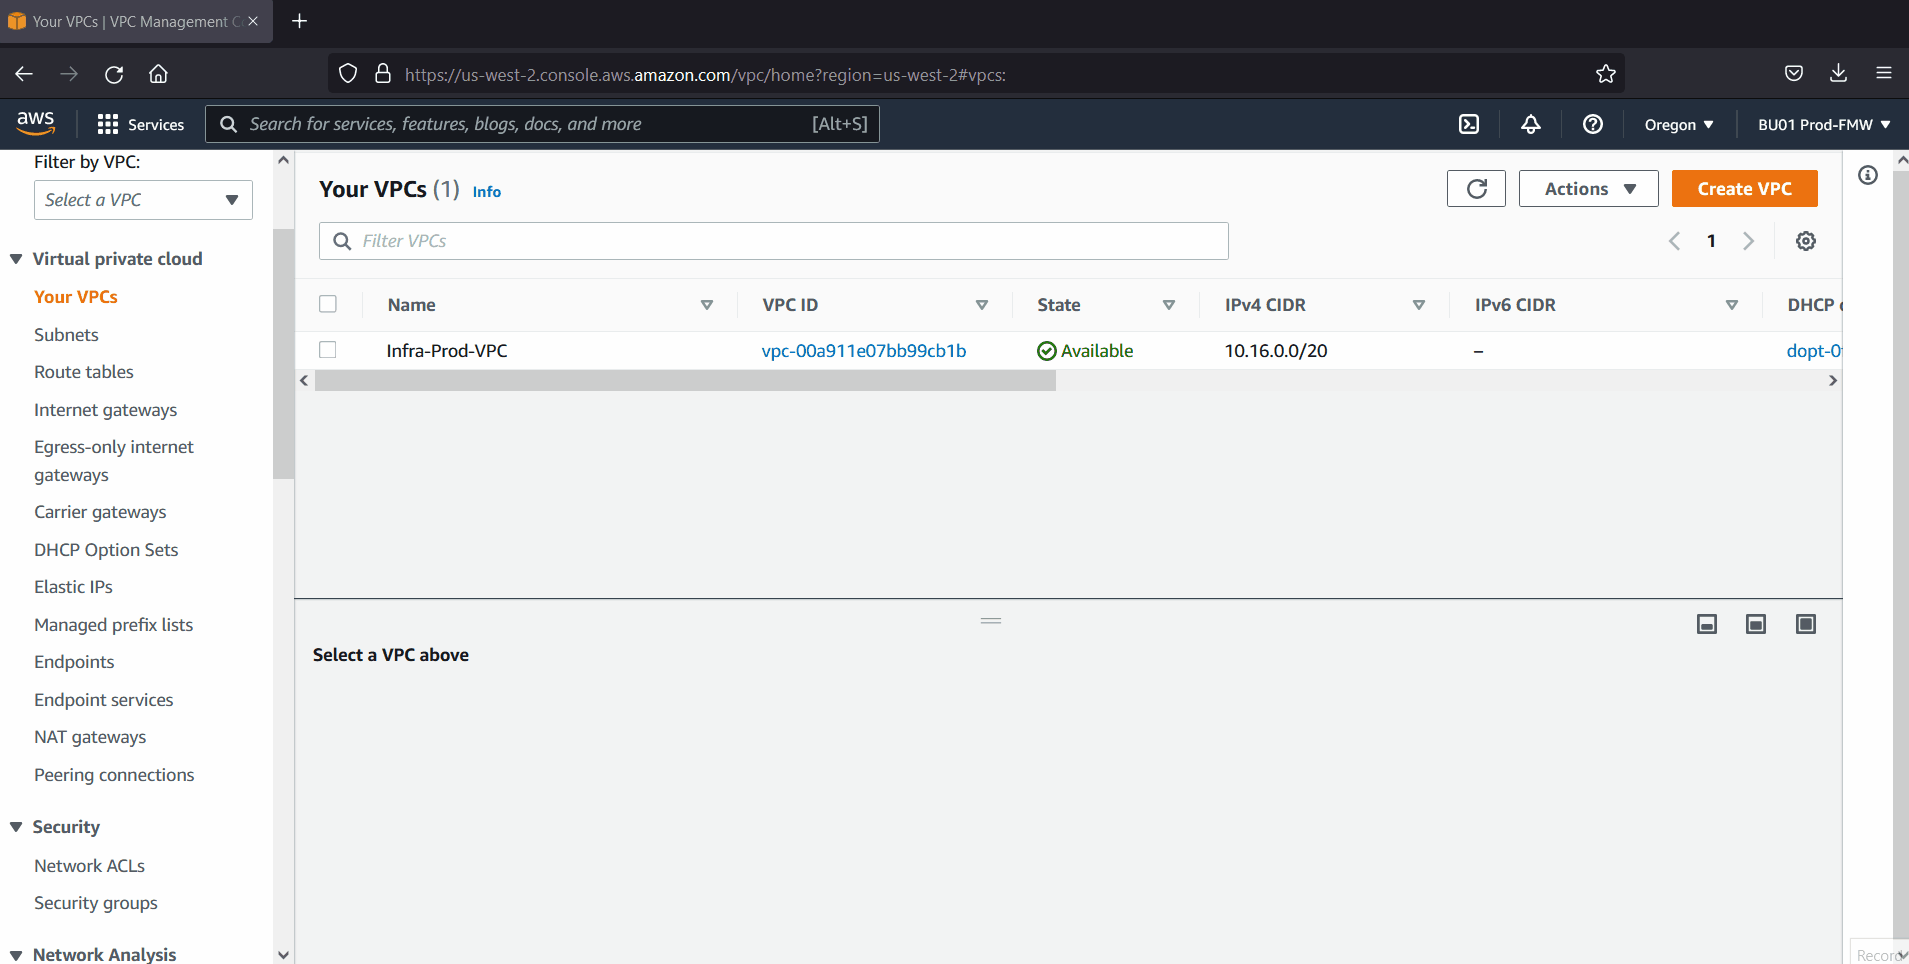
Login to your AWS console, create a VPC with two public and private subnets in two different availability zones.
Also create Internet gateway, nat gateway and add routes to public and private subnet’s route table respectively.
Refer following for creating VPC,
In my case, I have created following VPC, subnets, internet & nat gateway and route tables.
2) Install and Configure AWS CLI, eksctl and kubectl
Create a virtual machine either on your on-premises or on AWS. Make sure internet connectivity is there on that virtual machine. In my case, I have created a Ubuntu 22.04 virtual machine.
Login to the virtual machine and install AWS cli using the following steps,
$ curl "https://awscli.amazonaws.com/awscli-exe-linux-x86_64.zip" -o "awscliv2.zip"
$ unzip awscliv2.zip
$ sudo ./aws/install
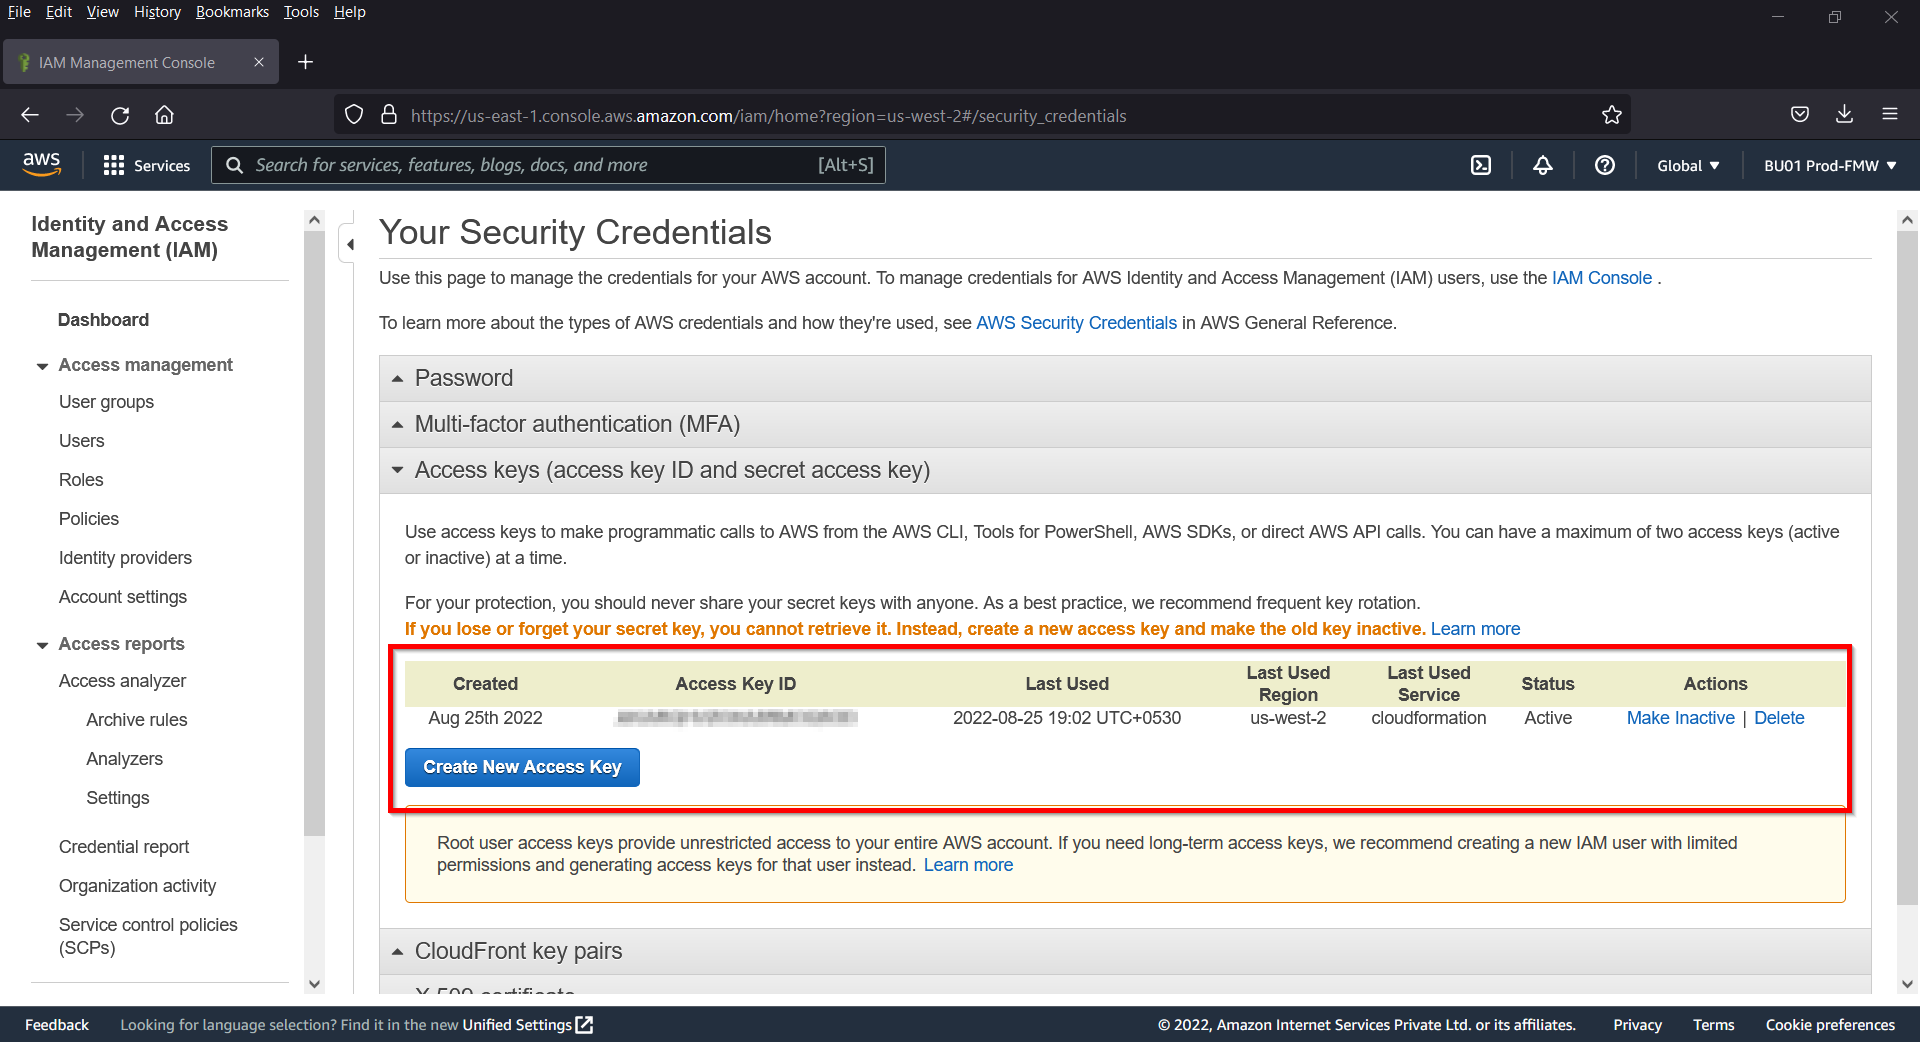
Get you account’s access and secret key from AWS console.
Now, run following command to configure AWS CLI,
$ aws configure
It will prompt you to enter Access Key and Secret Key.

Once above command is executed successfully then it will create two files under .aws folder,
- Config
- Credentials
Run following command to test aws cli,
 $ aws sts get-caller-identity
{
    "UserId": "xxxxxxxxxxxx",
    "Account": "xxxxxxxxxx",
    "Arn": "arn:aws:iam::xxxxxxxxxxx:root"
}
$
We will be using eksctl command line utility to configure Amazon EKS cluster, so run following set of commands to install it.
$ curl --silent --location "https://github.com/weaveworks/eksctl/releases/latest/download/eksctl_$(uname -s)_amd64.tar.gz" | tar xz -C /tmp
$ sudo mv /tmp/eksctl /usr/local/bin
$ eksctl version
0.109.0
$
Kubectl is also a command line tool which will allow us to interact with eks cluster. For it’s installation, run beneath commands one after the another
$ curl -LO "https://dl.k8s.io/release/$(curl -L -s https://dl.k8s.io/release/stable.txt)/bin/linux/amd64/kubectl"
$ sudo install -o root -g root -m 0755 kubectl /usr/local/bin/kubectl
$ kubectl version --client

Perfect, we are ready now to create EKS cluster using eksctl utility.
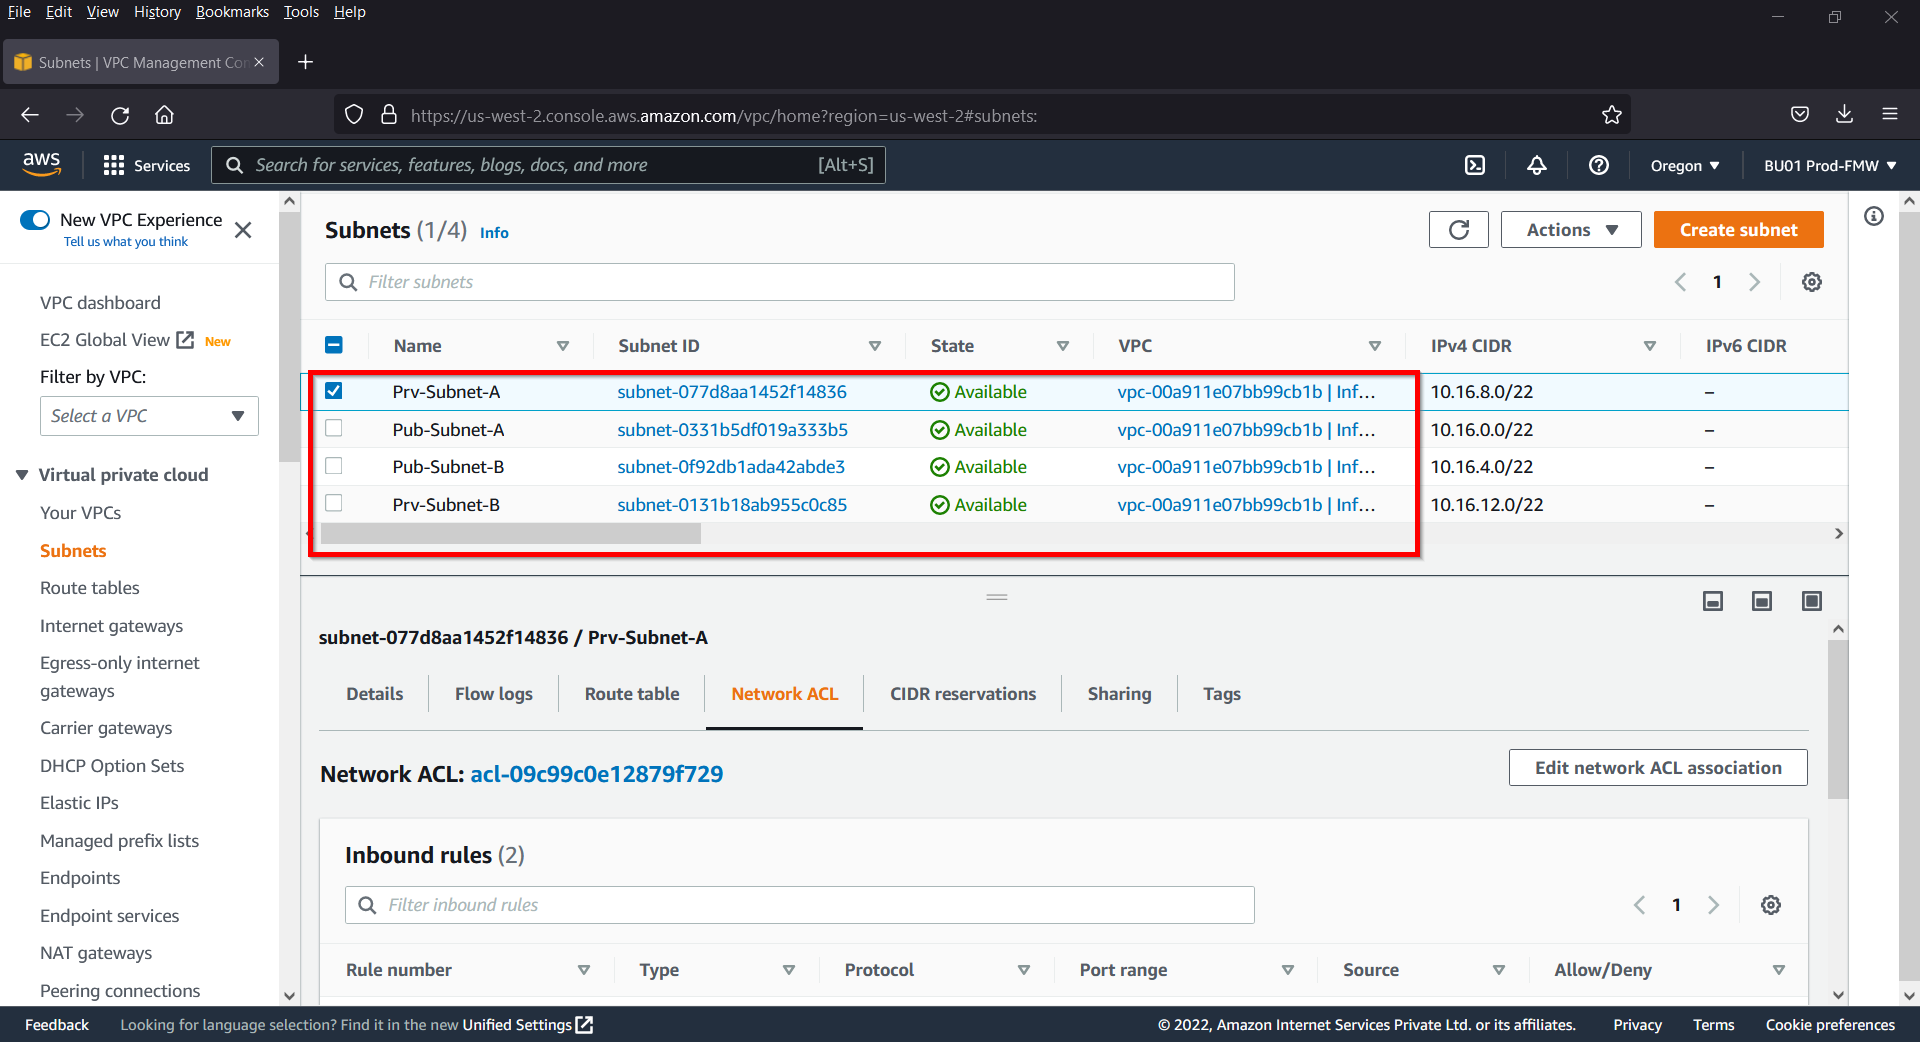
Copy public and private subnet’s ids of your VPC from VPC console. We would be using these ids in cluster yaml file.
3) Create EKS Cluster with eksctl utility
Create a cluster yaml file on your virtual machine with the following content,
$ vi demo-eks.yaml
apiVersion: eksctl.io/v1alpha5
kind: ClusterConfig
metadata:
  name: demo-eks
  region: us-west-2
vpc:
  subnets:
    private:
      us-west-2a: { id: subnet-077d8aa1452f14836 }
      us-west-2b: { id: subnet-0131b18ab955c0c85 }
    public:
      us-west-2a: { id: subnet-0331b5df019a333b5 }
      us-west-2b: { id: subnet-0f92db1ada42abde3 }

nodeGroups:
  - name: ng-workers
    labels: { role: workers }
    instanceType: t2.micro
    desiredCapacity: 2
    privateNetworking: true
    iam:
      withAddonPolicies:
        imageBuilder: true
    ssh:
      publicKeyPath: /home/linuxtechi/.ssh/id_rsa.pub
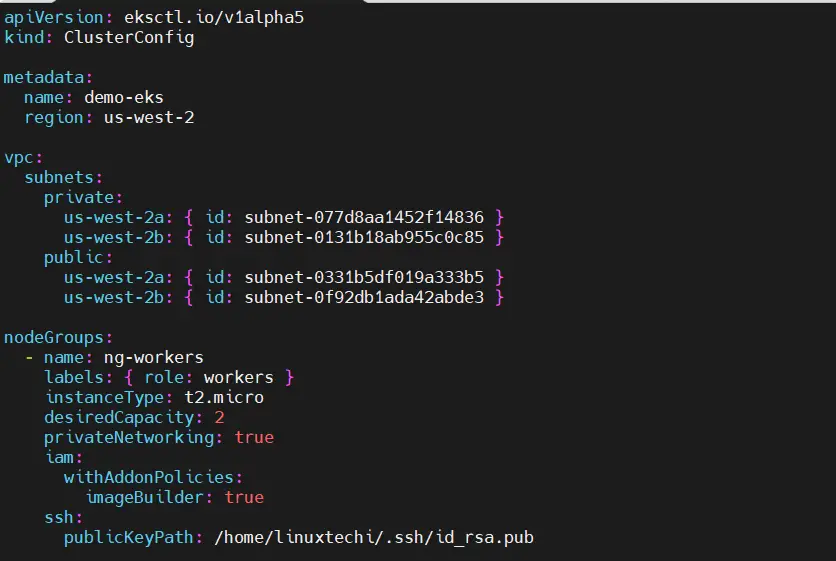
Here we are using public subnets for control plane and private subnets for worker nodes. It will also automatically create IAM roles and security group for control plane and worker nodes.
Apart from this we are also using a node group named ‘ng-workers’ for worker nodes with desired capacity two and instance type as ‘t2.micro’. Moreover, we have mentioned ‘linuxtechi’ user’s public key so that we can ssh worker nodes.
Note: Please change these parameters as per your setup.
Run following eksctl command to initiate EKS cluster setup,
$ eksctl create cluster -f demo-eks.yaml

Once the cluster is setup successfully, we will get the following output,

Great, output above confirms that EKS cluster is ready. Run following kubectl command to view status of worker nodes,
$ kubectl get nodes

Head back to AWS console, verify the EKS cluster status
Now, let’s deploy ingress controller along with NLB so that application from this cluster is accessible from outside.
4) Deploy Ingress Controller and NLB
We will be deploying nginx based ingress controller, download the following yaml file using wget command
$ wget https://raw.githubusercontent.com/kubernetes/ingress-nginx/main/deploy/static/provider/aws/deploy.yaml
Change the parameter ‘externalTrafficPolicy: Local’ to ‘externalTrafficPolicy: Cluster’
Note: This yaml file has the required entries of nginx ingress controller and AWS NLB.
$ sed -i 's/externalTrafficPolicy: Local/externalTrafficPolicy: Cluster/g' deploy.yaml
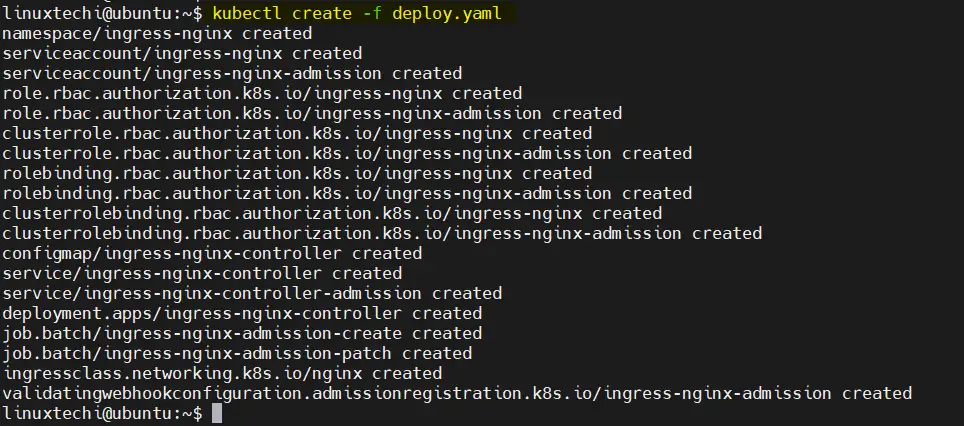
Execute following kubectl command to deploy ingress controller and NLB,
$ kubectl create -f deploy.yaml
Output,
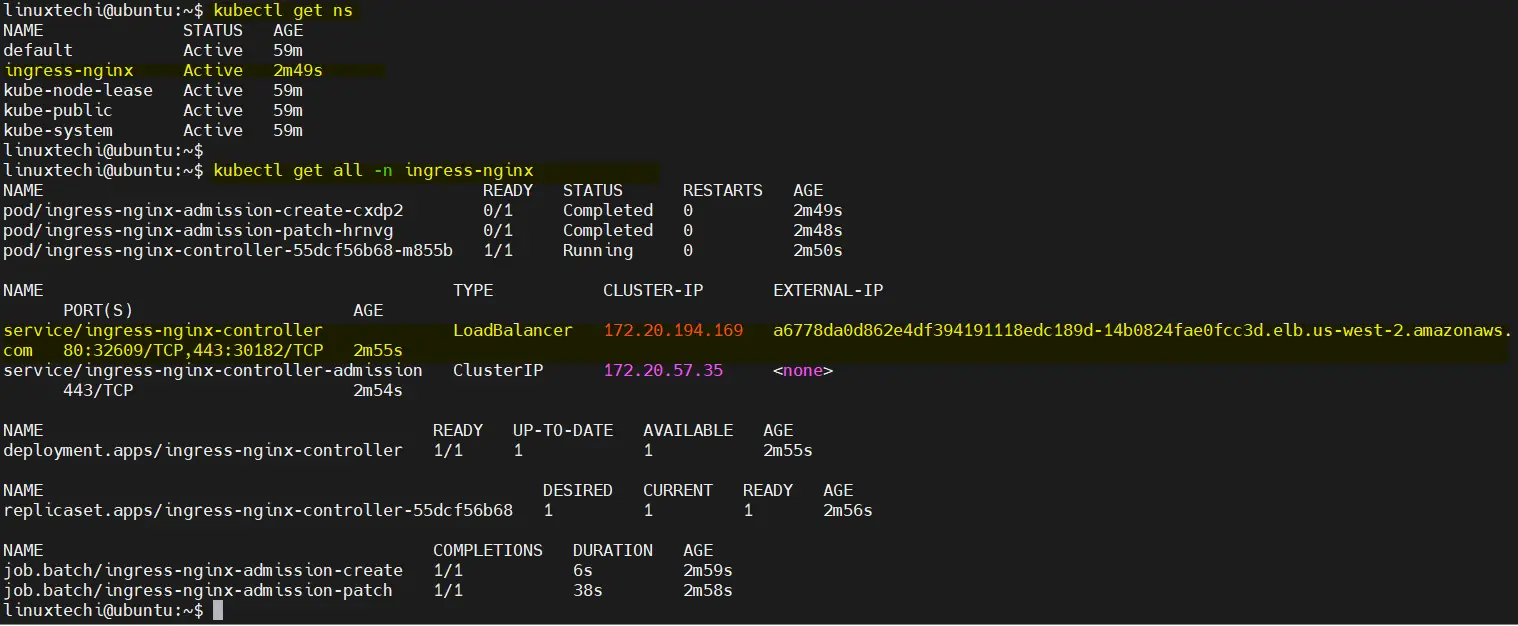
To verify the status of ingress controller, run following commands,
$ kubectl get ns
$ kubectl get all -n ingress-nginx
Output,
Head back to AWS console and check NLB status which is created via deploy.yaml file.
Perfect, above confirms that NLB has been setup properly for EKS cluster.
5) Test EKS Cluster Installation
To test eks cluster installation, let’s deploy a nginx based deployment, run
$ kubectl create deployment nginx-web --image=nginx --replicas=2
Create the service for deployment, run
$ kubectl expose deployment nginx-web --name=nginx-web --type=LoadBalancer --port=80 --protocol=TCP
View Service status,
$ kubectl get svc nginx-web
Output of above commands would look like below:

To access the application, copy the URL shown in service command,
http://ad575eea69f5044f0ac8ac8d5f19b7bd-1003212167.us-west-2.elb.amazonaws.com

Great, above nginx page confirms that we are able to access our nginx based deployment outside of our EKS cluster.
Once you are done with all the testing and wants to remove the NLB and EKS cluster, run following commands,
$ kubectl delete -f deploy.yaml
$ eksctl delete cluster -f demo-eks.yaml
That’s all from this guide, I hope you are able to deploy EKS cluster on your AWS account. Kindly do post your queries and feedback in below comments section.
Hello LinuxTechi,
I’m a newbie here, please pardon any perceived “stupid ask”. Great article to help me condense my EKS learning. please assist to breakdown the below on how i can create on my PC to complete the manifest.
ssh:
publicKeyPath: /home/linuxtechi/.ssh/id_rsa.pub
I want to create and execute it from my own PC. but that’s the point of error so far…
Hi ,
Please make sure you have a linux system and configure AWS Cli on it.
To generate the ssh keys, run following command and change the PublicKetPath as per your system.
$ ssh-keygen
Thanks for this! I liked your easy method to test the cluster.
However, on my EKS cluster, when I tried to expose the service, I was never assigned an external IP or DNS name:
> k get svc nginx-web -n test2
NAME TYPE CLUSTER-IP EXTERNAL-IP PORT(S) AGE
nginx-web LoadBalancer 172.20.126.112 80:31707/TCP 6m
It never came out of state. Any ideas why?
It looks like your system parsed my post for HTML. the “pending” was in “/” and was removed:
> k get svc nginx-web -n test2
NAME TYPE CLUSTER-IP EXTERNAL-IP PORT(S) AGE
nginx-web LoadBalancer 172.20.126.112 pending 80:31707/TCP 6m