In this post, we will show you how to install Kali Linux on Windows 11 using WSL.
A while back, running a virtual machine was the only way of running another operating system, such as Linux, inside Windows. The drawback of virtual machines is that they are associated with high resource usage which in most cases slows down applications and services on the host especially if the underlying host has low computing specifications.
The Windows Subsystem for Linux, commonly abbreviated as WSL, is an abstraction layer that lets you run a Linux environment, including its utilities and tools, directly on Windows. It does this without the resource overhead of traditional virtual machines or having to configure a dual-boot setup. WSL was first released in 2016. WSL 2 is the current version and provides performance improvements and other enhancements to boost system performance.
Prerequisites
For this to work, ensure that your system meets the following requirements:
- Virtualization needs to be enabled on your BIOS.
- Must be running x64 system Version 1903 or higher, with Build 18362 or higher.
Without much ado, let’s get started.
1) Enable Windows Subsystem for Linux (WSL)
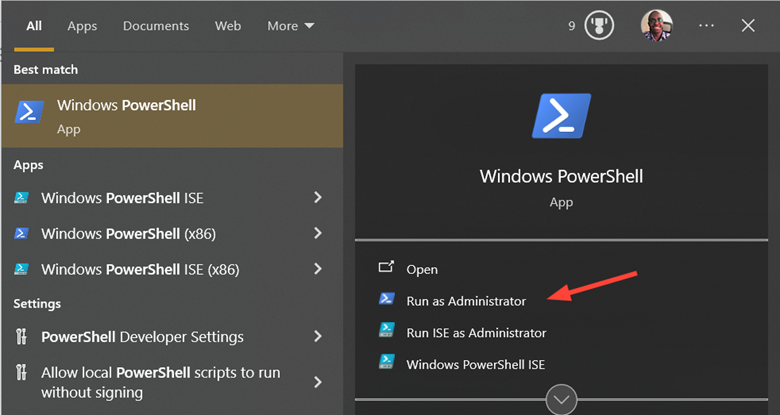
The first step is to enable the WSL feature on your Windows system. To do this, launch Windows PowerShell as the Administrator.
Next, run the following command on the terminal to enable the WSL feature.
dism.exe /online /enable-feature /featurename:Microsoft-Windows-Subsystem-Linux /all /norestart
This takes a minute or two to complete.
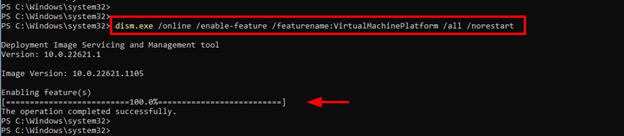
2) Enable Virtual Machine Platform Feature
The virtual Machine Platform feature is a feature that allows you to emulate other operating systems and is a prerequisite for specific features to run such as the WSL.
Still on Powershell, run the following command to enable the virtual machine platform feature.
dism.exe /online /enable-feature /featurename:VirtualMachinePlatform /all /norestart
In addition, (although not a requirement) consider setting WSL version 2 as the default version.
wsl --set-default-version 2

3) Install the Linux Kernel Update package.
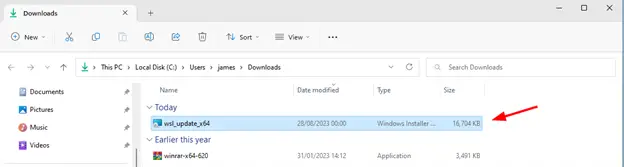
To avoid running into errors while running Kali Linux, it’s recommended to install the Linux Kernel Update Package for WSL. Therefore click on this link to download the WSL2 Linux kernel update package for x64 machines.
Once you have downloaded the installer, run it by double-clicking on it.
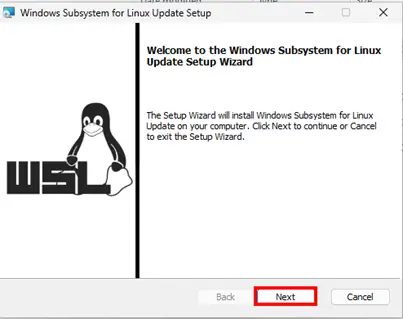
This opens the WSL setup wizard as shown. Click ‘Next’ and accept the default selections.
4) Install Kali Linux on Windows using WSL
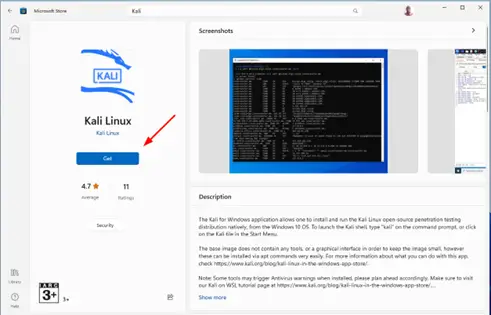
All our ducks are in a row as far as the requisite features needed are concerned. The next step is to install Kali Linux. So, head over to the Microsoft store and search for the ‘Kali Linux’ app.
Click the ‘Get’ button.
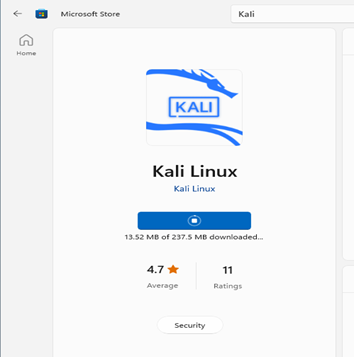
The download of the App, which is about 237MB will begin and the progress will be indicated as shown.
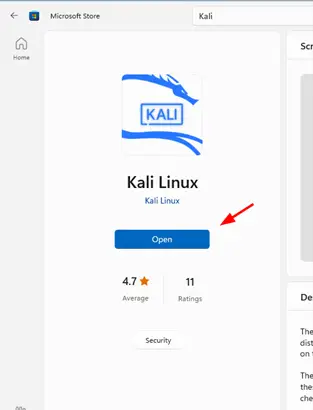
Once the download is complete, click ‘Open’.
This opens a terminal window that prompts you to provide a username and password for your user account. Once you are done, you’ll automatically be logged in and prompted with a bash in Kali Linux.
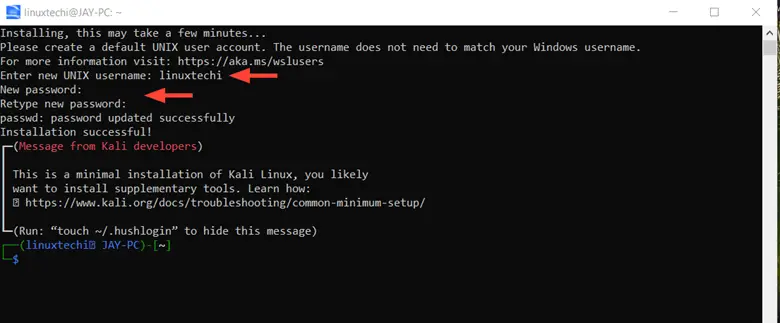
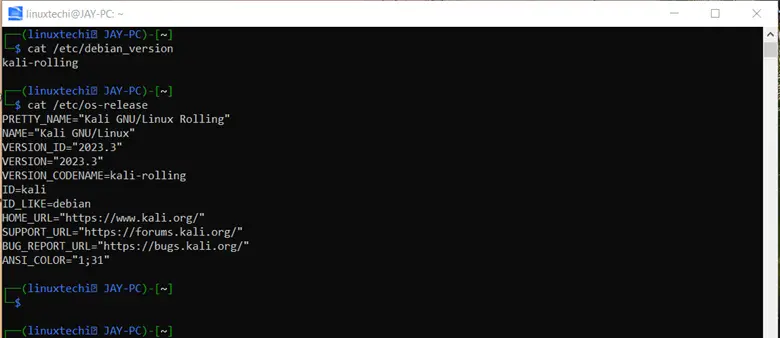
You can verify the version of Kali Linux using the command:
$ cat /etc/os-release
5) Install Win-Kex Utility to Enable GUI (Optional)
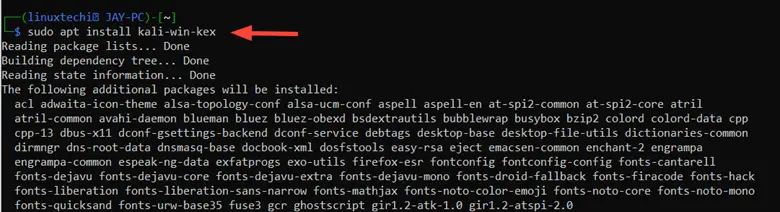
To make the most out of your Kali Linux instance, installing a GUI is recommended. To do so, install the Win-Kex package which provides a desktop experience for Kali Linux in WSL 2.
$ sudo apt update
$ sudo apt install kali-win-kex
The package is quite big (approximately 2.3G) and takes quite some time to install.
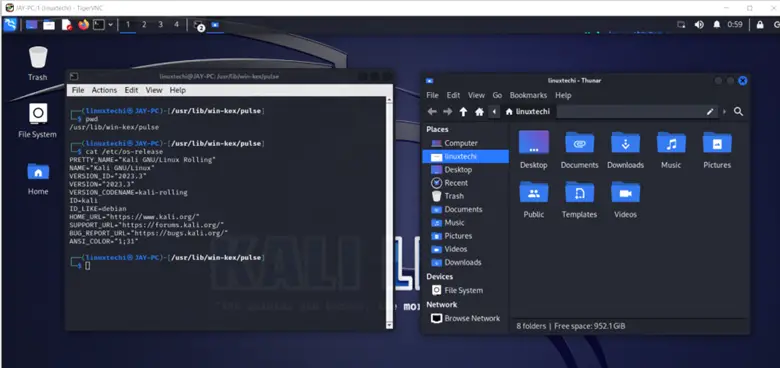
Once installed, launch the GUI interface as shown.
$ kex --win -s
Provide the password and confirm it. When prompted to enter a view-only password, type ‘n’ and hit ENTER.

This immediately launches the Kali Linux GUI on your screen as shown.
The Win-Kex utility provides three modes:
- Window mode: Starts Kali Linux in a dedicated window.
- Enhanced session mode: Uses RDP protocol to provide a richer UI experience.
- Seamless mode: Shares the Windows desktop between Windows and Kali applications and menus.
For more information about the Win-Kex utility, check out the Kali Linux Win-Kex documentation.
Conclusion
And there you go. In this guide, we have demonstrated how to install Kali Linux on Windows 11 using WSL 2. Your feedback on this guide is welcome.
Awesome! instructions and documentation.