When planning to install any Linux distributions, you definitely need a bootable USB flash drive or bootable DVD. There are several 3rd party applications that helps you turn the ISO file into a Bootable USB disk. With a Bootable drive, you can not only install distro applications, you can also use the disk to test the desktop experience of Ubuntu without needing to meddle with your computer’s configuration or even help in fixing any configuration issues. In this article, we’ll show you how to create a bootable usb flash drive on Ubuntu / Linux Mint.
When it comes to creating bootable usb drive, there are many tools available and we are going to discuss about the following tools:
- Startup Disk Creator
- UNetbootin
- dd (command line utility)
Startup Disk Creator
Startup Disk Creator is a utility that is readily available with Ubuntu to help you create bootable disks easily. Whenever we install Ubuntu and Linux Mint then this installed automatically as part of default tools. Refer the beneath steps to Create Bootable USB stick or DVD using startup Disk Creator
Step: 1) Insert the USB disk / DVD into your computer
Step:2 ) Open the Start Disk Creator application in Ubuntu
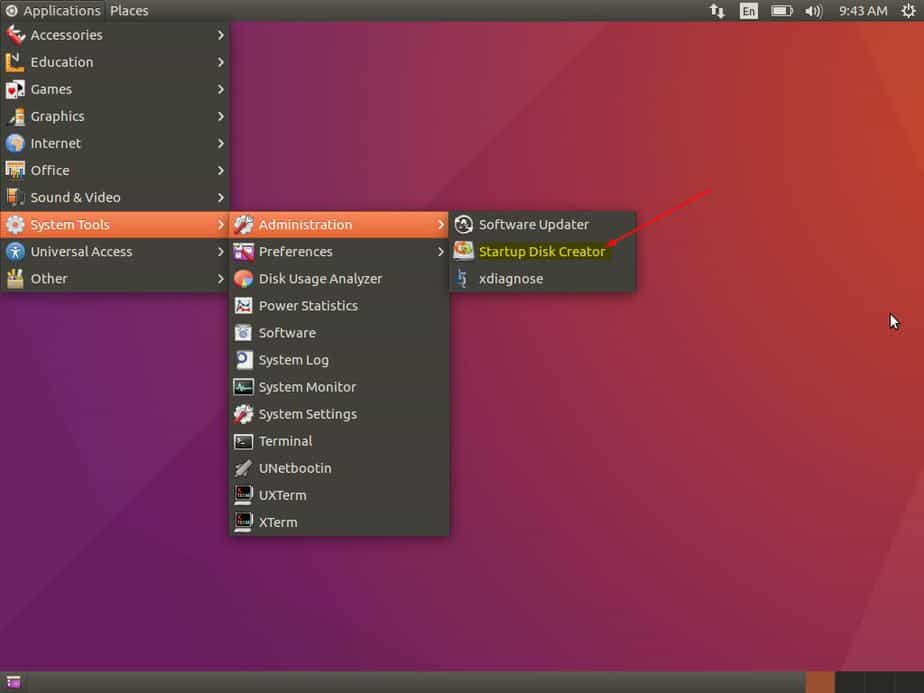
Step:3 ) Once the application is launched, it automatically looks for any ISO file in your Downloads folder and lists that ISO file in the Source image area of the utility,
If you want to choose another ISO file, click “Other” button to open the file and select the ISO you need
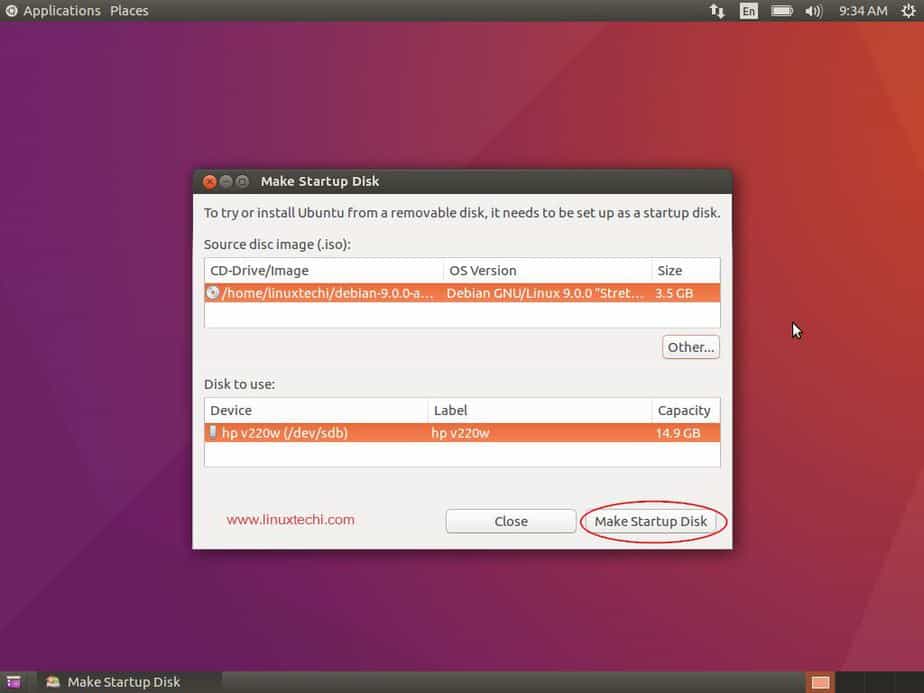
The USB flash drive or DVD whichever is connected to your computer is also automatically detected and placed in the “Disk to Use” section.
If not, Click “Other” button to choose the desired disk in which a bootable disk need to be created
Once everything is set, select “Make Startup disk” button to create the bootable disk
UNetbootin
UNetbootin is another tool that allows you to create bootable USB drives as it either downloads the ISO file or you can provide the downloaded ISO file to create a bootable disk easily. With UNetbootin you can create bootable disks for Ubuntu, Fedora and other Linux distributions easily. UNetbootin also helps you to load a lot of system utilities into the USB disk to repair any configuration issues.
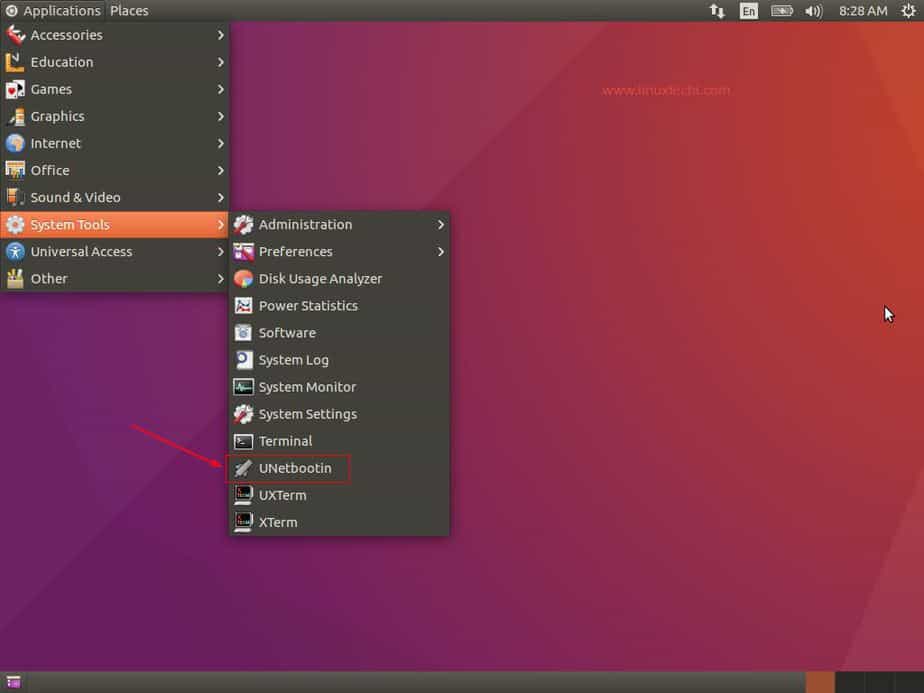
UNetbootin is not installed by default during Ubuntu and Linux Mint installation. Follow below steps to Install UNetbootin on Ubuntu Linux & Linux Mint
linuxtechi@nixworld:~$ sudo add-apt-repository ppa:gezakovacs/ppa
linuxtechi@nixworld:~$ sudo apt-get update
linuxtechi@nixworld:~$ sudo apt-get install unetbootin -y
To create a bootable USB disk / DVD using UNetbootin use the beneath steps:
Step:1 ) Open the tool and select the distribution and the version as shown below
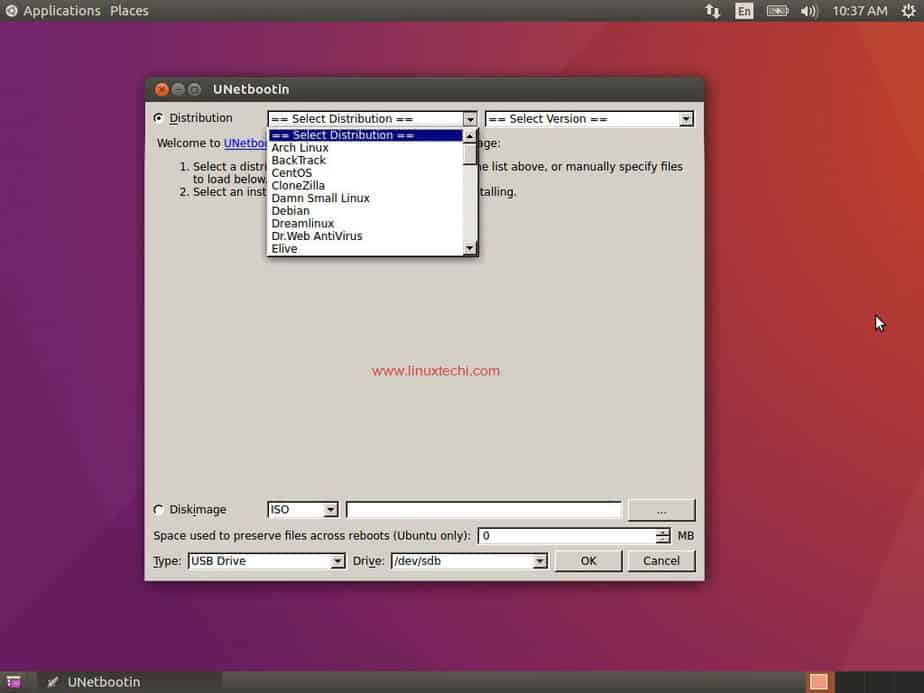
Step:2 ) Select the location of the ISO file
Step:3 ) Choose the type of disk USB / DVD in which the bootable disk needs to be created and also specify the drive letter of the USB / DVD disk
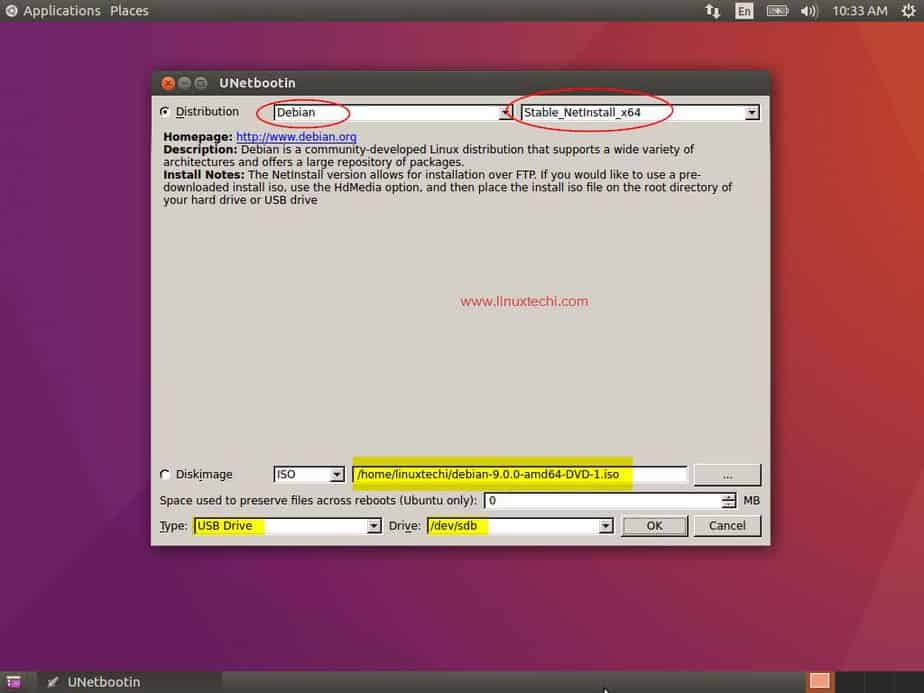
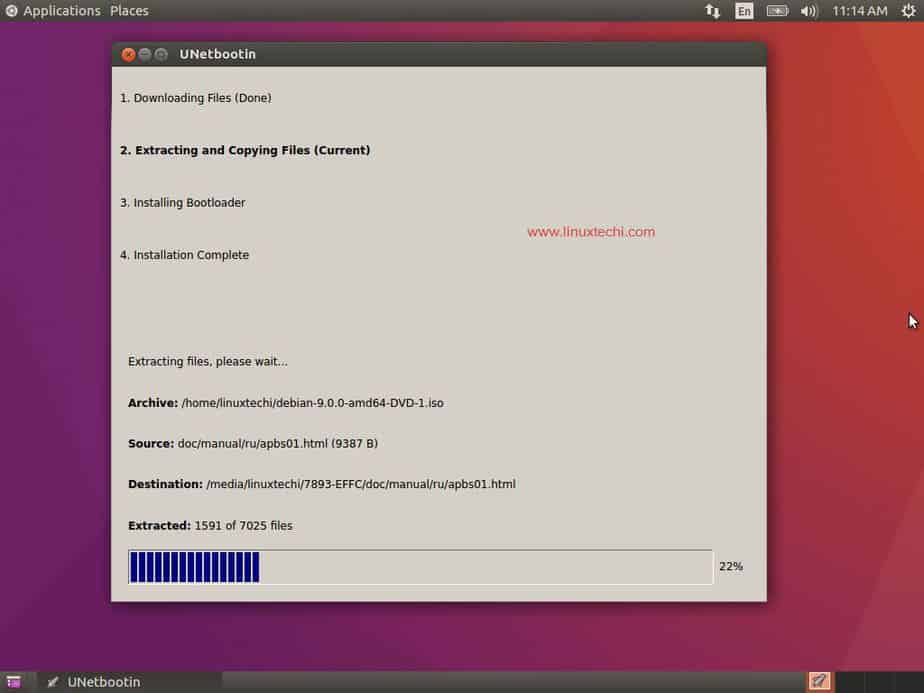
Step:4 ) Click “OK” to start the process
dd (Command line Utility)
People looking to burn an ISO from the command line can go for “dd“, an easy and simple command line utility to create your bootable USB flash drive / DVD for Ubuntu/ Linux Mint.
To create a bootable USB disk / DVD using “dd”:
Step:1 ) First step is insert the USB disk in your computer and open the terminal (Press CTRL + ALT + T)
Step:2 ) To find the USB device, you can use the following command:
linuxtechi@nixworld:~$ sudo fdisk -l
Take for example our USB disk is in /dev/sdb
Now it is time to unmount the USB disk using the following command
linuxtechi@nixworld:~$ sudo umount /dev/sdb
step:3 ) For now let’s assume that the ISO file is in the current folder and then type the following command to burn the ISO into the USB device
linuxtechi@nixworld:~$ sudo dd if=ubuntu-17.10-desktop-amd64.iso  of=/dev/sdb bs=4M
357+1 records in
357+1 records out
1501102080 bytes (1.5 GB, 1.4 GiB) copied, 164.77 s, 9.1 MB/s
linuxtechi@nixworld:~$
where,
‘ubuntu-17.10-desktop-amd64.iso‘ is the ISO file and
‘bs=4M‘ is an optional command to speed up the creation process of the bootable disk
Test Your Bootable Disk
It is better to check if the bootable disk has been created successfully. To check that you need to download a utility called QEMU, a machine emulator and virtualizer.
Open the terminal and install qemu using the following command
linuxtechi@nixworld:~$ sudo apt-get install qemu
Once the qemu has been installed successfully then run the following command
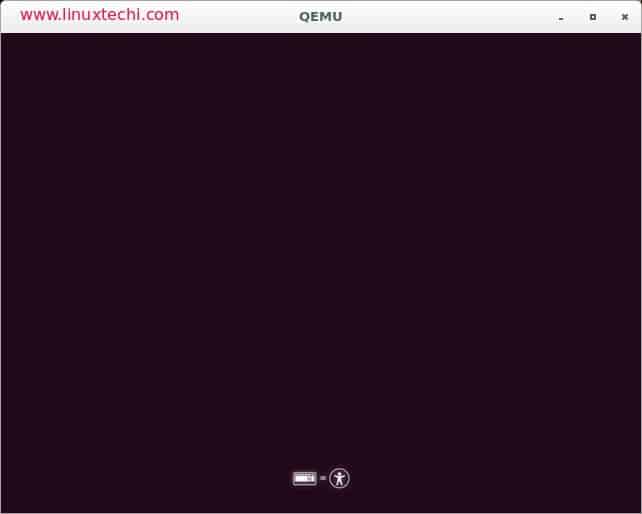
linuxtechi@nixworld:~$ sudo qemu-system-x86_64 -hda /dev/sdb
Your booting process is successful if you see a virtual machine booting from your USB disk / DVD.
That’s conclude the article, I hope you guys got an idea how we can create Bootable USB / DVD Disk using the above described methods, please do share your feedback and comments if you like the article.
> Whenever we install Ubuntu and Linux Mint then this (Startup Disk Creator) installed automatically as part of default tools.
Mint Cinnamon (17.3) doesn’t have this installed by default. Instead it uses something called ‘USB Image Writer’. Maybe it’s the same program but the interface was altered somewhat.
I’ve lately burned in a few ISOs using ‘USB Image Writer’ and the debian-based stuff has booted fine. Having problems with non-debian stuff (arch-based and others). Most boot their menus fine but all end up not being able to find the ISO directory (weird, maybe it’s my USB hardware). I’m going to try uNetBootin to see if I have better success.
I did try multisystem for multiple ISOs on a disk (it installed so much stuff, including qemu) but it turned out to be a failure. Also tried YUMI (under WINE) and it too failed to create a multi-boot system.
Mint XFCE (18.2) doesn’t have this installed by default either. It also uses something called ‘USB Image Writer, as have the preceding XFCE versions. I have had some success using this programme but also some failures. A further disadvantage with it is that the file system on the created USB device is unreadable. Unetbootin has been slightly more productive for me and avoids the unreadable file system issue.
I’ve also used dd and that has worked well.
I did all dd (Command line Utility) process and works fine but USB Memory doesnt boot (Im trying PureOS 8.0 Live iso). I made a comparison with another USB Memory with Ubuntu 16.04 iso image. I verified on GParted:
PureOS 8.0 Live: System Files=unknowed, Options=boot, hidden.
UBUNTU 16: System Files=fat32, Options=boot, lba. (this boot normally).
What you think about?
If I already had Linux loaded I wouldn’t need a bootable disk.
lol so true… its like going to the cop telling them you lost your documents, and they ask for your documents to identify yourself …
he should have show it , how to do it from windows or whatever.
These are Linux boot options for use IN a Linux installation. What about making a Linux boot and install disc in Windows? MOST of us wanting to try Linux distros will be coming from a Windows PC and we seriously need such a Linux boot and install tutorial as you have here. We will likely NOT be getting a disc from another Linux user because we don’t know any. So, let’s make it easy -as many say Linux is- to get involved. Since the most recent info says 0.6% of all PC’s have Linux installed, I’m very sure that’s what the Linux community wants as well. [BTW: with apologies, Barry, you are regrettably short sighted]
Hi Pradeep,
Informative Post! Thank you so much for sharing this valuable post on How to Create Bootable USB Disk / DVD on Ubuntu / Linux Mint. And i am pretty impressed with the in-depth article you have provided in the post. And it really worked for me. Keep sharing such posts…
Cheers,
Abhay