It’s always advised against running administrative-level commands as the root user. In fact, as a rule of thumb, it’s recommended to configure or create a sudo user on any Linux server that you intend to manage. Executing commands as the root user is risky and can cause detrimental damage to your system. All it takes is a single command to accidentally crash your system. To avoid that, running elevated operations as the sudo user comes highly recommended.
A sudo user (short for super user do) is a regular user that has been granted root or elevated privileges and hence can perform elevated tasks similar to those which are a reserve for the root user. These include editing configuration files, installing and removing software packages, starting and stopping services, and so much more.
In this guide, we focus on how you can create and configure sudo user on Arch Linux.
Step 1) Install sudo package
Right off the bat, we need to install the sudo utility. Unlike other Linux distributions, this is not included by default in the base install. To install this, execute the following command as root:
# pacman -S sudo
Step 2) Create a regular user
Next, we need to create a regular user. We will later add this user to the sudoers group to enable them to carry out administrative tasks.
To create a sudo user, use the useradd command as shown:
# useradd -m -G wheel -s /bin/bash username
Let’s break down the command:
The -m option creates a home directory for the user /home/user.
The -G option adds the user to an additional group. In this case, the user is being added to the wheel group.
The -s option specifies the default login shell. In this case, we are assigning bash shell denoted by /bin/bash.
So, let’s assume you want to add a regular user called techuser. To accomplish this, run the command as follows:
# useradd -m -G wheel -s /bin/bash techuser
Step 3) Configure the regular user as sudo user
What we have so far done is to create a regular login user. The user does not yet have the capability of running elevated commands. We need to edit the sudoers file located at /etc/sudoers
The wheel group is a special type of group in Linux systems that controls who has access to sudo commands.
To confirm that the wheel group is enabled, execute the command:
# visudo
Or
# vi /etc/ sudoers
This ushers you to the sudoers file which is rendered on a vim editor. The sudoers file defines access rights and can be edited to grant or deny certain privileges to regular users.
Once you have opened the sudoers file, scroll and locate the following entry. In the basic arch linux installation it would be commented. Uncomment it and save the file to enable the wheel group.
%wheel ALL=(ALL) ALL
As we have already a regular user, let’s assign password as shown using the passwd command.
# passwd techuser
When prompted, provide the new user’s password and confirm it.
Alternate way to configure regular user as sudo user, add following user’s entry in the sudoers file as shown below,
# vim /etc/sudoers
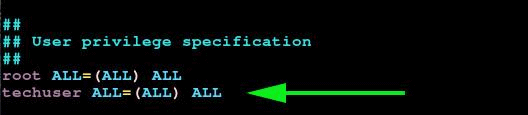
Under the User privilege specification section, add the following line.
techuser ALL=(ALL) ALL
Save and exit the sudoers file
Step 3) Testing the sudo user
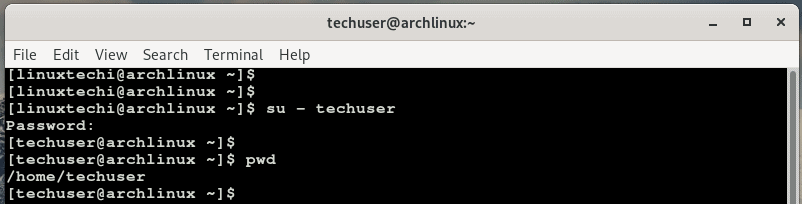
Lastly, we are going to confirm if the user can perform root tasks. First, switch over to the new user.
$ su - techuser
Provide the user’s password and hit ENTER.
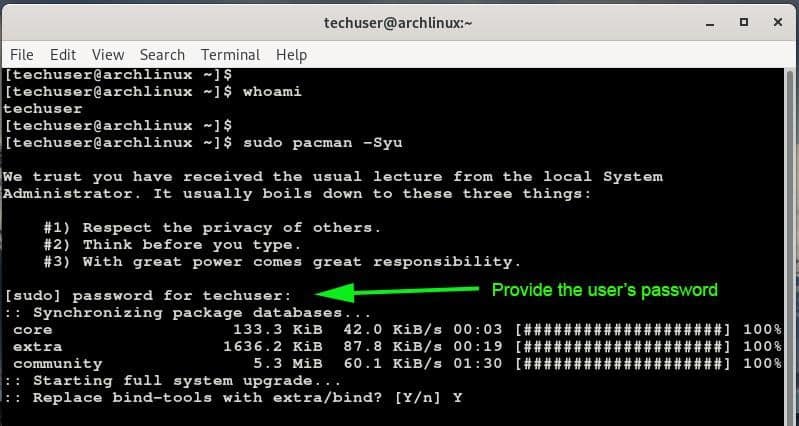
Now try invoking sudo along with a command that is usually reserved for the root user. In the example below, we are updating Arch Linux.
$ sudo pacman -Syu
You will be provided with a disclaimer informing you of the salient things to keep in mind when invoking sudo and later, you will be prompted for the password.
That’s conclude the article, we hope that this guide has provided enough insights in the creation of a sudo user in Arch Linux. Please do share your feedback and comments in below comments section.
Quick and detailed nice article