So you’ve successfully installed Ubuntu 18.04 LTS and hoping what do to next? Yes, you can always browse on the new features introduced in the 18.04 LTS, the Bionic Beaver. But let’s not hurry up, let us list out the top 10 things to do after installing Ubuntu 18.04,
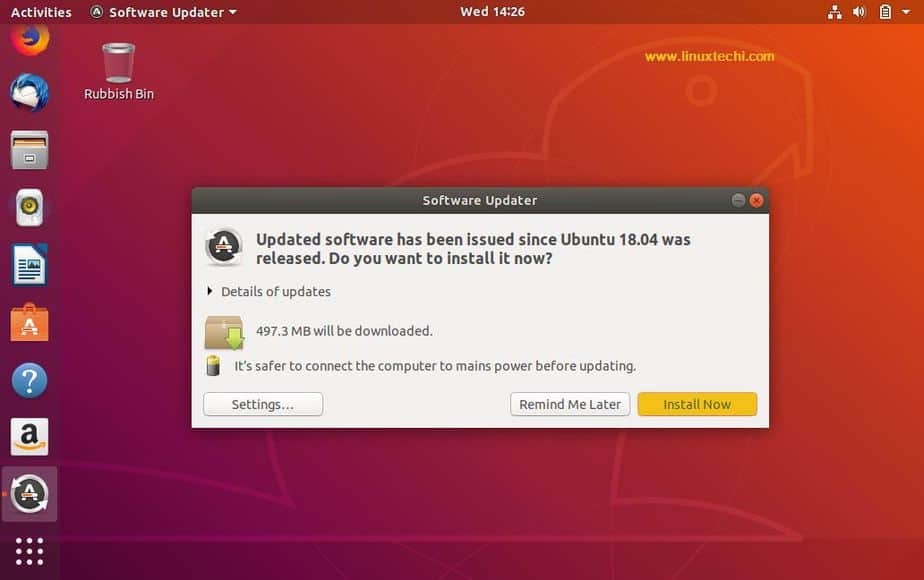
1. Check for Recent Updates
First and foremost thing is to check for any recent updates and have it installed immediately. This will help your Ubuntu 18.4 LTS always in an updated state and also protect your system against all sorts of vulnerabilities.
Even though you’ve downloaded the latest version, there may be still some bug fixes or security patches that may be released after the release of the stable version. So it is always better to check for updates often.
To get the recent updates, access the Software Updater, search “software updater” in the Gnome Search Box and follow the process as instructed on the Updater Tool
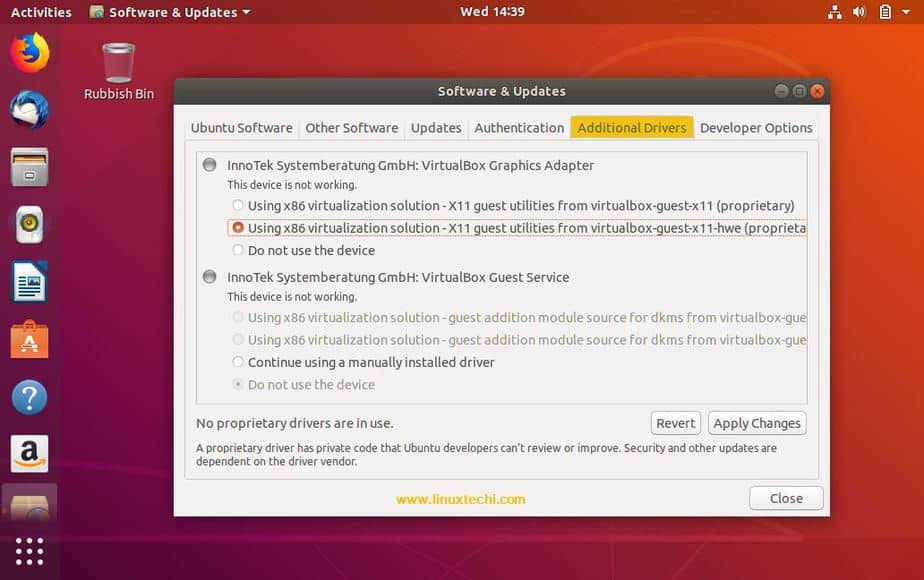
2. Install All Missing / Additional Drivers
Even though most of the basic drivers come installed with the Linux Kernel, there maybe a few exception that you may need to install some additional drivers like printer drivers or other proprietary restricted drivers like NVIDIA drivers. If you want to enjoy the latest linux games to the fullest, then you need your system equipped with the latest graphic drivers.
To install Additional or Missing Drivers on your Ubuntu 18.04 LTS dekstop,
Gnome Search Box –> Software & update –> Click on “Additional Drivers” Tab –> follow the specific instructions provided on the screen
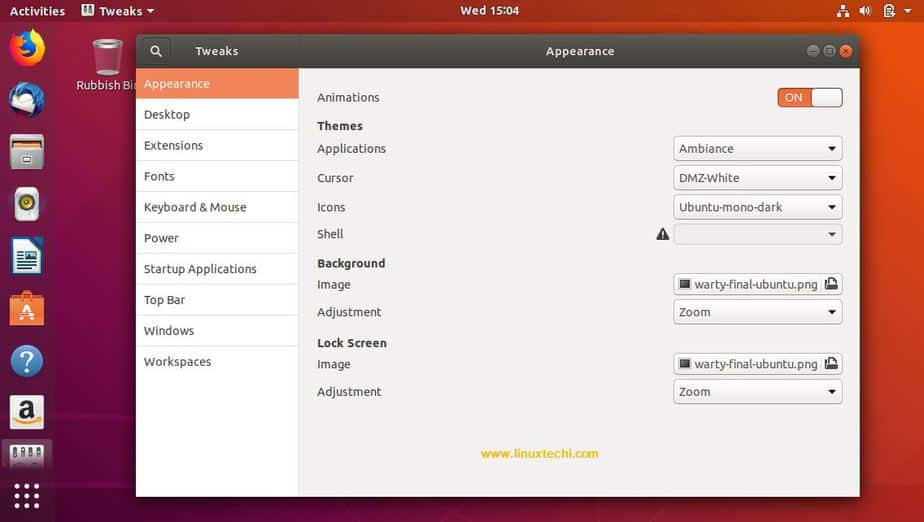
3. Install GNOME Tweak Tool
Next one in our top 10 list is to allow you to customize your desktop environment the way you like. Even though the default settings is well enough to work with Ubuntu 18.04 as it comes installed with all kinds of options and toggles, not everything is in there. This is where the GNOME Tweak Tool, settings manager for GNOME might come handy to let you customize the Ubuntu 18.04 desktop according to your liking.
Installing GNOME Tweaks provides you access to a lot of customization settings along with many “reset to defaults” allowing you to take complete control over your desktop. With the GNOME Tweak tool you can accomplish the following:
- Change the look and feel of Ubuntu 18.04 LTS Desktop Environment
- Change the default fonts
- Play with the Window buttons
- Effectively manage all GNOME extensions
- Enable/Disable desktop icons
Run the beneath command from terminal to install gnome-tweak-tool,
linuxtechi@Ubuntu-Rocks:~$ sudo apt install gnome-tweak-tool -y
To Access the tweak tool, refer the below steps,
From Gnome Search Box –> search ‘Tweaks’ –> click on Tweaks Icon
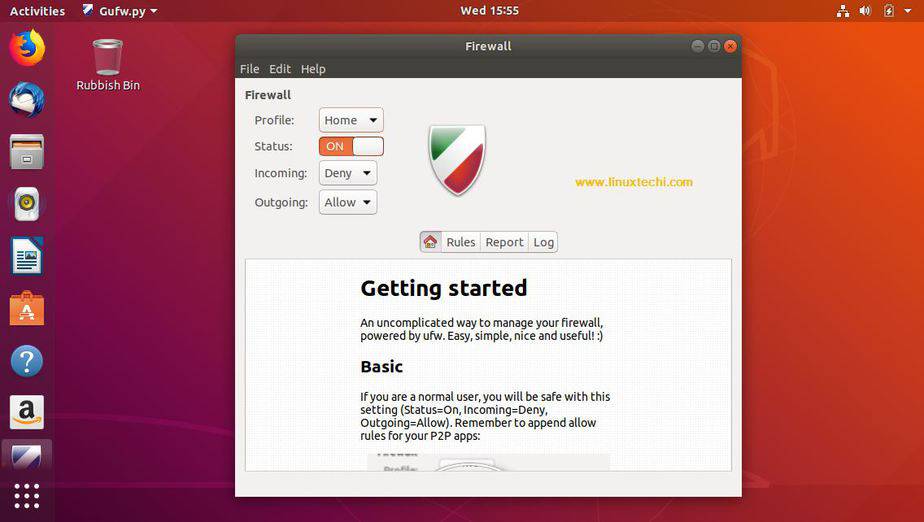
4. Enable and Start Firewall(ufw) to Enhance Security
It is extremely important to enhance security to your desktop system and to do that you need to enable the Firewall settings, which is disabled by default while installing Ubuntu 18.04 LTS.
To enable Ubuntu firewall on your Ubuntu 18.04 Desktop, run the below command from terminal ,
linuxtechi@Ubuntu-Rocks:~$ sudo ufw enable
Firewall is active and enabled on system startup
linuxtechi@Ubuntu-Rocks:~$
You can also recheck if the firewall has been enabled with the following command. If the status returns “active” then firewall has been enabled. Type the following command to check the status of the firewall.
linuxtechi@Ubuntu-Rocks:~$ sudo ufw status
Status: active
linuxtechi@Ubuntu-Rocks:~$
To allow any specific service or ports in ufw, use below syntax
$ sudo ufw allow ssh
or
$ sudo ufw allow 22/tcp
If you need a graphical user interface for firewall then you need to install the gufw.
linuxtechi@Ubuntu-Rocks:~$ sudo apt install gufw -y
5. Install some useful tools
Next thing is to install some additional tools that will enhance your Ubuntu 18.04 LTS functionality to a great extent. Some of the tools that may look to install are:
Synaptic
Another installation tool that can beat your default application software easily.
linuxtechi@Ubuntu-Rocks:~$ sudo apt-get install synaptic -y
VLC
VLC is the most widely used multi-media player at windows and Linux desktop, it can play your favorite mp3 songs and videos. Use below command to install VLC from the command line,
linuxtechi@Ubuntu-Rocks:~$ sudo apt-get install vlc -y
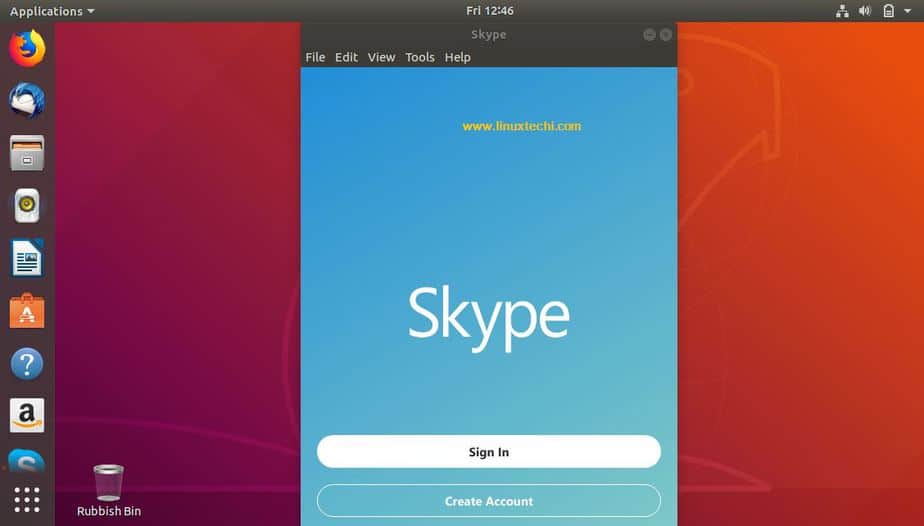
Skype
skype is a free audio and video calling software. It is a closed source proprietary software and can be installed using following commands,
linuxtechi@Ubuntu-Rocks:~$ wget https://repo.skype.com/latest/skypeforlinux-64.deb
linuxtechi@Ubuntu-Rocks:~$ sudo dpkg -i skypeforlinux-64.deb
linuxtechi@Ubuntu-Rocks:~$ sudo apt-get install -f
GIMP
It is a free and open source image manipulation tool, it is used for image editing, drawing and can also be as used to convert images into different formats,
linuxtechi@Ubuntu-Rocks:~$ sudo apt-get install gimp -y
Steam
If you are looking to play games on Ubuntu, then you need to have Steam, one of the ultimate gaming platforms that allows you to buy games, play multiplayer games with friends and also video streaming services etc.
linuxtechi@Ubuntu-Rocks:~$ sudo apt-get install steam -y
PlayOnLinux (optional)
If you are looking to install Windows-based video games your Ubuntu 18.04 desktop, then you need to have PlayOnLinux installed in your system. Not only Windows based games, you can also install many windows based applications like Internet Explorer, Microsoft Office etc.
linuxtechi@Ubuntu-Rocks:~$ sudo apt-get install playonlinux -y
Email Clients (optional)
Even though Ubuntu 18.04 comes with a default mail client like Mozilla Thunderbird, there are many alternatives that offer far greater functionality than Thunderbird like Mailspring and Hiri.
To install Mailspring Using Snap, Use run following snap command from termianl
linuxtechi@Ubuntu-Rocks:~$ sudo snap install mailspring
To install Hiri Using Snap, Use the following command from terminal
linuxtechi@Ubuntu-Rocks:~$ sudo snap install hiri
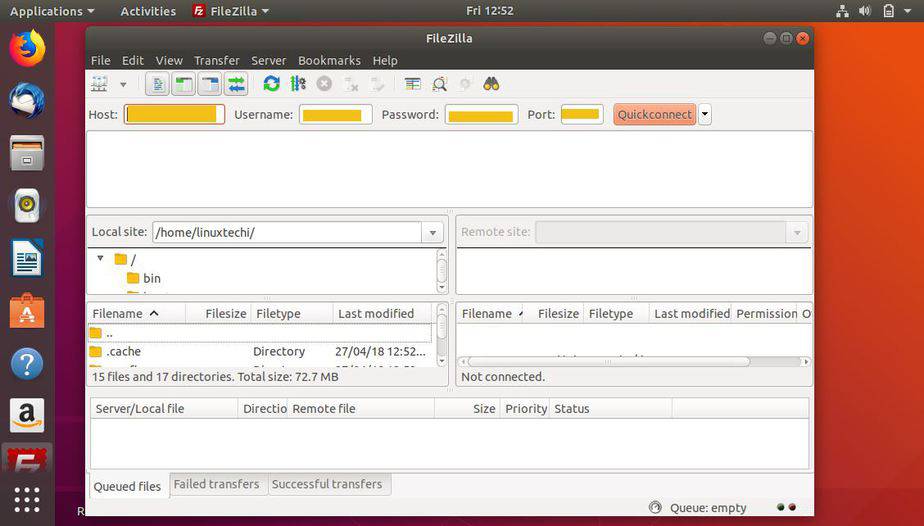
6. Install FileZilla and Screenshot Tool(Shutter)
FileZilla is the most popular file transferring tool used at both Linux and windows desktop. Use below command to install filezilla from the command,
linuxtechi@Ubuntu-Rocks:~$ sudo apt-get filezilla -y
Shutter is a well known screenshot used at Linux desktop, it is available in the Ubuntu 18.04 repositories, we can install it using below ap-get command,
linuxtechi@Ubuntu-Rocks:~$ sudo apt-get install shutter -y

7. Install full multimedia support
Next step is to make sure you have support for playing all kinds of multimedia files in your system. If nor then you may need to install the full multimedia support including mp3 audio, Adobe Flash player and Microsoft fonts etc.
To install full multimedia support on your Ubuntu 18.04 desktop, run the beneath command from the terminal,
linuxtechi@Ubuntu-Rocks:~$ sudo apt-get install ubuntu-restricted-extras
8. Install your Favorite Browser(Chrome)
Even though Ubuntu 18.04 comes with a default web browsers like Firefox and Chromium, but if you want to install your favorite Google Chrome Browser then refer the below steps,
linuxtechi@Ubuntu-Rocks:~$ sudo apt install gdebi-core
Now download the Google Chrome package using wget command and install it using gdebi command,
linuxtechi@Ubuntu-Rocks:~$ wget https://dl.google.com/linux/direct/google-chrome-stable_current_amd64.deb
linuxtechi@Ubuntu-Rocks:~$ sudo gdebi google-chrome-stable_current_amd64.deb

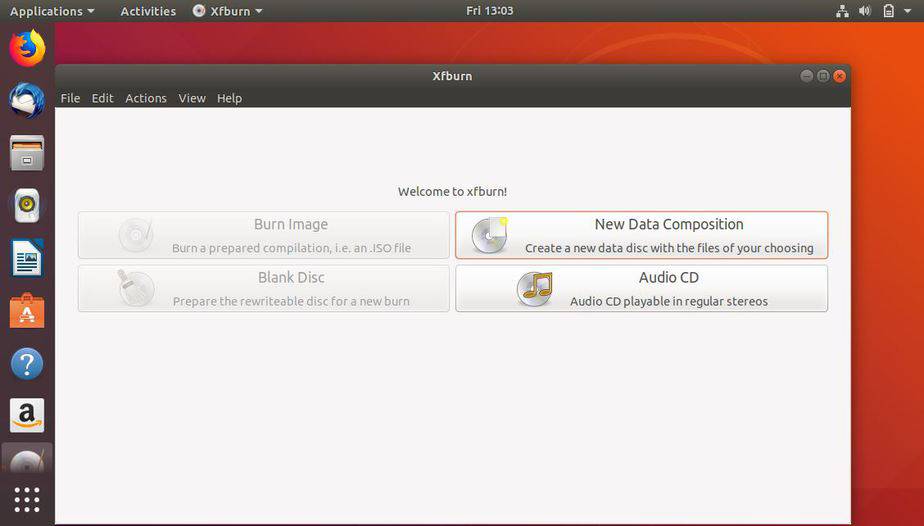
9. Install Xfburn for burning DVD’s
The default DVD burning tool Brasero is not up to the mark and you can instead install xfburn that much more simple and stable than Brasero. To install Xfburn on your Ubuntu 18.04 desktop, run the following command from terminal,
linuxtechi@Ubuntu-Rocks:~$ sudo apt-get install xfburn -y
Note: Xfburn doesn’t support multisession DVD’s and hence you cannot burn DVD’s that already have content in it.
Read More on : How to Create Bootable USB Disk / DVD on Ubuntu / Linux Mint
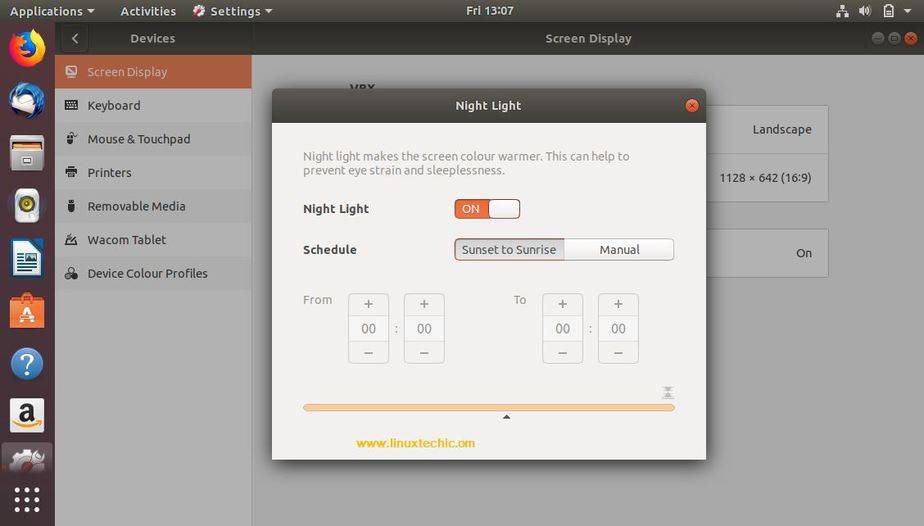
10. Turn on Night Light
According to a recent study, the blue light emanating from your PC or Laptop may cause considerable amount of eye strain. Hence, you can turn on the Night light feature that will automatically adjust the blue light.
To enable Night Light feature on your Ubuntu 18.04 desktop refer the below steps:
Go to Settings –> Devices –> Choose Screen Display –> Turn on the Night Light feature
That’s all from this article, i hope these top 10 things can help you to use your Ubuntu desktop in more productive & efficient way.
Read Also: 15 ‘apt-get’ and ‘apt-cache’ command examples for Ubuntu Geeks
Hi Pradeep,
The install step for filezilla is missing an install after apt-get: it should read sudo apt-get install filezilla -y
Like the 10 steps blog.
Regards,
Chris
maybe is more useful to teach us about errors in update .and how can we fix .in first day after install in first update at the finished of update …ups missing a key..
i found two advices but the error persit .and when i open ps in the next day i can-nit enter no screnn no leter nothing .How many times need to reinstall my ubuntu?
After I follow on your steps to install ubuntu along side my windows, and did the same partition
WINDOWS JUST DISAPPEARED:)
And after trying every single solution to show up my windows os, I always failed
Now i UNINSTALLED that ubuntu and every time I turn on the pc, a nice black window appear and says no operating system detected
WILL YOU PLEASE HELP FIX THIS?
My life is almost at stake thanks to your steps
i get stuck on step 3, it says
E: Could not get lock /var/lib/dpkg/lock-frontend – open (11: Resource temporarily unavailable)
E: Unable to acquire the dpkg frontend lock (/var/lib/dpkg/lock-frontend), is another process using it?
could you please help me out?
As you can see in error, dpkg process is used by another process, to resolve this either reboot your system or kill the process which is using dpkg.
most likely synaptic ,close it
You were trying to install the restrictive extras… After you reissue the reinstall command two times, the system will tell you how to correct the issue by issuing a command, read the message you get back each time. After you issue the unlock command, you can rerun the install command and remember when you get to the MS EULA screen within terminal, press your TAB key to get to OK at the bottom and press [ENTER]. When you see those types of screens, your TAB key is your friend. Hope this helps…
how to install amd radeon driver
i am running ubuntu 18.04