Generally, all Linux administrators use history command to track which commands were executed in previous sessions, but there is one limitation of history command is that it doesn’t store the command’s output. There can be some scenarios where we want to check commands output of previous session and want to compare it with current session. Apart from this, there are some situations where we are troubleshooting the issues on Linux production boxes and want to save all terminal session activities for future reference, so in such cases script command become handy.
Script is a command line tool which is used to capture or record your Linux server terminal sessions activity and later the recorded session can be replayed using scriptreplay command. In this article we will demonstrate how to install script command line tool and how to record Linux server terminal session activity and then later we will see how the recorded session can be replayed using scriptreplay command.
Installation of Script tool on RHEL 7/ CentOS 7
Script command is provided by the rpm package “util-linux”, in case it is not installed on your CentOS 7 / RHEL 7 system , run the following yum command,
[root@linuxtechi ~]# yum install util-linux -y
On RHEL 8 / CentOS 8
Run the following dnf command to install script utility on RHEL 8 and CentOS 8 system,
[root@linuxtechi-rhel8 ~]# dnf install util-linux -y
Installation of Script tool on Debian based systems (Ubuntu / Linux Mint)
Execute the beneath apt-get command to install script utility
root@linuxtechi ~]# apt-get install util-linux -y
How to Use script utility
Use of script command is straight forward, type script command on terminal then hit enter, it will start capturing your current terminal session activities inside a file called “typescript”
[root@linuxtechi ~]# script
Script started, file is typescript
[root@linuxtechi ~]#
To stop recording the session activities, type exit command and hit enter.
[root@linuxtechi ~]# exit
exit
Script done, file is typescript
[root@linuxtechi ~]#
Syntax of Script command:
~ ] # script {options} {file_name}
Different options used in script command,
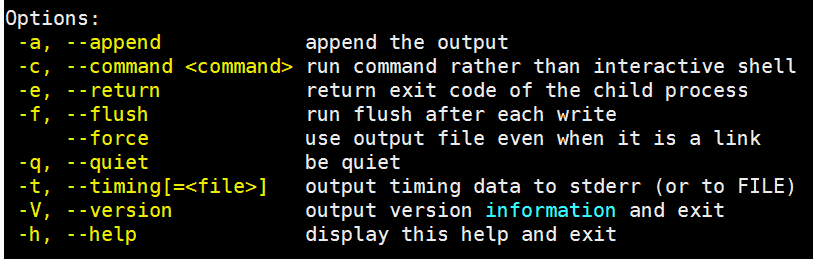
Let’s start recording of your Linux terminal session by executing script command and then execute couple of command like ‘w’, ‘route -n’ , ‘df -h’ and ‘free-h’, example is shown below
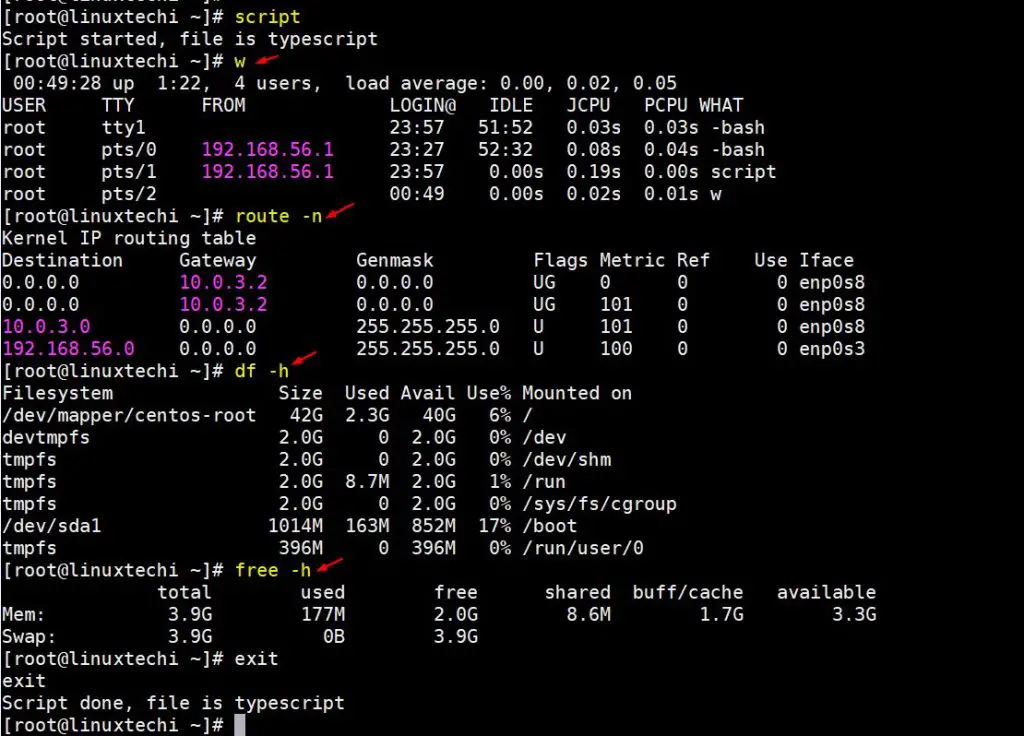
As we can see above, terminal session logs are saved in the file “typescript”
Now view the contents of typescript file using cat / vi command,
[root@linuxtechi ~]# ls -l typescript
-rw-r--r--. 1 root root 1861 Jun 21 00:50 typescript
[root@linuxtechi ~]#
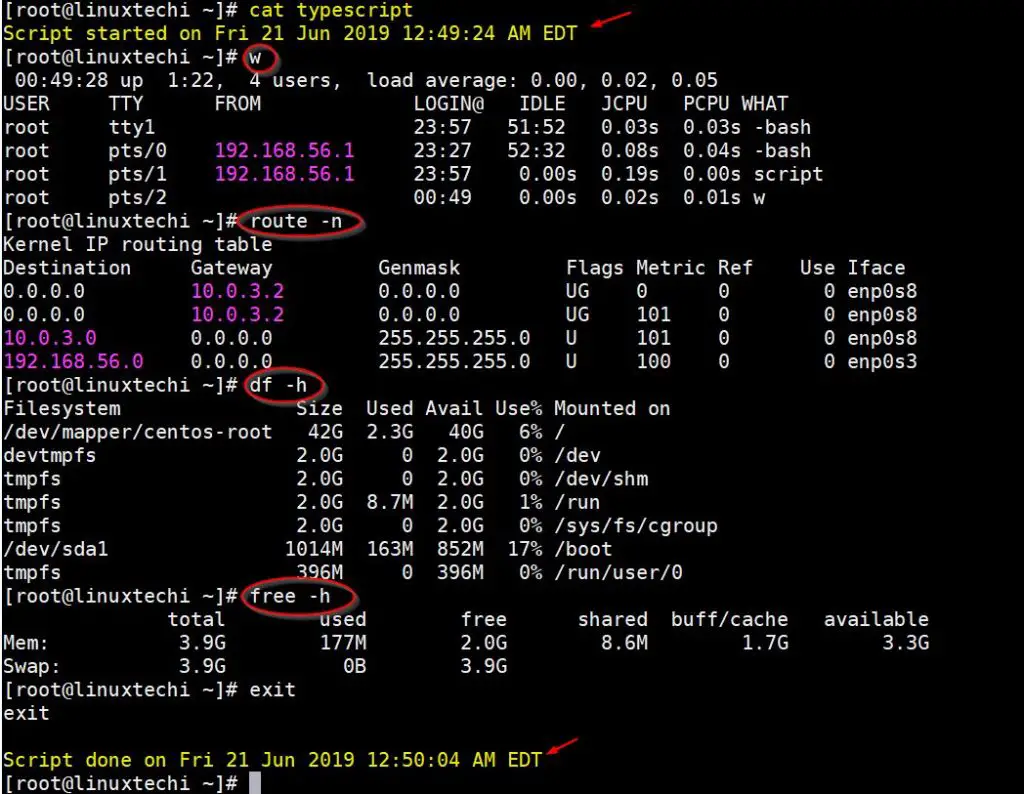
Above confirms that whatever commands we execute on terminal that have been saved inside the file “typescript”
Use Custom File name in script command
Let’s assume we want to use our customize file name to script command, so specify the file name after script command, in the below example we are using a file name “session-log-(current-date-time).txt”
[root@linuxtechi ~]# script sessions-log-$(date +%d-%m-%Y-%T).txt
Script started, file is sessions-log-21-06-2019-01:37:39.txt
[root@linuxtechi ~]#
Now run the commands and then type exit,
[root@linuxtechi ~]# exit
exit
Script done, file is sessions-log-21-06-2019-01:37:39.txt
[root@linuxtechi ~]#
Append the commands output to script file
Let assume script command had already recorded the commands output to a file called session-log.txt file and now we want to append output of new sessions commands output to this file, then use “-a” command in script command
[root@linuxtechi ~]# script -a sessions-log.txt
Script started, file is sessions-log.txt
[root@linuxtechi ~]# xfs_info /dev/mapper/centos-root
meta-data=/dev/mapper/centos-root isize=512    agcount=4, agsize=2746624 blks
         =                       sectsz=512   attr=2, projid32bit=1
         =                       crc=1        finobt=0 spinodes=0
data     =                       bsize=4096   blocks=10986496, imaxpct=25
         =                       sunit=0      swidth=0 blks
naming   =version 2              bsize=4096   ascii-ci=0 ftype=1
log      =internal               bsize=4096   blocks=5364, version=2
         =                       sectsz=512   sunit=0 blks, lazy-count=1
realtime =none                   extsz=4096   blocks=0, rtextents=0
[root@linuxtechi ~]# exit
exit
Script done, file is sessions-log.txt
[root@linuxtechi ~]#
To view updated session’s logs, use “cat session-log.txt ”
Capture commands output to script file without interactive shell
Let’s assume we want to capture commands output to a script file, then use -c option, example is shown below,
[root@linuxtechi ~]# script -c "uptime && hostname && date" root-session.txt
Script started, file is root-session.txt
 01:57:40 up  2:30,  3 users,  load average: 0.00, 0.01, 0.05
linuxtechi
Fri Jun 21 01:57:40 EDT 2019
Script done, file is root-session.txt
[root@linuxtechi ~]#
Run script command in quiet mode
To run script command in quiet mode use -q option, this option will suppress the script started and script done message, example is shown below,
[root@linuxtechi ~]# script -c "uptime && date" -q root-session.txt
 02:01:10 up  2:33,  3 users,  load average: 0.00, 0.01, 0.05
Fri Jun 21 02:01:10 EDT 2019
[root@linuxtechi ~]#
Record Timing information to a file and capture commands output to a separate file, this can be achieved in script command by passing timing file (–timing) , example is shown below,
Syntax:
~ ]# script -t <timing-file-name> {file_name}
[root@linuxtechi ~]# script --timing=timing.txt session.log
Script started, file is session.log
[root@linuxtechi ~]# uptime
 02:27:59 up  3:00,  3 users,  load average: 0.00, 0.01, 0.05
[root@linuxtechi ~]# date
Fri Jun 21 02:28:02 EDT 2019
[root@linuxtechi ~]# free -h
              total        used        free      shared  buff/cache   available
Mem:           3.9G        171M        2.0G        8.6M        1.7G        3.3G
Swap:          3.9G          0B        3.9G
[root@linuxtechi ~]# whoami
root
[root@linuxtechi ~]# exit
exit
Script done, file is session.log
[root@linuxtechi ~]#
[root@linuxtechi ~]# ls -l session.log timing.txt
-rw-r--r--. 1 root root 673 Jun 21 02:28 session.log
-rw-r--r--. 1 root root 414 Jun 21 02:28 timing.txt
[root@linuxtechi ~]#
Replay recorded Linux terminal session activity
Now replay the recorded terminal session activities using scriptreplay command,
Note: Scriptreplay is also provided by rpm package “util-linux”. Scriptreplay command requires timing file to work.
[root@linuxtechi ~]# scriptreplay --timing=timing.txt session.log
Output of above command would be something like below,
Record all User’s Linux terminal session activities
There are some business critical Linux servers where we want keep track on all users activity, so this can be accomplished using script command, place the following content in /etc/profile file ,
[root@linuxtechi ~]# vi /etc/profile
……………………………………………………
if [ "x$SESSION_RECORD" = "x" ]
then
timestamp=$(date +%d-%m-%Y-%T)
session_log=/var/log/session/session.$USER.$$.$timestamp
SESSION_RECORD=started
export SESSION_RECORD
script -t -f -q 2>${session_log}.timing $session_log
exit
fi
……………………………………………………
Save & exit the file.
Create the session directory under /var/log folder,
[root@linuxtechi ~]# mkdir /var/log/session
Assign the permissions to session folder,
[root@linuxtechi ~]# chmod 777 /var/log/session/
[root@linuxtechi ~]#
Now verify whether above code is working or not. Login to ordinary user to linux server, in my I am using pkumar user,
~ ] # ssh [email protected]
[email protected]'s password:
[pkumar@linuxtechi ~]$ uptime
 04:34:09 up  5:06,  3 users,  load average: 0.00, 0.01, 0.05
[pkumar@linuxtechi ~]$ date
Fri Jun 21 04:34:11 EDT 2019
[pkumar@linuxtechi ~]$ free -h
              total        used        free      shared  buff/cache   available
Mem:           3.9G        172M        2.0G        8.6M        1.7G        3.3G
Swap:          3.9G          0B        3.9G
[pkumar@linuxtechi ~]$ id
uid=1001(pkumar) gid=1002(pkumar) groups=1002(pkumar) \
context=unconfined_u:unconfined_r:unconfined_t:s0-s0:c0.c1023
[pkumar@linuxtechi ~]$ whoami
pkumar
[pkumar@linuxtechi ~]$ exit
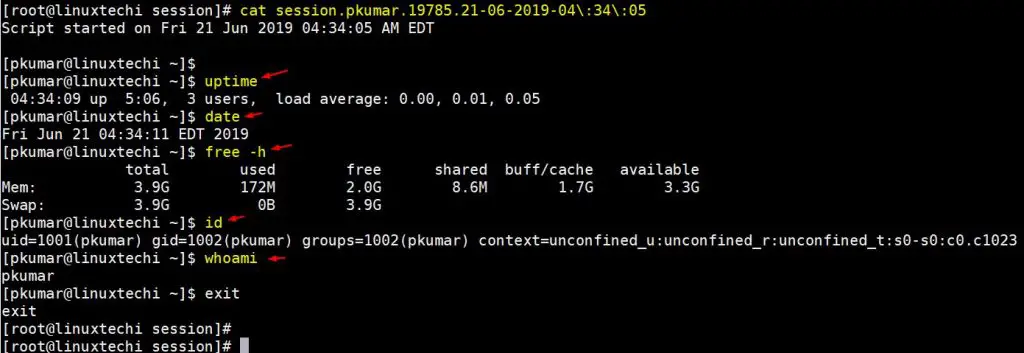
Login as root and view user’s linux terminal session activity

[root@linuxtechi ~]# cd /var/log/session/
[root@linuxtechi session]# ls -l | grep pkumar
-rw-rw-r--. 1 pkumar pkumar 870 Jun 21 04:34 \
session.pkumar.19785.21-06-2019-04:34:05
-rw-rw-r--. 1 pkumar pkumar 494 Jun 21 04:34 \
session.pkumar.19785.21-06-2019-04:34:05.timing
[root@linuxtechi session]#
We can also use scriptreplay command to replay user’s terminal session activities,
[root@linuxtechi session]# scriptreplay --timing \
session.pkumar.19785.21-06-2019-04\:34\:05.timing \
session.pkumar.19785.21-06-2019-04\:34\:05
That’s all from this tutorial, please do share your feedback and comments in the comments section below.
This is what I was looking for.It will be very helpful for automation.
Is there a way to repeat a subset of commands in a loop Also is there a way to do ssh from there terminal by feeding password
Thanks for this.
I have one issue, after applying this. Users’s profile “bash_profile” variables won’t load anymore.
How can I solve this?
Very nice!
A suggestion:
/var/log/session
should be created before editing the profile.
If you exit from the root session before session folder exists you get:
$ su –
Password:
-bash: /var/log/session/session.root.1705.08-03-2020-13:37:55.timing: File o directory non esistente
…and you can’t be root easily again 😉
great, well explained and complete! Thx!
any idea on how to prevent the user from deleting it own session?.. since the file owner is the user itself and /var/log/session is with world writable permission?..
This works fine for ssh sessions, but now I can not use scp to transfer files, I was looking for any solution about it, but… nothing until now, do anyone had the same issue? how did you solve it?
Can we include the info about who sshed my server in this thing ?
Pardom Me , If anything is wrong, I am new to Linux.