OpenSUSE Leap 15 is a free and open source operating system that is ideally suited for installing your laptops, desktop and servers for both home and office use. OpenSUSE is considered to be one of the leading linux distros currently available and is also on the oldest distros. OpenSUSE Leap is based on the SUSE Linux Enterprise version, but comes packed with more additional hardware support, modified desktop environment along with useful graphical applications. In this article, we are going to take a look at the new features available in OpenSUSE Leap 15 along with simple step-by-step guide to install OpenSuse Leap 15 in your system with screenshots.
OpenSuse Leap 15 – New Features
- Provides easy migration to SUSE Linux Enterprise (SLE)
- Comes integrated with Groupware Kopano
- File sharing service NextCloud is also available
- The Firewall management tool has been moved from SUSE Firewall2 to Firewalld
- Entirely different look that is much closely lined up with SLE
- GNOME Builder available
- New Updated Kernel 4.12
- Can be used as Virtual Machine(VM) too
- Multiple improvements made in AutoYAST
Minimum System requirements for Installation
- A computer or laptop with 64bit processor (32-bit not supported)
- Minimum 1 GB RAM
- Minimum of 20 GB Hard disk Space
- Resolution of 1024×768 or higher
- Support all major graphics and cards
- USB/DVD or a flash drive
Step by Step Installation Guide for OpenSUSE Leap15
Step 1) Download OpenSuse Leap 15
First step is to download the OpenSuse Leap 15 iso from the link provided below:
https://download.opensuse.org/distribution/leap/15.0/iso/
Step 2) Create a Bootable Disk
Next step is to create a bootable disk to install OpenSUSE Leap 15 in your system. If you already have the OpenSuse Leap 15 Installation DVD, it is well and good. If not copy the ISO you have downloaded into the USB/Flash drive and create a bootable disk. Change the boot sequence to allow the system to start using the bootable UDB/DVD/Flash drive
Step 3) Choose Installation option
Once you boot using the USB/DVD, you can see the initial installation screen, please select “Installation” to continue with the installation

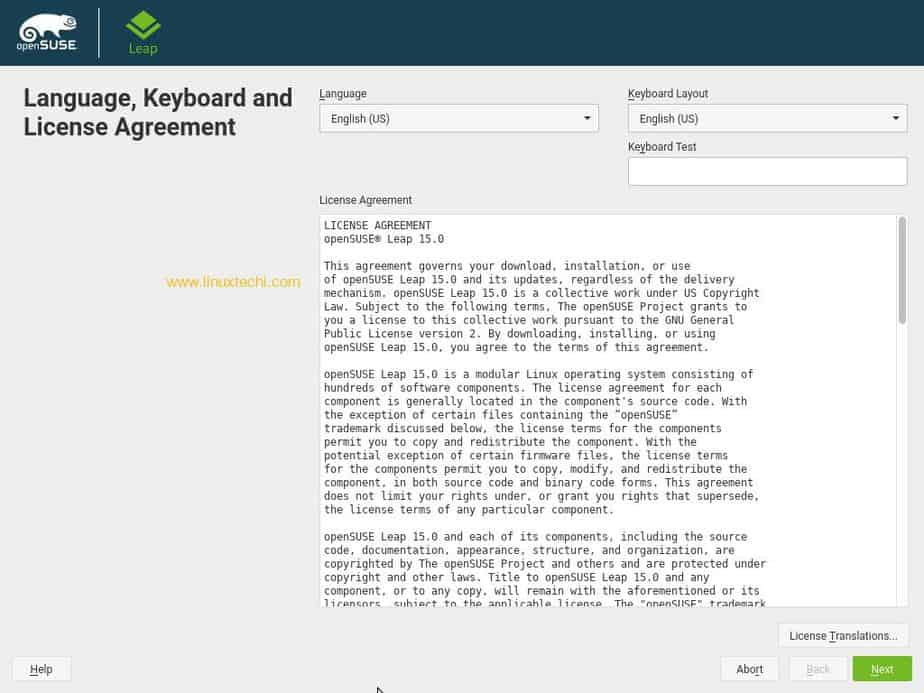
Step 4) Language. Keyboard and License Agreement
In the next screen, select your language, keyboard layout and you can see the license agreement displayed below. Click on “Next” to continue
Step 5) Select desktop Environment
Next screen allows you to choose your desktop environment, I will select my favorite GNOME Desktop. In that screen, you also allowed to configure your online repositories.

Click “Configure Online Repositories” to choose additional online repositories. Once you’ve chosen the repositories, click “Next” to continue. You will be returned to the original screen, click “Next” to continue

Step 6) Custom Partitioning Scheme
If you want installer to do automatic partitioning, click Next to continue. Or else if you want to do a manual partitioning, click on “Expert Partitioner” and partition the drives according to your liking. If you are beginner to linux, then better leave it alone and continue or if you are expert level user, then choose Expert Partitioner and create a custom setup.
In my case I am going to create custom or manual partition,
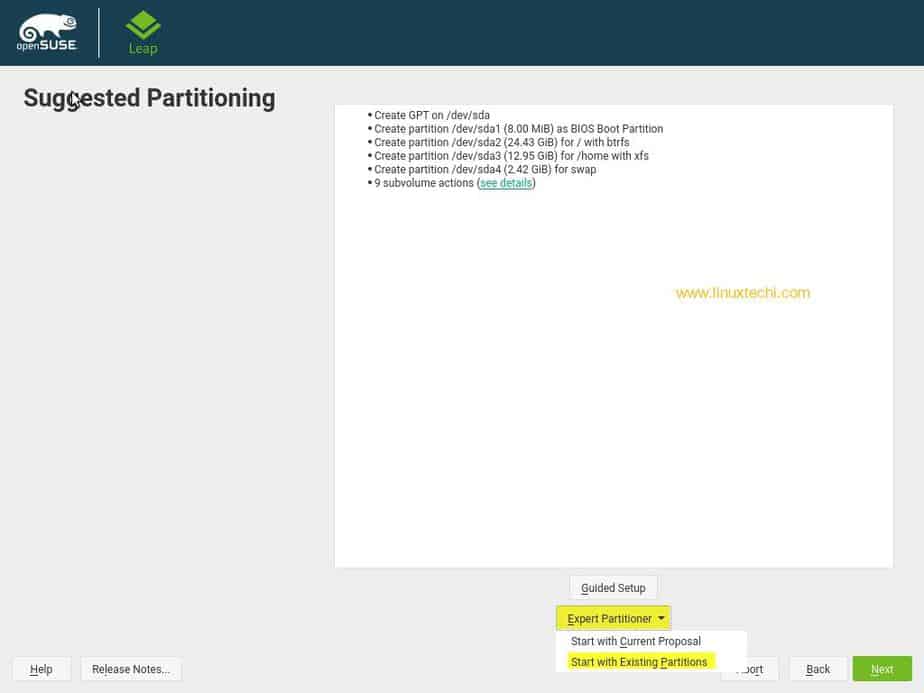
Select Expert Partitioner -> Start with Existing Partitions
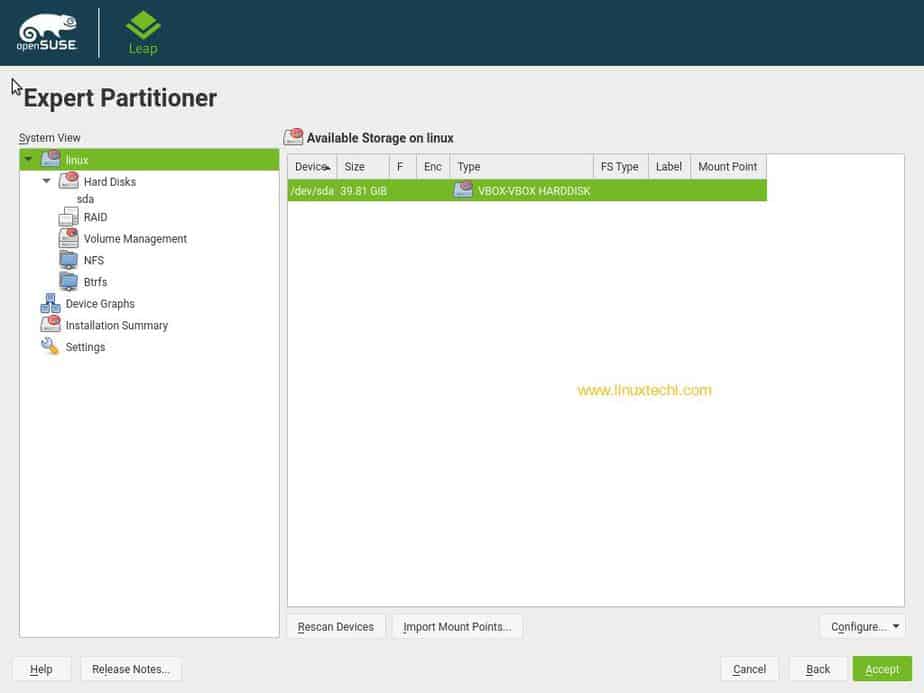
As we can see we have around 40 GB disk space available for openSUSE Leap 15 Installation, so we are going to create following partitions,
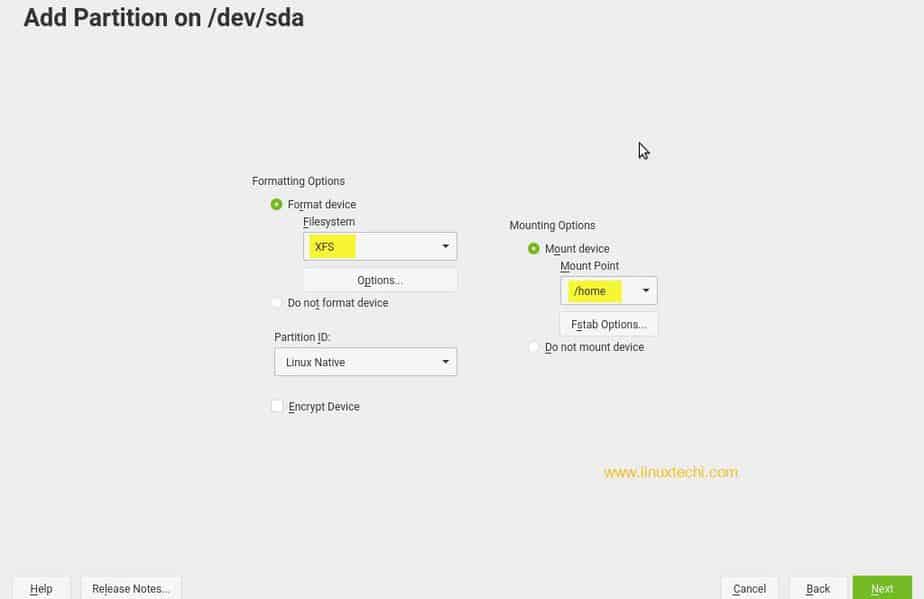
- /boot = 1 GB (xfs file system)
- /home = 18 GB (xfs file system)
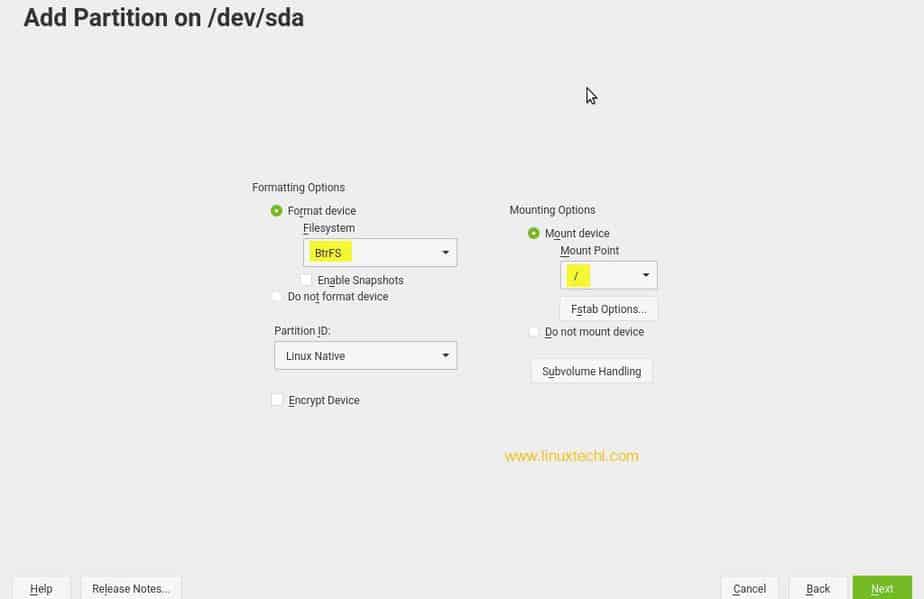
- / = 10 GB (btrfs file system)
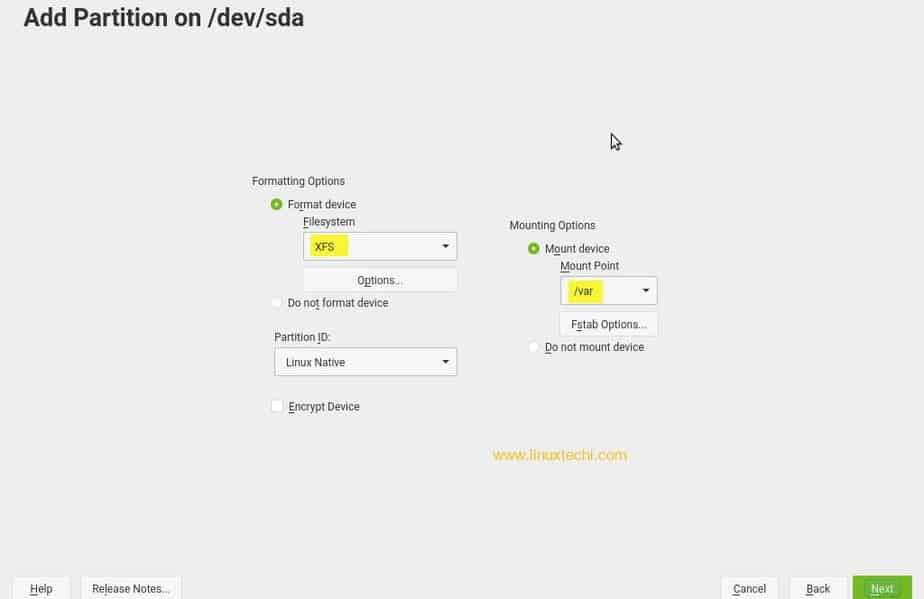
- /var = 8 GB (xfs file system)
- Swap = 2 GB
Select the Hard disk “sda” and then click on Add,
Specify the disk size for partition, so our first partition is /boot, specify partition size as 1 GB
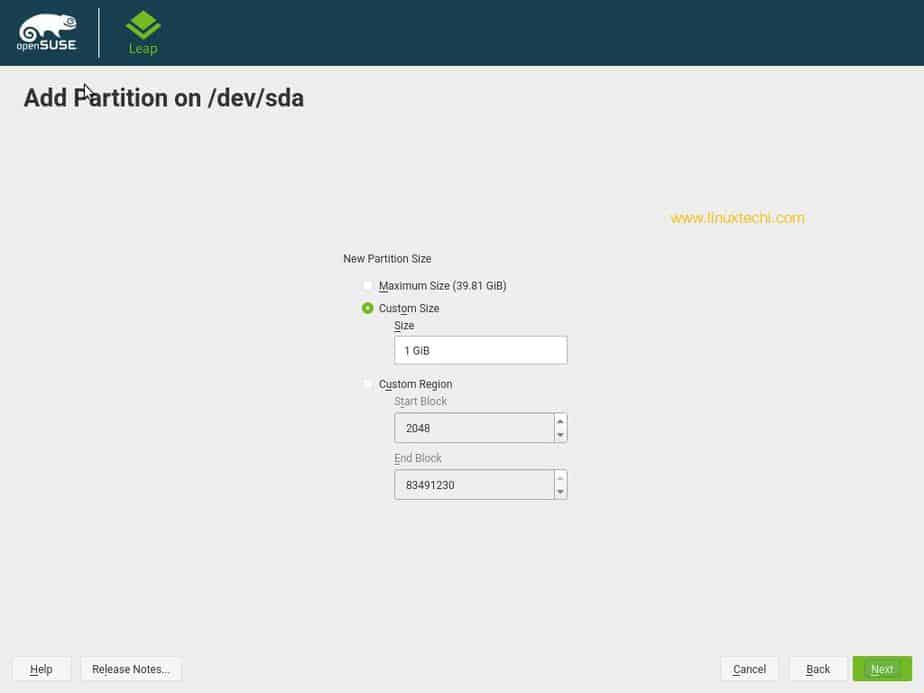
Click on Next, then in the next screen select Role as “Operating System”
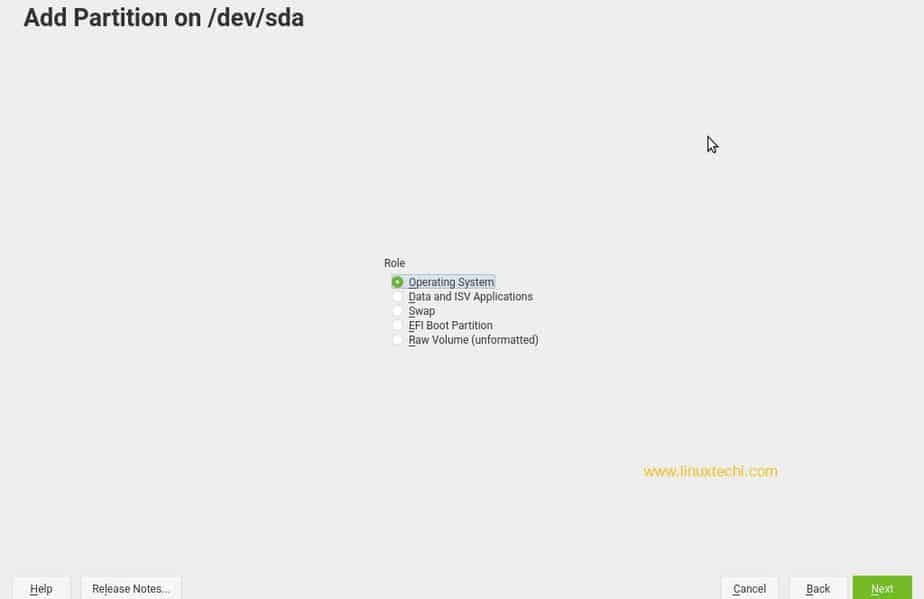
In the next screen, select the partition as /boot and file system type as xfs,

Click on Next.
Now similarly create the /home, / and /var partitions, roles for these partitions will be “Operating System”
now create a swap partition, role for swap partitions should be “swap”

Once you are done with your partitions, your custom partition table should look like something below,
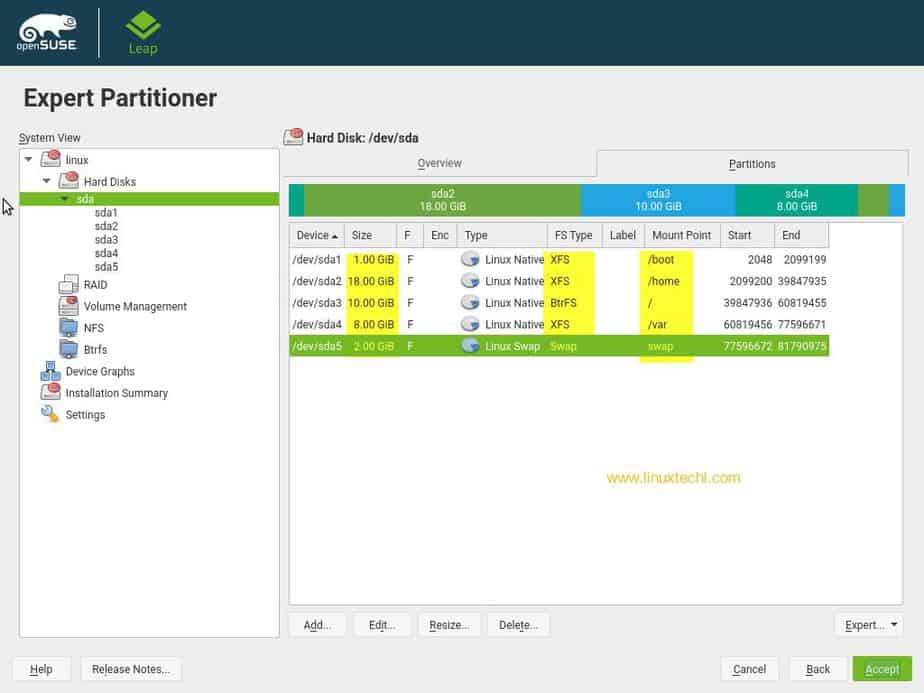
Click on Accept
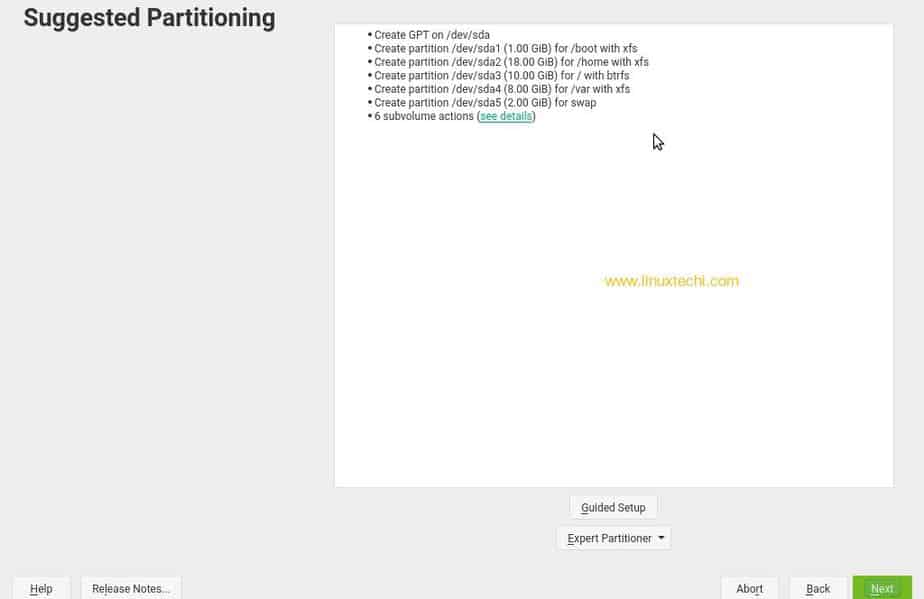
Click on Next to proceed with installation
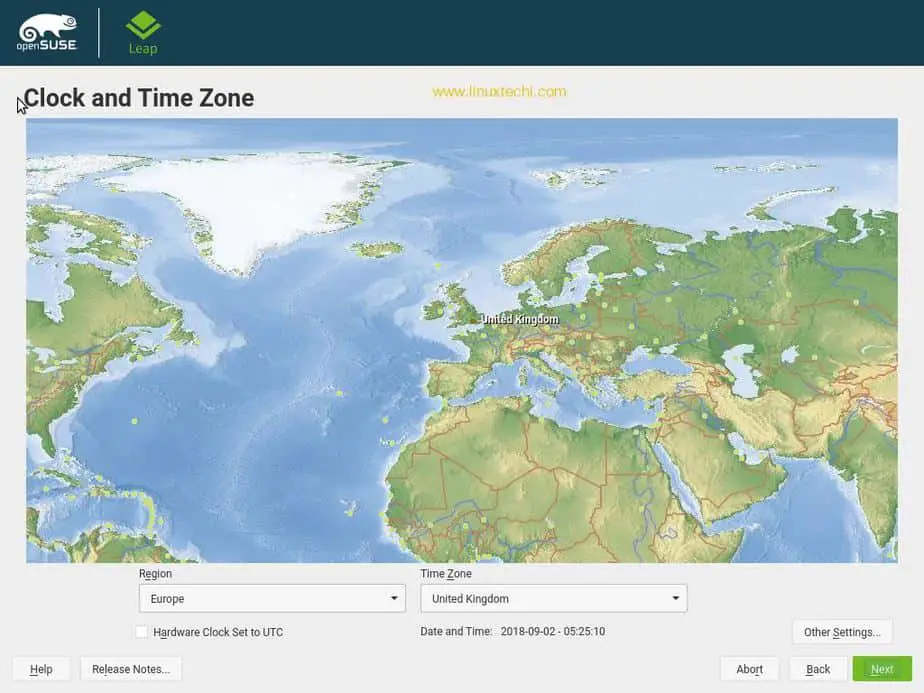
Step 7) Select your timezone and location
choose your preferred time zone and location
Read More on : SUSE Linux – Zypper Command Examples
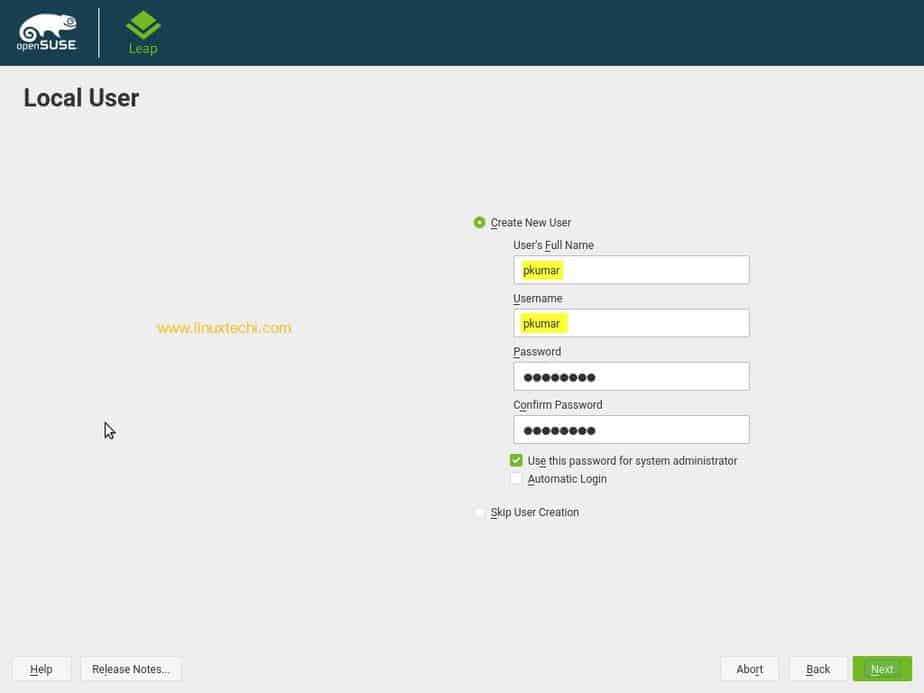
Step 8) Create Your User Name and its Password
Next step is to create your own account for OpenSuse Leap 15. Provide your name, username and password. It is not advisable to check “Automatic Login” and “use this password for system administrator” for security reasons. Click on next to continue
Step 9) Verify and Confirm Installation Settings
The installation settings allows you to review about the current configurations to be installed with the OpenSUSE Leap 15. If you want to change any setting, click the name and you can be allowed to change the settings. Click “Install” to continue
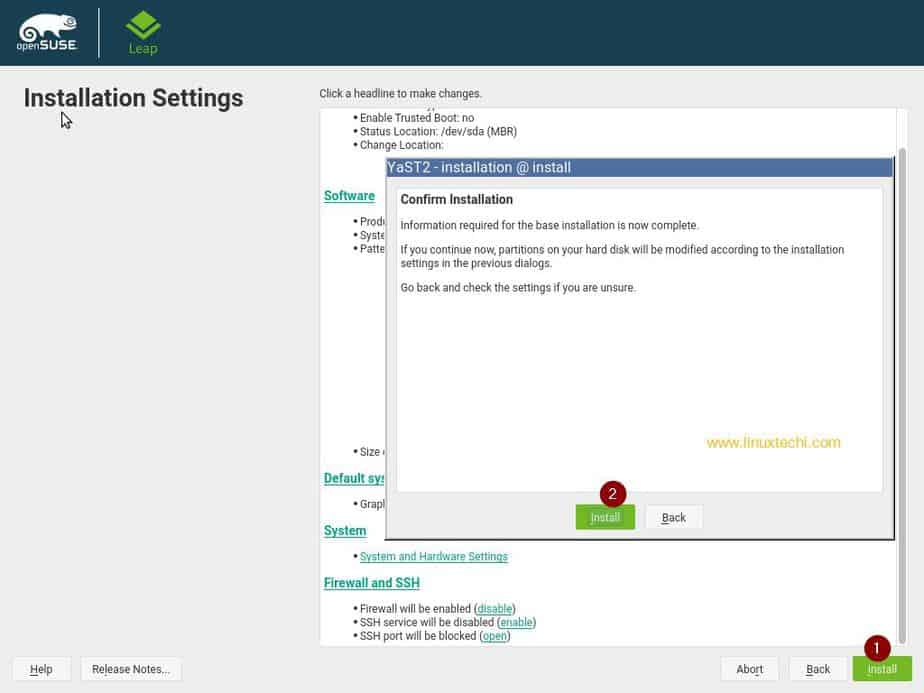
you need to confirm your installation. Click “Install” to proceed with the installation or click “Back” to go back and change any settings.
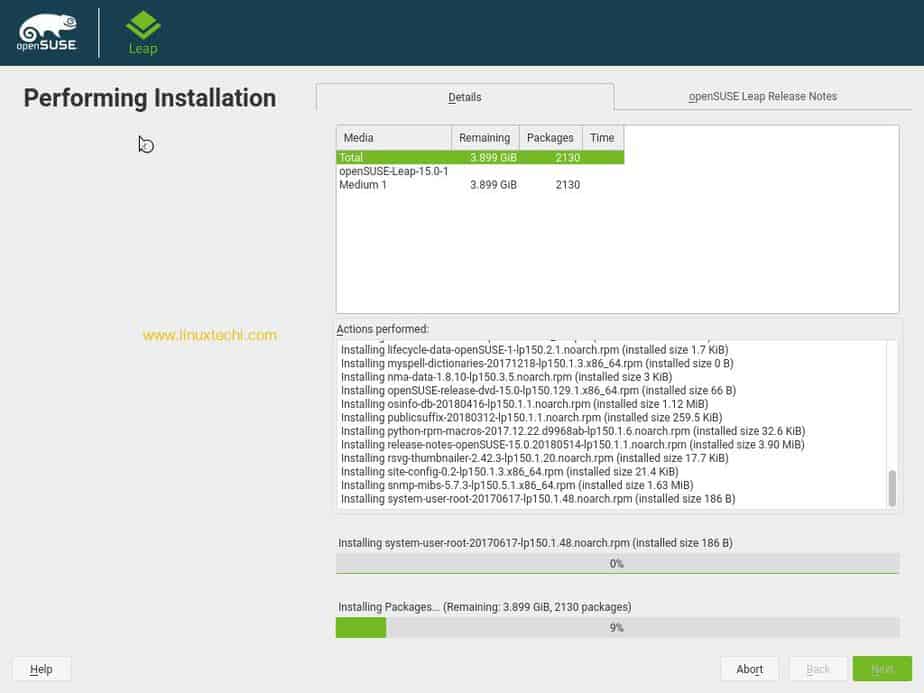
Step 10) Installation Progress
Installation process starts and the progress can be seen in the detail tab. You can also check out some important information of OpenSuse Leap 15 in the OpenSUSE Release Notes tab.
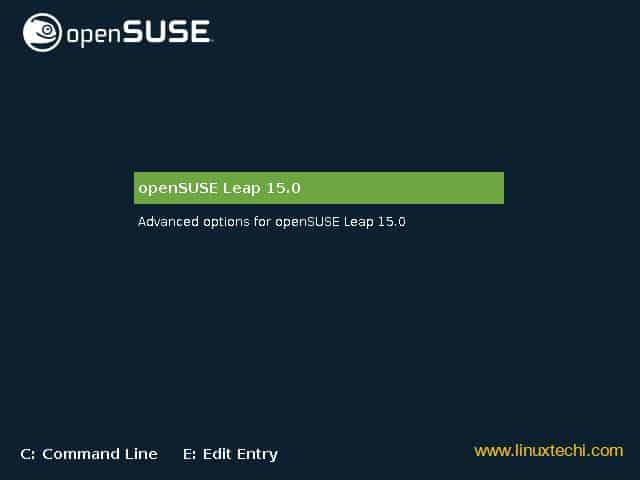
Step 11) OpenSUSE Leap 15 Login Screen and Desktop
Once the installation is completed, Installer will reboot your system,
You will be sent to login screen and once you provide your user credentials, you can see the openSUSE Gnome desktop.
For Login, use the same user name and password that you have created during the installation
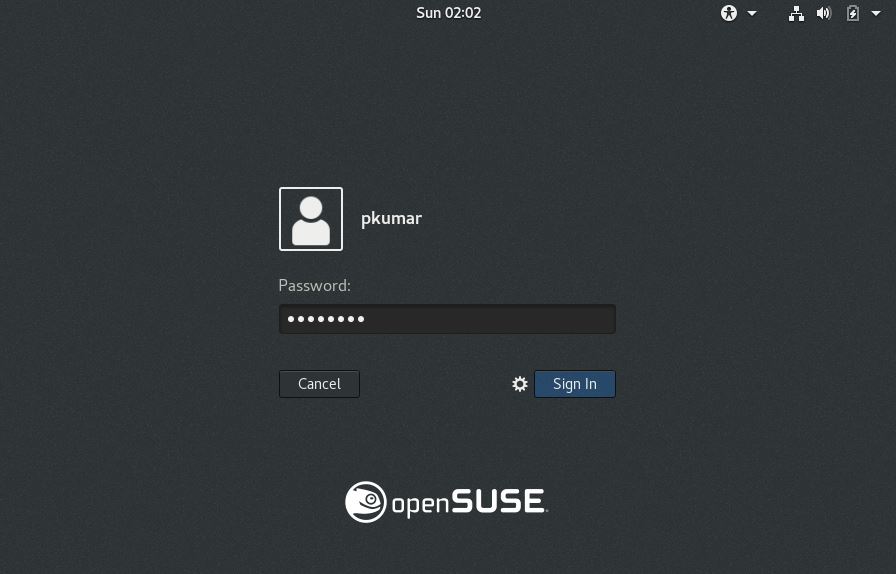
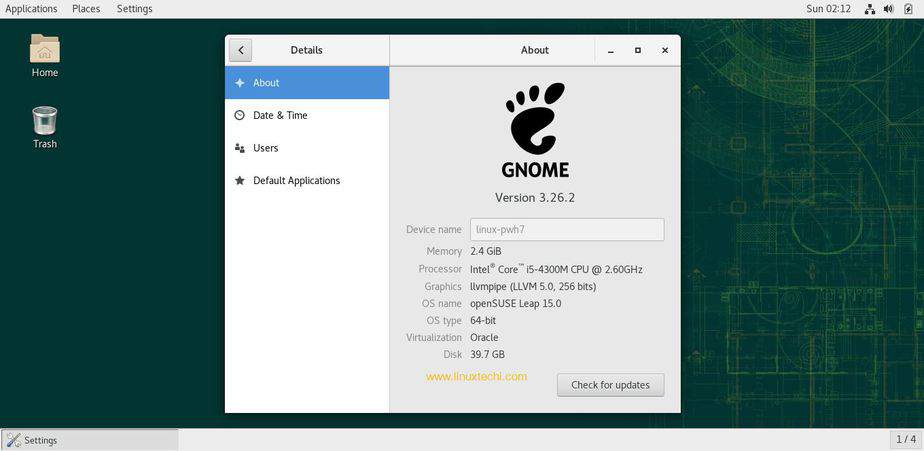
This confirms that openSUSE Leap15 has been installed successfully. Explore it and have fun with this exciting Linux distribution ?
Read More On : How to Install and Configure KVM on OpenSUSE Leap 15