KVM is virtualization module that is loaded inside the Linux kernel and then linux kernel start working as a KVM hypervisor. KVM stands for Kernel based Virtual Machine. Before start installing KVM on any Linux System we have to make sure that our system’s processor supports hardware virtualization extensions like Intel VT or AMD-V.
OpenSUSE is one of the most widely used OS (Operating System) at desktop and server level. In this article we will demonstrate how to Install and configure KVM on OpenSUSE Leap 15.
Lab Details :
- OS : OpenSUSE Leap 15
- Hostname : SUSE-KVM
- IP address (eth0) : 192.168.0.107
- RAM : 4 GB
- CPU = 2
- Disk = 40 GB Free Space ( /var/lib/libvirtd)
Let’s Jump into the Installation and configuration Steps of KVM.
Step:1) Verify Whether Your System’s Processor Support Hardware Virtualization
Open the terminal and execute the below egrep command to verify whether your system’s processor support hardware virtualization or not.
If output of below command is equal to 1 or more than 1 then we can say hardware virtualization is enabled else reboot your system, go to bios settings and enable the hardware virtualization by enabling the Intel VT or AMD virtualization
linuxtechi@SUSE-KVM:~> sudo egrep -c '(vmx|svm)' /proc/cpuinfo
2
linuxtechi@SUSE-KVM:~>
Step:2) Install KVM and its dependencies using Zypper command
Run the below zypper command from the terminal to install KVM and its dependent packages,
linuxtechi@SUSE-KVM:~> sudo zypper -n install patterns-openSUSE-kvm_server patterns-server-kvm_tools
Step:3) Start and enable libvirtd service
linuxtechi@SUSE-KVM:~> sudo systemctl enable libvirtd
Created symlink /etc/systemd/system/multi-user.target.wants/libvirtd.service → /usr/lib/systemd/system/libvirtd.service.
Created symlink /etc/systemd/system/sockets.target.wants/virtlockd.socket → /usr/lib/systemd/system/virtlockd.socket.
Created symlink /etc/systemd/system/sockets.target.wants/virtlogd.socket → /usr/lib/systemd/system/virtlogd.socket.
linuxtechi@SUSE-KVM:~> sudo systemctl restart libvirtd
linuxtechi@SUSE-KVM:~>
Note: If KVM module is not loaded after package installation then run below command to load it,
For Intel based systems
linuxtechi@SUSE-KVM:~> sudo modprobe kvm-intel
For AMD based systems
linuxtechi@SUSE-KVM:~> sudo modprobe kvm-amd
Step:4) Create Bridge and add Interface to it
Let’s create a bride with name Br0 but before make sure bridge-utils package is installed, in case it is not installed then use the below zypper command to install it,
linuxtechi@SUSE-KVM:~> sudo zypper install bridge-utils
Now Start the Yast2 tool,
Yast2 –> Network Settings –> click on Add option

In the next window select the Device type as “Bridge” and Configuration Name as “br0”
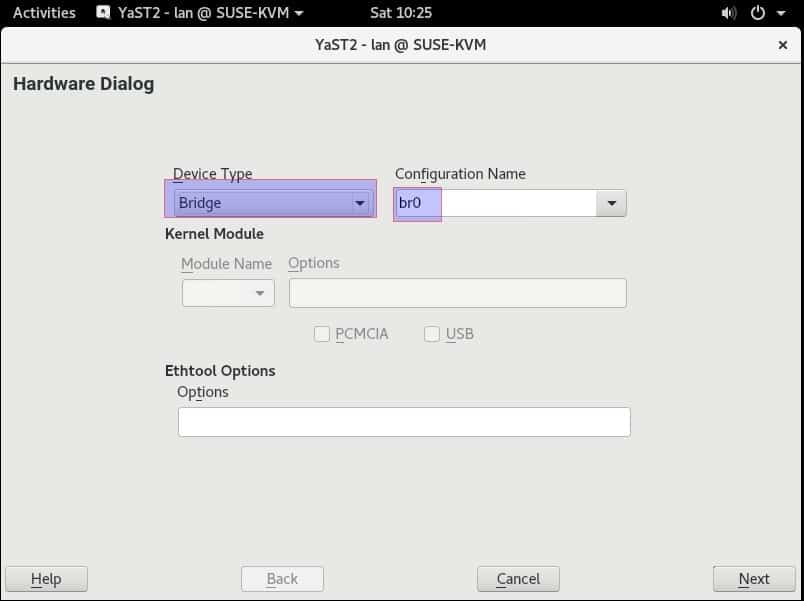
click on Next,
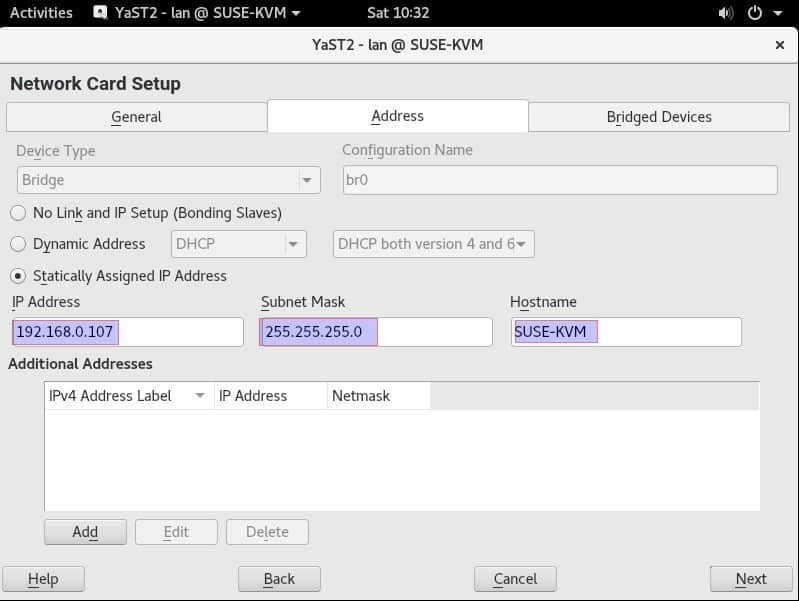
In the Next Window, choose Statically assigned IP Option, Specify the IP address for Bridge, netmask and Hostname, i am assigning the same IP address that were assigned to my LAN Card eth0
Now Select the “Bridged Devices” Option and then select LAN Card that you want to associate with br0, in my case it was eth0
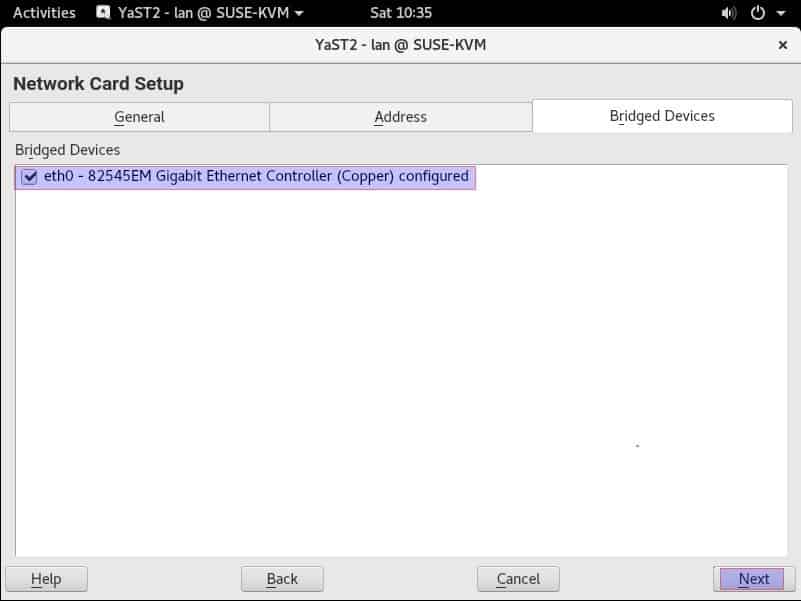
Click on Next to finish the configuration
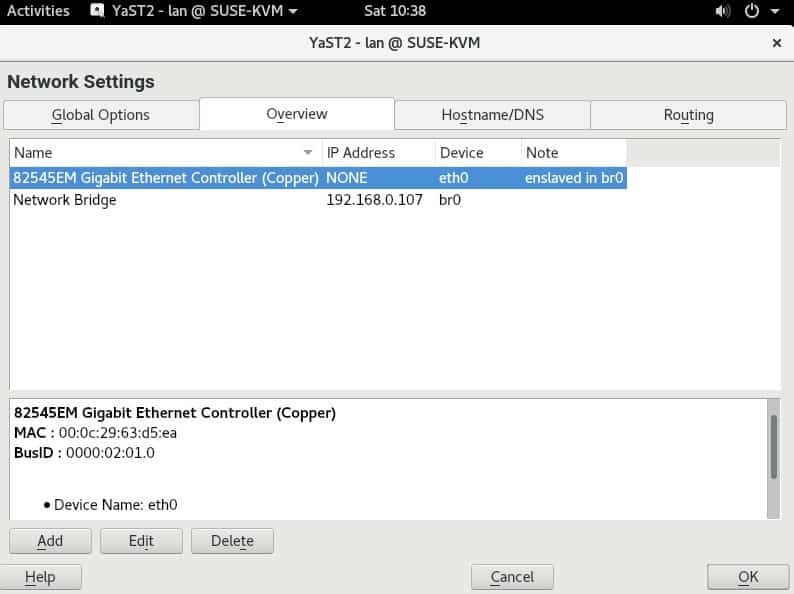
click OK to write device configuration
To verify whether bridge has been created successfully or not, type the below command from the terminal,
linuxtechi@SUSE-KVM:~> ip a s br0
3: br0: <BROADCAST,MULTICAST,UP,LOWER_UP> mtu 1500 qdisc noqueue state UP group default qlen 1000
link/ether 00:0c:29:63:d5:ea brd ff:ff:ff:ff:ff:ff
inet 192.168.0.107/24 brd 192.168.0.255 scope global br0
valid_lft forever preferred_lft forever
inet6 fe80::20c:29ff:fe63:d5ea/64 scope link
valid_lft forever preferred_lft forever
linuxtechi@SUSE-KVM:~>
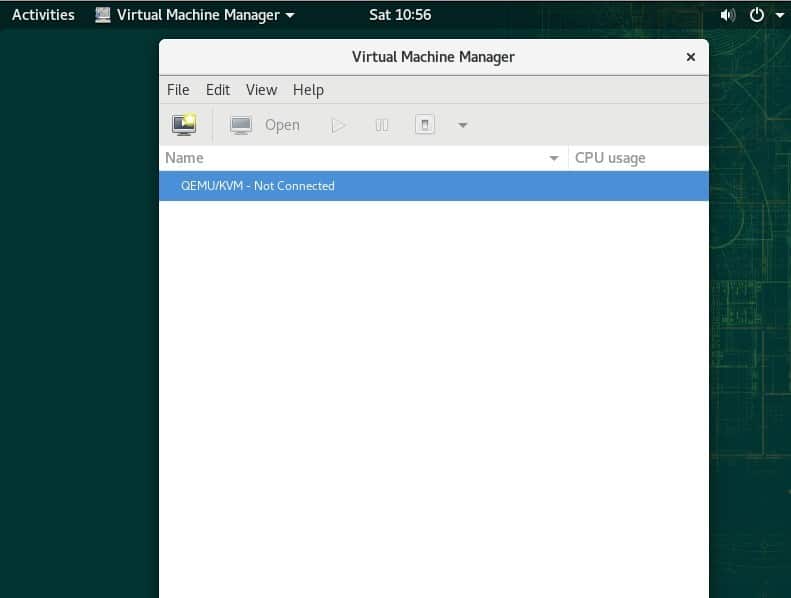
Step:5) Creating Virtual Machine from GUI (Virt-Manager)
Virtual machines can be created by two different ways either from virt-manager GUI or via command line,
To create a VM from virt-manager, Access it from Desktop, example is shown below,
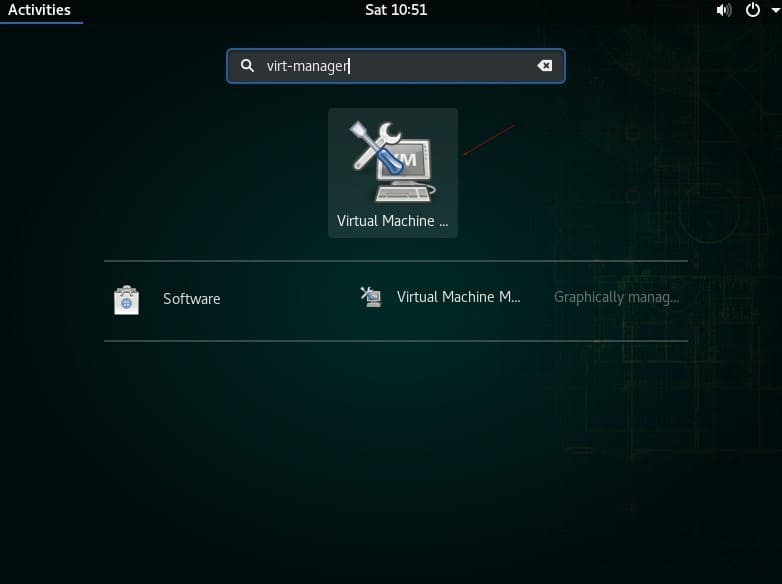
Click on monitor icon to create a new virtual machine
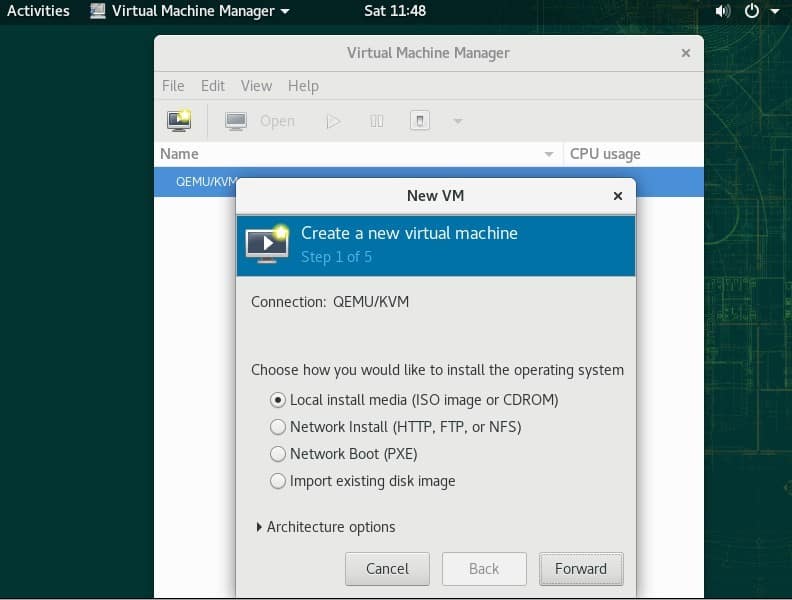
As i am using ISO file to install OS, so i am selecting the first option and then click on forward,
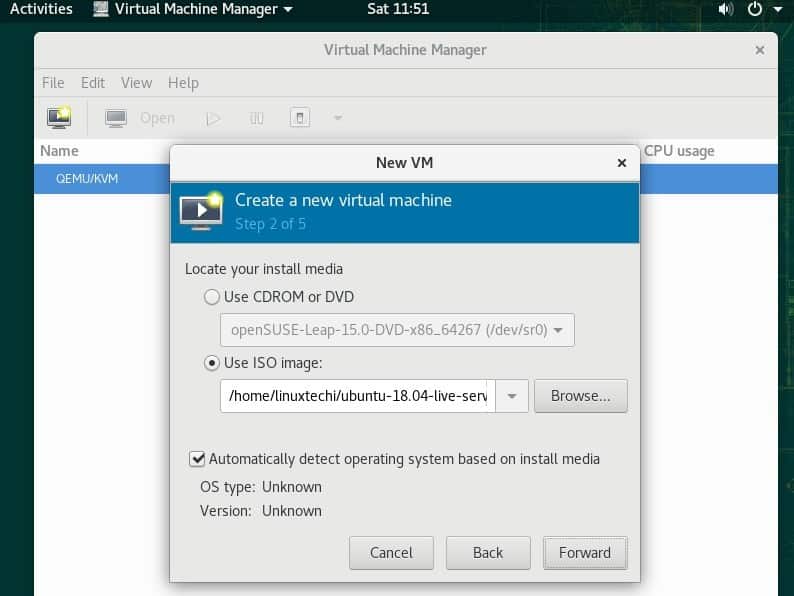
Browse your OS ISO file and then click on forward, in my case i am using Ubuntu 18.04 Server ISO file,
In Next window select RAM and CPU for your VM,
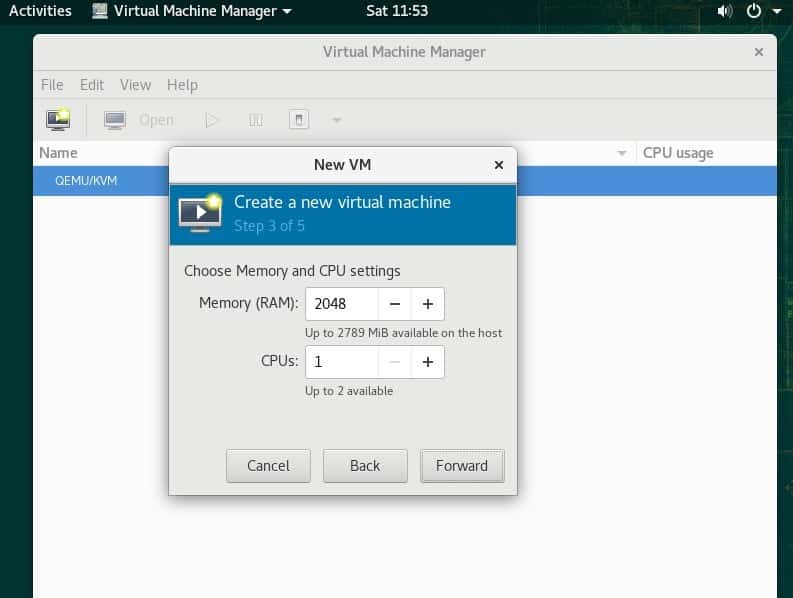
click on forward
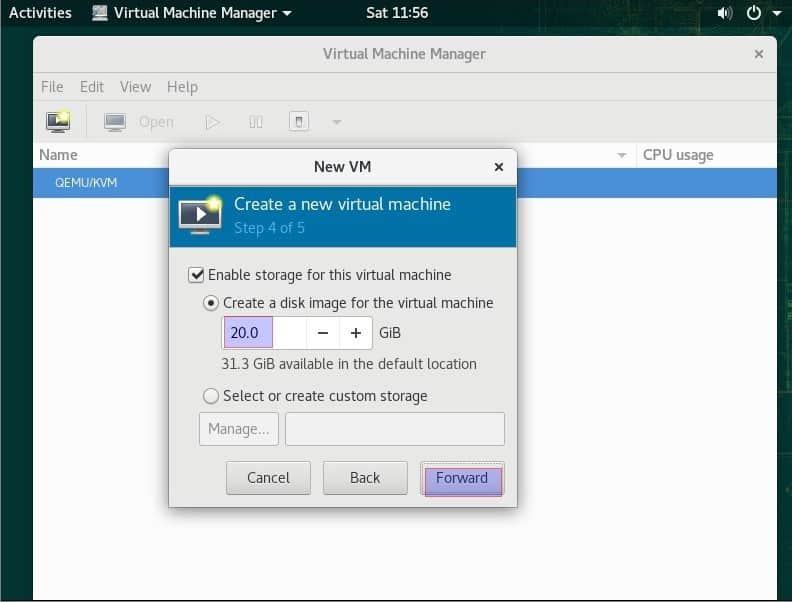
Specify the disk size of your VM, and then click on forward,
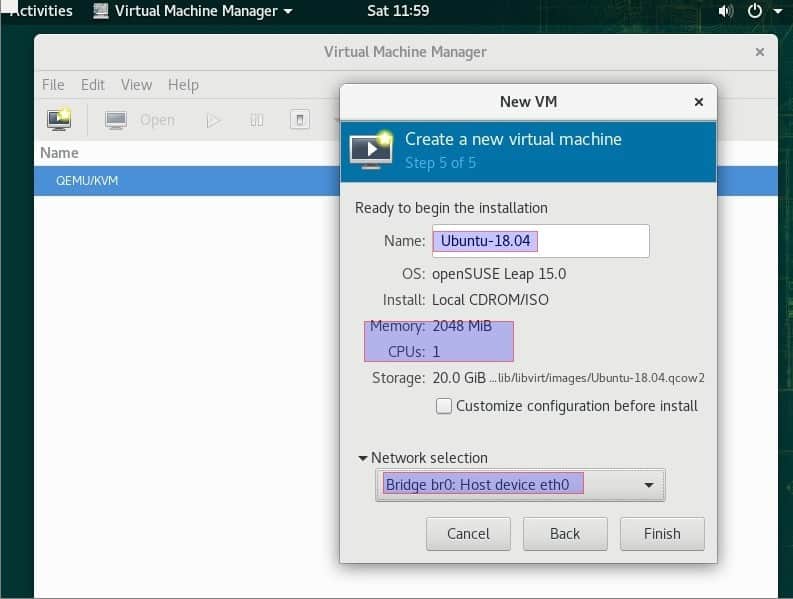
In the next window, Specify the name of your VM and Network and then click on finish
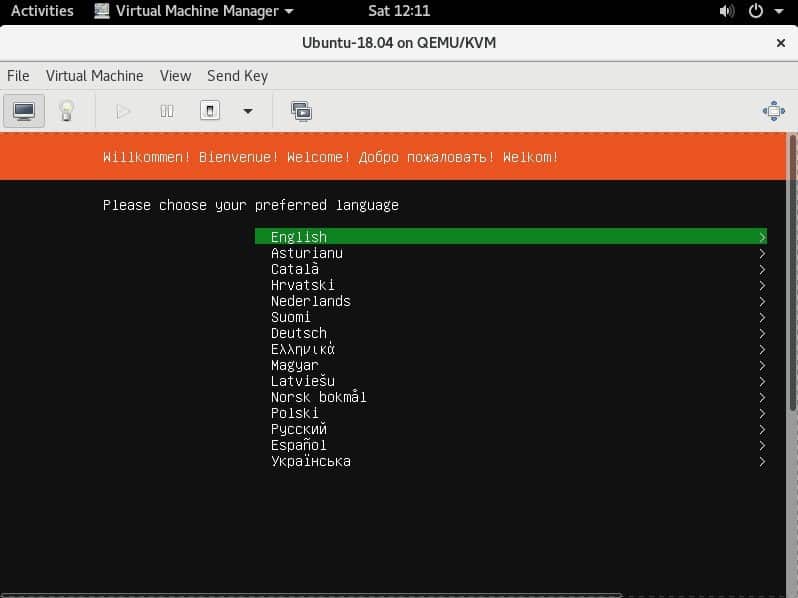
As we can see below the OS Installation process has bee started, please follow the screen instructions to complete the installation,
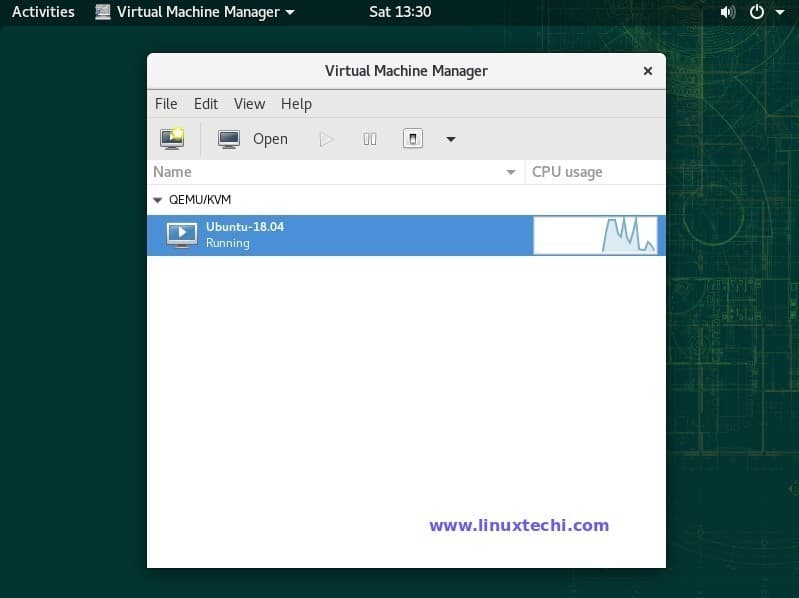
Once the OS installation is completed , your virt-manager would look like below,
This confirms that we have successfully installed and configure KVM on our OpenSUSE Leap 15 system. That’s all from this article, please do share your feedback and comments.
Great tutorial! Easy to follow and more importantly, works.