Good News for Openstack lovers, latest version OpenStack ‘Newton’ has been released on 6th Oct 2016, this is the 14th release of openstack (open source cloud software). Below are the new features that have been noticed in this release :
- Enhanced Scalability : It offers scale-up/scale-down capabilities in Nova, Horizon, and Swift.
- Introduction of Magnum : It provides the container orchestration tools via docker Swarm, Kubernetes and Mesos
- Improvement in bare metal provisioning and it adds multi-tenant networking and integration with magnum.
In this article we are going to install OpenStack ‘Newton’ on three nodes running on CentOS 7 using packstack script. Below is the details of my setup,
- Node1 = controller.example.com (192.168.1.70)
- Node2= compute.example.com (192.168.1.80)
- Node3 = network.example.com (192.168.1.90)
Note: I am assuming Minimal CentOS 7 is installed and hostname is also set as per above specification in all the nodes.
Step:1 Update the Servers using yum command
Update the controller, compute and network node using below yum command and reboot them. Run the below command on all the nodes.
~]# yum update -y ; reboot
Edit the Hosts file on each server and set the below entries in case you don’t your local DNS server.
192.168.1.70 controller.example.com controller
192.168.1.80 compute.example.com compute
192.168.1.90 network.example.com network
Step:2 Stop and disable firewalld & NetworkManager Service
Execute the beneath commands one after the another to stop and disable firewalld and NetworkManager Service on all nodes.
~]# systemctl stop firewalld
~]# systemctl disable firewalld
~]# systemctl stop NetworkManager
~]# systemctl disable NetworkManager
Disable SELinux using below command
~]# setenforce 0 ; sed -i 's/=enforcing/=disabled/g' /etc/sysconfig/selinux
Step:3 Configure passwordless ssh from controller to compute and network node.
Execute the below commands from controller node to configure passwordless ssh from controller to network and compute node.
[root@controller ~]# ssh-keygen
[root@controller ~]# ssh-copy-id [email protected]

[root@controller ~]# ssh-copy-id [email protected]
Verify whether passwordless ssh is working from Controller node or not.
[root@controller ~]# ssh [email protected]
Last login: Sat Oct 8 08:26:46 2016 from controller.example.com
[root@compute ~]#
[[root@controller ~]# ssh [email protected]
Last login: Sat Oct 8 08:27:27 2016 from controller.example.com
[root@network ~]#
Step:4 Set OpenStack Newton Repository and install packstack utility.
Run the below command on controller node to set CentOS 7 Openstack Newton repository.
[root@controller ~]# yum install centos-release-openstack-newton -y
[root@controller ~]# yum update -y
Install Packstack utility on controller node using following yum command
[root@controller ~]# yum install openstack-packstack -y
Step:5 Generate and update Openstack answer file
Execute below packstack command on controller node to generate answer file
[root@controller ~]# packstack --gen-answer-file=/root/newton-answer.txt
[root@controller ~]#
Update the answer file as per your architecture. In my case i have updated the following entries in my newton-answer.txt file.
[root@controller ~]# vi /root/newton-answer.txt
............................
CONFIG_CONTROLLER_HOST=192.168.1.70
CONFIG_COMPUTE_HOSTS=192.168.1.80
CONFIG_NETWORK_HOSTS=192.168.1.90
CONFIG_PROVISION_DEMO=n
CONFIG_CEILOMETER_INSTALL=n
CONFIG_NTP_SERVERS=125.62.193.121
CONFIG_KEYSTONE_ADMIN_PW=<Specify_Password_for_Keystone_Admin>
.............................................................................
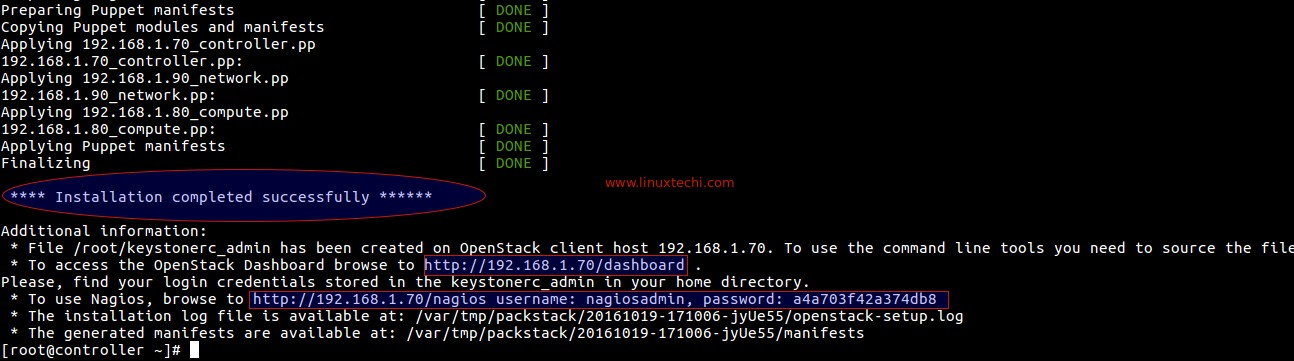
Step:6 Start the newton openstack installation using packstack
Run the beneath command from the controller node to start the openstack installation
[root@controller ~]# packstack --answer-file=/root/newton-answer.txt
Once the Installation is Completed Successfully , we will get below message.
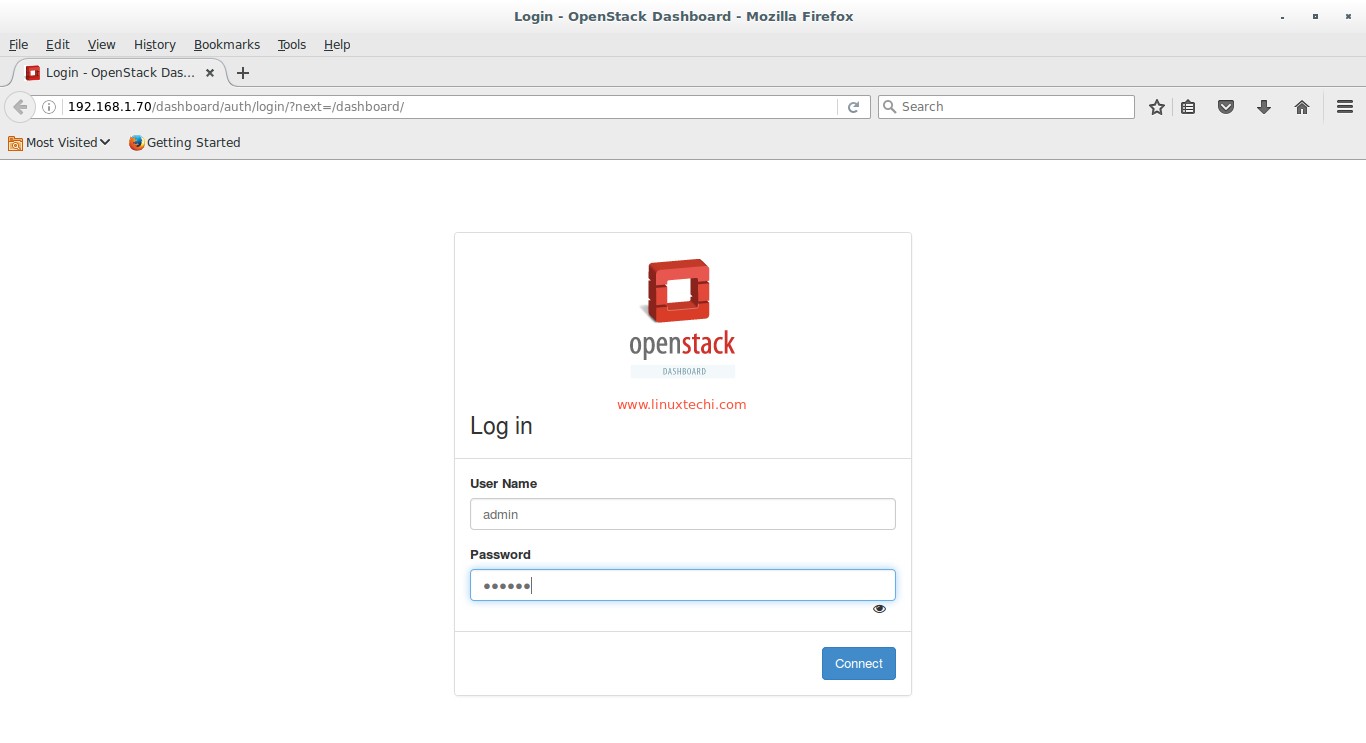
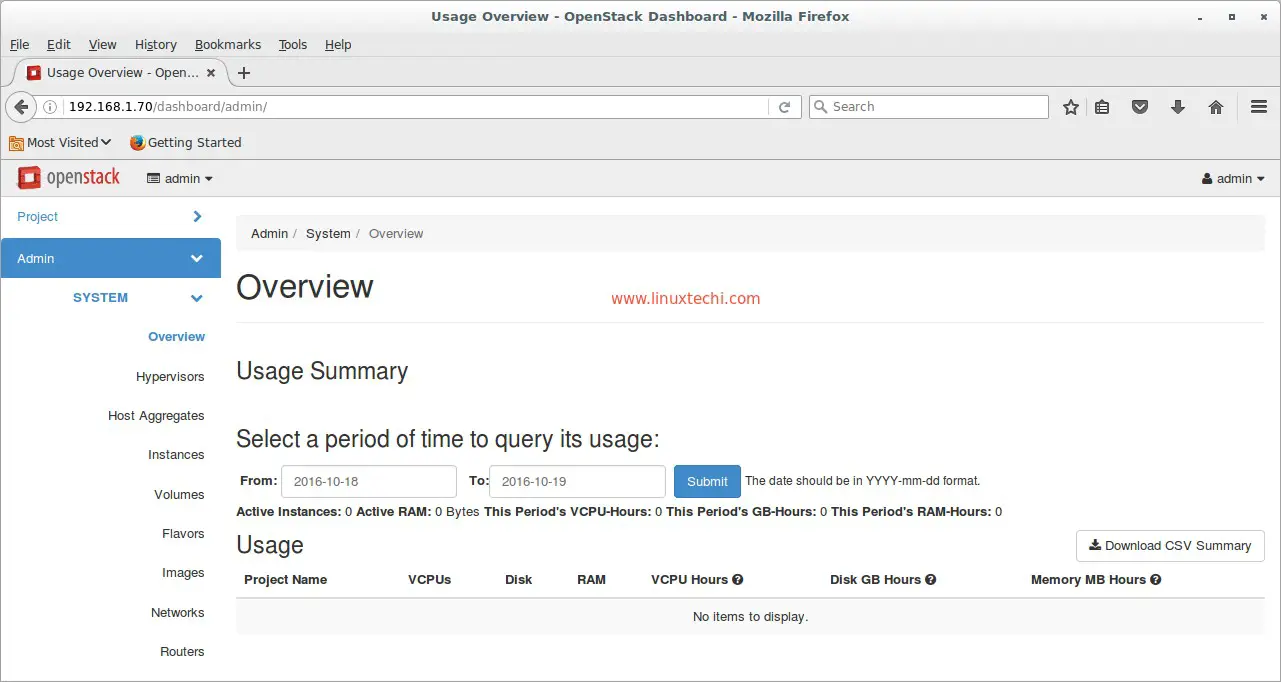
Step:7 Login to Newton Horizon Dashboard
When the installation is completed successfully then Dashboard URL is provided on the Screen as shown in above screenshot. So in my case Dashboard url is “http://192.168.1.70/dashboard” , Use the user name as admin and the password which we specify in the answer file under the “CONFIG_KEYSTONE_ADMIN_PW” parameter.
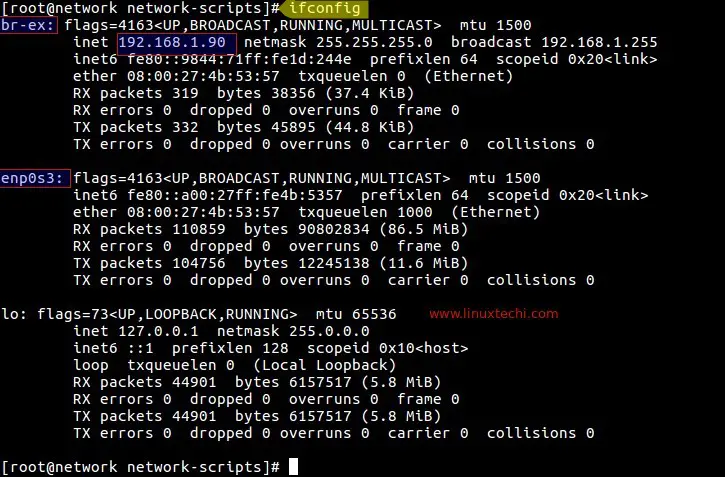
Step:8 Do the network Configuration on Network Node
When the openstack installation is completed bridge (br-ex) interface will be created on network node. Add interface (enp0s3 or ethx) in bride br-ex as a port and assign the ip address of enp0s3 or ethx to br-ex . To accomplish this do the below mentioned steps on the network node.
[root@network ~]# cd /etc/sysconfig/network-scripts/

[root@network network-scripts]# cp ifcfg-enp0s3 ifcfg-br-ex

[root@network network-scripts]# vi ifcfg-enp0s3
DEVICE=enp0s3
HWADDR=08:00:27:4b:53:57
TYPE=OVSPort
DEVICETYPE=ovs
OVS_BRIDGE=br-ex
ONBOOT=yes
Save & exit the file
[root@network network-scripts]# vi ifcfg-br-ex
DEVICE=br-ex
DEVICETYPE=ovs
TYPE=OVSBridge
BOOTPROTO=static
IPADDR=192.168.1.90
NETMASK=255.255.255.0
GATEWAY=192.168.1.1
ONBOOT=yes
Save &exit the file
Restart the network Service to take the above changes into the effect.
[root@network network-scripts]# systemctl restart network
[root@network network-scripts]#
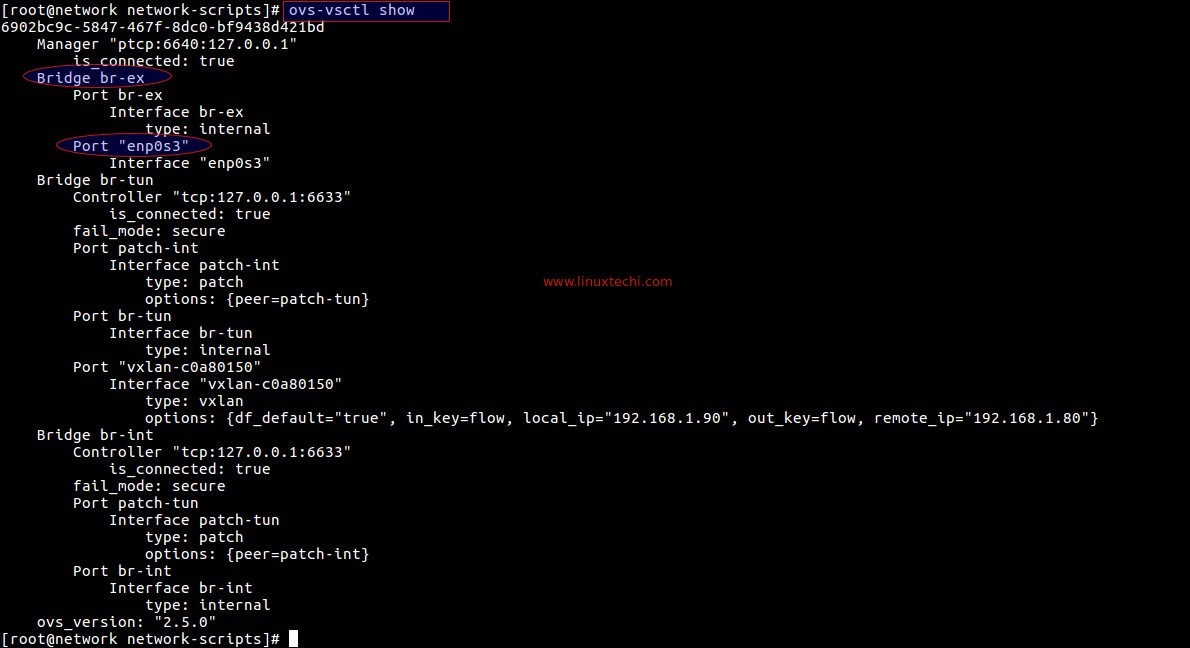
Now Verify whether the IP address of enp0s3 is assigned to br-ex using ifconfig command
Also verify whether a port has been added in OVS bridge interface br-ex using ovs-vsctl command.
[root@network network-scripts]# ovs-vsctl show
That’s all Basic installation of Openstack Newton is completed Now. Next step is create projects, users, network and flavors and upload cloud images and then start launching the VM instances using cloud images.
Red More : How to Install Tripleo(Openstack on Openstack) UnderCloud on CentOS 7
Red More : How to deploy TripleO Overcloud (Controller , Compute) on CentOS 7 VMs
Hi ,
Do you have a guide for multiple node openstack with high availability for CentOS?
Whats your email?
Regards,
Melborn De Chavez
Hi Melborn,
As of now we have not published above requested article, but shortly we will published it
Awesome, appreciate if you could also include the environment’s diagram.
The usual samples I’m seeing now is minimal just for installation, I’m also looking for production grade setup and configuration.
So far your guide is the most user friendly.
Do you have this setup with high availability?
Appreciate if you could share.
Hi ,
Its me again.
Requesting for demo using undercloud and overcloud openstack with high availability
Regards,
Melborn
Hi, Thanks for the excellent guide.
I want to deploy the OpenStack on 2 nodes…
Following the above guide, can I merge controller and network node on a single server and proceed with the installation.
Also before starting with the above guide, are there any per-requisites such as installing openvswitch or kvm or ntp or any other services on the nodes or packstack will do everything it needs…
I am trying installation on 2 node setup following the above guide (controller and network as one node and compute as another). Getting below error:
Error: Command: ‘openstack [“flavor”, “set”, [“m1.small”, “–project”, “”]]’ has been running for more than 40 seconds (tried 4, for a total of 170 seconds)
Kindly guide if I am doing anything wrong.
i was getting same error.. Simple fix was to increase the controller’s cpu resources such as ram and cpu etc..it worked for me.