Hello Geeks, recently brand-new arch based Linux distribution Manjaro 21 has been released, its code name is ‘Ornara’. It comes with lot of improvements and features specially Linux Kernel 5.10 LTS. Manjaro 21 supports three different desktop environments like XFCE , KDE and GNOME. In this article we will cover Manjaro 21 (KDE Edition) installation steps with screenshots.
System Requirements for Manajro 21
- At least 1GB RAM or more
- One GHz or higher processor
- At least free 30 GB hard disk
- Stable Internet Connection
- Bootable Media (USB / DVD)
Let’s dive into the Installation steps of Manjaro 21
Step 1) Download Manjaro 21 KDE Edition ISO file
Download Manjaro 21 KDE Edition ISO file from its official portal, Once the file is downloaded then burn it on USB (pen drive) or DVD and make the device bootable. In case, if you have downloaded ISO file on Windows system then you can ‘Rufus’ software to make bootable USB drive.
In Linux refer below for creating bootable USB drive,
Step 2) Boot System with bootable drive
Once you have created bootable drive for Manjaro 21 then reboot your target system, go to its BIOS settings, and change the boot medium from hard disk to USB drive.
Once the system boots up with bootable drive then we will get the following screen,
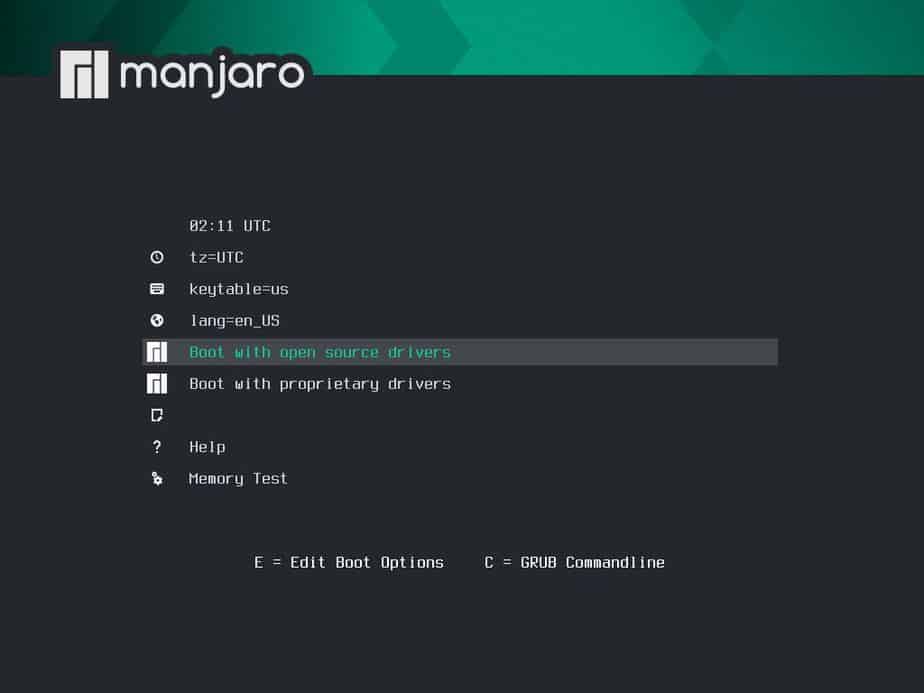
Choose ‘Boot with open source drivers’ option and hit enter.
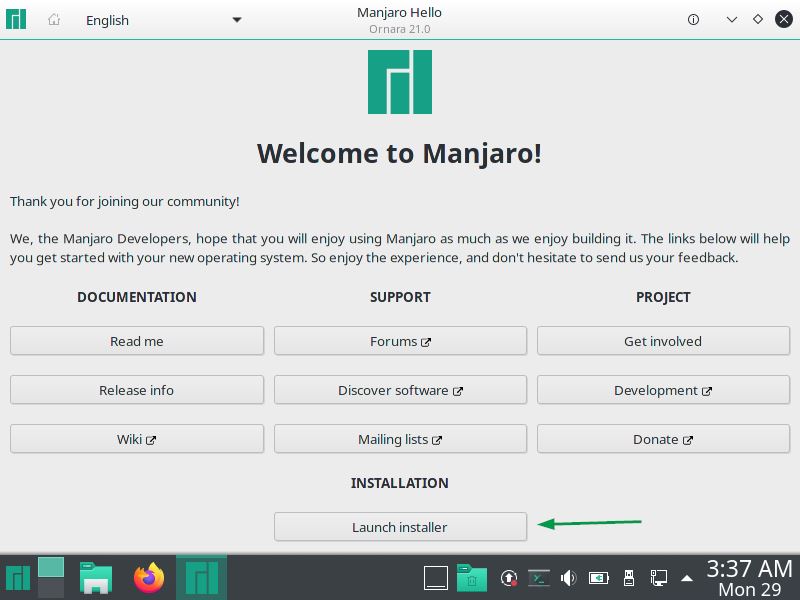
Step 3) Select ‘Launch Installer’
Choose ‘Launch Installer’ to start Manjaro 21 Installation process.
In the next screen, you will be prompted to choose your desired language, so make the selection that suits to your installation.
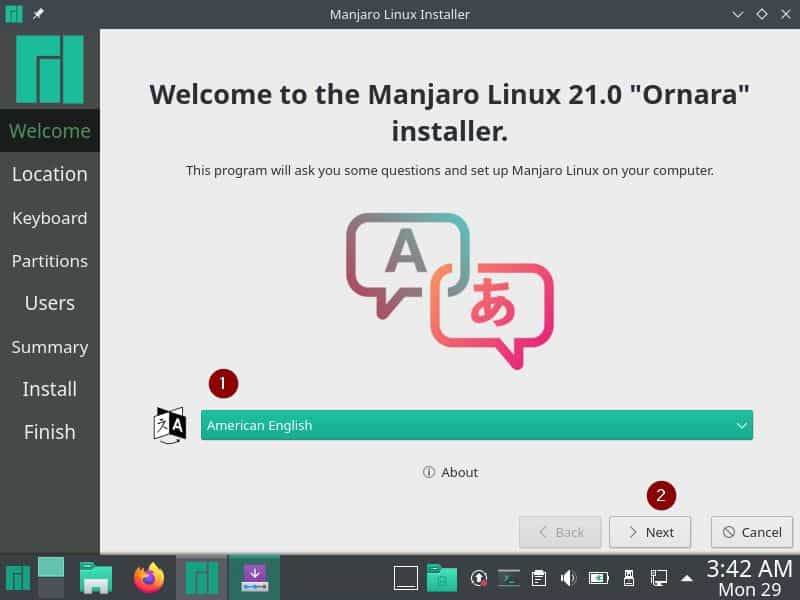
Click on Next.
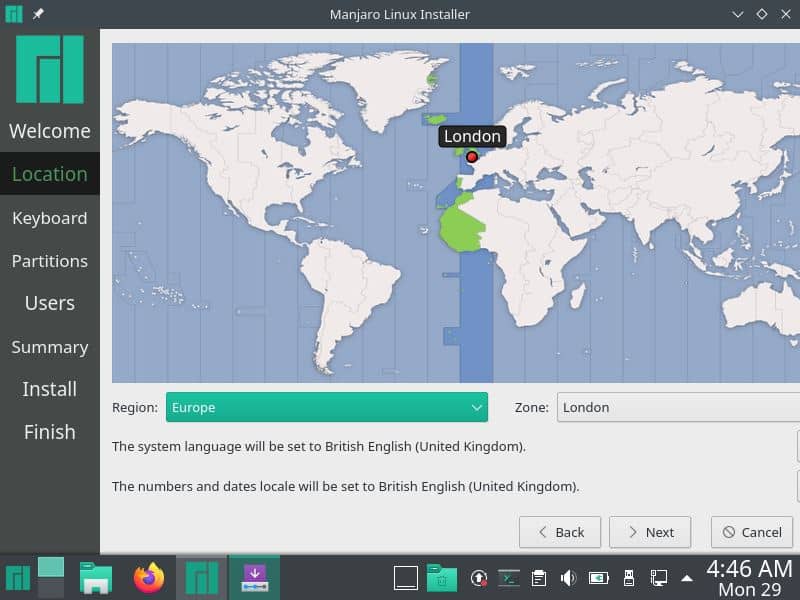
Step 4) Choose your desired location
In this step you will be asked to choose your location and once done click on Next
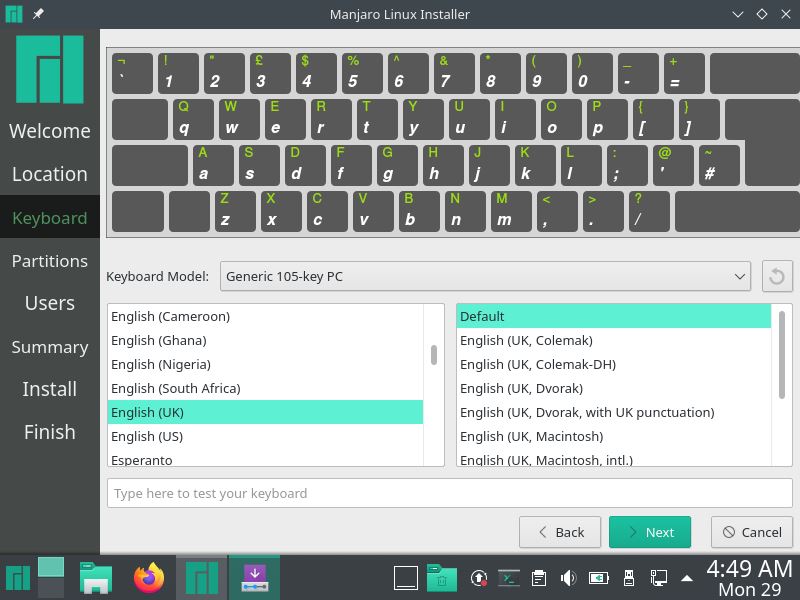
Step 5) Choose Keyboard Layout
Choose your preferred keyboard layout and then click on Next
Step 6) Choose Partitions Scheme
In this step, we will decide how we want to setup partition scheme. As shown below, there are two options either choose ‘Erase Disk’ or ‘Manual Partitioning’.
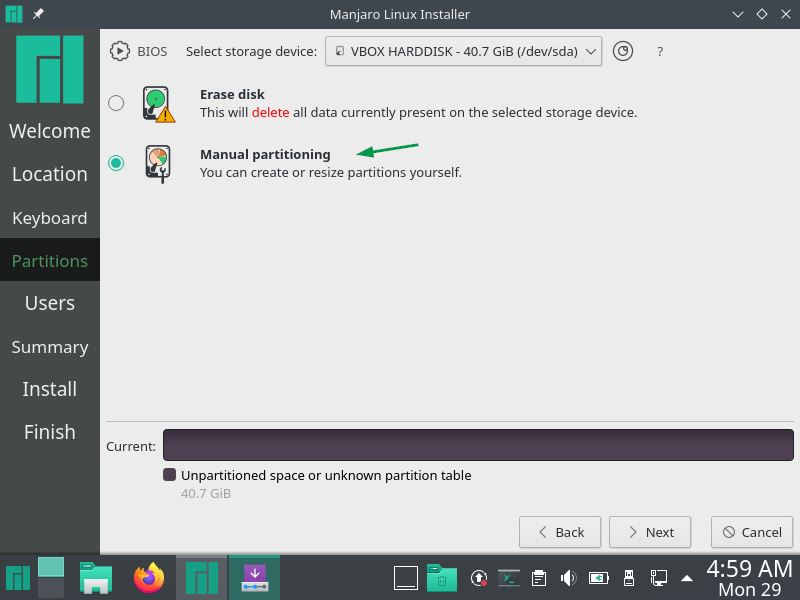
In case, you are new to Manjaro Linux then it is recommended to choose first option ‘Erase Disk’. In this option, installer will automatically create required partitions.
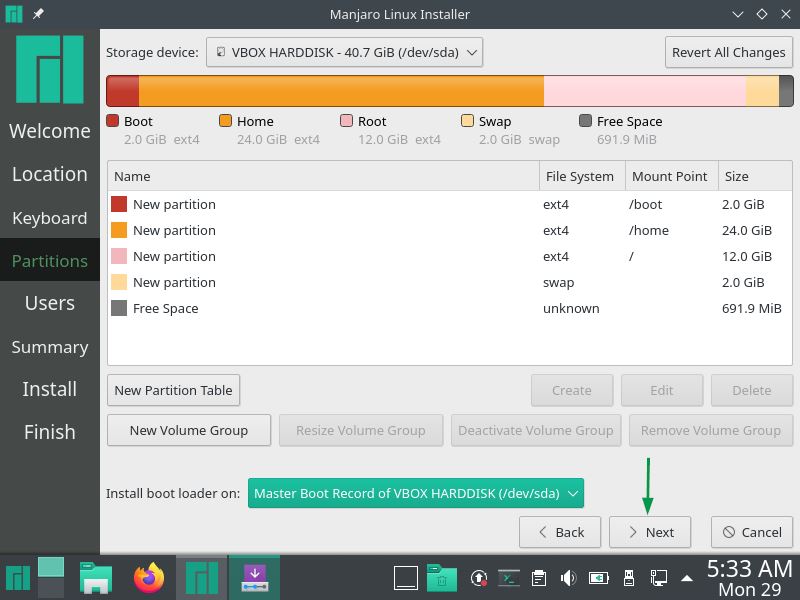
In case you want to create own customized partition scheme then choose ‘Manual Partitioning’ option and then click on Next. In this tutorial, we will go with the second option and will create following partitions manually on 40 GB hard disk.
- /boot – 2 GB (ext4 filesystem)
- /home – 24 GB (ext4 file system)
- / – 12 GB (ext4 file system)
- Swap – 2GB
When we choose second option and click on Next then we will get the following screen. Create new partition table first, steps are shown in the screenshot image.
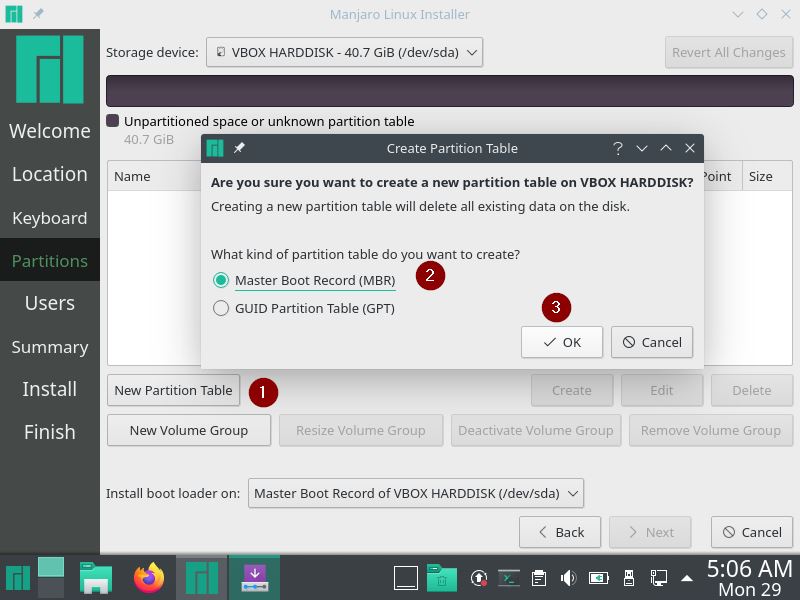
Click on Ok and start creating partitions.
To create our first partition as boot, choose free space first and then click on create. Specify the partition size as 2 GB (or 2048 MiB), file system as ext4 and mount point as /boot.
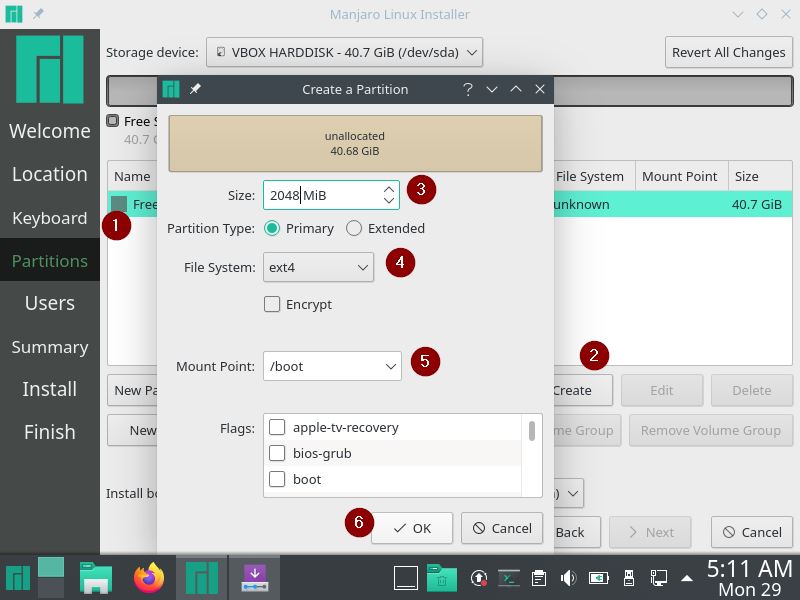
Click on OK
Create /home partition of size 24 GB and format it as ext4 filesystem. Choose Free space –> Click on ‘Create’ and the specify the details as shown below,
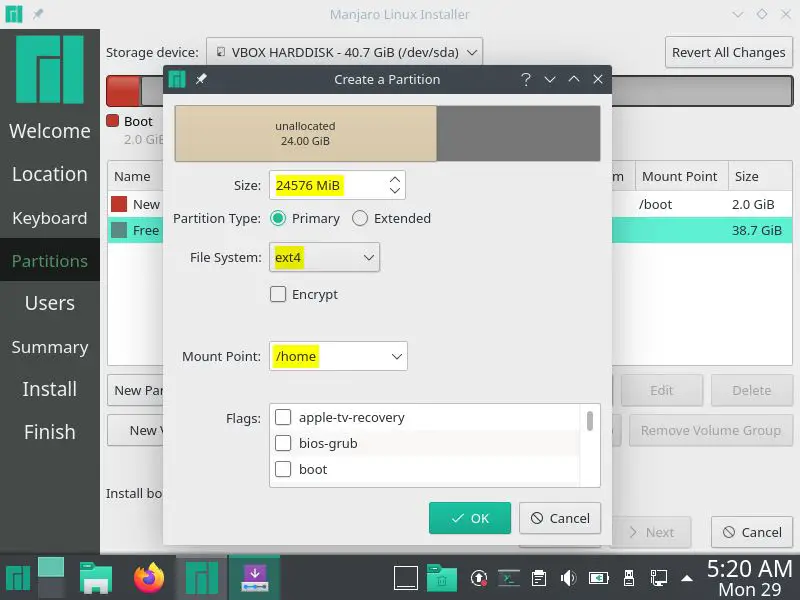
Click on OK.
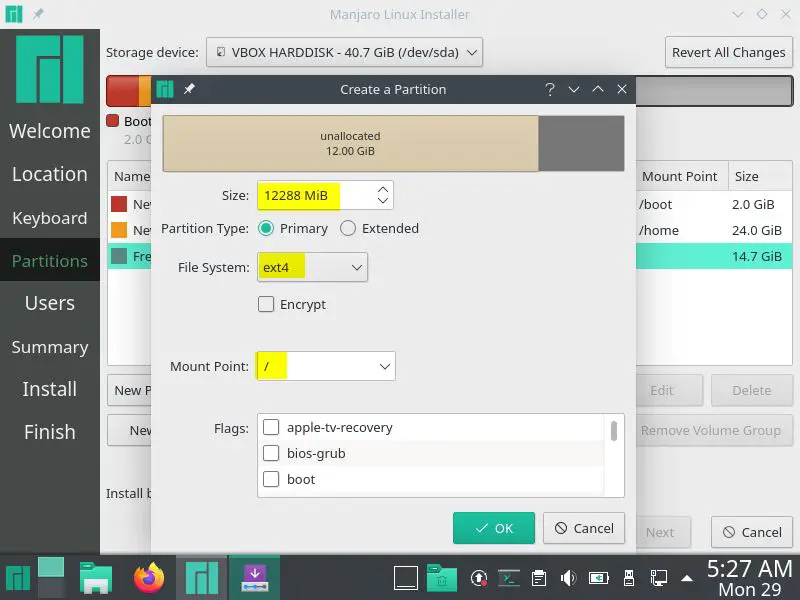
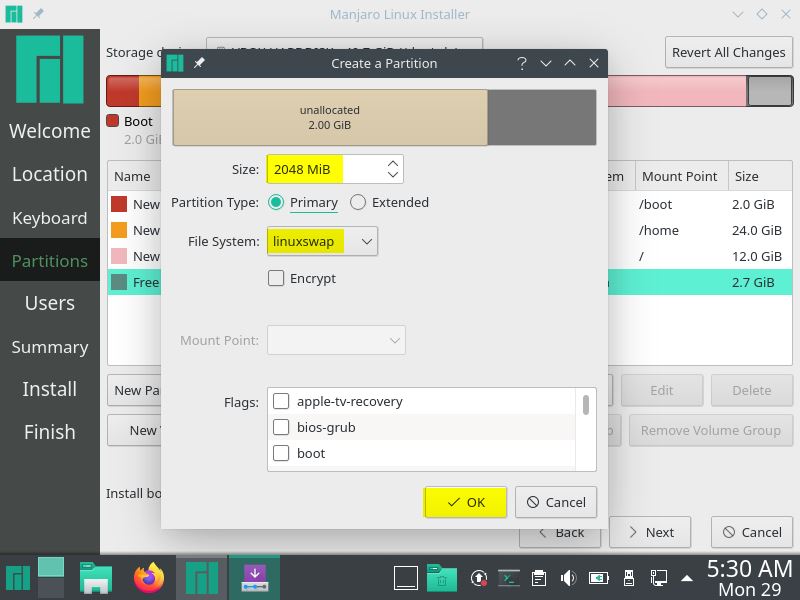
Similarly Create / and swap partitions.
Slash (/) partition of size 12 GB
Swap Partition of size 2 GB
Once you are done with partition scheme, click on Next as shown below
Step 7) Provide Username and Host Name Information
In this step specify the username, its password and hostname.
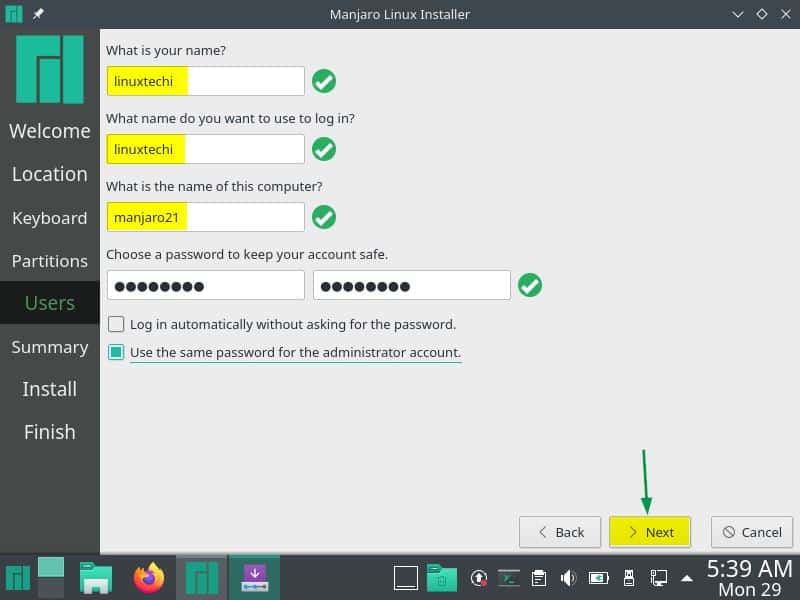
Click on Next to proceed further.
Step 8) Installation Summary
In this step, complete installation summary will be displayed, It will show what exactly will happen to the system once the installation is started.
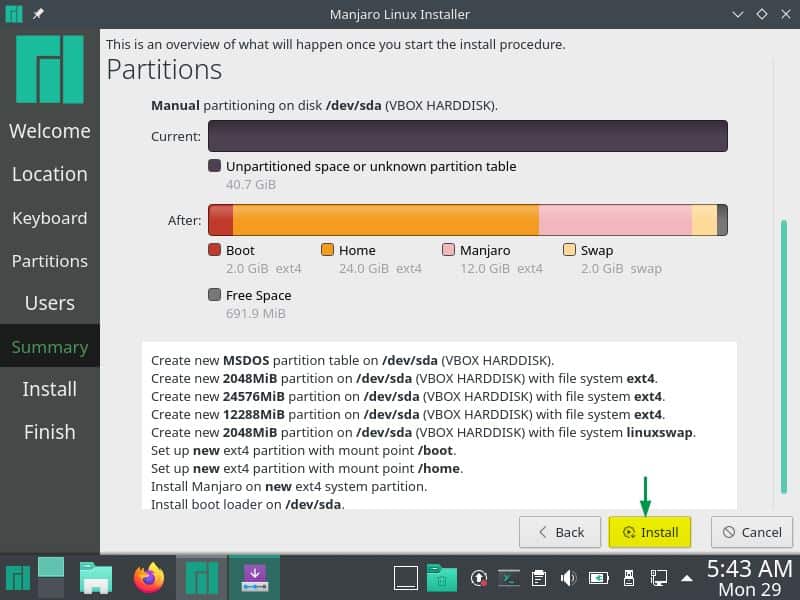
click on ‘Install’ to proceed with installation.
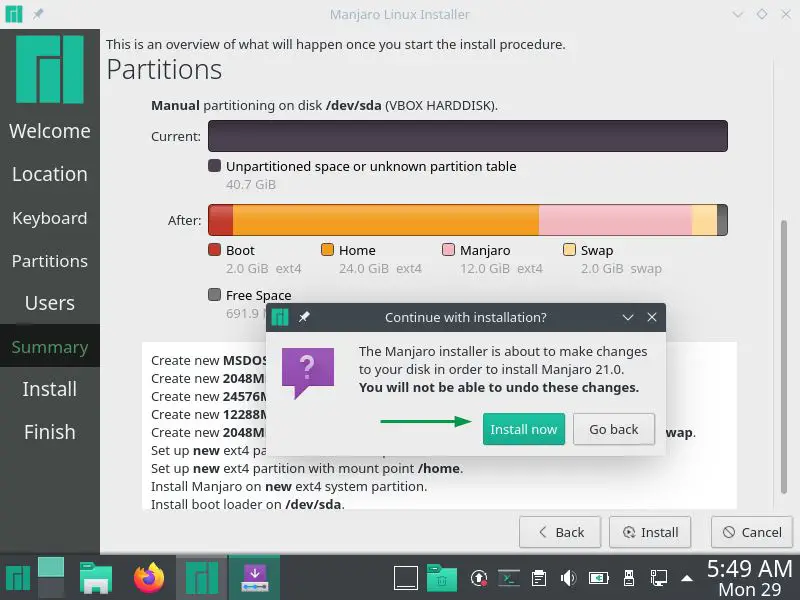
Click on ‘Install Now’ to begin the actual installation
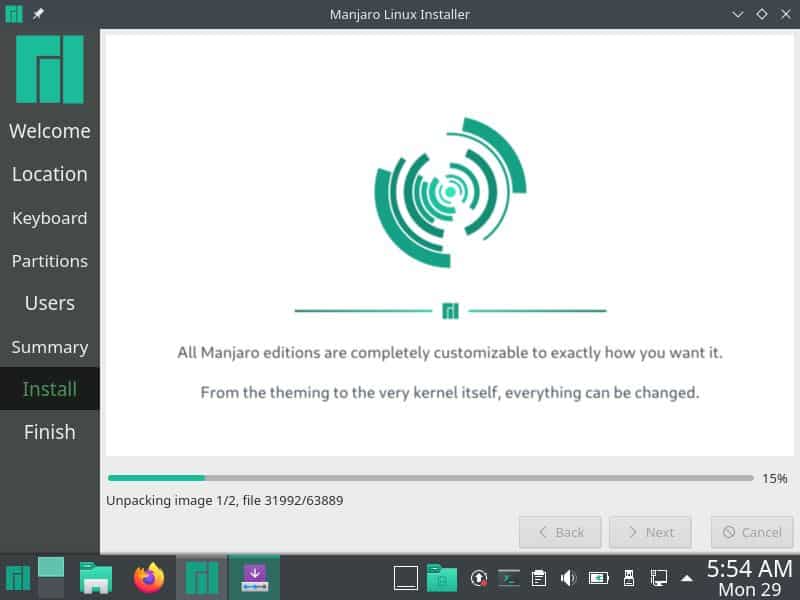
Step 9) Manjaro 21 Installation started and is in progress
As we can see installation has been started and is in progress. Once the installation is completed then installer will prompt to restart the system.
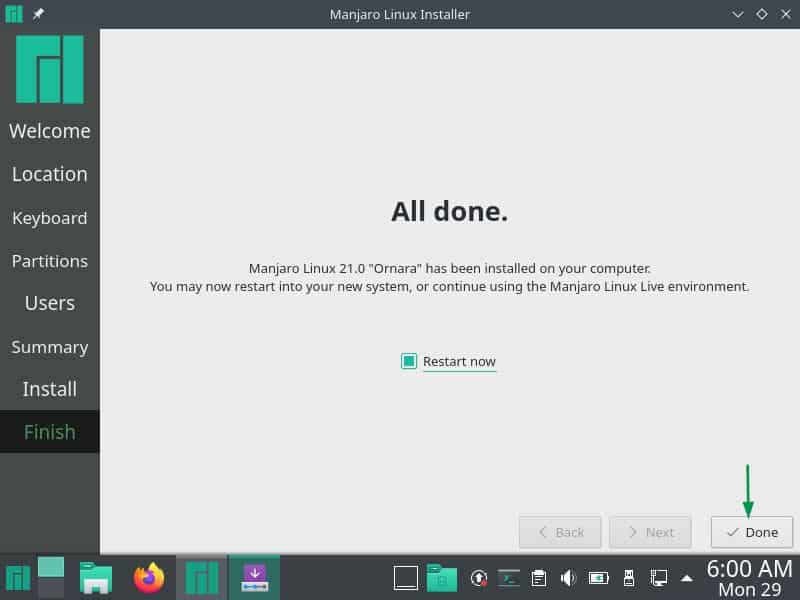
Choose ‘Restart now’ and then click on ‘Done’ to restart the system.
Note: Don’t forget to change boot medium from USB to hard disk from Bios settings after installation.
Step 10) Login Screen after Manjaro 21 Installation
After the reboot, we will get the following login screen
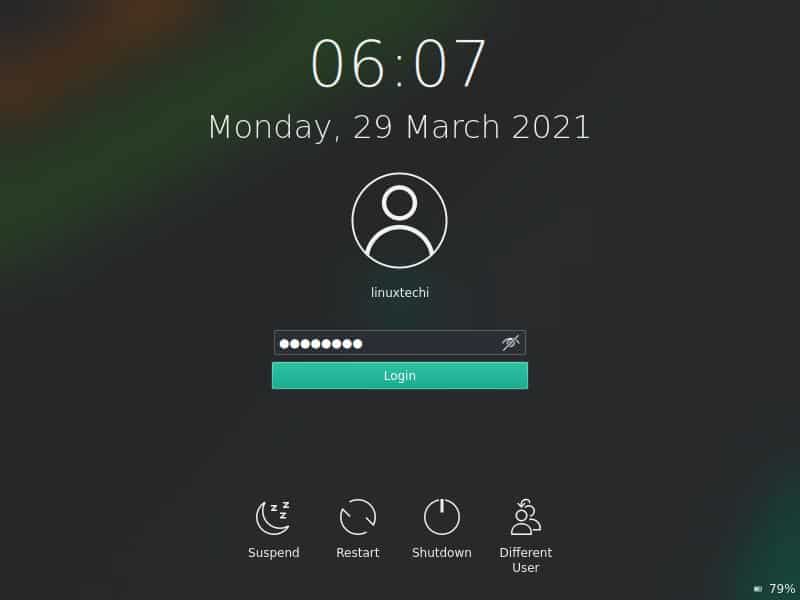
Use the same username and password that we have created during the installation.
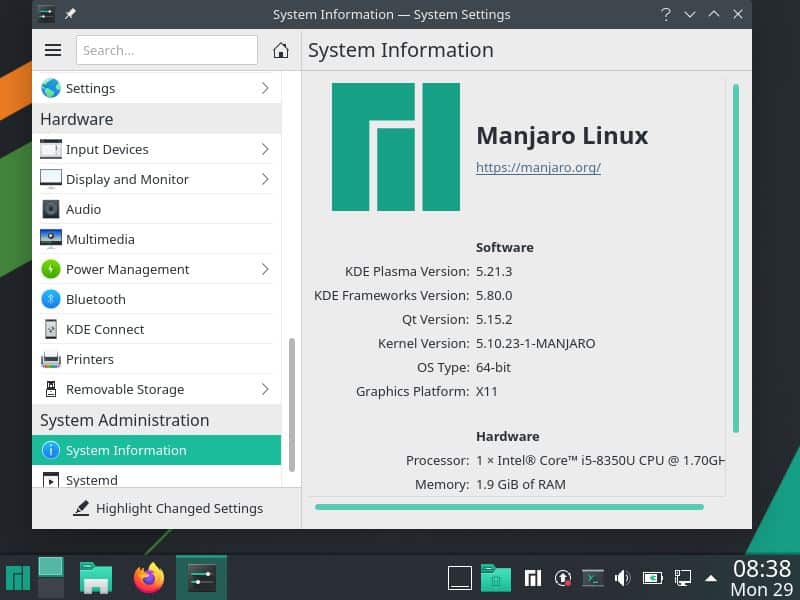
Above shows that we have successfully logged in to our Manjaro 21 KDE desktop.This confirms that installation has been completed successfully.
That’s all from this guide, I hope these steps help you to install Manjaro 21 smoothly. Please do share your feedback and comments.