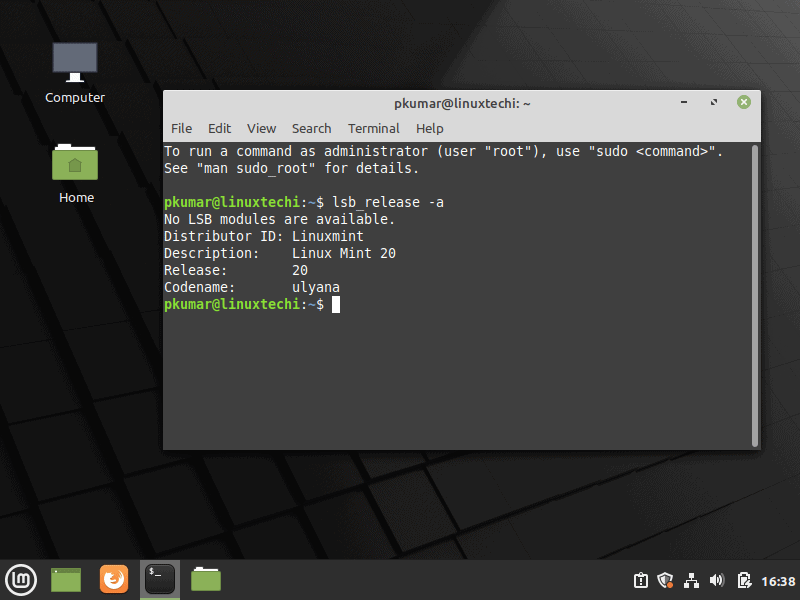
Linux Mint has announced its LTS (Long Term Version) release named “Ulyana“, Linux Mint 20.0. According to the Linux Mint team, this version is going to be based on Ubuntu 20.04 LTS. As it is a LTS release so we will get latest updates and patches for the next 5 years (till 2025). While Ubuntu comes with a set release date every time, it is not the case with Linux Mint. In this article, we’ll see all the new features in Linux Mint 20 along with a step-by-step installation guide for Linux Mint 20.0 (Ulyana). For this article purpose, we’ll discuss about the new features and installation guide for the Linux Mint 20 Cinnamon release.
Linux Mint 20 (Ulyana) – New Features
Linux Mint 20 comes loaded with a host of new features as well as with some enhancements to its existing features:
- Warpinator : One of the coolest features to be introduced is the “Warpinator”. Yes, it is a redo of the old “Giver” application. With Warpinator, file sharing across systems within the local network is made pretty much simple and quick.
- NVIDIA Optimus : Ulyana support offers support to NVIDIA Optimus card and from the Prime applet card, you can see options to switch from Intel to Nvidia graphics card.
- Updated System Tray : The system tray looks much more consistent and harmonized than before. From the tray, you can quickly port apps from GtkStatusIcon.
- Enhanced Performance : Another major highlight of Ulyana is the performance upgrade of many applications and utilities including the Nemo file manager, display refresh rate along with the introduction of fractional scaling. Until now, you can have the same kind of scaling for all monitors, but with Cinnamon 4.6, you can set different scaling levels.
- Desktop Colors : With Linux Mint 20, you have the option to choose between the dark or light-colored theme as well as change the folder icon colors as well.
Minimum system requirements for Linux Mint 20
- 2GB RAM
- Dual Core Processor
- 20GB free disk space
- Bootable Media (USB or DVD)
- Stable Internet (Optional)
Step-by-Step Guide to Install Linux Mint 20 Cinnamon
Step 1) Download Linux Mint 20 Cinnamon edition
Download the Linux Mint 20 Cinnamon edition from the link here
Step 2) Create a Bootable Disk of Linux Mint 20
To install Linux Mint 20 “Ulyana” in your system easily and quickly, you need to install using an USB disk. To do that you need to create a bootable USB disk first using downloaded ISO file. If you have downloaded the ISO file on Windows system then use ‘Rufus’ tool to create bootable USB disk. Now go to your system boot options and change the boot sequence to boot from the USB disk. Now restart your system.
Step 3) Live Session
When your system restarts, it automatically boots using the USB disk you’ve inserted in the system.
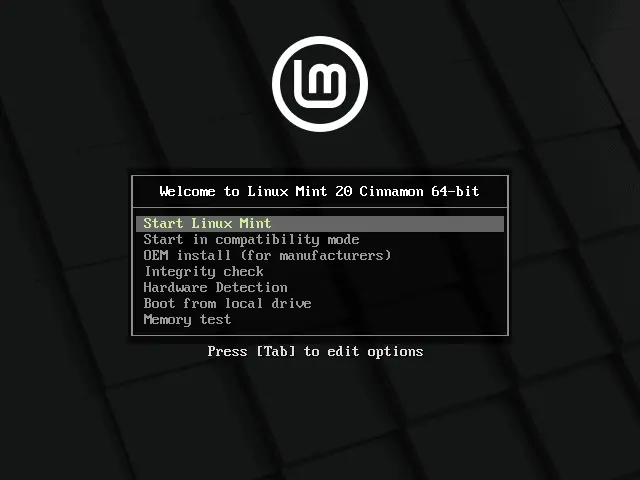
Choose the first option “Start Linux Mint”
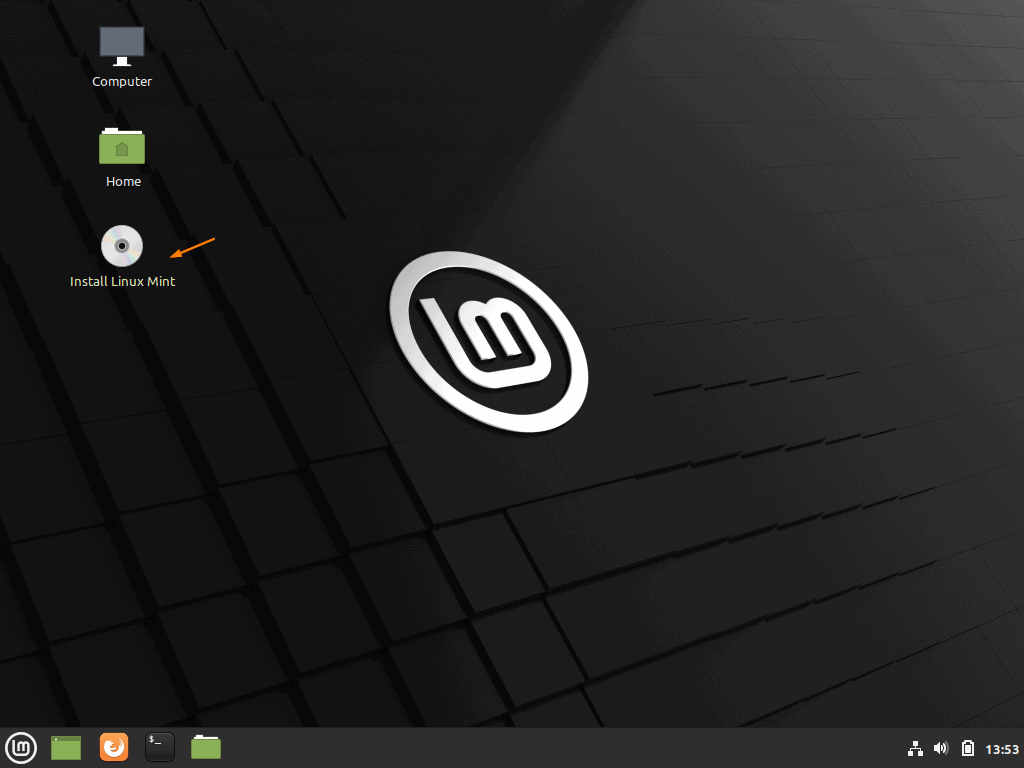
Now you can see that the Linux Mint 20 installer starting with a Live session. You don’t need to login into the system as the Live session create s new user by itself called “mint” and let you into the Live Session. Remember this is only a temporary session that is being created from the USB disk. To install a version permanently in your system, double click on “Install Linux Mint“.
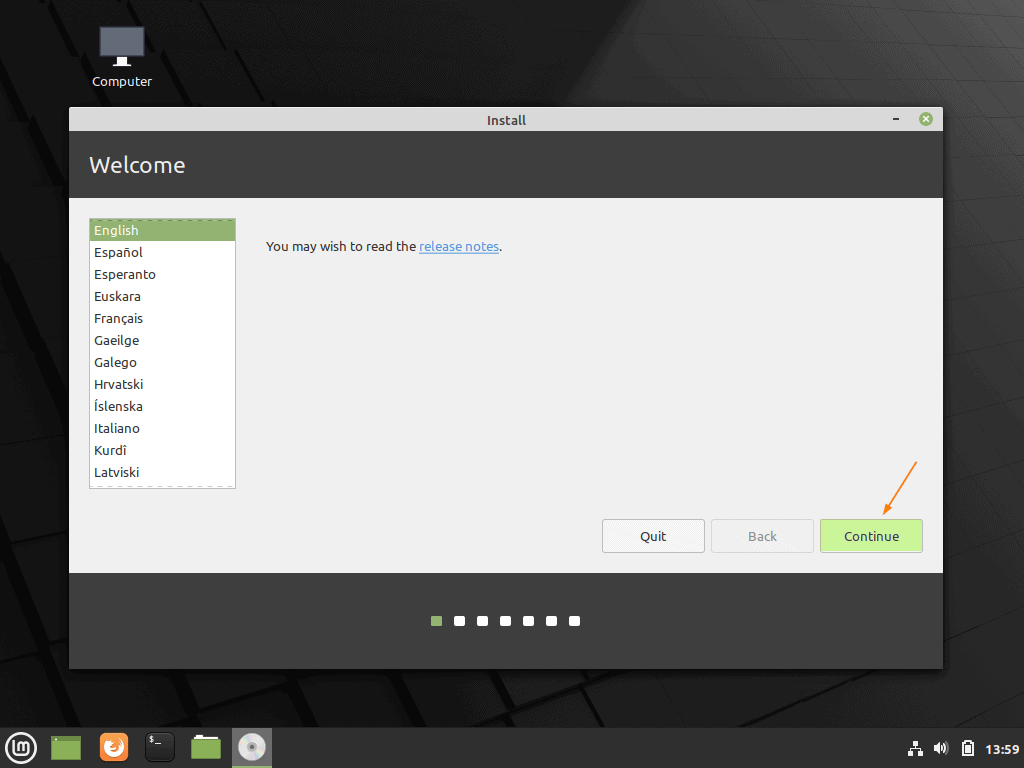
Step 4) Choose Language for Linux Mint 20 Installation
Once you click “Install Linux Mint“, you will be prompted with a screen to choose your preferred language. Choose it and click “Continue” to proceed with the installation.
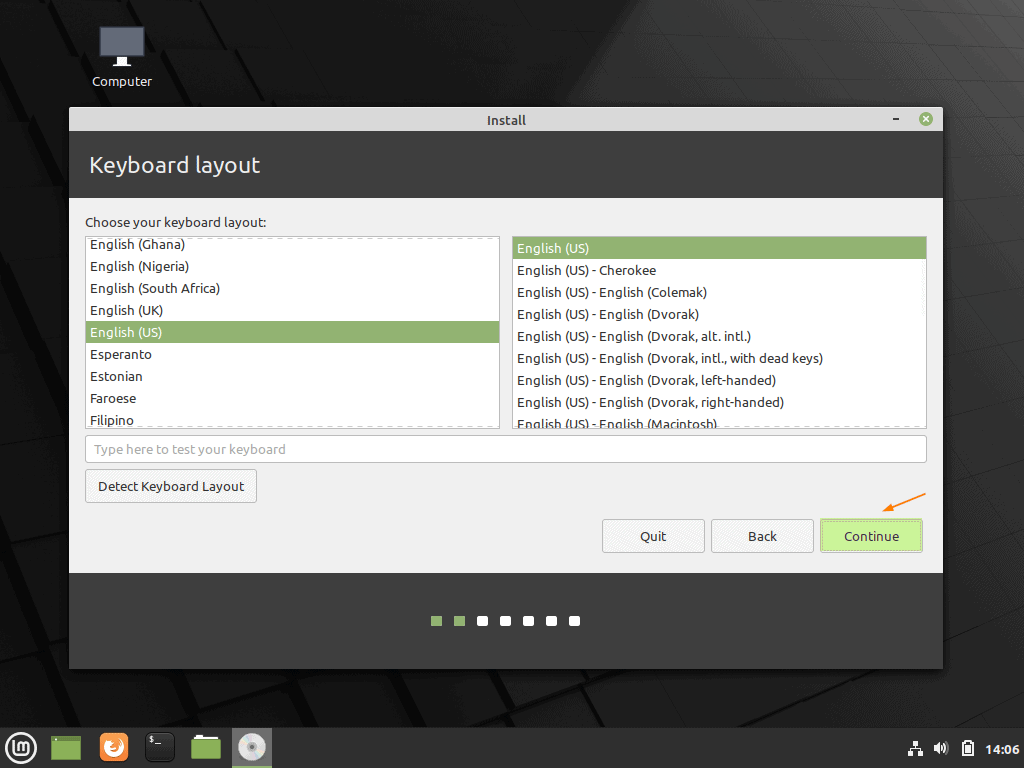
Step 5) Choose preferred keyboard layout for Linux Mint 20
In this step, choose your preferred keyboard layout for Linux Mint 20 and then click on “Continue”
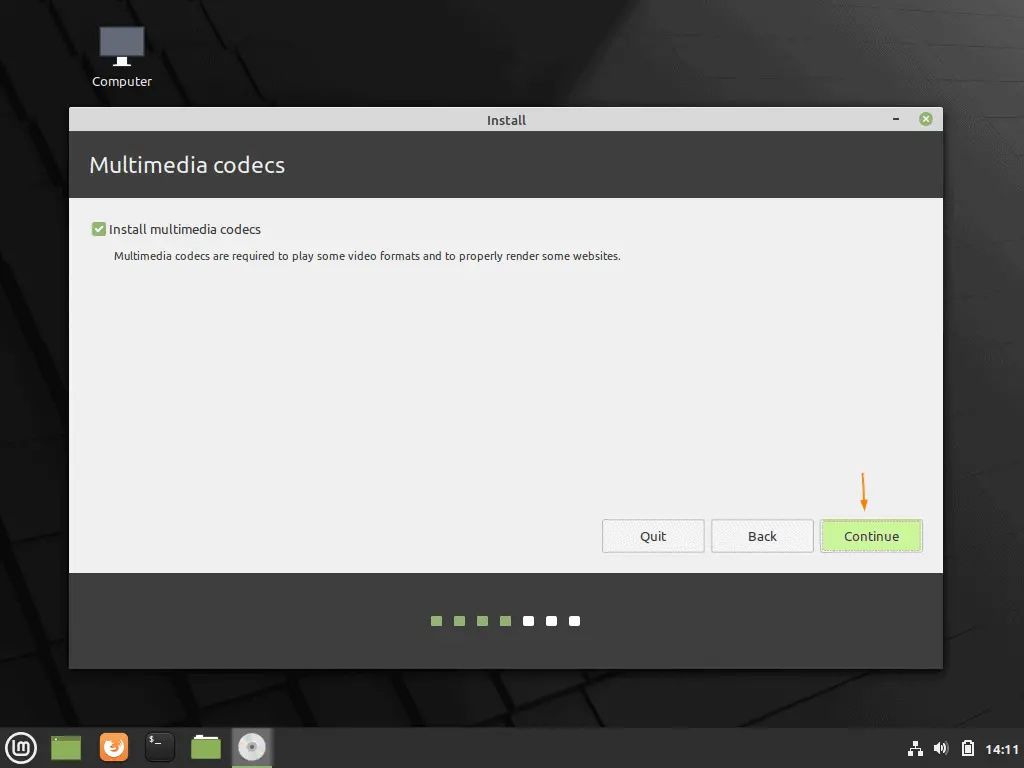
Step 6) Install Multimedia Codecs
If your system is connected to internet and wants to install multimedia codecs during the installation, then click on the check box, and then click on “Continue” to proceed with the installation.
Step 7) Choose Installation Type and Create Partition
In the next screen, you’ll be asked to choose the type of installation required. You’ll be presented with 2 options as shown in the screen below:
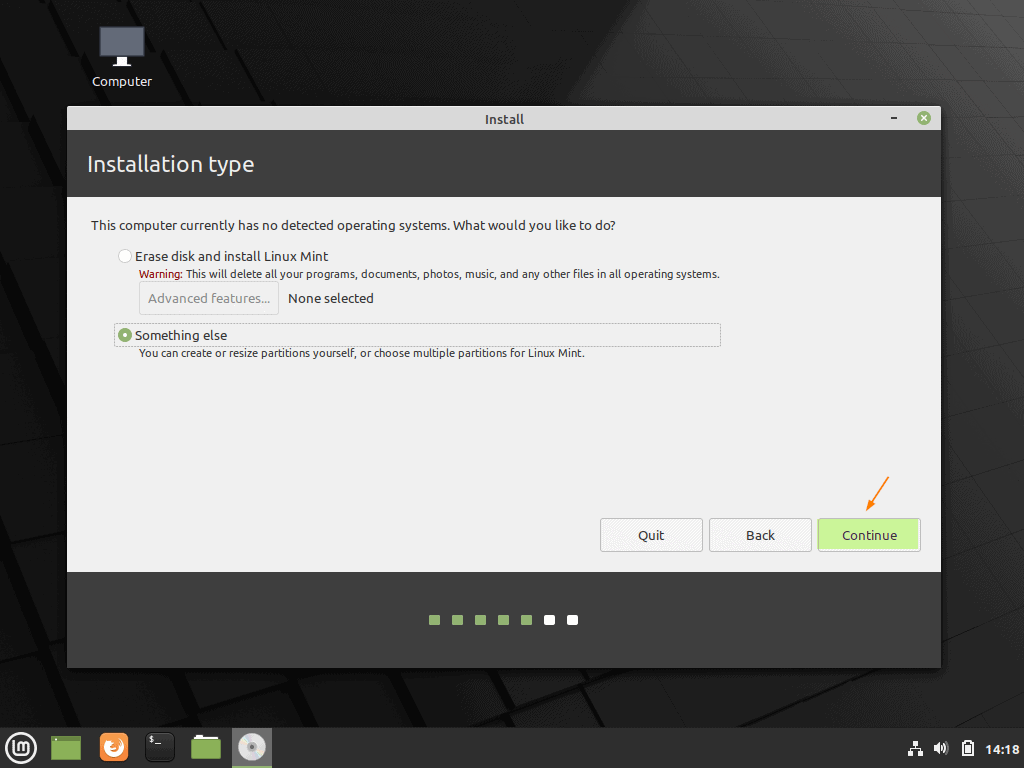
In case you are new to Linux and wants installer to create partitions automatically for you then choose first option “Erase disk and install Linux Mint”
If you want to create own customize partitions, then choose “Something else” and proceed with the partitioning.
In this tutorial, I will demonstrate on how to create own customize partition table by choosing the second option. For the installation of I have around 40 GB hard disk space and will create following partitions on it.
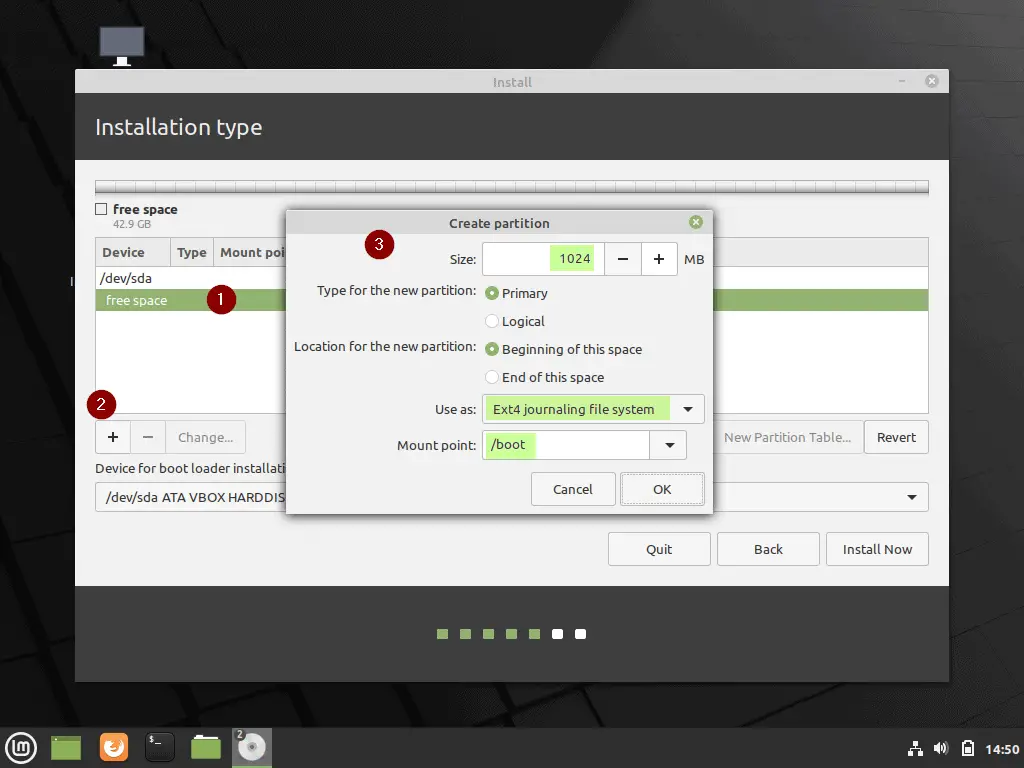
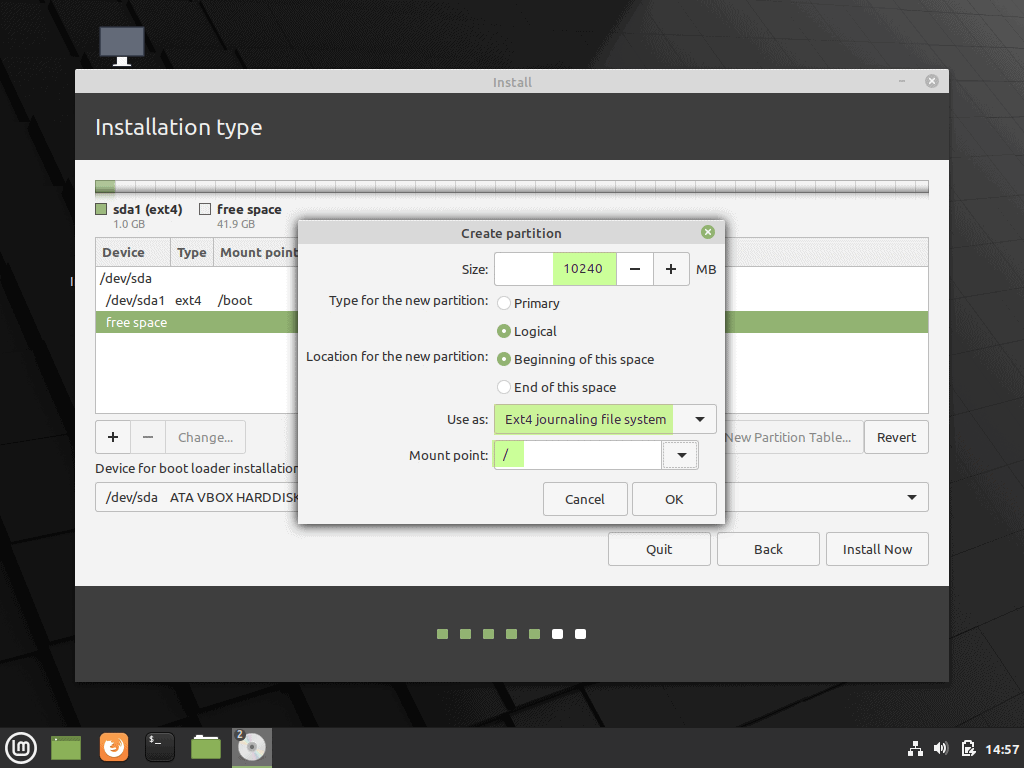
- /boot – 1 GB (ext4 file system)
- / – 10 GB (ext4 file system)
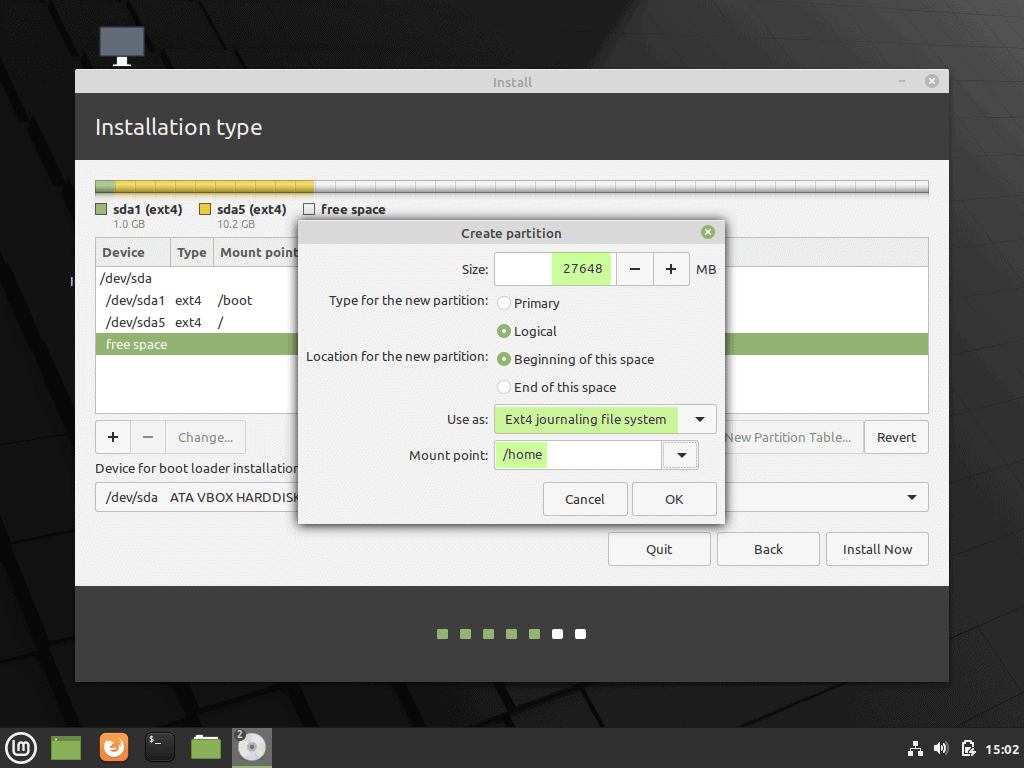
- /home – 27 GB (ext4 file system)
- Swap – 2 GB
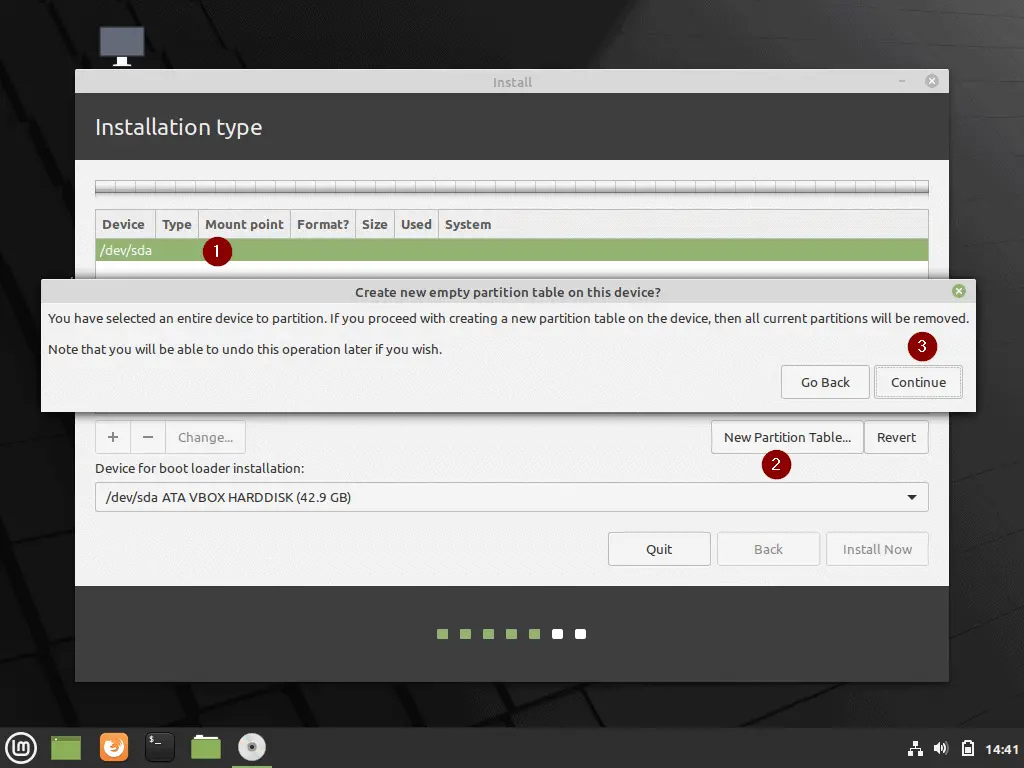
Let’s first create empty partition table before start creating partitions. Select the disk (/dev/sda) and click on “New Partition Table” and the click on Continue
Now start creating our first partition as /boot. Choose the free space and then click on + sign and specify the size as 1024 MB, file system type as “ext4” and mount point as /boot and then click on “OK”
Similarly create next two partitions as / and /home of size 10 GB and 27 GB respectively.
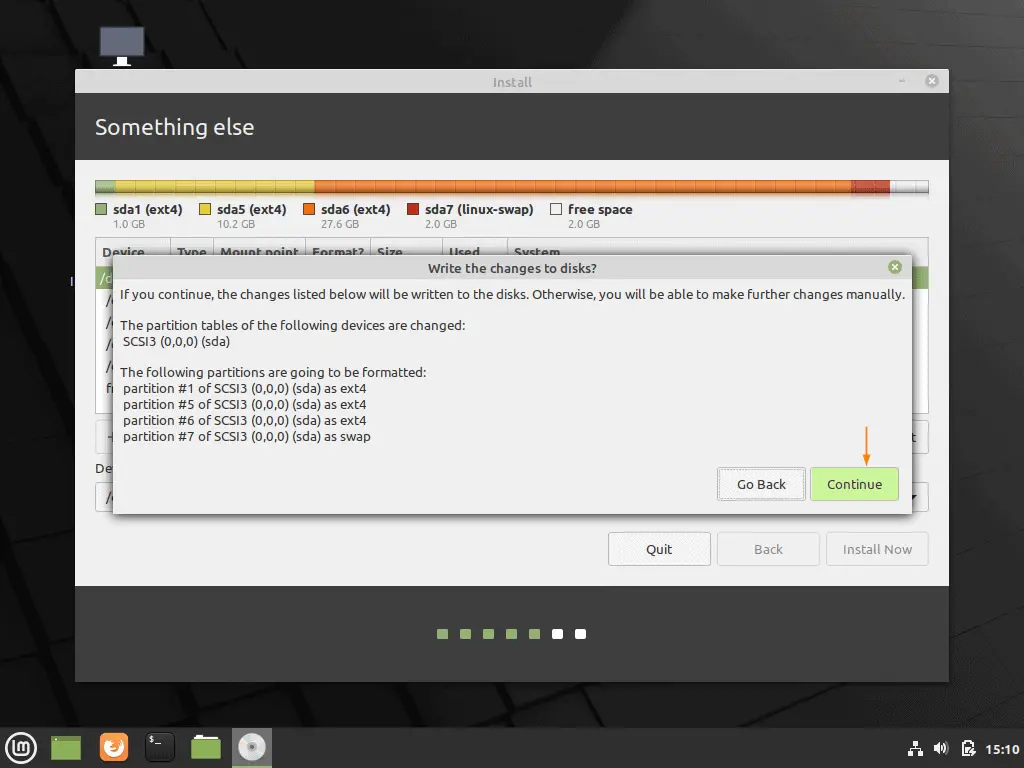
Now create our last partition as swap. It can prevent issues arising from out of memory issues.

Click on OK and then click on “Install Now” option. You will be getting the following screen, choose “Continue” to write changes to disk and to proceed with installation.
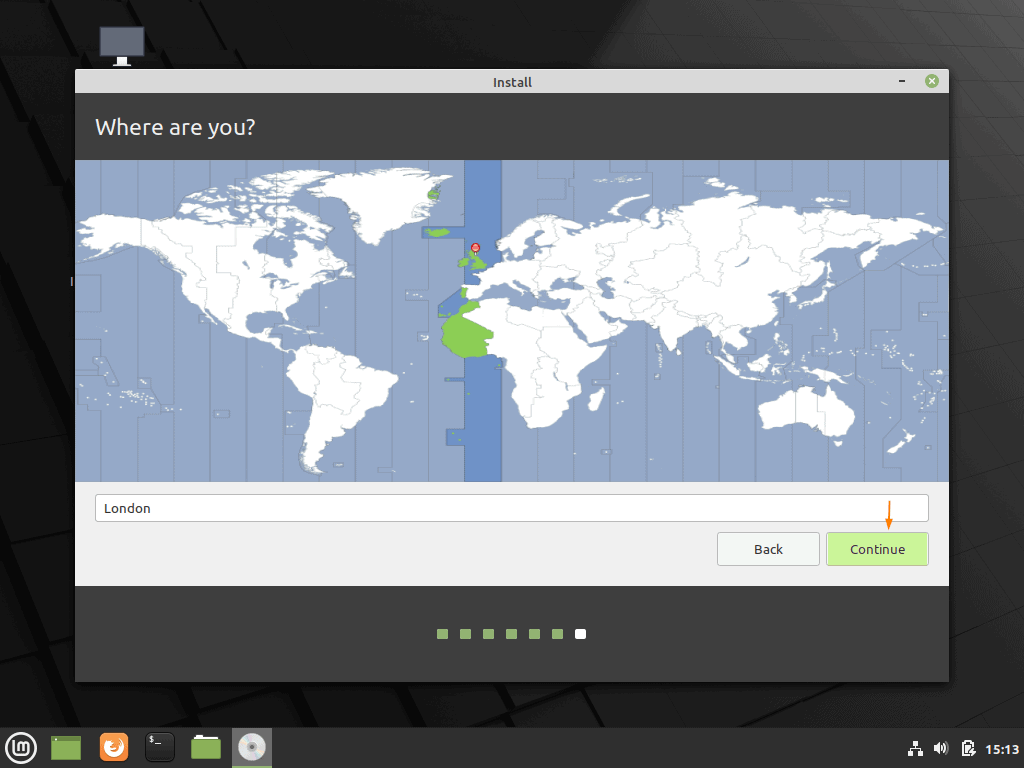
Step 8) Choose Your Time zone
In the next screen, you will be asked to select your time zone. Choose yours and click “Continue” to proceed
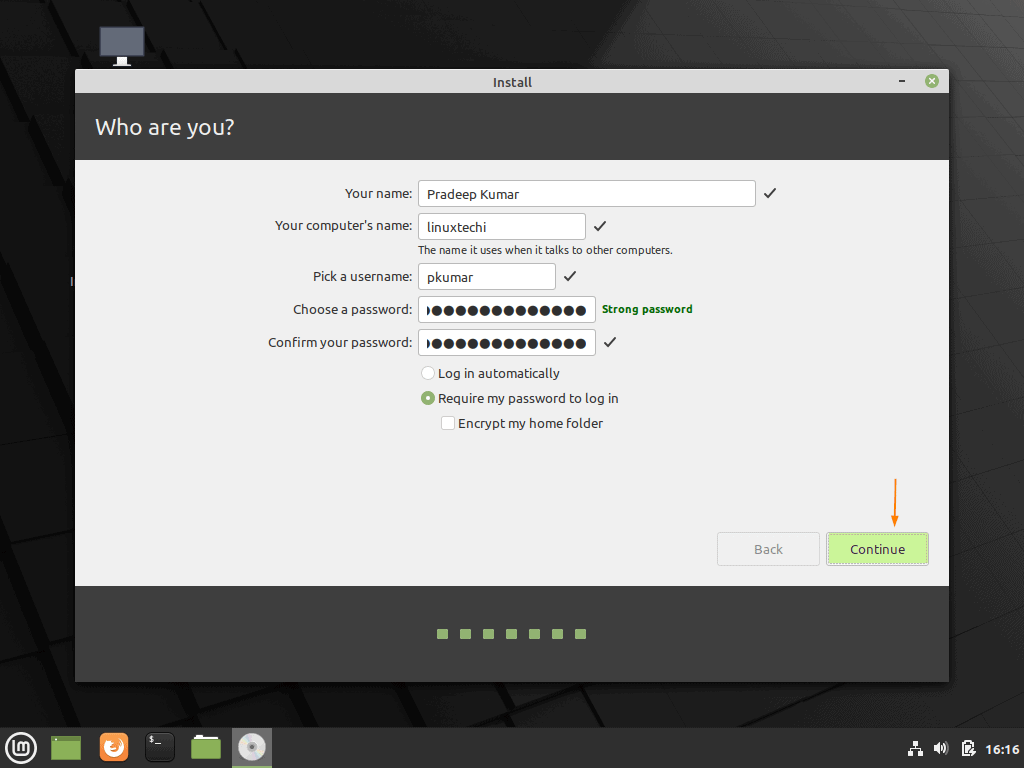
Step 9) Hostname and User Information
Before the installation begins, you will be asked to provide your user credentials and hostname of your system. Please provide the required information as shown in the screen below and click “continue” to start the installation of Linux Mint 20 Cinnamon edition.
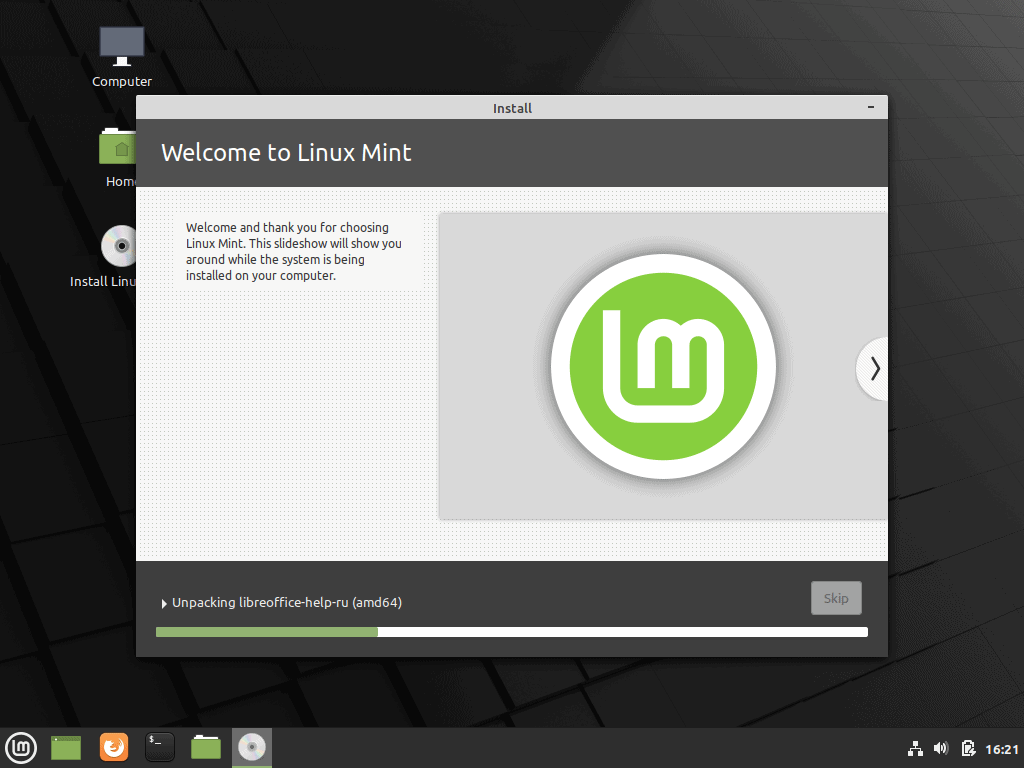
Step 10) Installation Begins
Finally, the installation begins, and it will take a couple of minutes to complete with the installation. But during the installation process, you can see details about all the new features added in the Ulyana edition of Linux Mint in the form of a slideshow.
Once the installation is completed then installer will prompt to reboot the system.
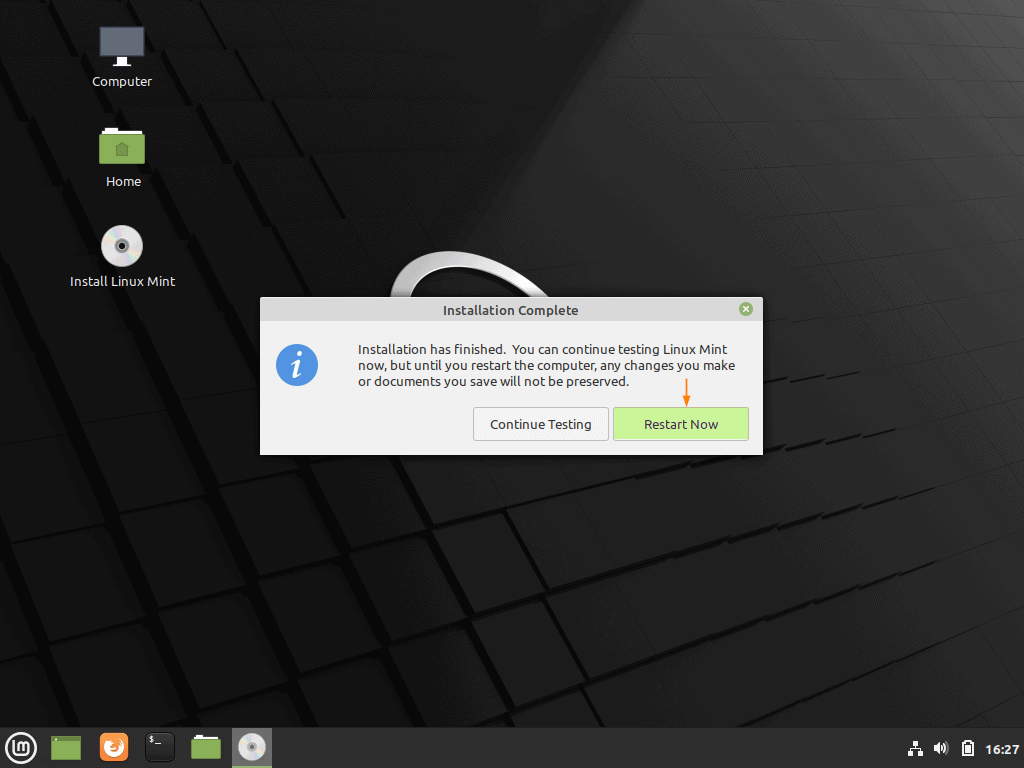
Click on “Restart Now” to reboot the system. Also do not forget to change boot medium from USB to Disk from bios settings.
Step 11) Linux Mint 20 Welcome Screen
Once the system is available after reboot, we will get following login screen. Use the same username and its credentials that we have created during the installation.
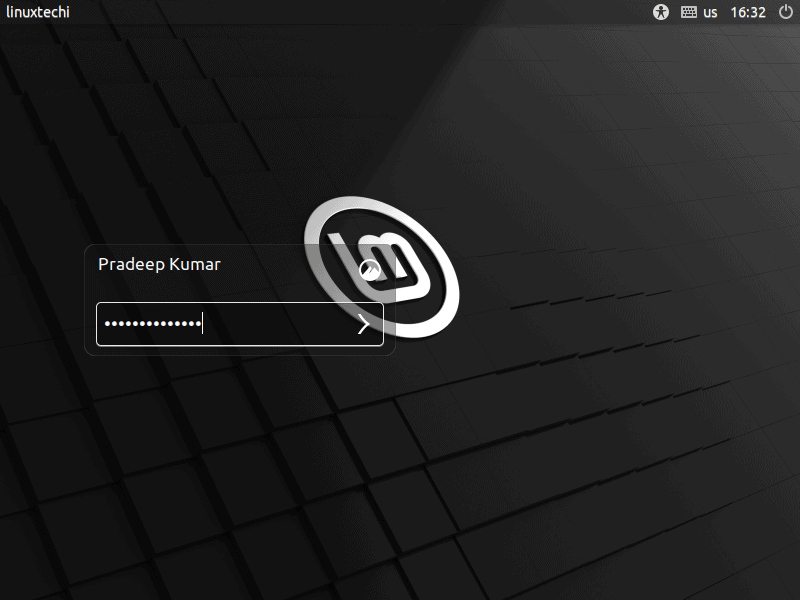
That’s it, you’ve successfully completed the installation of Linux Mint 20 Cinnamon on your system. Explore all the new features of Linux Mint 20.0 “Ulyana”.
If you still have any queries or doubts or if you do face any issues during the installation process, please post your questions in the feedback section below. We’ll try to answer all your queries at the earliest.
Also Read : How to Upgrade to Linux Mint 20 (Ulyana)
I find it impossible to make changes in the Nvidia x-server settings applet. Booting up, the system comes up in a 3840×2160 (very small fonts). The screens are reversed (dual DP monitors). I rearrange the monitors in the x-server Display Configuration, set the graphics to 2048×1280, and make the left monitor the primary display. Lastly, I select “Save to x-configuration file” by selecting /etc/X11/xorg.conf.
Strange occurrence: After saving, selecting “Quit” keeps complaining I have made changes but not saved. NOTHING GETS SAVED!! Rebooting returns back to the original configuration
What is the problem? I have to go through this configuration every time I reboot.
Hi, i have One HP G62 and decide to replace my HD (320GB) by SSD (240GB) and also replace the CD/DVD with that HD. I am going to install mint 20.1 but…my problem is only about partitions…is swap really needed?…i can use the HD as my /home particion?…how can i do it? (What kind of particion tablet).
Thanks a lot.
Hello ALBERTO,
There is no need to have separate swap partition. For creating /home partition on HDD, Use ‘something else’ option then first create empty partition table on hdd and after that format it as /home partition.
Hi,
regarding the comment of Philip Goatly just wanted to know if I create the /efi (because I get the same msg) do I still need the /boot partition or not.
+ i just switched from kubuntu 20.04 to mint 20.1. But I feel a slight downgrade regarding the general smoothness of the OS. any suggestion?
Hi Pradeep Kumar,
I follwed line by line to create a dual boot system in laptop WINDOWS 10. Minimum requirements for RAM an HDD were met. While booting from Rufus bootable pendrive, I did not get the screenshot mentioned in ‘Step 3: Live session. The screen locked itself. I have to force my laptop to switch off. Please help.
Please make sure Linux Mint Installation Media ( Bootable USB drive) is created successfully without any errors.