Mail server is one of the important server for any organization as all the communication are done via emails. There are number free and enterprise mail servers available in the IT world. Zimbra is one of the high rated mail server that comes in open source and enterprise edition. In this article, we touch base on how to install and configure single node open-source Zimbra mail server on CentOS 8 / RHEL 8 system.
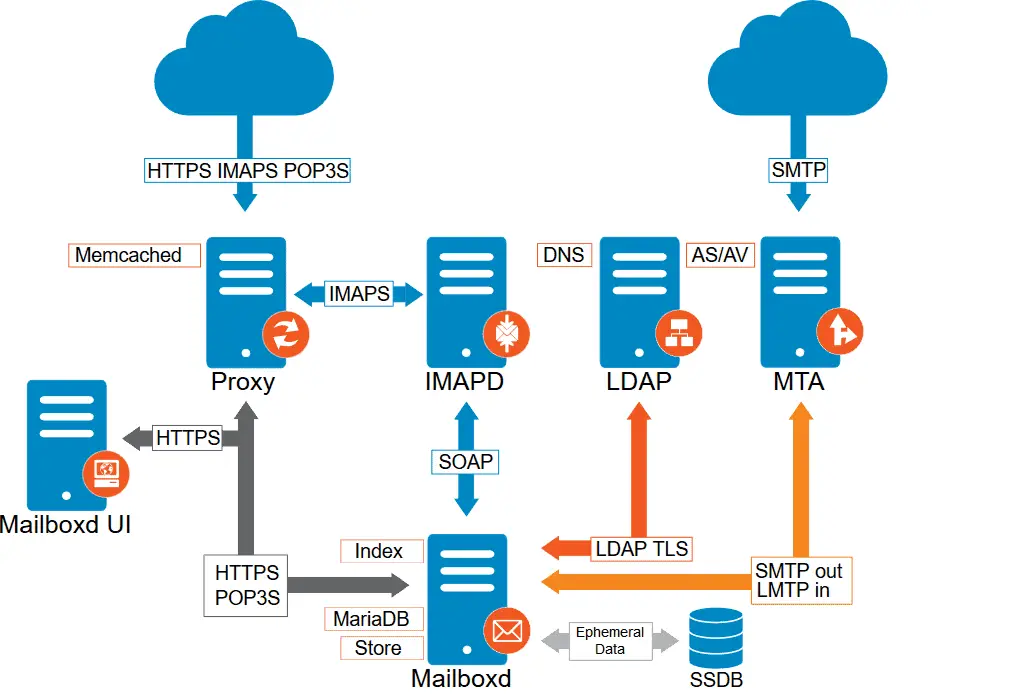
Zimbra is also known as Zimbra Collaboration Suite (ZCS) because it consists numbers of components like MTA (postfix), Database (MariaDB), LDAP and MailboxdUI etc. Below is the architecture of Zimbra
Minimum System Requirements for Open Source Zimbra Mail Server
- Minimal CentOS 8/ RHEL 8
- 8 GB RAM
- 64-bit Intel / AMD CPU (1.5 GHz)
- Separate Partition as /opt with at least 5 GB free space
- Fully Qualified Domain Name (FQDN), like ‘zimbra.linuxtechi.com’
- Stable Internet Connection with Fixed Internal / Public IP
Following are my Zimbra Lab Setup details:
- Hostname: zimbra.linuxtechi.com
- Domain: linuxtechi.com
- IP address: 192.168.1.60
- DNS Server: 192.168.1.51
- SELinux : Enabled
- Firewall : Enabled
Before jumping into the installation steps of Zimbra, let’s verify DNS records (A & MX) for our Zimbra Server, Login to your CentOS 8 / RHEL 8 system and use dig command to query dns records
Note: In case dig command is not available then install ‘bind-utils’ package
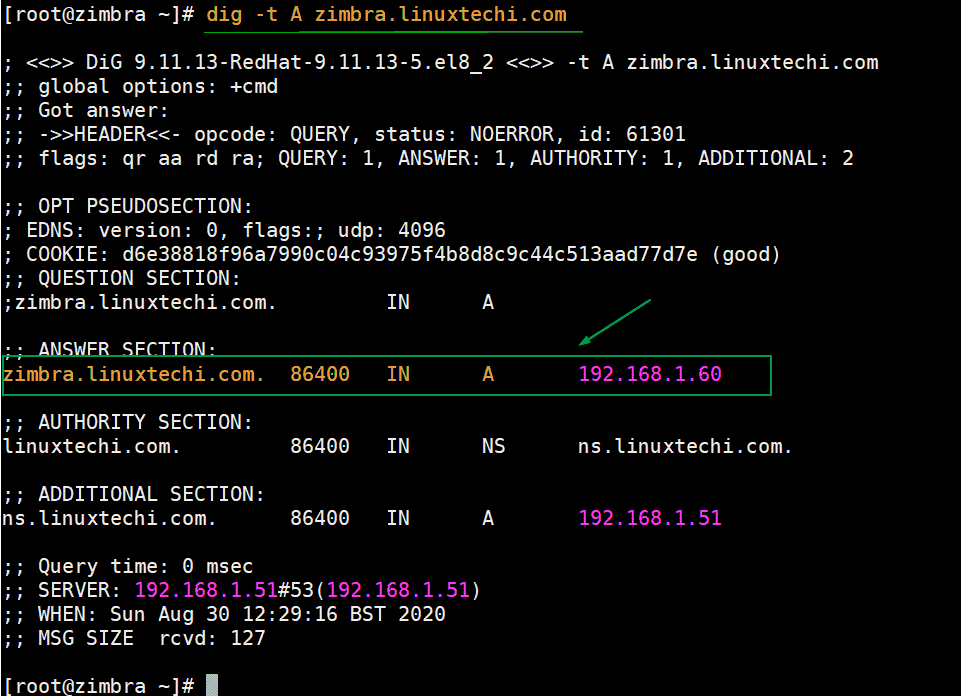
Run following dig command to query A record of our Zimbra server
[root@zimbra ~]# dig -t A zimbra.linuxtechi.com
Run following dig command to query MX record for our domain ‘linuxtechi.com’
[root@zimbra ~]# dig -t MX linuxtechi.com
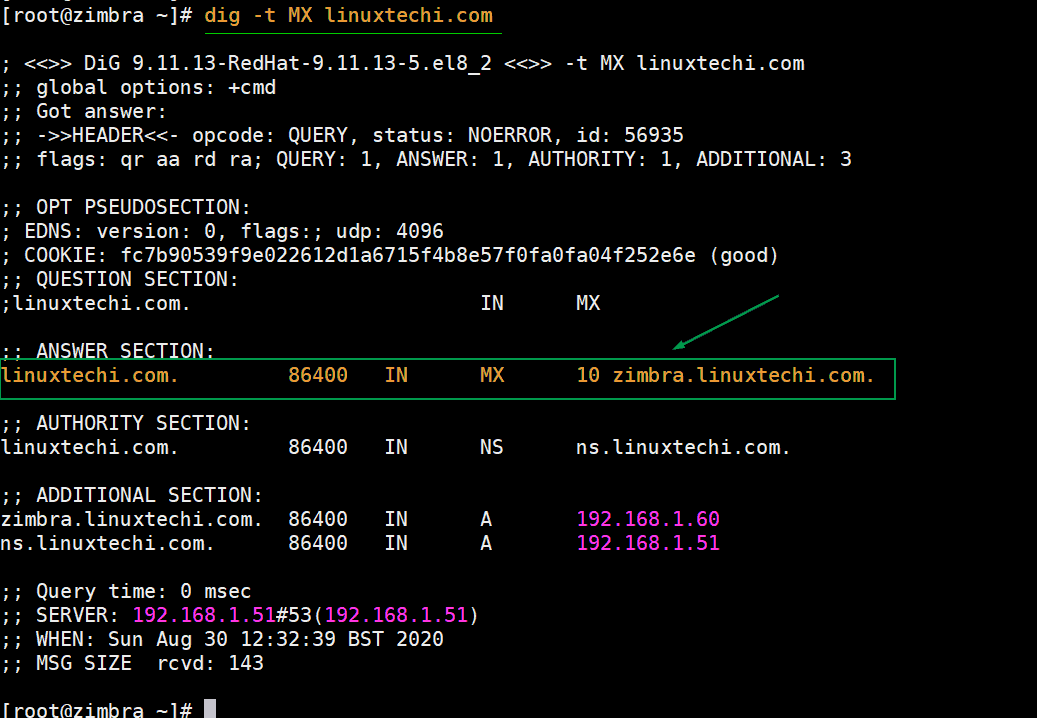
Above outputs confirm that DNS records are configured correctly for our Zimbra mail server.
Read Also : How to Setup DNS Server (Bind) on CentOS 8 / RHEL8
Note: Before starting Zimbra installation, please make sure no MTA ( or mail server) configured on the system. In case it is installed then first disable its service and remove its package
# systemctl stop postfix
# dnf remove postfix -y
Let’s dive into Zimbra installation steps,
Step 1) Apply Updates, add entry in hosts file and reboot your system
Add the hostname entry in hosts file, run the following echo command,
[root@zimbra ~]# echo "192.168.1.60 zimbra.linuxtechi.com" >> /etc/hosts
Run the beneath command to apply all the available updates,
[root@zimbra ~]# dnf update -y
Once all the updates have been installed then reboot your system once.
[root@zimbra ~]# reboot
Step 2) Download Open source Zimbra Collaboration suite
As we discussed above, Zimbra comes in two editions, so use the following URLs to download
To Download it from the command line, run following commands,
[root@zimbra ~]# dnf install wget tar perl net-tools nmap-ncat -y
[root@zimbra ~]# wget https://files.zimbra.com/downloads/8.8.15_GA/zcs-8.8.15_GA_3953.RHEL8_64.20200629025823.tgz
Step 3) Start Zimbra Installation via installation script
Once the compressed Zimbra tar file is downloaded in step 2 then extract it in your current working directory using tar command,
[root@zimbra ~]# tar zxpvf zcs-8.8.15_GA_3953.RHEL8_64.20200629025823.tgz
[root@zimbra ~]# ls -l
total 251560
-rw-------. 1 root root      1352 Aug 30 10:46 anaconda-ks.cfg
drwxrwxr-x. 8 1001 1001      4096 Jun 29 11:39 zcs-8.8.15_GA_3953.RHEL8_64.20200629025823
-rw-r--r--. 1 root root 257588163 Jul  1 07:16 zcs-8.8.15_GA_3953.RHEL8_64.20200629025823.tgz
[root@zimbra ~]#
Go to the extracted directory and execute install script to begin the installation
[root@zimbra ~]# cd zcs-8.8.15_GA_3953.RHEL8_64.20200629025823
[root@zimbra zcs-8.8.15_GA_3953.RHEL8_64.20200629025823]# ls -l
total 24
drwxrwxr-x. 2 1001 1001  127 Jun 29 11:39 bin
drwxrwxr-x. 2 1001 1001   31 Jun 29 11:39 data
drwxrwxr-x. 3 1001 1001   34 Jun 29 11:39 docs
-rwxr-xr-x. 1 1001 1001 8873 Jun 29 11:39 install.sh
drwxrwxr-x. 3 1001 1001   18 Jun 29 11:39 lib
drwxrwxr-x. 3 1001 1001 4096 Jun 29 11:39 packages
-rw-rw-r--. 1 1001 1001  369 Jun 29 11:39 readme_binary_en_US.txt
-rw-rw-r--. 1 1001 1001  428 Jun 29 11:39 README.txt
drwxrwxr-x. 3 1001 1001   76 Jun 29 11:39 util
[root@zimbra zcs-8.8.15_GA_3953.RHEL8_64.20200629025823]# ./install.sh
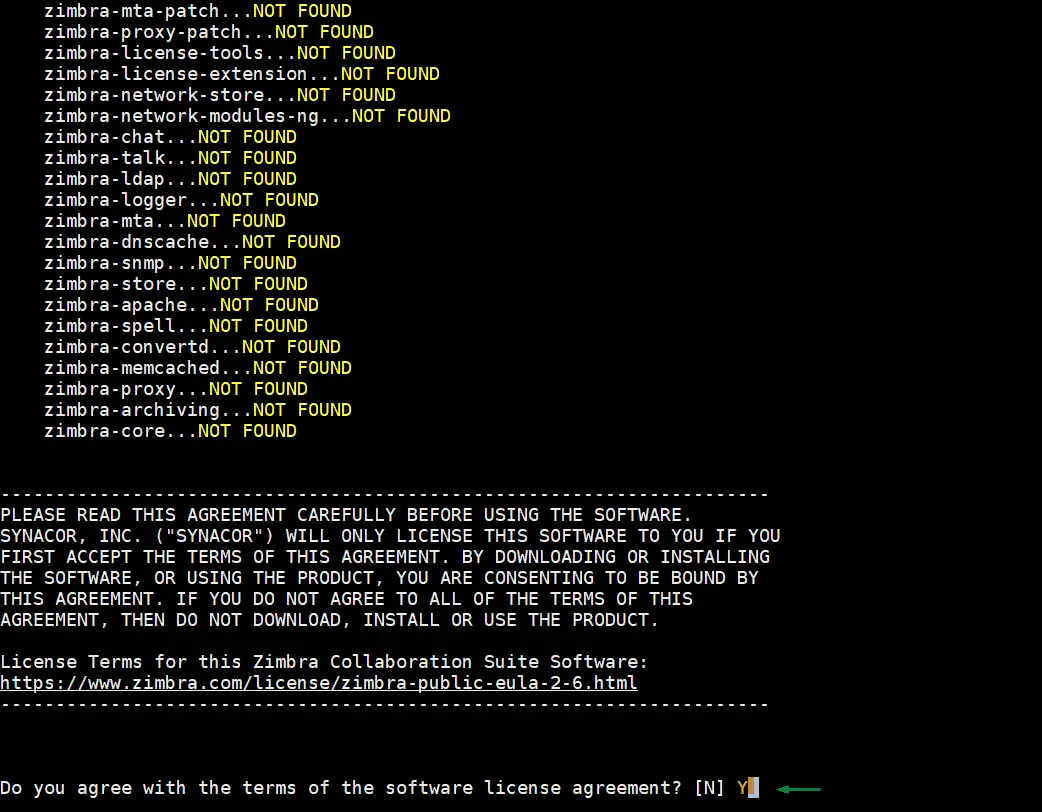
Output of install script would be something like below
Press ‘Y’ to accept the license agreement
In the next screen, press ‘Y’ to configure Zimbra package repository and install its components.
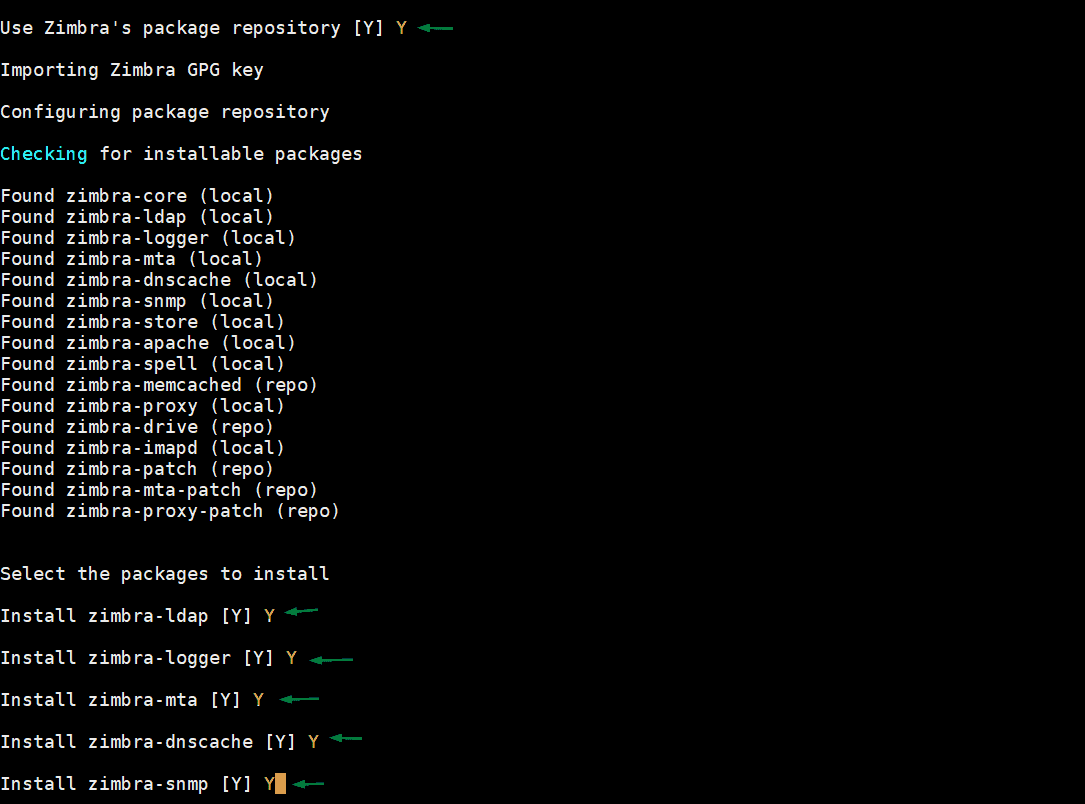
In the next following screen, press ‘Y’ to modify the system,
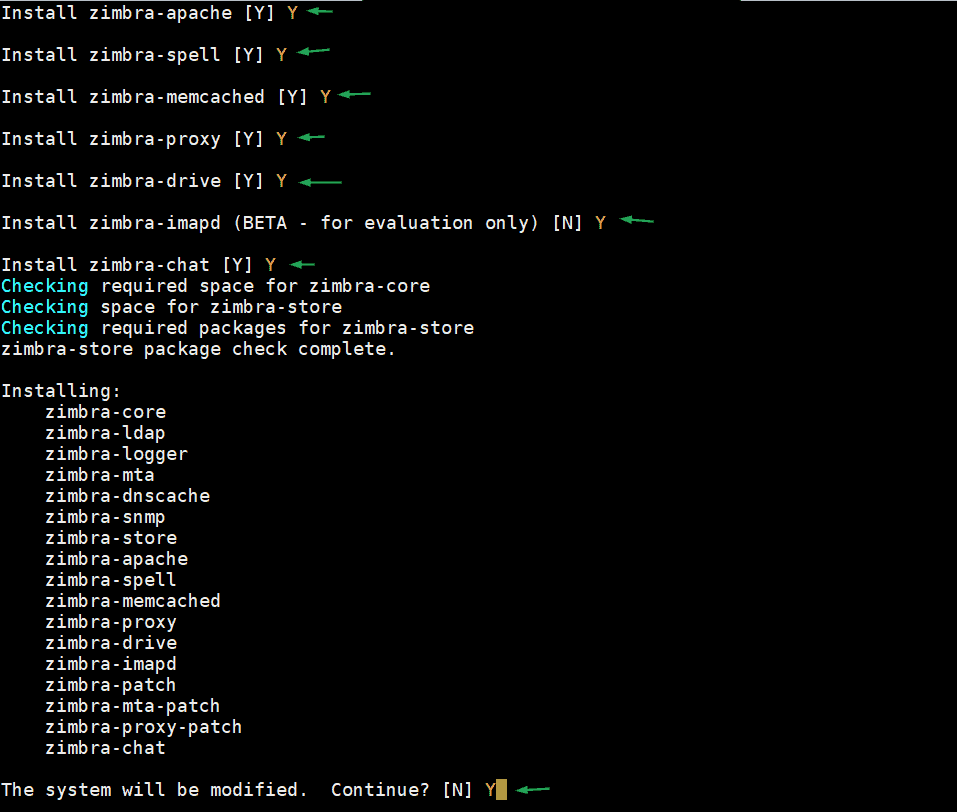
Once we press ‘Y’, it will start downloading and installing the Zimbra and its components. After the successful installation we will get the following screen:

As we can see above, admin user’s password is not set, so press 7 and then 4 to assign password to admin user.
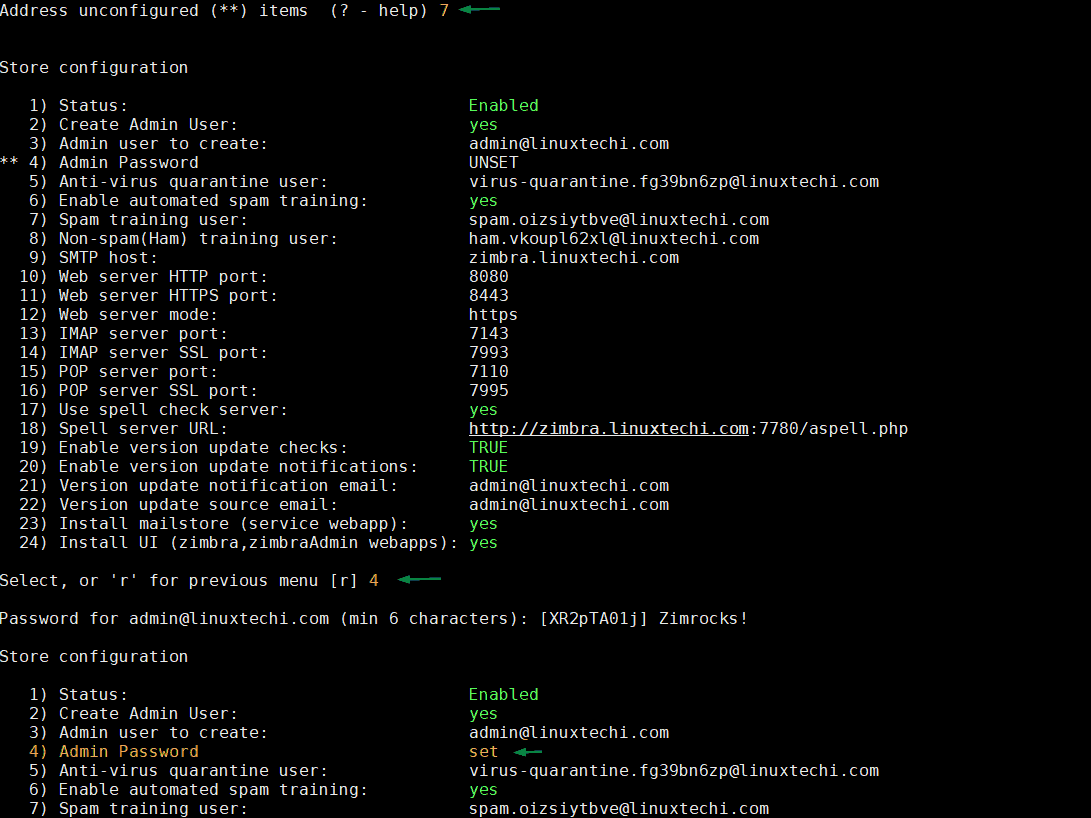
Once the password is set then press ‘r’ to go previous screen and then press ‘a’ to apply changes.
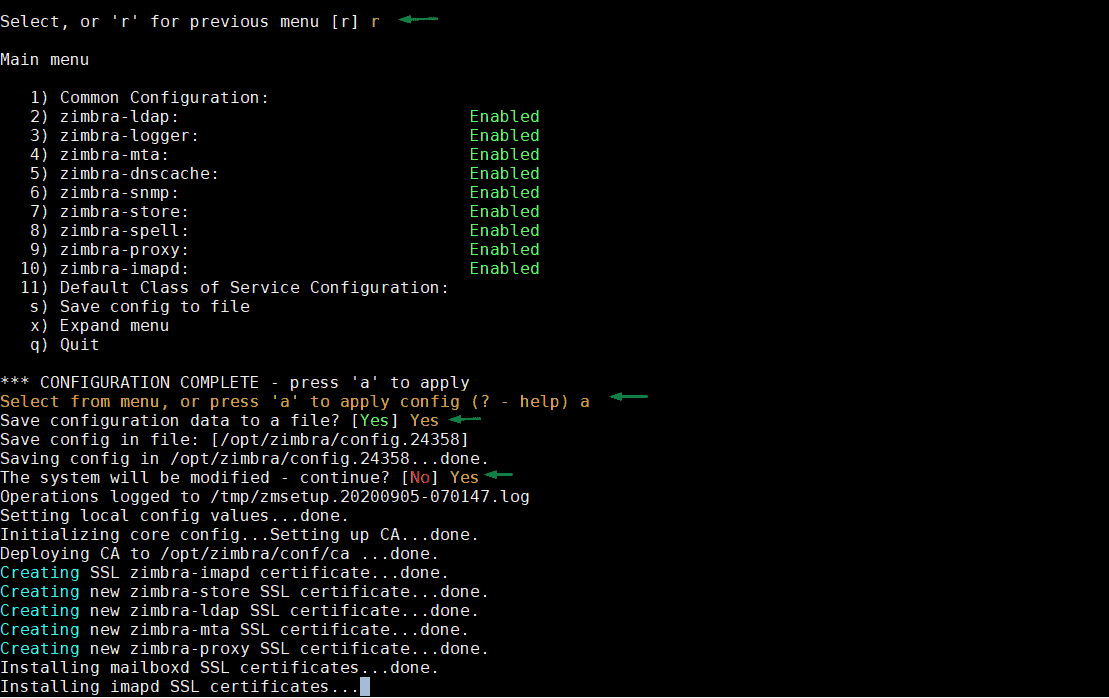
Once all the configurations are completed and Zimbra services are started successfully then we will get following screen:
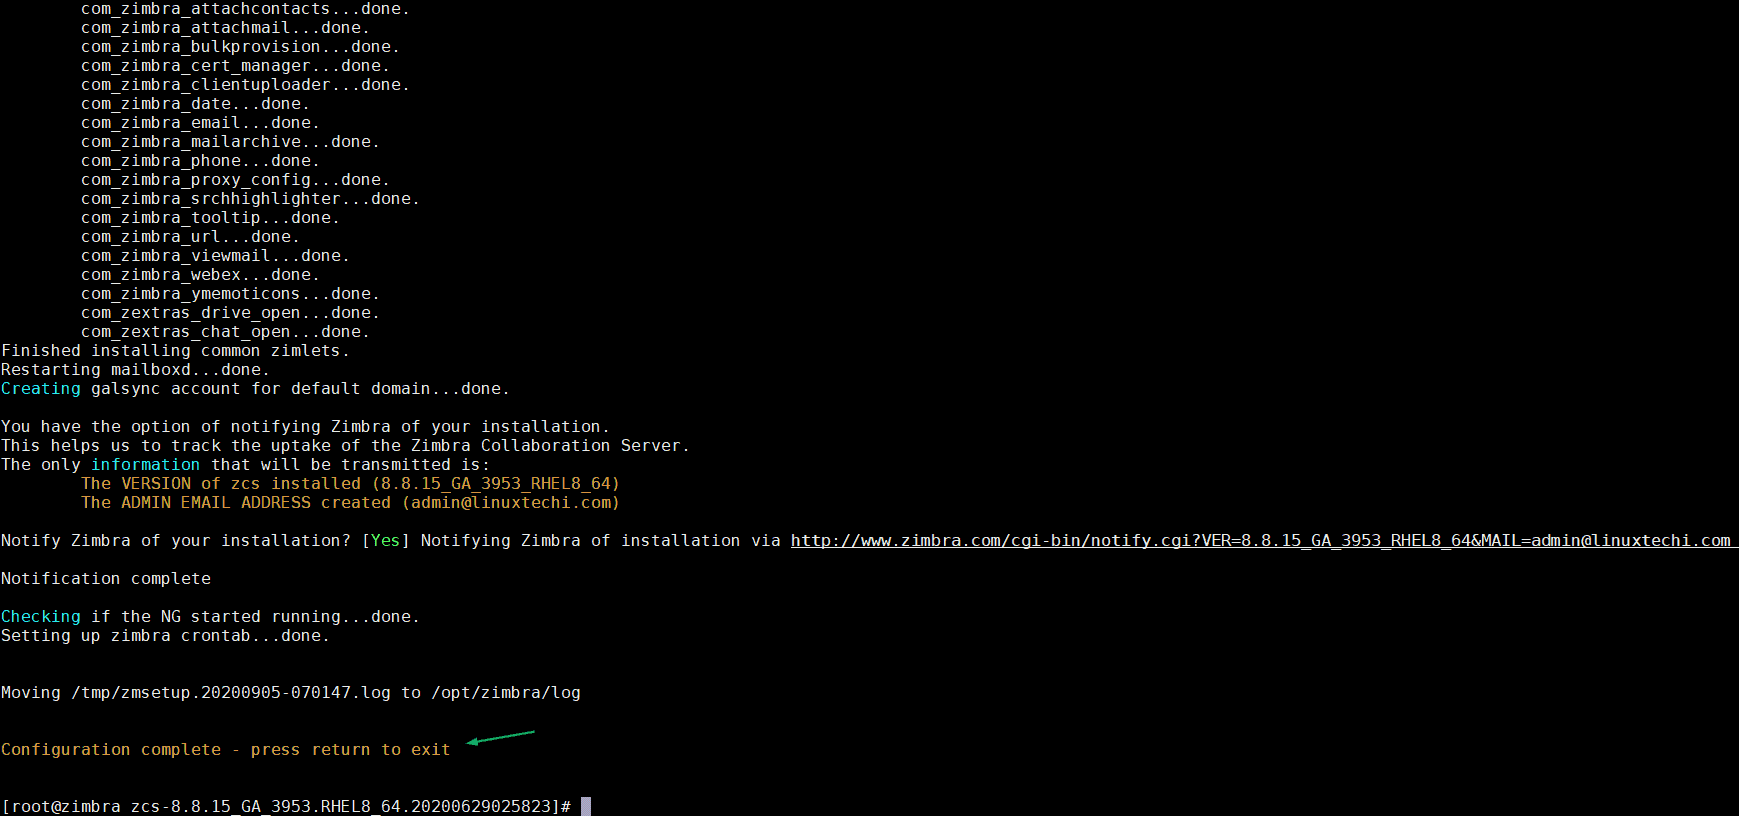
Perfect, above confirms that we have successfully installed Zimbra mail server. Before accessing its admin and web client portal, allow the following ports in OS firewall (In case firewall is disabled then you skip this step)
[root@zimbra ~]# firewall-cmd --add-service={http,https,smtp,smtps,imap,imaps,pop3,pop3s} --permanent
success
[root@zimbra ~]# firewall-cmd --add-port 7071/tcp --permanent
success
[root@zimbra ~]# firewall-cmd --add-port 8443/tcp --permanent
success
[root@zimbra ~]# firewall-cmd --reload
success
[root@zimbra ~]#
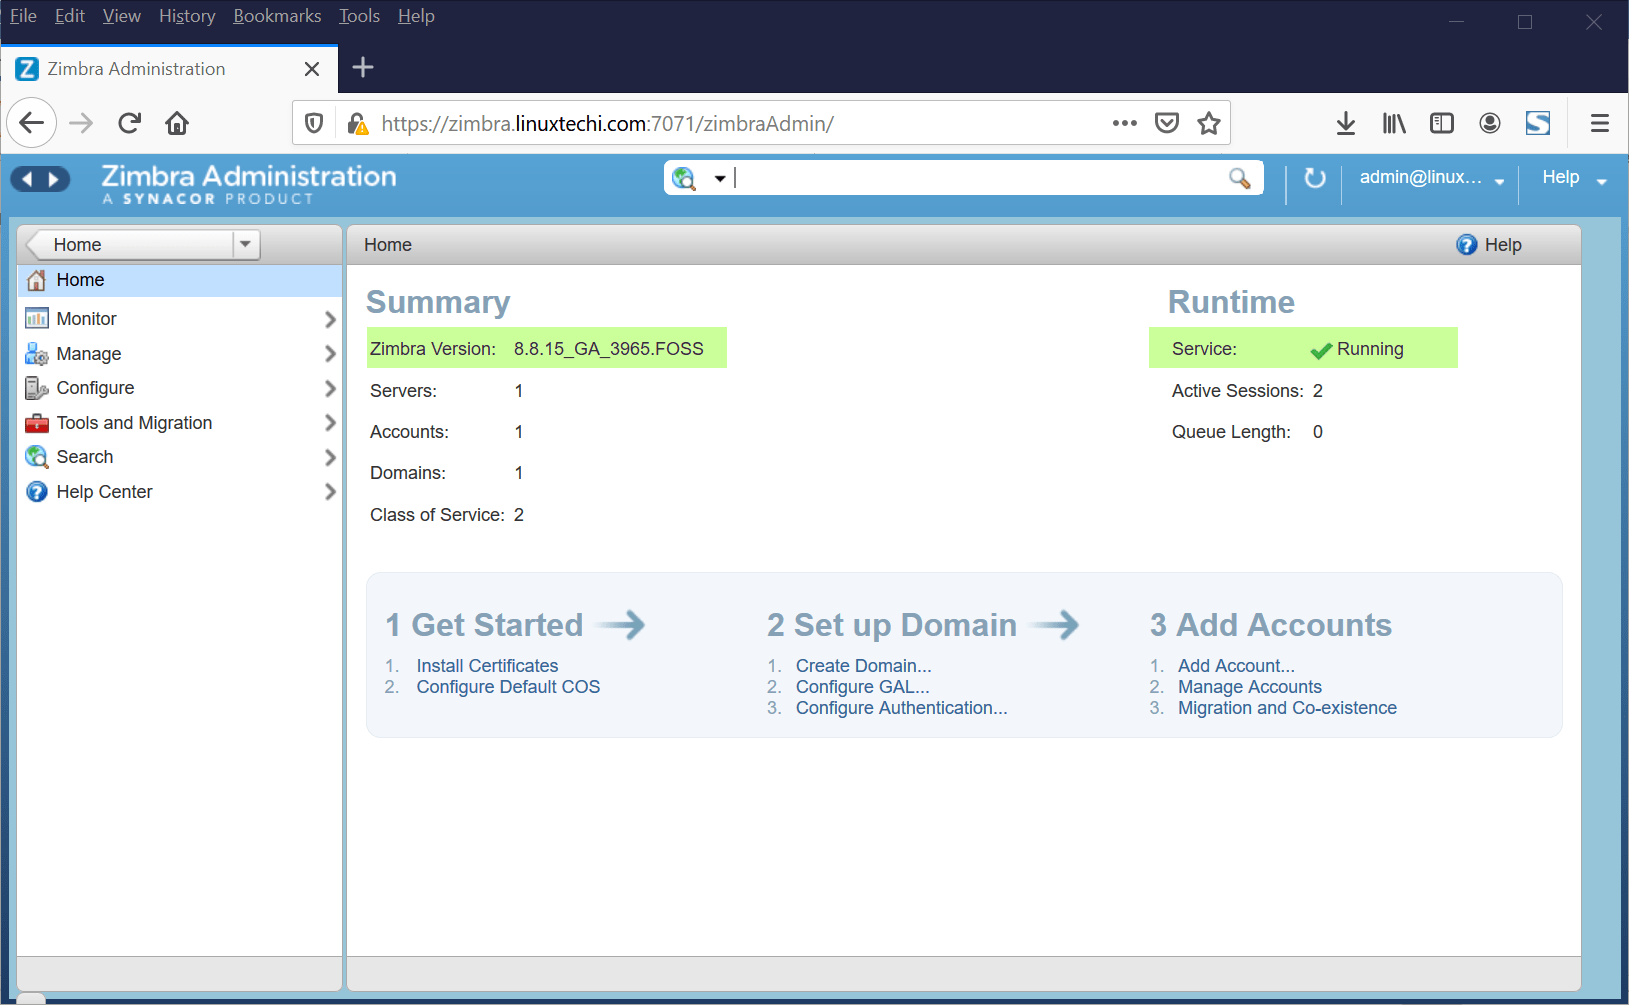
Step 4) Access Zimbra Mail Server Admin portal and Web Client
To Access Admin Portal, use the following URL:
https://zimbra.linuxtechi.com:7071/
Use the username as ‘admin’ and password that we set during the installation
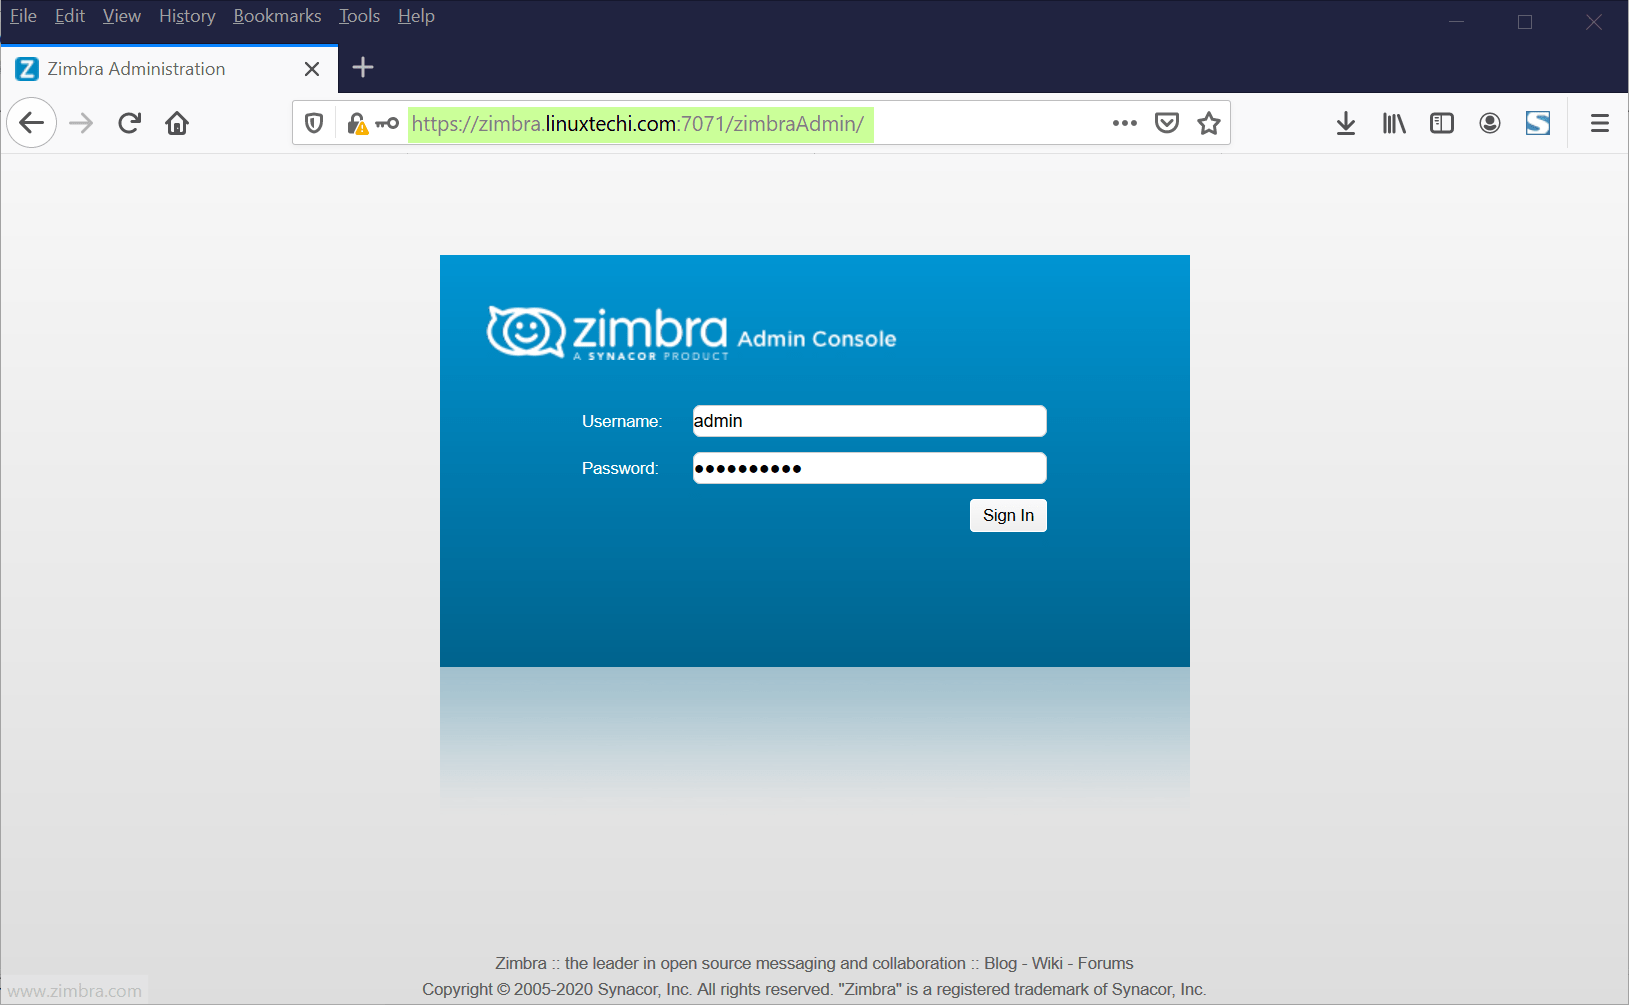
Click on ‘Sign In’
Note: After Zimbra installation on CentOS 8 / RHEL 8 system, I have found amavis was not running and when I checked Zimbra logs (/var/log/zimbra.log) then I have found below error:
Sep  5 09:53:05 zimbra amavis[29288]: Net::Server: Binding to TCP port 10024 on host 127.0.0.1 with IPv4
Sep  5 09:53:05 zimbra amavis[29288]: Net::Server: Binding to TCP port 10024 on host ::1 with IPv6
Sep  5 09:53:05 zimbra amavis[29288]: (!)Net::Server: 2020/09/05-09:53:05 Can't connect to TCP port 10024 on ::1 [Cannot assign requested address]\n  at line 64 in file /opt/zimbra/common/lib/perl5/Net/Server/Proto/TCP.pm
Sep  5 09:53:05 zimbra amavis[29288]: Net::Server: 2020/09/05-09:53:05 Server closing!
I resolved amavis issue by adding the following parameter in /opt/zimbra/conf/amavisd.conf file
$inet_socket_bind = '127.0.0.1';
and restarted the amavis service using following command,
[zimbra@zimbra ~]$ zmamavisdctl restart
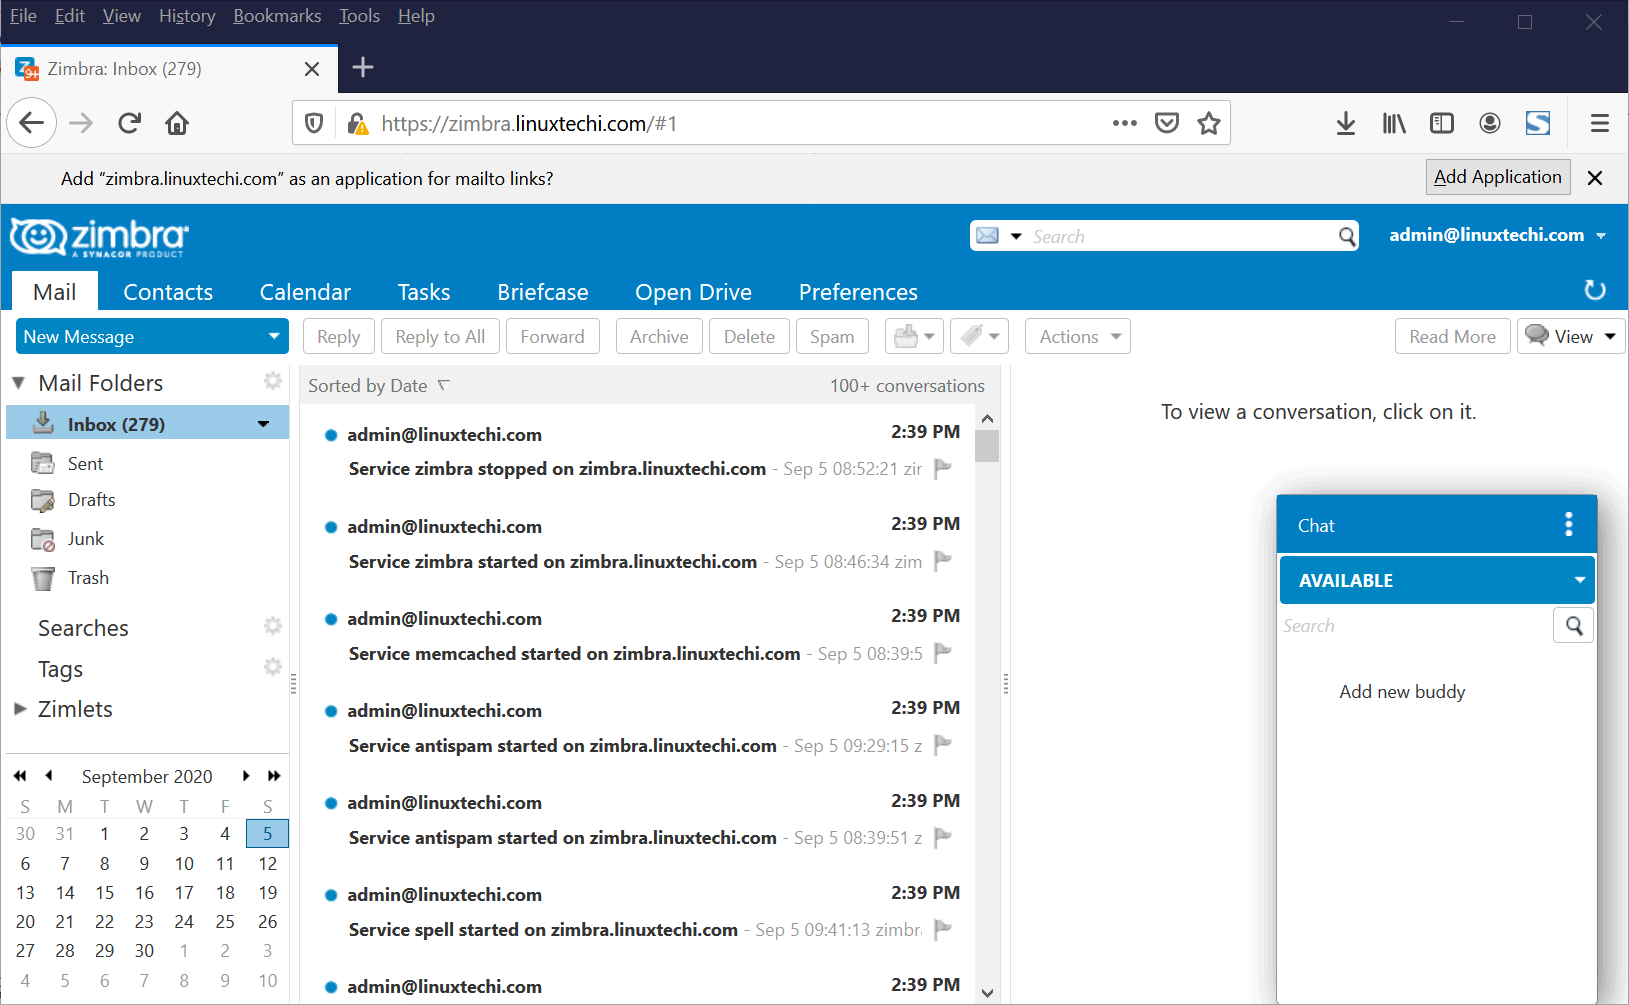
To access web client, use the following URL:
https://zimbra.linuxtechi.com
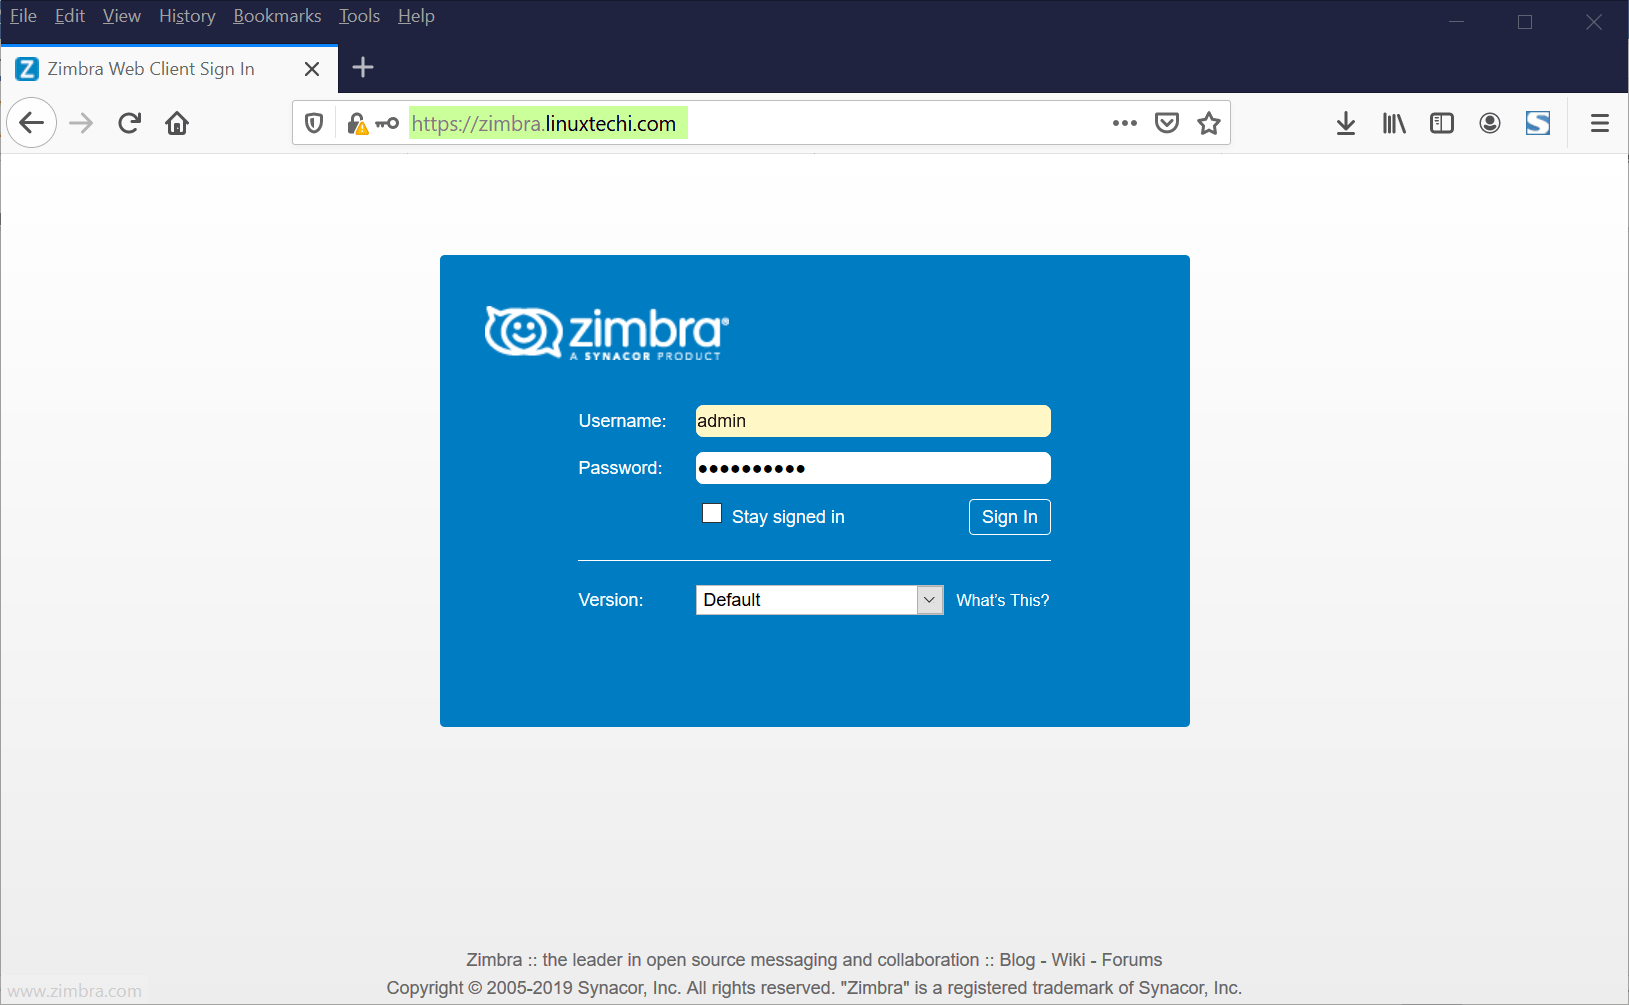
After Entering credentials, click on ‘Sign In’
Step 5) Manage Zimbra from Command Line
All most all the Linux geeks prefer command line to manage their servers, so Zimbra can also be managed from command line with zmcontrol utility. All Zimbra related admin and operations task are performed with Zimbra user.
[root@zimbra ~]# su - zimbra
Last login: Sat Sep  5 09:51:41 BST 2020 on pts/1
[zimbra@zimbra ~]$ zmcontrol status
Host zimbra.linuxtechi.com
        amavis                  Running
        antispam                Running
        antivirus               Running
        dnscache                Running
        imapd                   Running
        ldap                    Running
        logger                  Running
        mailbox                 Running
        memcached               Running
        mta                     Running
        opendkim                Running
        proxy                   Running
        service webapp          Running
        snmp                    Running
        spell                   Running
        stats                   Running
        zimbra webapp           Running
        zimbraAdmin webapp      Running
        zimlet webapp           Running
        zmconfigd               Running
[zimbra@zimbra ~]$
If you want to restart Zimbra service then run,
[zimbra@zimbra ~]$ zmcontrol restart
Zimbra logs are stored in ‘/var/log/zimbra.log’ file. We should always refer this file while troubleshooting. Log files for individual components are stored under ‘/opt/zimbra/log’ directory.
[zimbra@zimbra ~]$ ls -l /opt/zimbra/log | more
total 6244
-rw-r-----. 1 zimbra zimbra  194710 Sep  5 12:40 access_log.2020-09-05
-rw-r-----. 1 zimbra zimbra       0 Sep  5 09:11 activity.log
-rw-r-----. 1 zimbra zimbra       6 Sep  5 09:58 amavis-mc.pid
-rw-r-----. 1 zimbra zimbra       6 Sep  5 09:58 amavisd.pid
-rw-r-----. 1 zimbra zimbra   16112 Sep  5 12:40 audit.log
-rw-r-----. 1 zimbra zimbra   10999 Sep  5 12:49 clamd.log
-rw-rw-r--. 1 zimbra zimbra       6 Sep  5 09:53 clamd.pid
-rw-r-----. 1 zimbra zimbra       0 Sep  5 09:11 ews.log
-rw-r-----. 1 zimbra zimbra    3427 Sep  5 11:54 freshclam.log
-rw-rw----. 1 zimbra zimbra       6 Sep  5 09:53 freshclam.pid
-rw-r-----. 1 root   root    553466 Sep  5 12:47 gc.log
-rw-r-----. 1 zimbra zimbra       6 Sep  5 09:54 httpd.pid
-rw-r-----. 1 zimbra zimbra    1241 Sep  5 09:54 httpd_error.log.2020-09-05
-rw-r-----. 1 zimbra zimbra       0 Sep  5 09:13 imapd-audit.log
-rw-r-----. 1 zimbra zimbra  247177 Sep  5 12:49 imapd.log
-rw-r-----. 1 zimbra zimbra     159 Sep  5 09:54 imapd.out
-rw-r-----. 1 zimbra zimbra       5 Sep  5 09:54 imapd.pid
-rw-r-----. 1 zimbra zimbra       6 Sep  5 09:51 logswatch.pid
-rw-r-----. 1 zimbra zimbra  584562 Sep  5 12:48 mailbox.log
-rw-r-----. 1 zimbra zimbra       6 Sep  5 09:51 memcached.pid
-rw-rw----. 1 zimbra zimbra   40340 Sep  5 12:48 myslow.log
-rw-rw----. 1 zimbra zimbra       6 Sep  5 09:51 mysql.pid
-rw-rw----. 1 zimbra zimbra   18266 Sep  5 09:51 mysql_error.log
-rw-r-----. 1 zimbra zimbra   20130 Sep  5 12:24 nginx.access.log
-rw-r-----. 1 zimbra zimbra   12652 Sep  5 12:24 nginx.log
-rw-r--r--. 1 root   root         6 Sep  5 09:51 nginx.pid
-rw-r-----. 1 zimbra zimbra       6 Sep  5 09:53 opendkim.pid
-rw-r-----. 1 zimbra zimbra       0 Sep  5 09:11 searchstat.log
Step 6) Uninstallation of Zimbra Server
For any reasons, if you wish to uninstall Zimbra server from your CentOS 8 / RHEL 8 system then go to Zimbra extracted folder and execute install script with ‘-u’ parameter, example is shown below:
[root@zimbra ~]# cd zcs-8.8.15_GA_3953.RHEL8_64.20200629025823
[root@zimbra zcs-8.8.15_GA_3953.RHEL8_64.20200629025823]# ./install.sh -u
That’s all from this tutorial, I hope you manage to install open source Zimbra server on your system by referring these steps. Please do share your feedback and comments.
Read Also : Top 7 Security Hardening Tips for CentOS 8 / RHEL 8 Server