Zabbix is an open source monitoring tool that can be deployed on-premises or on the cloud depending on that you intend to monitor. With Zabbix, you can monitor a variety of devices: from physical servers, and network devices such as routers and switches on your IT infrastructure as well as cloud infrastructure.
The latest release of Zabbix is Zabbix 5.0 LTS. Zabbix gives users the ability to perform the following tasks:
- Monitor web services
- Monitor multiple network devices using the SNMP protocol.
- Monitor various database servers such as Oracle, PostgreSQL, MySQL and Microsoft SQL Server.
- Monitor virtual machines and Hypervisor platforms such as VMware vCenter
- Monitor crucial system metrics such as CPU load, network utilization and available disk space.
In this guide, we will discuss how to install and configure Zabbix monitoring tool on CentOS 8 / RHEL 8.
Prerequisites:
Before getting started, ensure that the following requirements are fulfilled:
- An instance of CentOS 8 with a minimum of 2GB RAM and 10 GB available disk space.
- A regular login user with sudo privileges
- Stable Internet Connection
Let’s now jump in and get on with the installation.
Step 1) Apply Updates and Disable / Turn off SELinux
It is always recommended to apply all the available updates before starting Zabbix installation, so run the following dnf command:
$ sudo dnf update -y
For Zabbix to run smoothly without any issues, it’s recommended that you turn off SELinux. SELinux is enabled by default and you can check the status by running the command:
$ sestatus
To disable SELinux, run the following sed command:
$ sudo sed -i --follow-symlinks 's/SELINUX=enforcing/SELINUX=disabled/g' /etc/sysconfig/selinux
Reboot your CentOS 8 or RHEL 8 system for the changes to come to effect.
$ sudo reboot
Step 2) Install LAMP stack
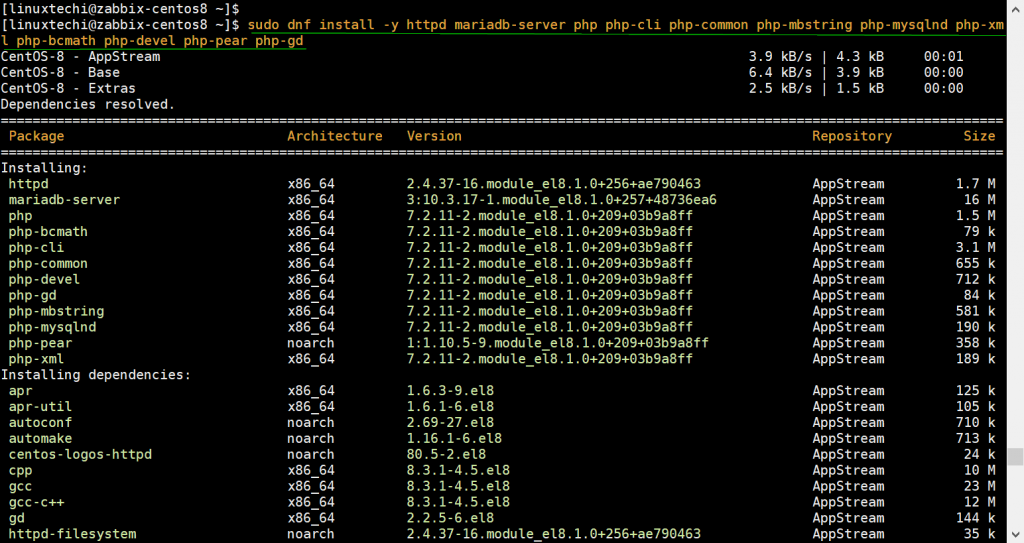
Zabbix is both a front-end and back-end tool and requires a web server, a database engine and PHP installed to function. All these components comprise a LAMP stack. You will, therefore, need to install Apache web server, a database engine (MariaDB is preferred), PHP and requisite PHP modules as shown:
$ sudo dnf install -y httpd mariadb-server php php-cli php-common php-mbstring php-mysqlnd php-xml php-bcmath php-devel php-pear php-gd
Once above packages have been installed successfully then start the webserver and MariaDB database engine as shown
$ sudo systemctl enable httpd --now
$ sudo systemctl enable mariadb --now
Step 3) Create a database for Zabbix
Once the LAMP stack is in place, you need to configure a database for Zabbix server to store its files.
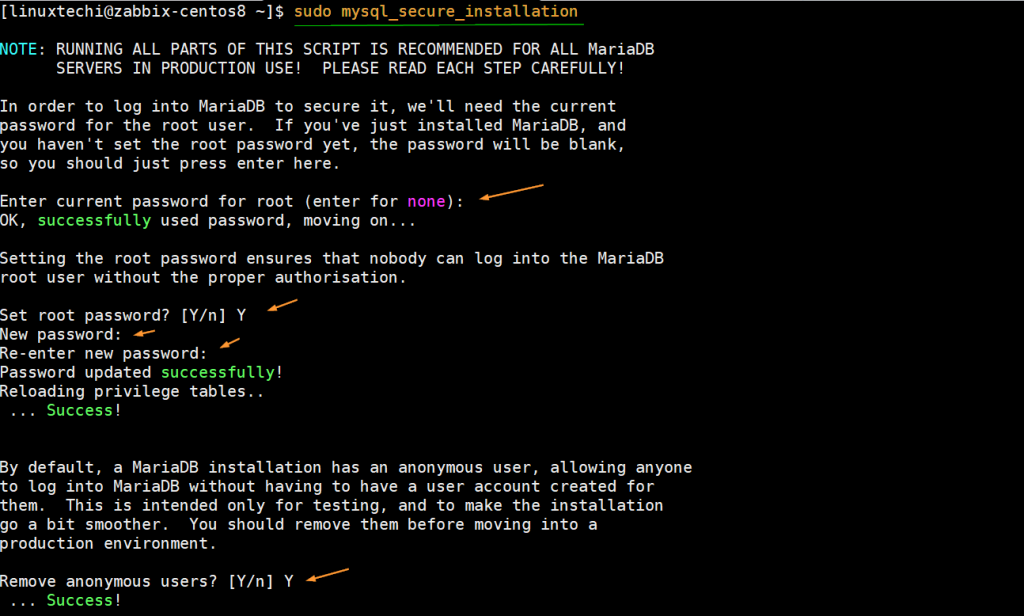
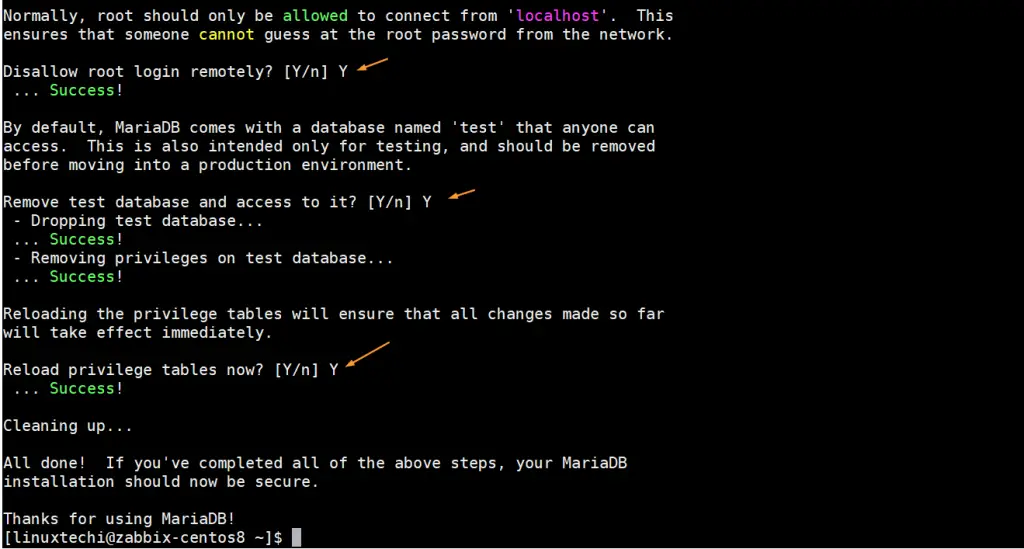
Before setting up the database for Zabbix, first set mysql root password, disable remote root logins and delete test database. Execute “mysql_secure_installation” command, example is shown below:
$ sudo mysql_secure_installation
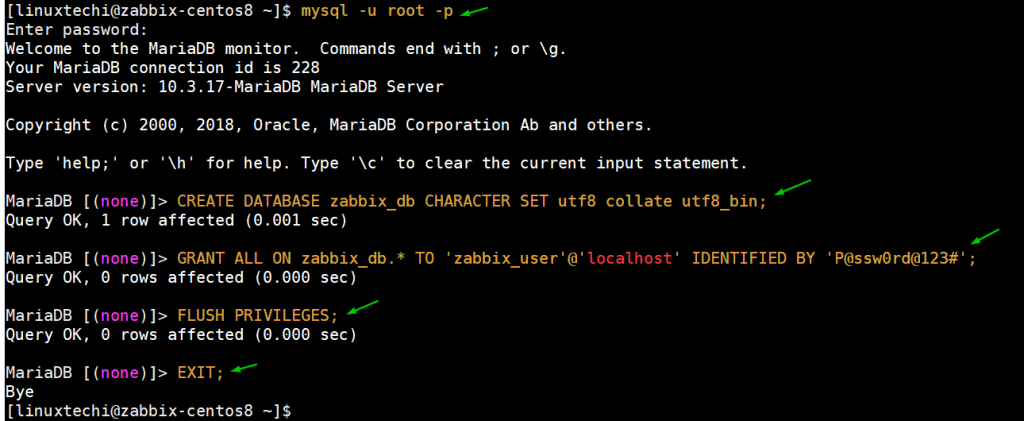
Now, log in to MariaDB server
$ mysql -u root -p
Use the same root password that you have set in above command.
To create and configure database (zabbix_db), run the command:
CREATE DATABASE zabbix_db CHARACTER SET utf8 collate utf8_bin;
The create a database user (zabbix_user) and grant then grant all rights on the database.
GRANT ALL ON zabbix_db.* TO 'zabbix_user'@'localhost' IDENTIFIED BY 'P@ssw0rd@123#';
Finally, reload the grants table for the changes to take effect and exit
FLUSH PRIVILEGES;
EXIT;
The database for Zabbix is in place, now configure Zabbix repository and install Zabbix server in next steps.
Step 4) Configure Zabbix Repository
Zabbix repository is not included by default, and for that reason, you need to manually add it on your system. To accomplish this, execute
$ sudo rpm -Uvh https://repo.zabbix.com/zabbix/5.0/rhel/8/x86_64/zabbix-release-5.0-1.el8.noarch.rpm
Step 5) Install Zabbix Server
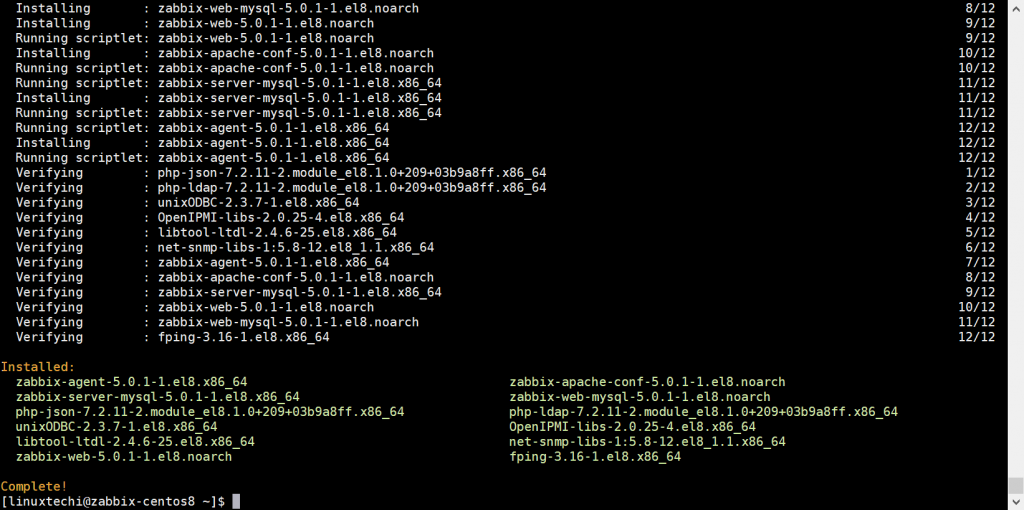
With Zabbix repository in place, now proceed and install Zabbix and associated packages by running the command below:
$ sudo dnf install -y zabbix-server-mysql zabbix-web-mysql zabbix-agent zabbix-apache-conf
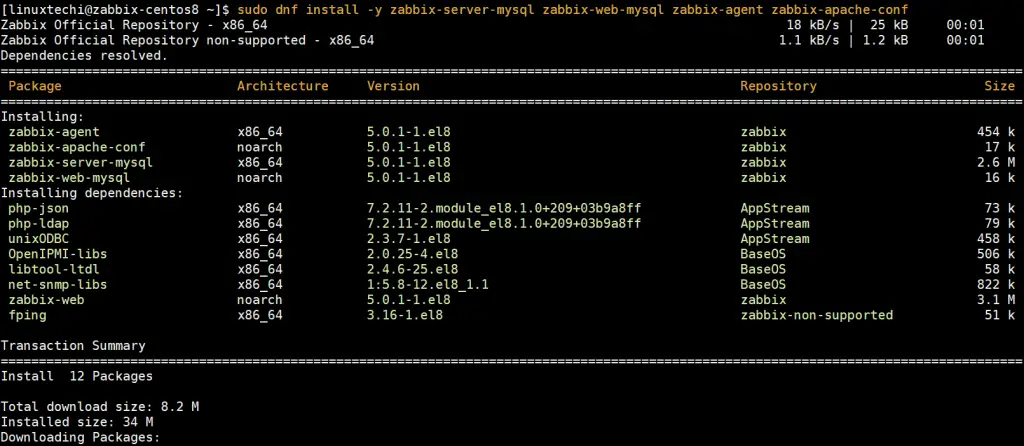
You will get the output below as a confirmation that Zabbix and associated dependencies have been installed
You can now proceed and start Zabbix server, agent, Apache web server and PHP-FPM
$ sudo systemctl start zabbix-server zabbix-agent php-fpm httpd
Next, enable the services to start upon a reboot or on boot:
$ sudo systemctl enable zabbix-server zabbix-agent php-fpm
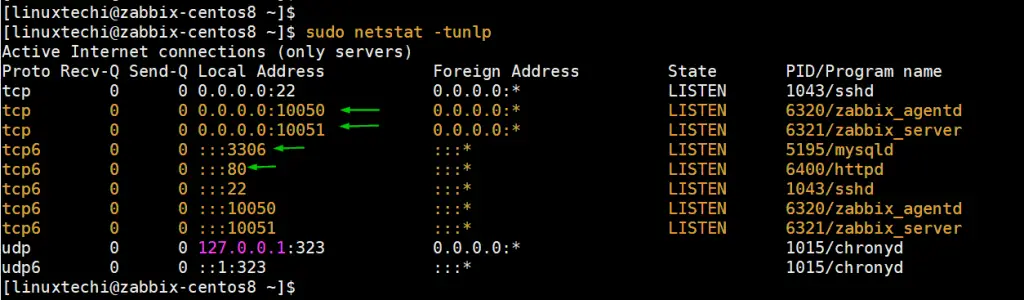
By default, Zabbix server listens on port 10050 while the Zabbix agent listens on port 10051. You can confirm if the 2 services are listening by running the netstat command as shown:
Note: If netstat command is not installed on your system then first installed it using the command :
$ sudo dnf install net-tools -y
$ sudo netstat -tunlp
Step 6) Configure Zabbix Server
The first step in configuring Zabbix is to import the database schema into the database that was created for Zabbix in step 2. So run the commands below:
$ cd /usr/share/doc/zabbix-server-mysql/
$ sudo zcat create.sql.gz | mysql -u zabbix_user -p zabbix_db
In above command specify the zabbix_user password that we have created during Zabbix database creation. (In my case zabbix_user password would be P@ssw0rd@123#)
Next, specify the Zabbix database information in the zabbix.conf file as shown
$ sudo vi /etc/zabbix/zabbix_server.conf
Be on the lookout for the following Database attributes – DBHost, DBName, DBUser and DBPassword and fill them out according to the database credentials.
DBHost=localhost
DBName=zabbix_db
DBUser=zabbix_user
DBPassword=P@ssw0rd@123#
Save and exit the file.
Finally, Set the timezone by editing the file zabbix.conf in /etc/php-fpm.d/zabbix.conf.
For example, to set timezone in London, Europe, edit the file as shown
php_value[date.timezone] = Europe/London
Here are additional timezones that you can use.
Once you are done, save and exit. Then, restart the Zabbix services and PHP-FPM to effect the changes made.
$ sudo systemctl restart zabbix-server zabbix-agent php-fpm httpd
Step 7) Configure the Firewall Rules for Zabbix
To allow Zabbix agent from other servers to access the Zabbix Server, you need to open the Zabbix ports and port 80 associated with Apache web server on the firewall. Therefore, run the commands below:
$ sudo firewall-cmd --permanent --add-port=10050/tcp
$ sudo firewall-cmd --permanent --add-port=10051/tcp
$ sudo firewall-cmd --permanent --add-port=80/tcp
To save the changes, reload the firewall
$ sudo firewall-cmd --reload
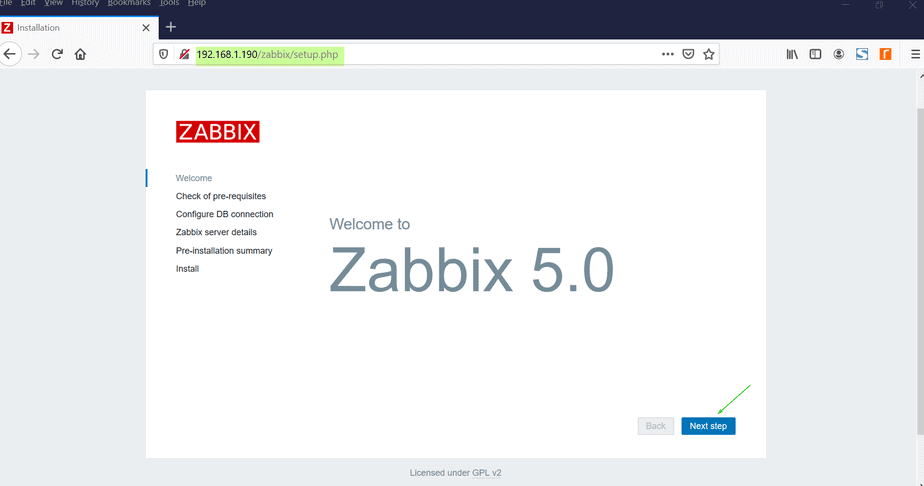
Step 8) Finalize Zabbix installation via a browser
With all the configurations in place, the only thing left to do is to finalize the installation via a browser. Therefore, fire up your browser and browse the server’s address as shown:
http://server-ip/zabbix
You will get a ‘Welcome’ page as shown: Click ‘Next Step’ to proceed to the next step
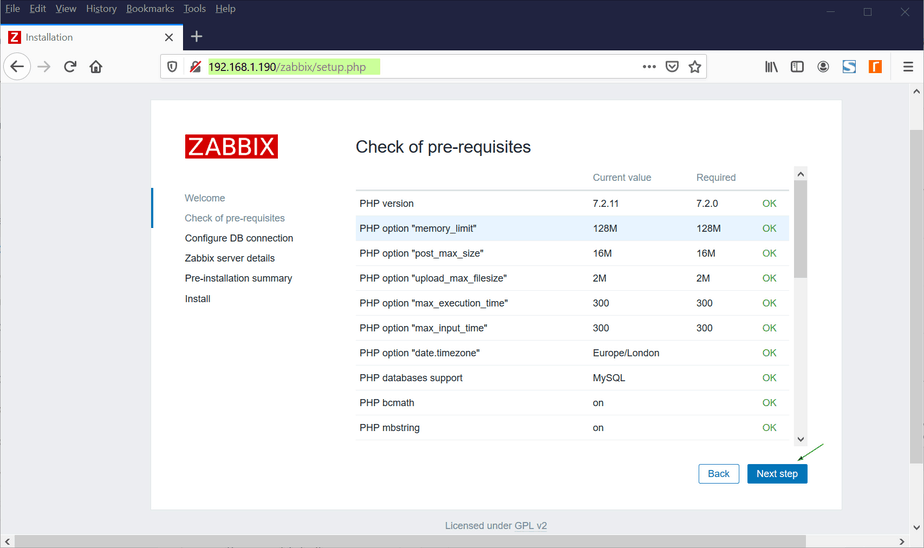
The next page displays all the prerequisites needed for the installation of Zabbix. If some errors are displayed, click on the ‘Back’ button and install what’s missing. If there are no errors as shown, click ‘Next step’ to go ahead with the installation.
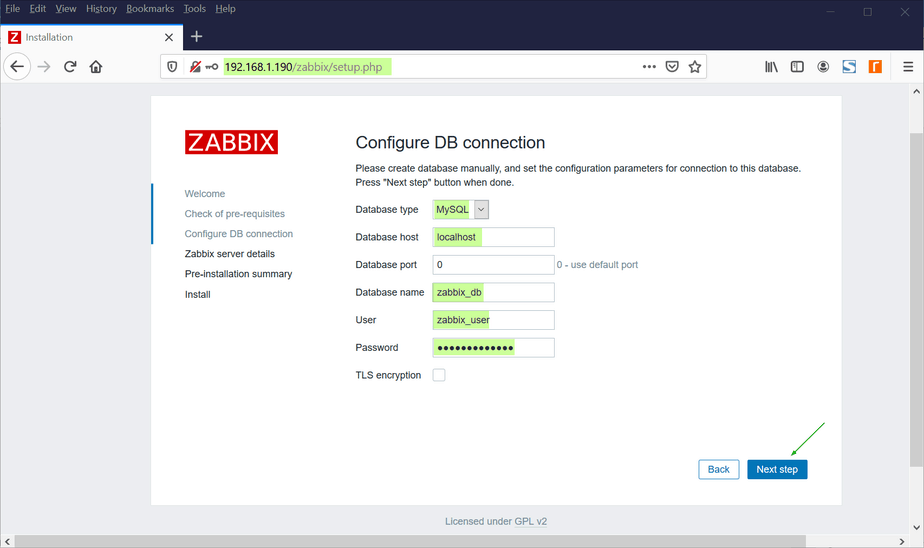
In the next step, provide the database details as shown and click ‘Next step’
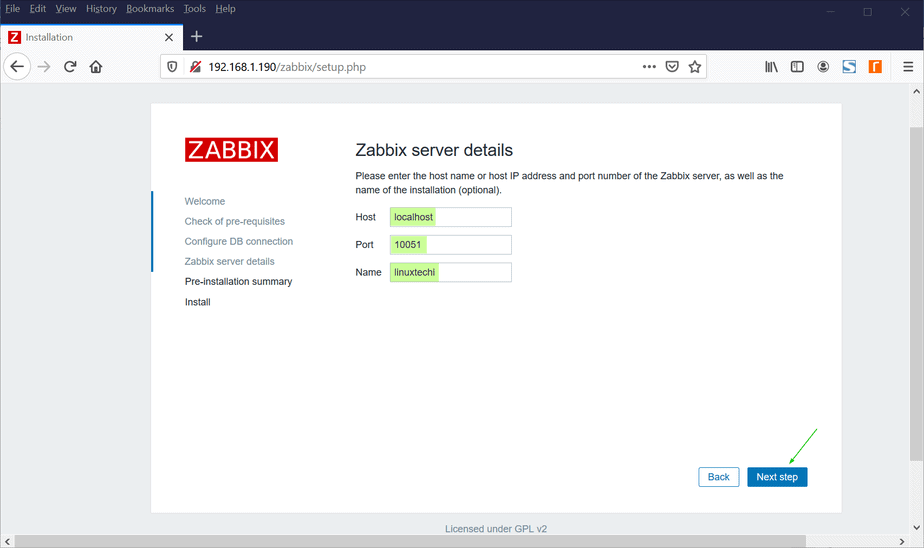
Next, specify the name of your database server as indicated in the ‘Name’ text field. Leave other details just as they are and click ‘Next Step’
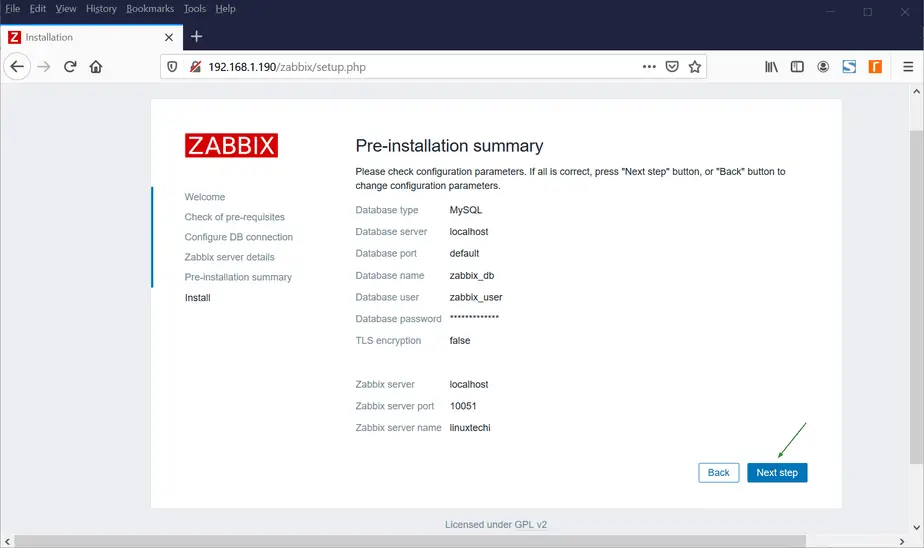
The next page presents you with a summary of the database information that you have provided. If all is good, click ‘Next Step’. Else go back and make corrections if need be.
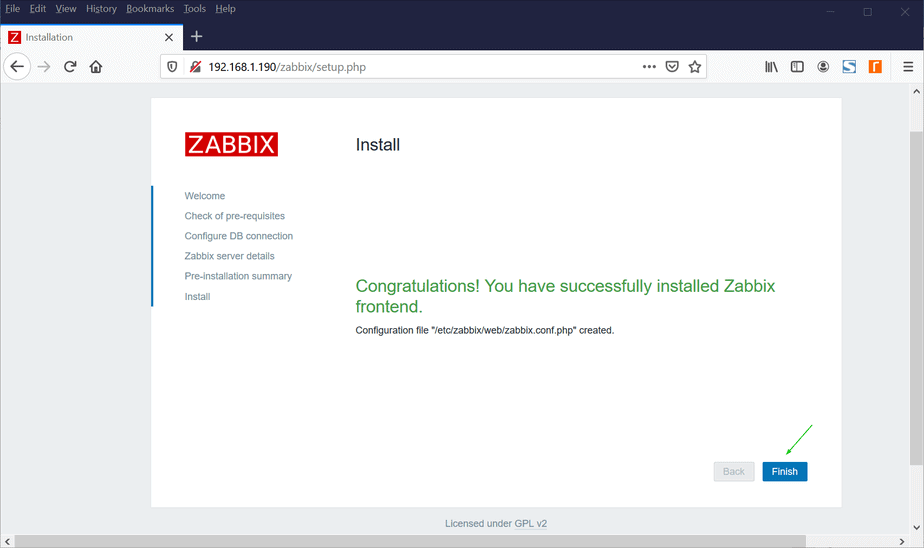
If the details you provided are correct, you will get a notification below indicating that you have successfully installed Zabbix server. Click ‘Finish’.
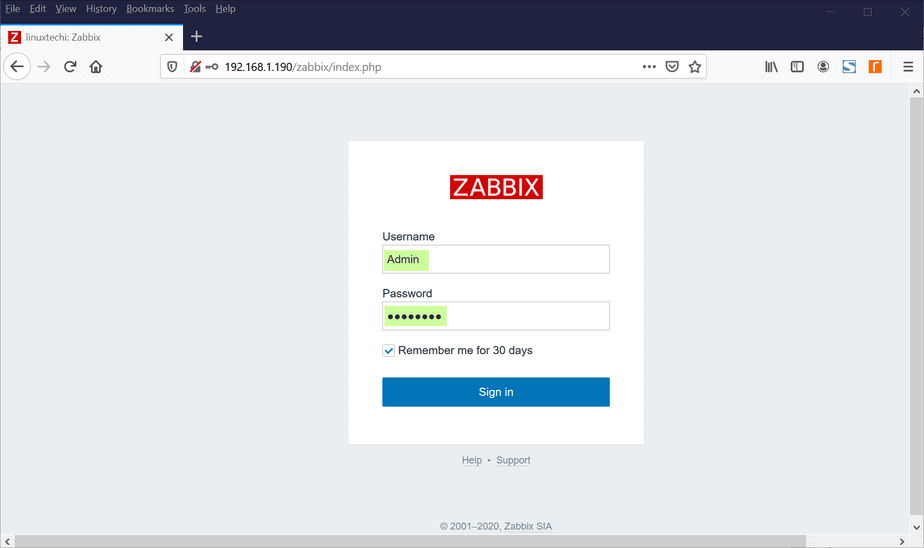
A login page will be displayed below: Use Admin as the username and zabbix as the password to sign in.
Finally, you will get the dashboard displayed as shown.
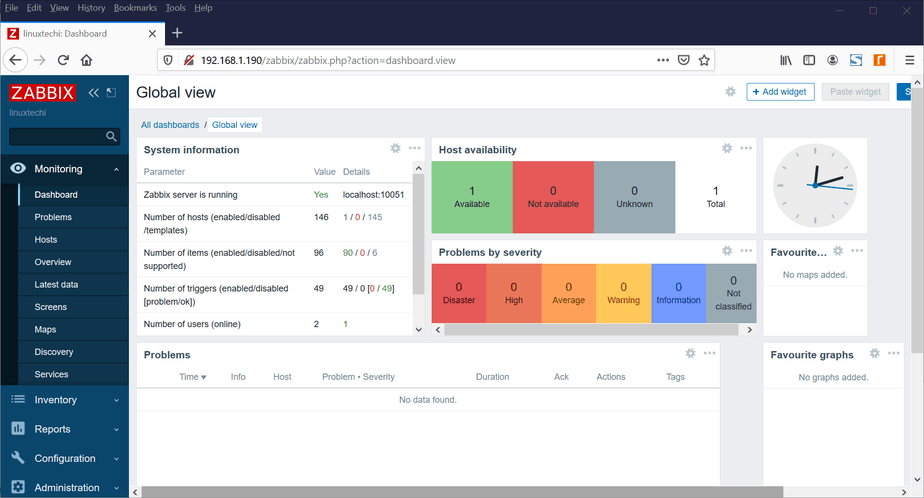
Bravo! you have successfully managed to install Zabbix server on CentOS 8.
Also Read: How to Add Linux Host in Zabbix Server for Monitoring
Also Read: How to Add Windows Host to Zabbix Server for Monitoring
This all works for me up to Step 4 then I get error that cannot download the repodata/repomd.xml due to cert errors, I have followed that for a while and cannot seem to resolve it.