In the previous article, we looked at how you can add Linux servers on the Zabbix server for monitoring. In this guide, we switch gears and focus our spotlight on how you can add a Windows host system to the Zabbix server for monitoring.
For this tutorial, we will add the Windows server 2019 datacenter edition to Zabbix Server.
Step 1) Download Zabbix Agent for Windows Server
As we saw when adding Linux hosts, the first step when adding a host to the Zabbix server is to install the Zabbix agent on the host system first. With that in mind, head out to the official Zabbix agents download page and download the Zabbix Window’s agent.
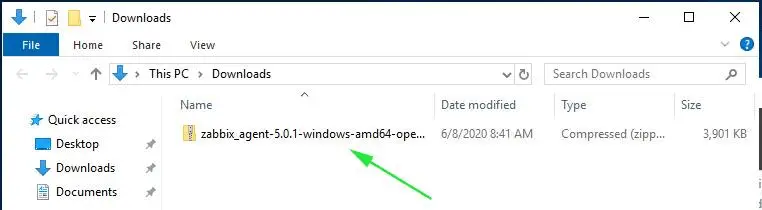
By default, this will download it in the ‘Downloads’ folder as shown.
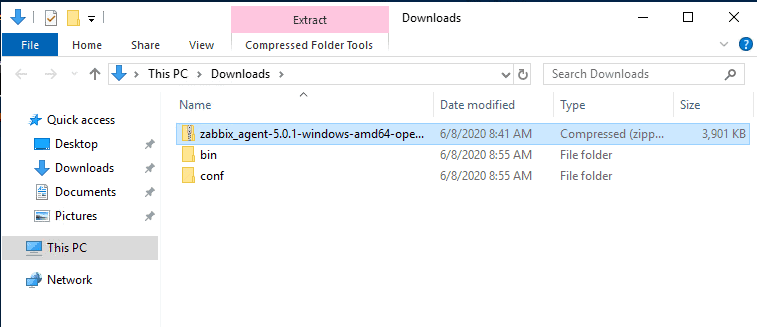
Once downloaded, right-click on the zipped file and select ‘Extract All’ to unzip it as shown.
This unzips it into 2 folders: bin and conf folder. The bin folder contains the Zabbix agent executable file while the conf folder contains the Zabbix agent configuration file – zabbix.agentd.conf
Step 2) Edit the Zabbix configuration file
We need to make a few changes to the zabbix configuration file for the Zabbix agent to communicate with the Zabbix server. Therefore, open the zabbix configuration file – zabbix.agentd.conf – and modify the parameters as shown:
Server=<IP address of the Zabbix server>
ServerActive=<IP address of the Zabbix server>
Hostname=<The FQDN of the Windows server>
Save the changes and exit the file.
Step 3) Install and start Zabbix Agent on Windows server
With all the configurations in order, run command prompt as administrator and install Zabbix using the syntax as shown:
C:\> {full system path to zabbix_agentd.exe) –config {full system path to zabbix_agentd.win.conf} –install
In my case, the command will be:
C:\>C:\Users\winnie95atieno\Downloads\bin\zabbix_agentd.exe --config C:\Users\winnie95atieno\Downloads\conf\zabbix_agentd.conf --install
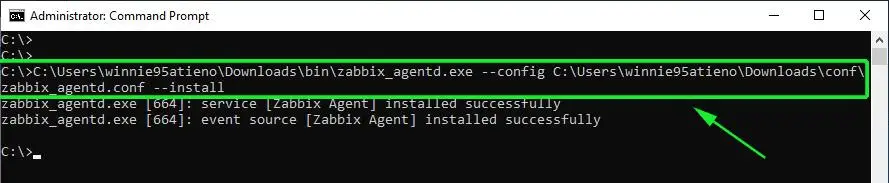
From the output, we can see that the Zabbix agent has successfully been installed.
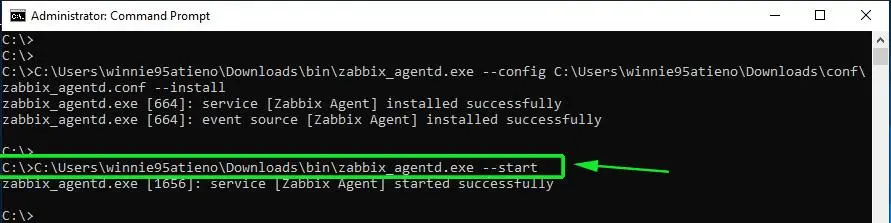
To start Zabbix, use the syntax:
C:\> {full system path to zabbix_agentd.exe) –start
The command will therefore be:
C:\>C:\Users\winnie95atieno\Downloads\bin\zabbix_agentd.exe --start
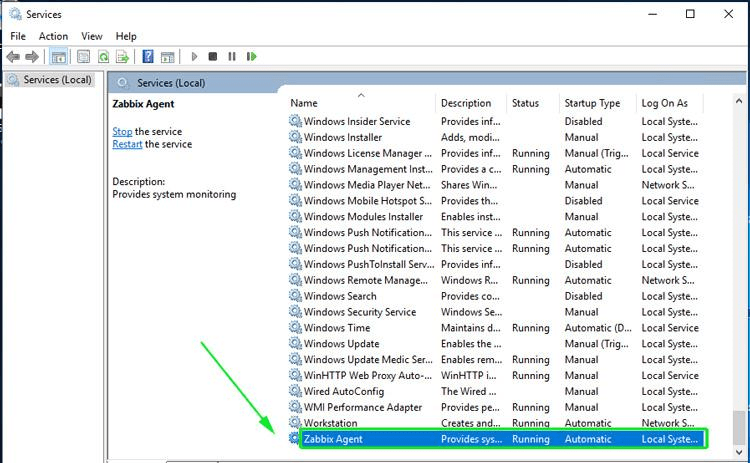
To confirm that the Zabbix agent is running, head out to the ‘Windows Services’ application and confirm that the Zabbix agent is up and running.
Step 4) Configure Windows firewall for Zabbix Agent
By default, the Windows firewall is enabled and blocks incoming and going connections. We are therefore going to make a few changes to allow traffic from the Windows Server host to the Zabbix server.
First, we are going to allow ICMP protocol for the Zabbix server to establish network communication with the Windows host and report any errors when they occur. Therefore, run Windows Powershell with Administrative privileges and execute the command as shown:
netsh advfirewall firewall add rule name="ICMP Allow incoming V4 echo request" protocol="icmpv4:8,any" dir=in action=allow
Next, allows port 10050 – which is the default port that Zabbix listens to – on the firewall.
netsh advfirewall firewall add rule name="Open Port 10050" dir=in action=allow protocol=TCP localport=10050

To this point, we have successfully installed and configured the Zabbix agent on the Windows host system. The Zabbix agent should be sending system metrics to the Zabbix server. Let’s now go over and see how you can add the Windows host on the Zabbix server.
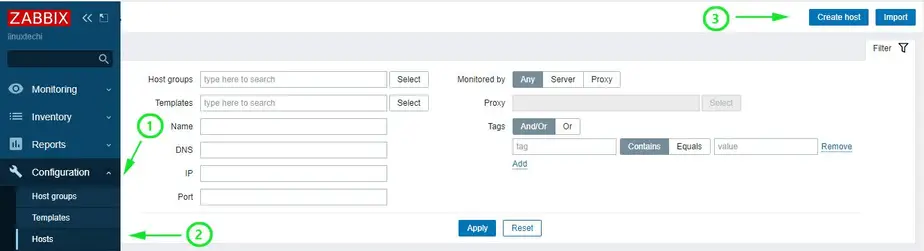
Step 5) Add a Windows host on Zabbix Server
To add a Windows host, go to Configuration –> Host –> Create Host
On the next screen, fill out the Windows host details such as hostname, visible name and IP address.
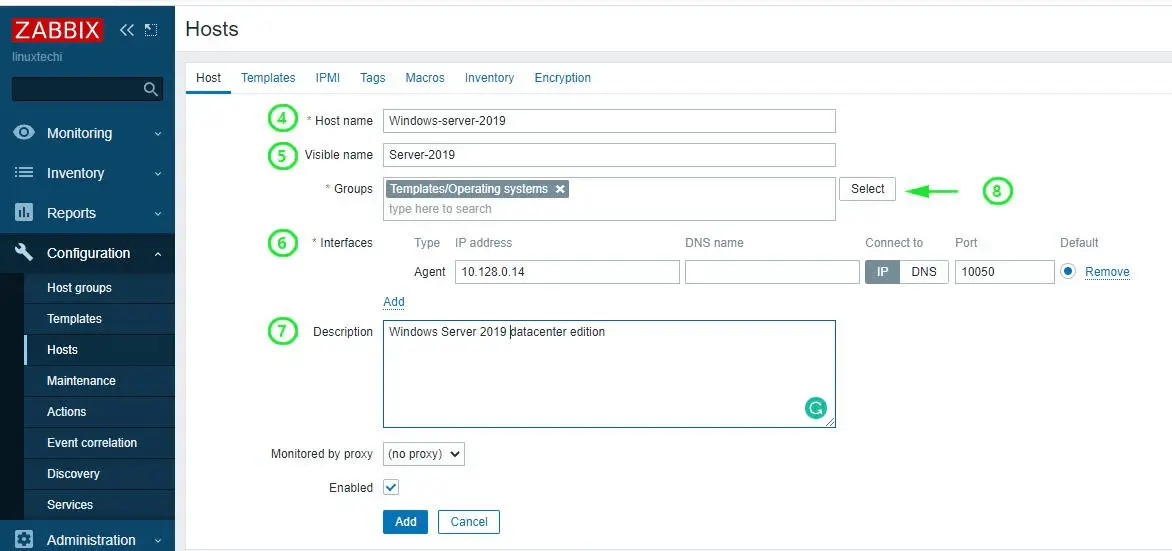
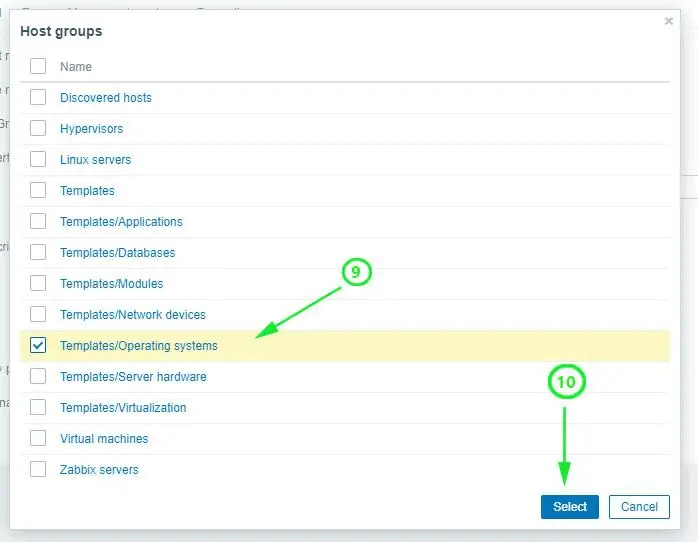
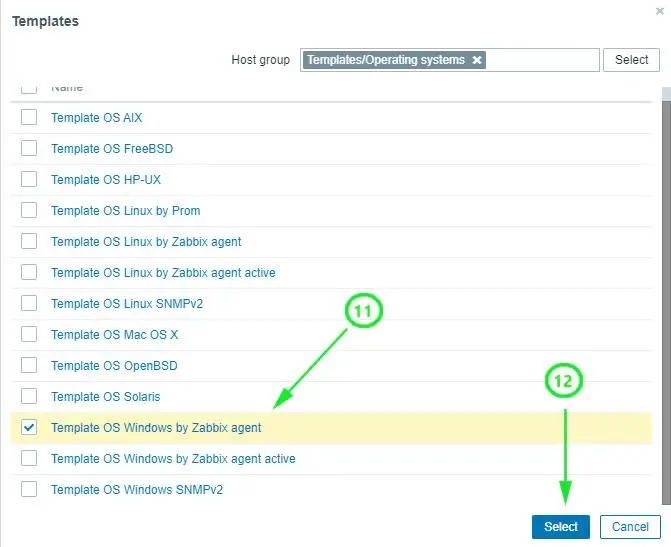
For the ‘Groups’ section, click on the ‘Select’ button and click on the ‘Templates/Operating system’ option.
Next, click on the ‘Templates’ tab on the menu and click ‘Template OS Windows by Zabbix agent’. Finally, click on the ‘Select’ button.
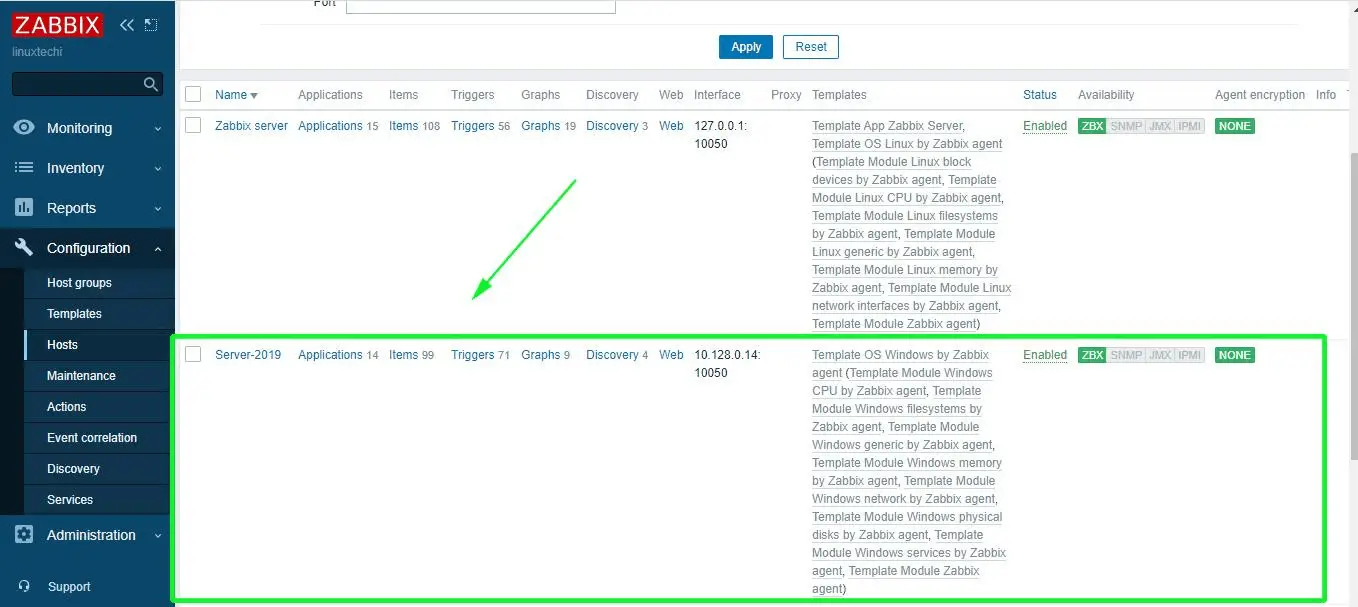
On the dashboard, check the Windows host listed as shown below. Note that the state is indicated ‘Enabled’ with the Zabbix icon ‘ZBX’ in green color.
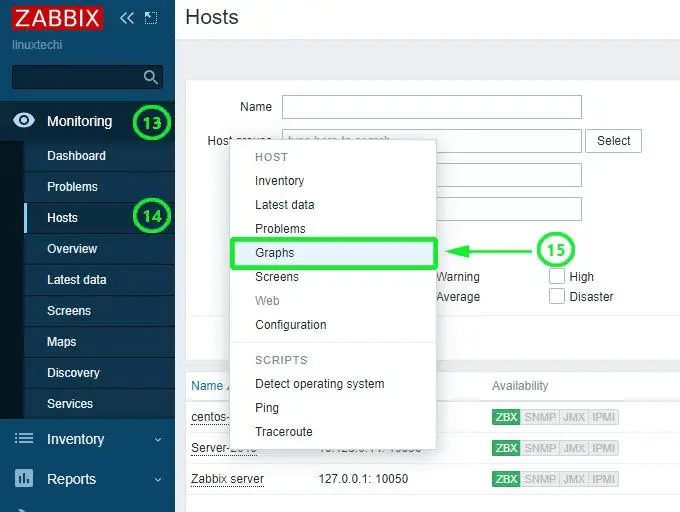
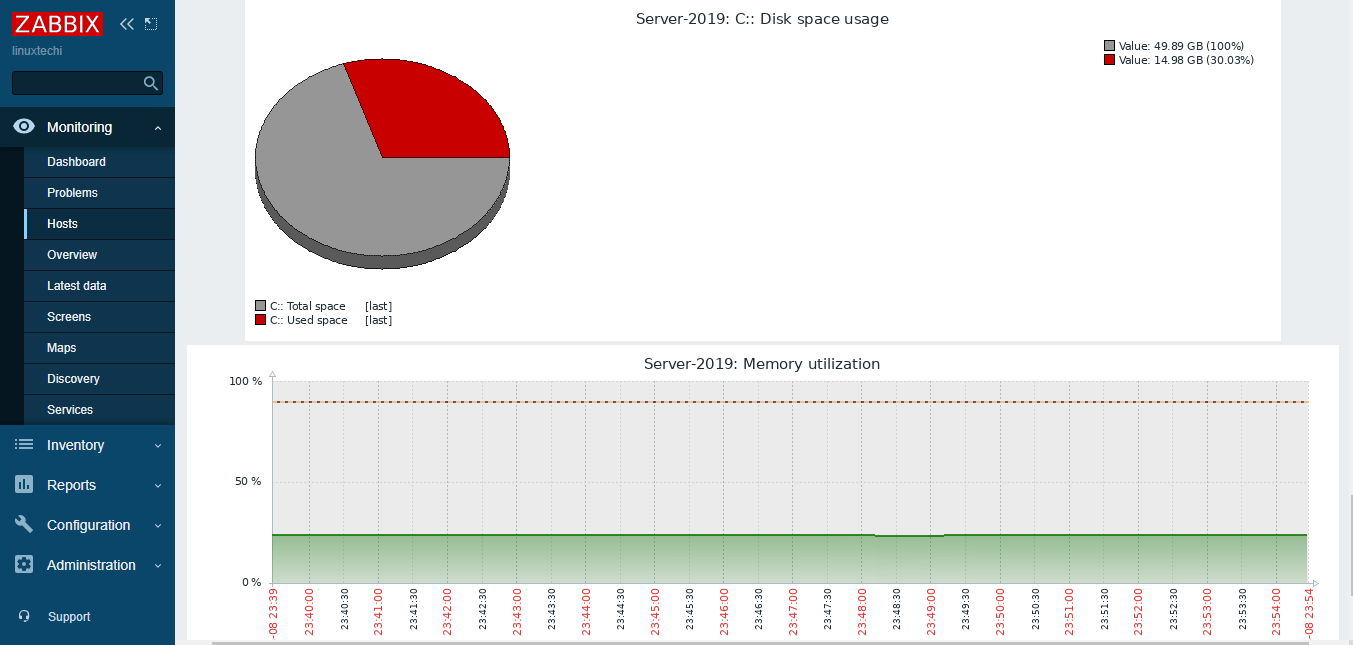
To graph the metrics associated with the Windows host system, click on ‘Monitoring’ –> ‘Hosts’. Click on the Windows host and select ‘Graphs’.
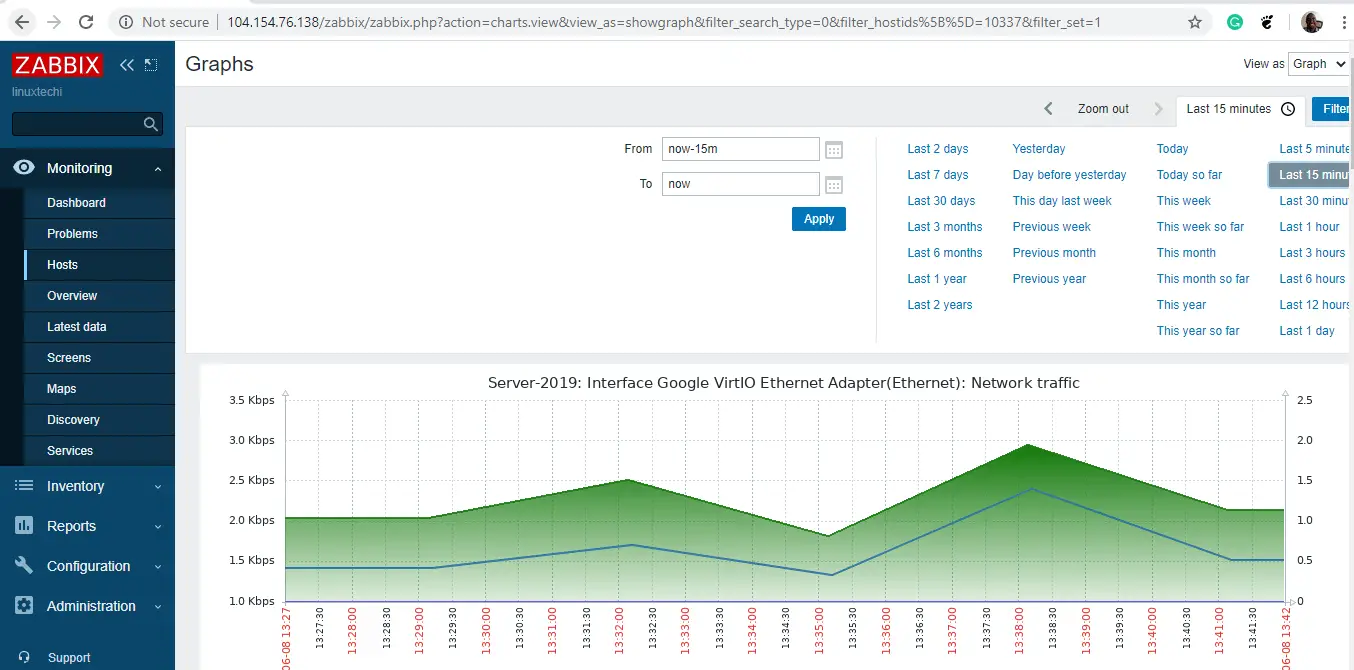
Finally, the Zabbix server will start graphing the system metrics shipped by the Zabbix agent which is residing on the Windows server host system. There are various metrics that you can monitor including network Interface statistics, CPU usage and utilization, Disk space usage and Memory utilization to mention a few.
And this brings us to the end of this topic. It’s our hope that you can now comfortably add a Windows host on the Zabbix server for monitoring.