FTP, short for File Transfer Protocol, is a protocol that provides access to files residing on a server. It’s one of the earliest protocols that enabled users to download files over the internet. With the FTP protocol, users can download and upload files on servers with ease.
Vsftpd, short for Very Secure FTP daemon, is a secure FTP daemon that is an upgrade of FTP protocol. It enforces secure connections to FTP servers by encrypting traffic send to and from the server, and by so doing, the file transfer is kept safe and secure from hackers.
In this topic, we shine the spotlight on the installation of vsftpd on CentOS 8 / RHEL 8.
Step 1) Install vsftpd using dnf command
Right off the bat, we are going to install vsftpd. To achieve this, we will run the command below:
$ sudo dnf install vsftpd

Press ‘y’ and hit ENTER to get underway with the installation. The installation takes a few seconds and will complete in no time. The output below confirms that vsftpd has been successfully installed.

The output indicates that we have installed vsftpd version 3.0.3-31.el8.x86_64. To confirm this, execute the following command:
[linuxtechi@centos8-vsftpd ~]$ rpm -q vsftpd
vsftpd-3.0.3-31.el8.x86_64
[linuxtechi@centos8-vsftpd ~]$
The output should tally with the version printed on the terminal upon successful installation. To retrieve more detailed information about Vsftpd, append the -i flag at the end as shown:
$ rpm -qi vsftpd
This will print additional information on the screen such as the Architecture, install date, license and signature to mention a few.

With vsftpd installed, we need it running to facilitate access to file shares.
To start the vsftpd service, run the command:
$ sudo systemctl start vsftpd
You may also want to enable it to start automatically upon a reboot. To achieve this, run the command
$ sudo systemctl enable vsftpd --now
To verify the status of vsftpd on your system, run:
$ sudo systemctl status vsftpd
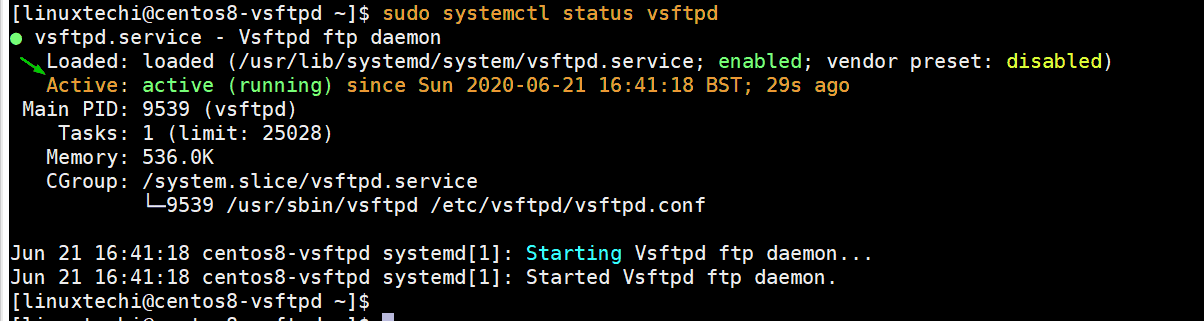
If you see the “active: (running)” directive in green as indicated on the terminal, then the vsftpd service is up and running.
Step 2) Create a ftp user and its directory
Next, we will create a user that we will use to access the FTP server. In this case, the user will be ftpuser but feel free to give your user a name of your choice.
$ sudo adduser ftpuser
$ sudo passwd ftpuser
With the FTP user in place, we will proceed and create the FTP directory and assign the following permissions and directory ownership.
$ sudo mkdir -p /home/ftpuser/ftp_dir
$ sudo chmod -R 750 /home/ftpuser/ftp_dir
$ sudo chown -R ftpuser: /home/ftpuser/ftp_dir
We also need to add the FTP user to the /etc/vsftpd/user_list file to allow the user access to the vsftp server.
$ sudo bash -c 'echo ftpuser >> /etc/vsftpd/user_list'
Step 3) Configure vsftpd via its configuration file
So far, we have managed to install and confirm that vsftpd is up and running. Further adjustments are necessary for Vsftpd to allow users access to the server.
The default configuration file for vsftpd is the /etc/vsftpd/vsftpd.conf file. The file is replete with directives that help fortify your FTP server’s security.
In this section, we will make a few tweaks to the configuration file and allow users to access the server.
To allow local users to access the FTP server remotely, and block anonymous users, ensure you have the directives as shown:
anonymous_enable=NO
local_enable=YES
To grant users rights to run any FTP command & make changes such as uploading, downloading and deleting files, have the following line in place.
write_enable=YES
For security purposes, you may opt to restrict users from accessing any files & directories outside their home directories. Therefore, have the following directive in place.
chroot_local_user=YES
To grant users write access to their respective home directories, ensure you have this directive.
allow_writeable_chroot=YES
Next, we are going to define custom ports to enable Passive FTP connections. In this case, we will specify ports 30000 and 31000. We shall later open these on the firewall.
pasv_min_port=30000
pasv_max_port=31000
Next, we are going to only allow the users defined in the /etc/vsftpd/user_list access to the server and block the rest. To achieve this, have the lines below.
userlist_file=/etc/vsftpd/user_list
userlist_deny=NO
Finally, save and close the file. For the changes to persist, restart the Vsftpd service.
$ sudo systemctl restart vsftpd
At this point, you can test for FTP connectivity by running
$ ftp ip-address
Specify the username of the ftp user and later provide the password. You should get the output as shown.
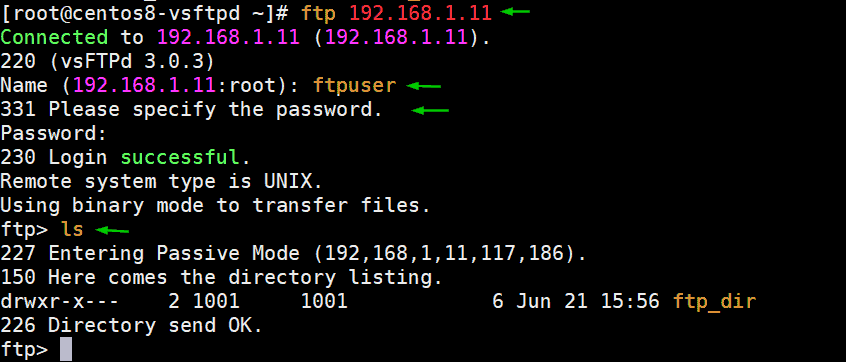
Though we have established connectivity to the vsftpd server. The connection is not secure, and information sent is in plain text and not encrypted. We, therefore, need to take extra steps to encrypt communications sent to the server.
Step 4) Configure SSL / TLS for vsftpd
To encrypt communications between the server and a client system, we need to generate a TLS certificate and later configure the server to use it.
To generate the certificate, run the command below:
$ sudo openssl req -x509 -nodes -days 3650 -newkey rsa:2048 -keyout /etc/vsftpd.pem -out /etc/vsftpd/vsftpd.pem
This will be followed by a series of prompts where you will be required to provide a few details such as country name, state or province, and organizational name to mention a few. Fill out all the details accordingly as shown.

We also need to tell the server where the certificate files are stored. So, head back to the configuration file /etc/vsftpd/vsftpd.conf and specify the path to the certificate files.
rsa_cert_file=/etc/vsftpd/vsftpd.pem
rsa_private_key_file=/etc/vsftpd.pem
And then, instruct the server to turn on SSL.
ssl_enable=YES
Save and exit the configuration file. To make above changes into the effect, restart vsftpd service,
$ sudo systemctl restart vsftpd
Step 5) Allow ftp server (vsftpd) ports in the firewall
If you are running a firewall, you need to allow these salient ports”
- 20 – to allow FTP traffic
- 21 – FTP data port
- 30000-31000 – To allow passive communication with the FTP server.
Therefore, run the commands below:
$ sudo firewall-cmd --permanent --add-port=20-21/tcp
$ sudo firewall-cmd --permanent --add-port=30000-31000/tcp
Then reload the firewall for the changes to come into effect.
$ sudo firewall-cmd --reload
Step 6) Test your vsftpd or FTP server
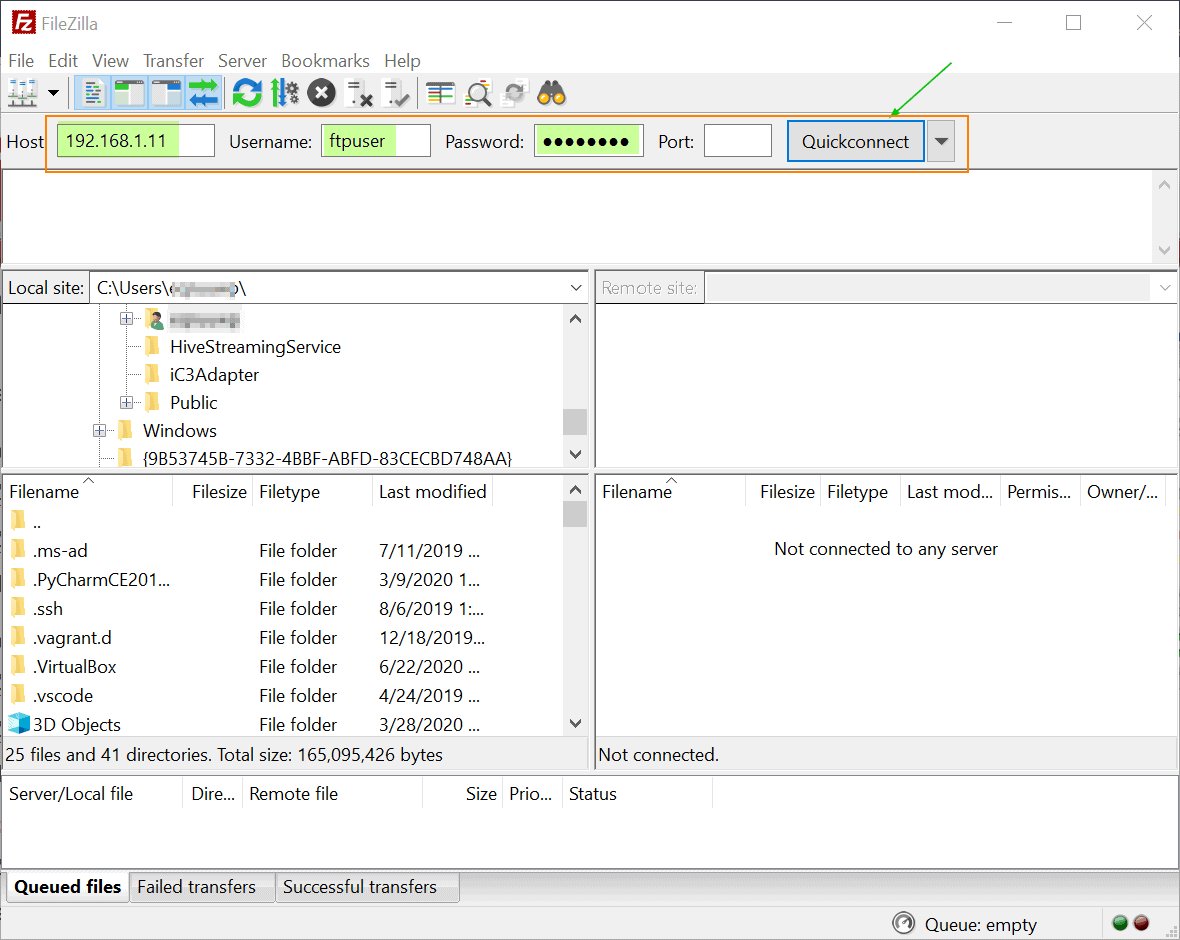
With all settings done, it’s time to test our connectivity. In this example, we are using an FTP client known as FileZilla which is a free FTP client for both client and server systems. It supports both plain FTP and FTP over TLS which is what we are going to test.
When launched, the interface looks as shown. Provide the IP address of the host (vsftpd), username and password of the ftp user and then click on the ‘Quickconnect’ button.
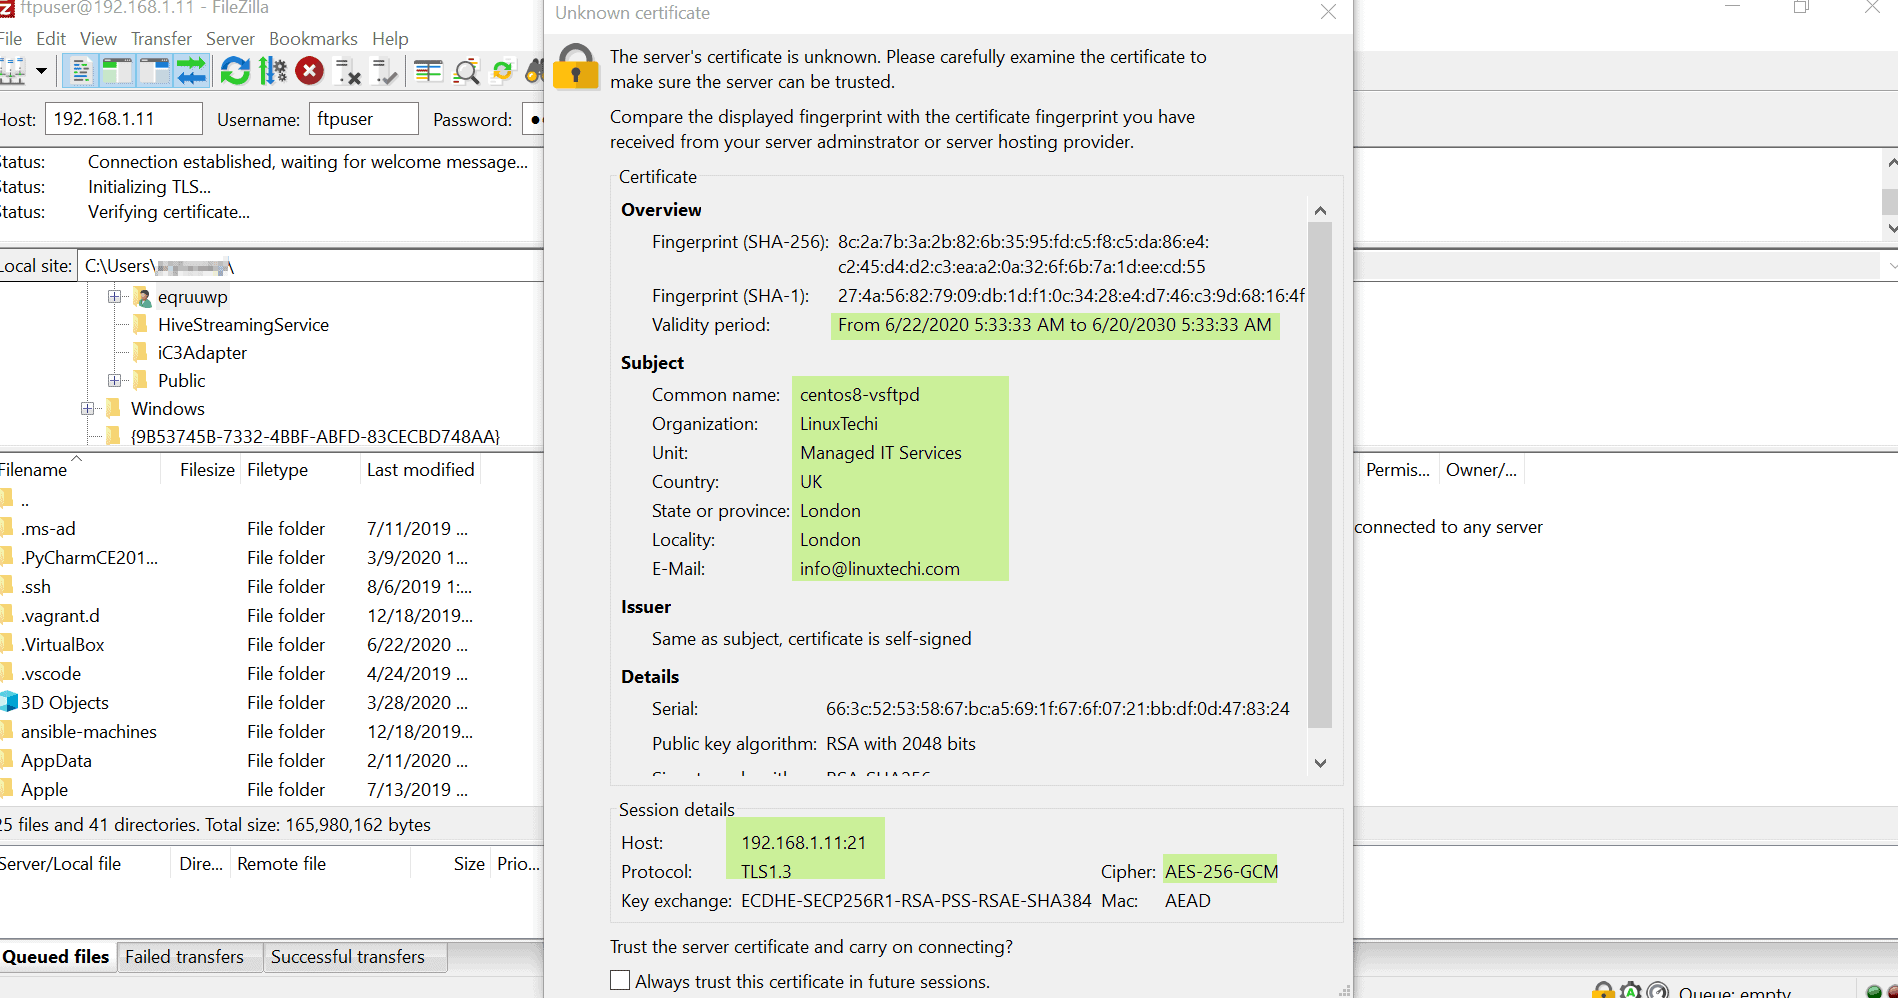
Shortly after, a pop-up will appear displaying the FTP server’s certificate & session details. To proceed with the connection, click on “Always trust this certificate in future session” and then hit enter.
If you all your configurations are correct, you should gain entry without any issues as shown. On the bottom right pane, the remote server’s home directory as shown. You can now upload, download and edit the files as you deem fit.

This concludes our topic on the installation of vsftpd on CentOS 8. It’s our hope that you can now comfortably set up your own vsftpd (secure ftp) server. Please do share it among your technical friends and also share your valuable feedback and comments.
Also Read : How to Rotate and Compress Log Files in Linux with Logrotate
Also Read: How to Install Memcached (Caching Server) on CentOS 8

Hello, I have a problem with your tutorial. I everything do with your tutorial, but when I put ftp ip address of CentOS server i sew error>
530 login incorrect
login failde.
Please do you help me.
Hi Zoran,
I would suggest try to connect to your ftp server locally first and see if you got same invalid login error. Try to reset user password and cross verify the parameters in vsftpd.conf and restart vsftpd service once.
you should run setenforce 0 command then check. if working then you should allow ftp from firewall or permanent dibale selinux firewall. hope this will help
Dear Kumar, I try first localy. In Trminal I put command ftp 192.168.0.40 (this is my localy IP adress of CentOS server), and I get error 530 login incorrect, login failed. I everything configure by your tutorial.I edit vsftpd.conf file by your statement.
Hey Zoran, In the configuration file /etc/vsftpd.conf, ensure you add this line and restart the vsftpd service.
pam_service_name=ftp
Let me know if this works for you.
Kumar I now chnage user password with command sudo passwd ftpuser, to new password, but When I try ftp ipadress of my CetnOS, error is still same
Hello James, I added line pam_service_name=vsftpd, but error still. After that I install update from Cockpit, then everything all works. Thanks of lot for your support. I wish the best of all for you. The greethings, from me from Belgrade – Serbia.
Awesome tutorial. Thank you.
I want to report you a quick fix in the SSH PRIVATE KEY FILE the correct url is /etc/vsftpd.pem (the second one)
Thanks a lot!
Thanks Gricel, I have fixed it now in the article.
Hey Pradeep
Thanks for the guide, very handy.
Q: I already have my site setup at /var/www/html/example.com
How do I setup the FTP to point to this path? Can’t figure it out.
Hi Jake,
While creating ftpuser set its home directory as ‘/var/www/html/example.com’.
Thank you very much !!!!
Awesome, it works for me at the first try.