In this blog post, we will show you how to install VirtualBox Guest Additions on Ubuntu 22.04.
Running Ubuntu 22.04 as a virtual machine within Oracle VirtualBox is a common scenario for many users. While VirtualBox provides a seamless virtualization experience, you can further improve it by installing VirtualBox Guest Additions. These additions offer enhanced functionality and performance, including better display resolution, seamless mouse integration, and improved file sharing between your host and guest OS.
Prerequisites
- Pre-Installed Ubuntu 22.04 VM in VirtualBox
- A Regular User with sudo rights
- Stable Internet connectivity
Without any further delay, let deep dive into VirtualBox Guest Additions on Ubuntu 22.04
1) Start Your Ubuntu Virtual Machine
Before we dive into the installation process, make sure your Ubuntu virtual machine is up and running in VirtualBox.
2) Install Required Packages
Before you can install VirtualBox Guest Additions, you’ll need some essential packages. Run the following command in your terminal to install them:
$ sudo apt update
$ sudo apt install build-essential linux-headers-$(uname -r) -y
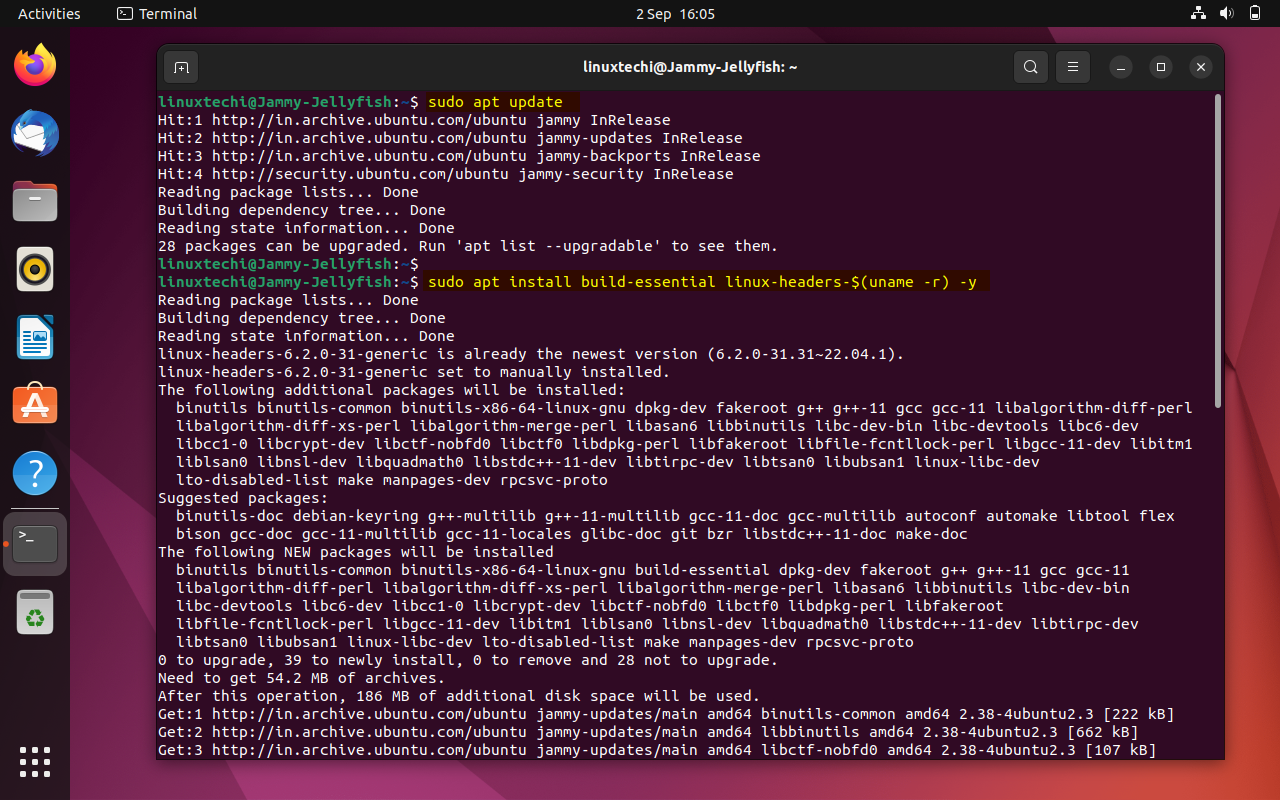
These packages are necessary for building and installing the VirtualBox Guest Additions modules.
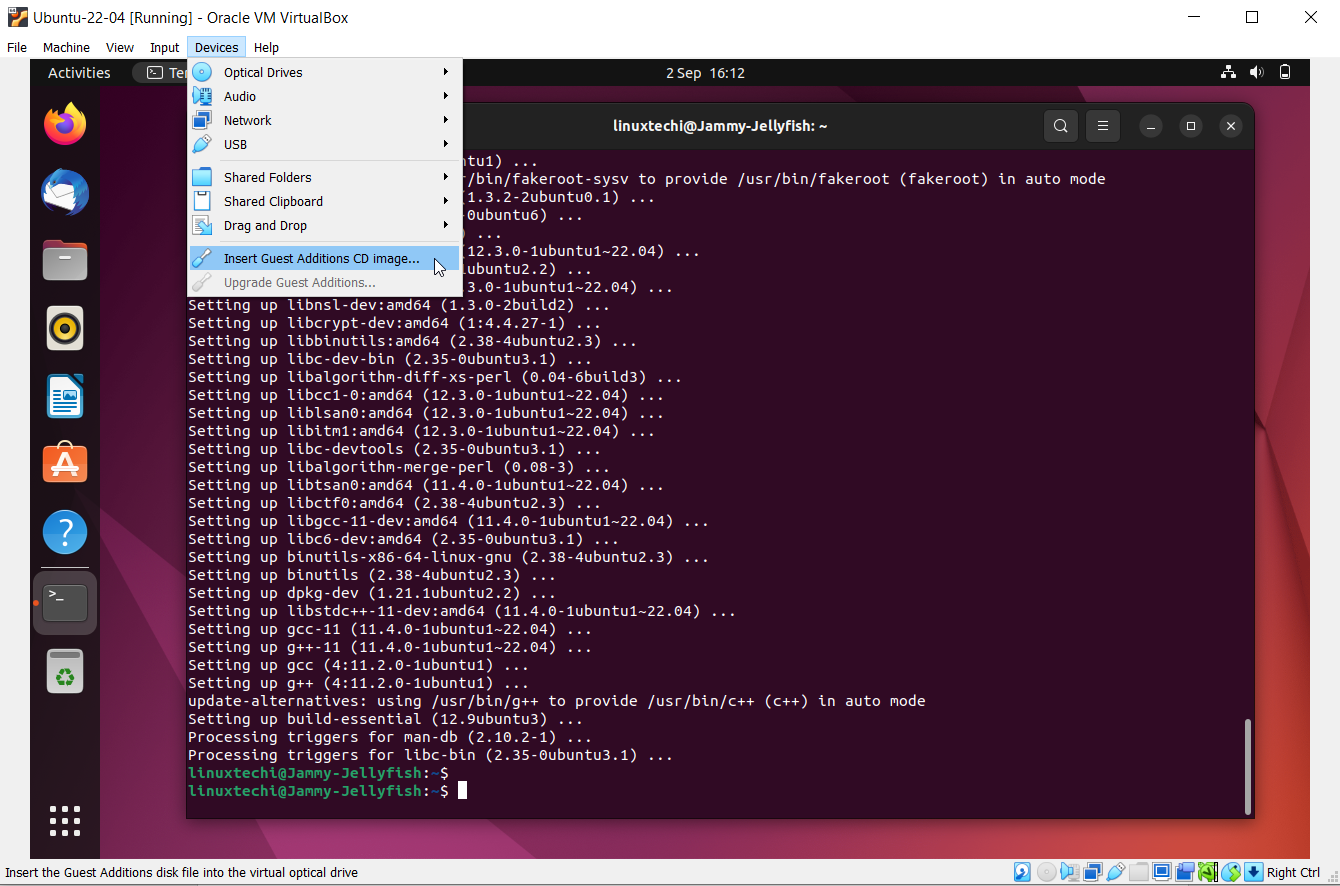
3) Mount the VirtualBox Guest Additions CD Image
In VirtualBox, go to the “Devices” menu at the top of the virtual machine window and select “Insert Guest Additions CD Image.” This action virtually mount the Guest Additions CD image into your virtual machine.
4) Install VirtualBox Guest Additions
Now, let’s navigate to the directory containing the VirtualBox Guest Additions CD image. In your terminal, run:
$ cd /media/linuxtechi/VBox_GAs_7.0.4/
This command takes you to the mounted CD image directory. Note that the directory name may vary slightly depending on your VirtualBox version.
To install VirtualBox Guest Additions, run the following command:
$ sudo ./VBoxLinuxAdditions.run
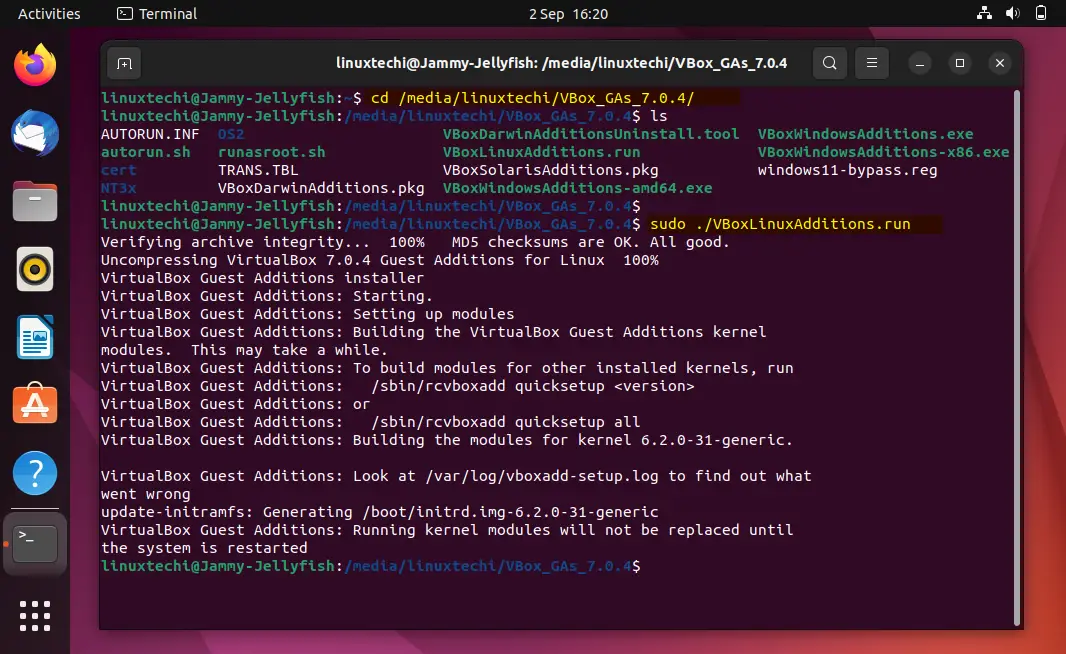
This script will compile and install the necessary modules for improved integration between your host and guest systems.
5) Reboot Your Virtual Machine
After the installation is complete, it’s essential to reboot your virtual machine to ensure that the VirtualBox Guest Additions are fully integrated:
$ sudo reboot
6) Verify Guest Additions Installation
Once your virtual machine restarts, you can verify the successful installation of VirtualBox Guest Additions by checking for improved functionality, such as automatic screen resizing and seamless mouse integration.
Conclusion
By installing VirtualBox Guest Additions on your Ubuntu 22.04 virtual machine, you’ve enhanced your virtualization experience, making it more seamless and user-friendly. You can now enjoy features like better display resolution, automatic mouse integration, and improved file sharing between your host and guest systems. These additions make managing and using virtual machines in VirtualBox a more efficient and enjoyable process.
This was very helpful. Thank you very much
This is very helpful. Thanks
Perfect, it works.
Great information! it worked, thanks a lot, Regards, Thierry
This is super useful, thank you!
Helped alot!