Good news for Ubuntu users, Canonical has released its latest operating system Ubuntu 24.04, code name “Noble Numbat”. This is an LTS (Long Term Support) release, means we will get updates and support till next 5 years.
In this blog post, we will show you how to install Ubuntu 24.04 LTS desktop step-by-step with screenshots. Before moving to installation steps, let’s a quickly look into the new and updated features of this edition.
- Introduction of latest GNOME 46 Desktop Environment.
- Latest Linux Kernel 6.8
- Major updates in Software Center and Tweaks
- Much Improved Installer for better user experience
- Dynamic Workspace Indicator.
- Improved Remote RDP Login feature along with GNOME 46
- Added PipeWire as default sound server.
- Installer will do minimal installation if we don’t choose ‘extended installation’.
Prerequisites
- Minimal 4 GB of RAM
- 2 GHz dual core processor
- 25 GB disk space
- Internet Connectivity (Optional)
- Installation Media (Bootable USB or DVD).
Without any delay, let’s jump into Ubuntu 24.04 LTS installation steps.
1) Download Ubuntu 24.04 ISO File
Visit the Ubuntu official web site (https://ubuntu.com/download/desktop) and download the ISO file.
Once the ISO file downloaded, prepare the installation media by burning the ISO file into USB or DVD drive. On Windows OS, use “Rufus” software to make bootable USB drive using the ISO file. On Linux, using the following:
2) Boot System with Installation Media
Boot your target system with installation media, in our case it’s bootable USB drive that we have created in above step. (In BIOS settings, change the boot media from hard disk to USB).
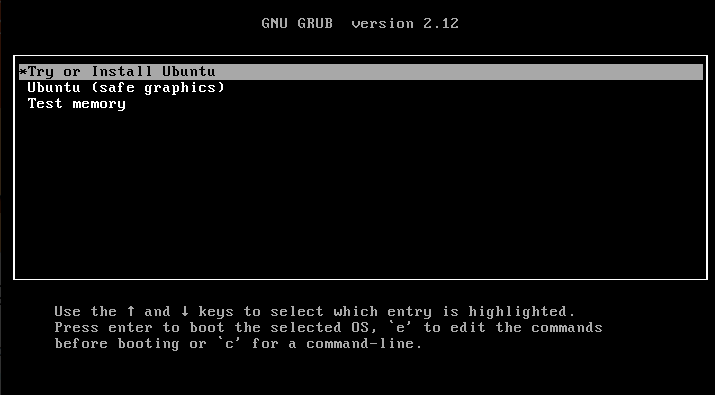
When the system boots up with the installation media, we will get the following screen.
Choose “Try or Install Ubuntu”
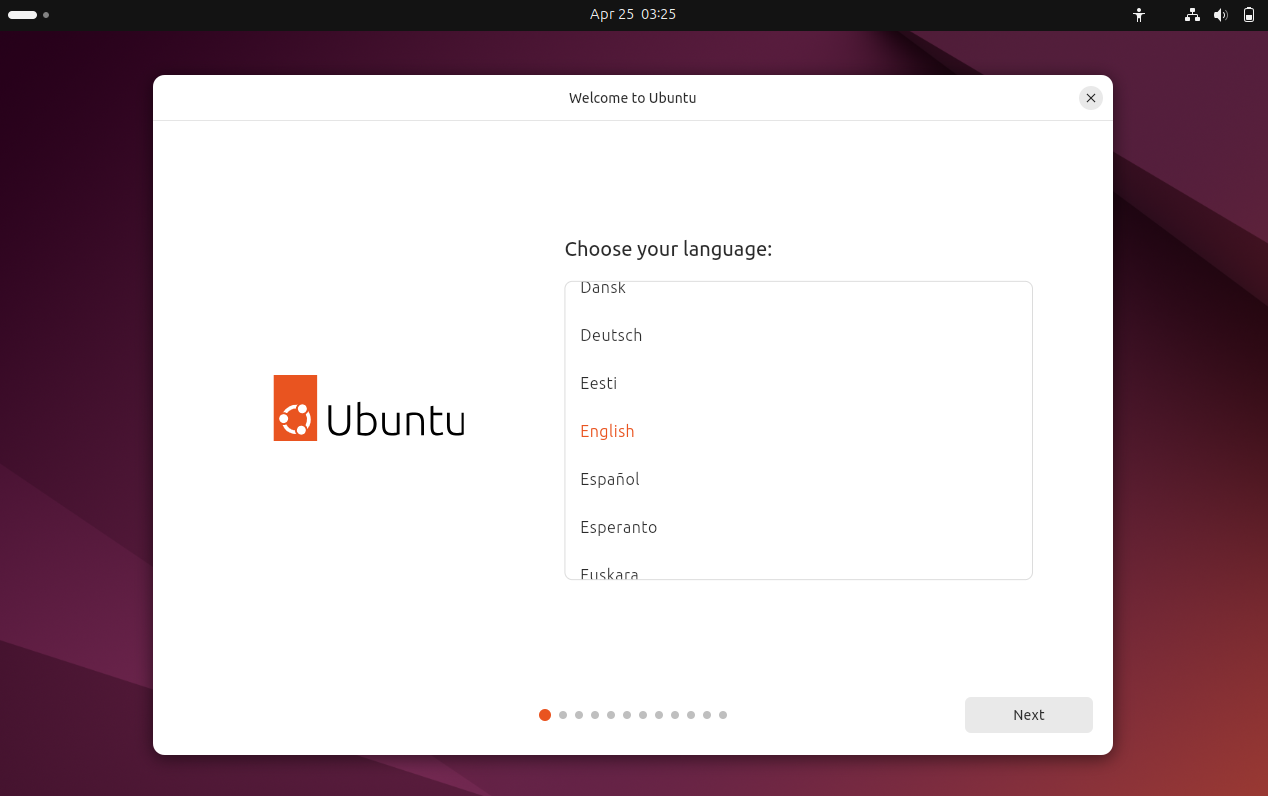
3) Select Your Language
In this step you will be prompted to select your language, so choose accordingly and the click on Next
4) Customize Ubuntu 24.04 Settings
On this step installer give you the options to customize your Ubuntu settings as show below. Though you can also customize these settings later post installation.
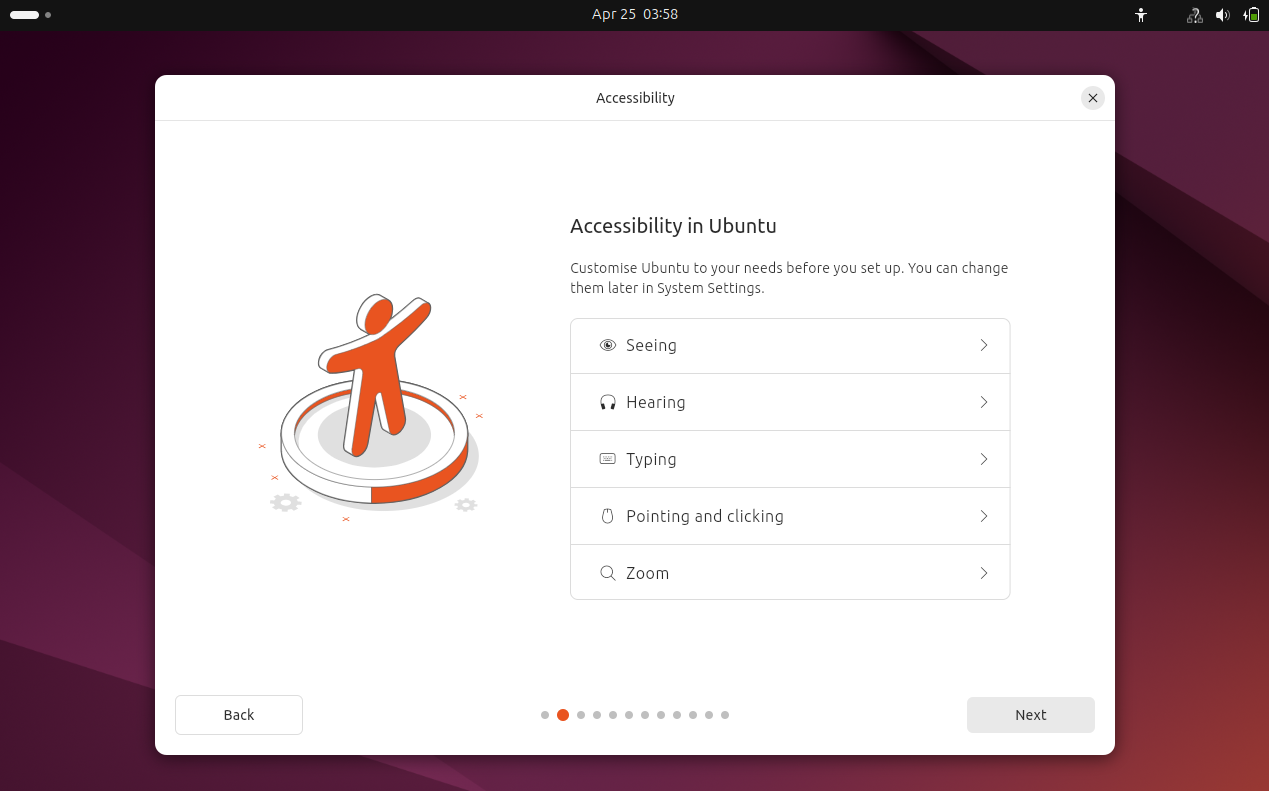
Click on Next to proceed further.
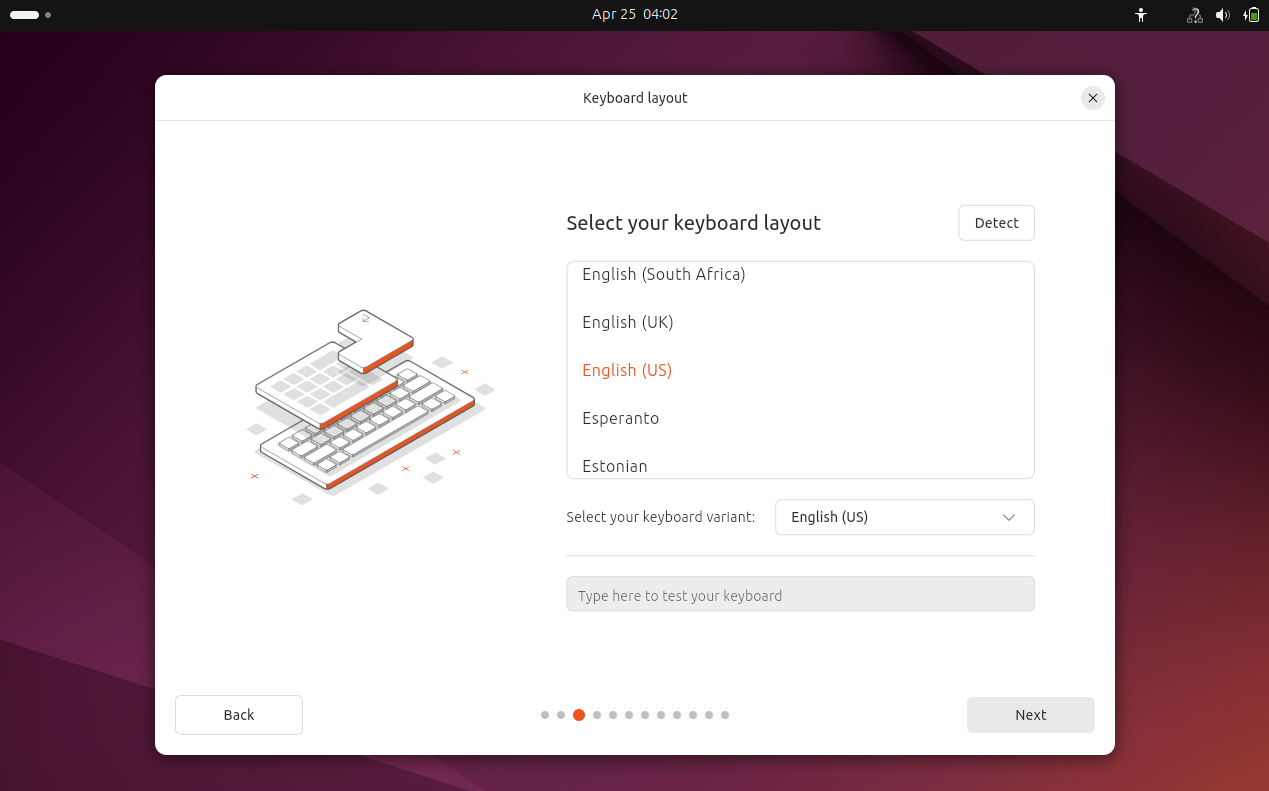
5) Choose Preferred Keyboard Layout
Choose the appropriate keyboard layout that suits your installation and click Next
6) Select Install Ubuntu
In case, your system is connected to internet then choose “Use Wired Connection” else select “Do not Connect to the Internet”.
In my case, my system is connected to the internet so, I will choose first option.
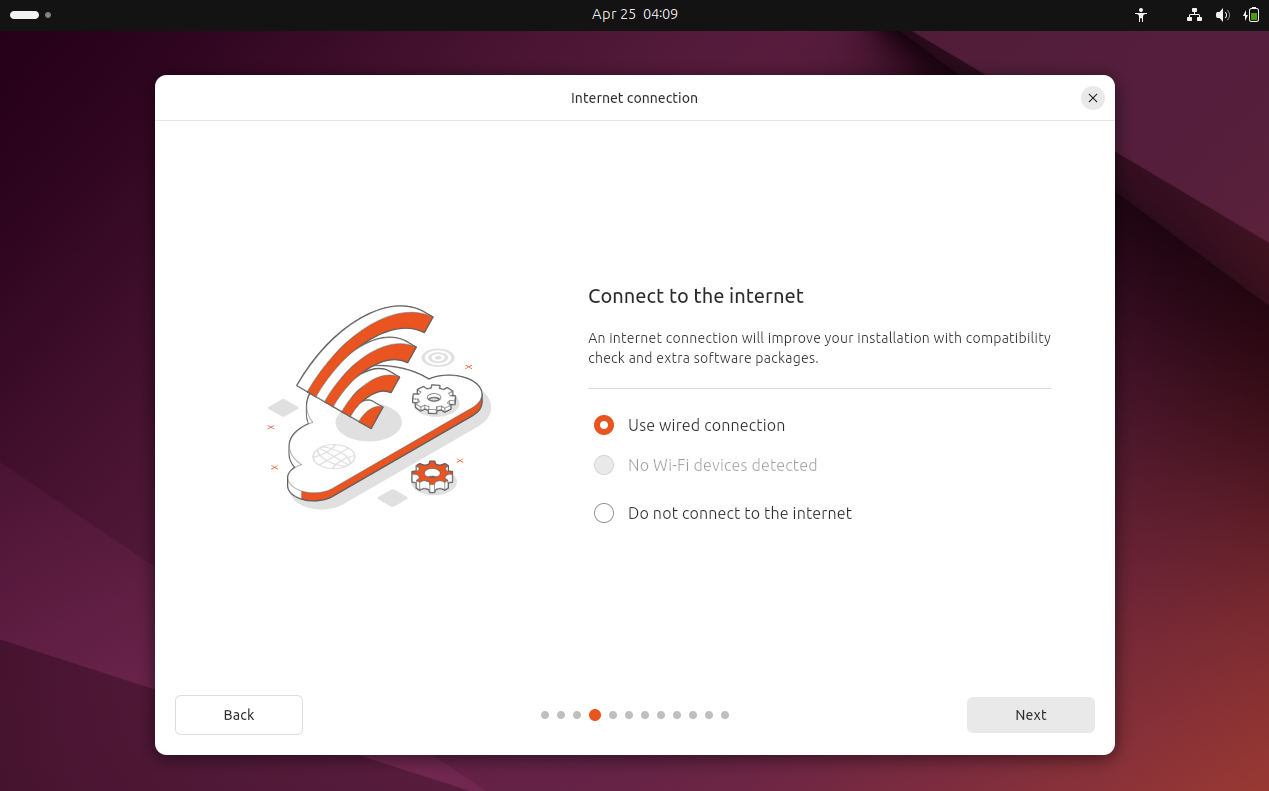
Click Next.
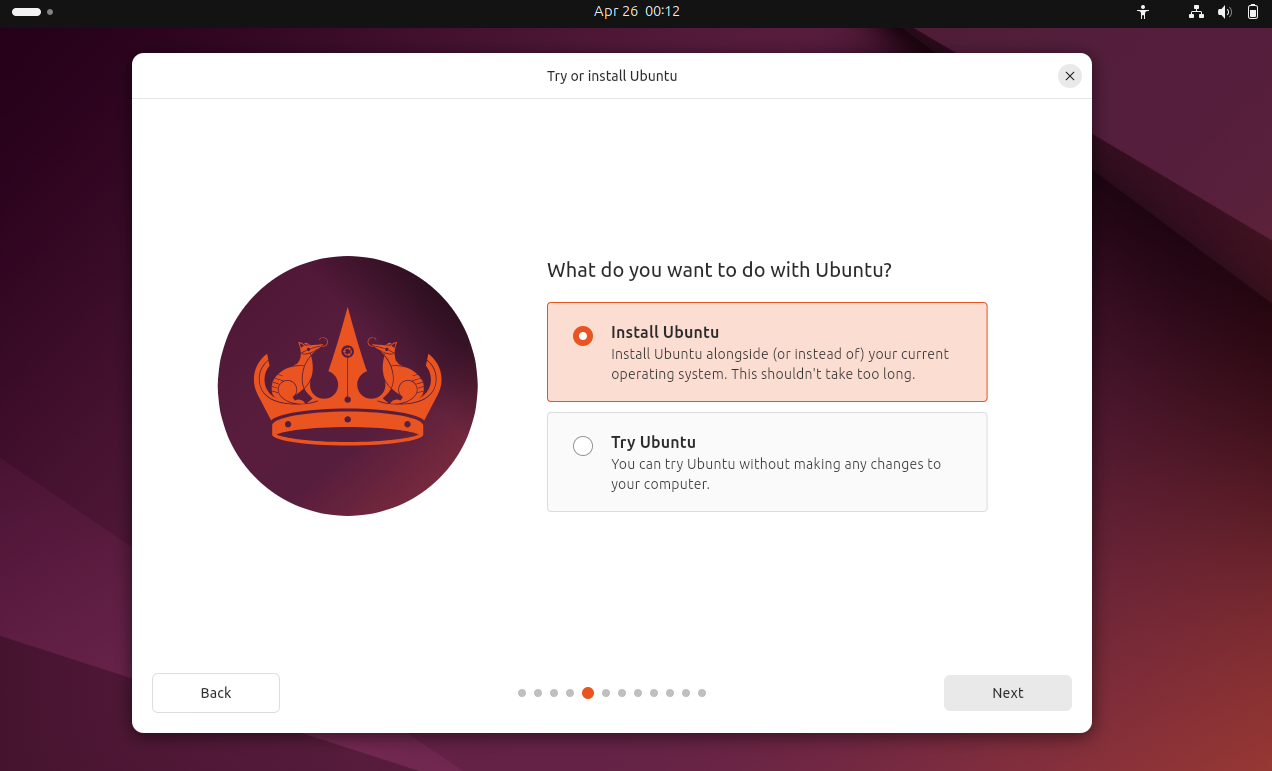
In the following window, select “Install Ubuntu” and then click Next.
7) Type of Installation
At this step, installer will prompt you “how do you like to install Ubuntu”.
There are two options:
- Interactive Installation: In this type of installation, users will interactive installation os.
- Automated Installation: As the name suggested, this automated installation but for that you need to prepare “autoinstall.yaml” which will have all the required settings or parameters for OS installation.
In this guide, we will go with interactive installation,
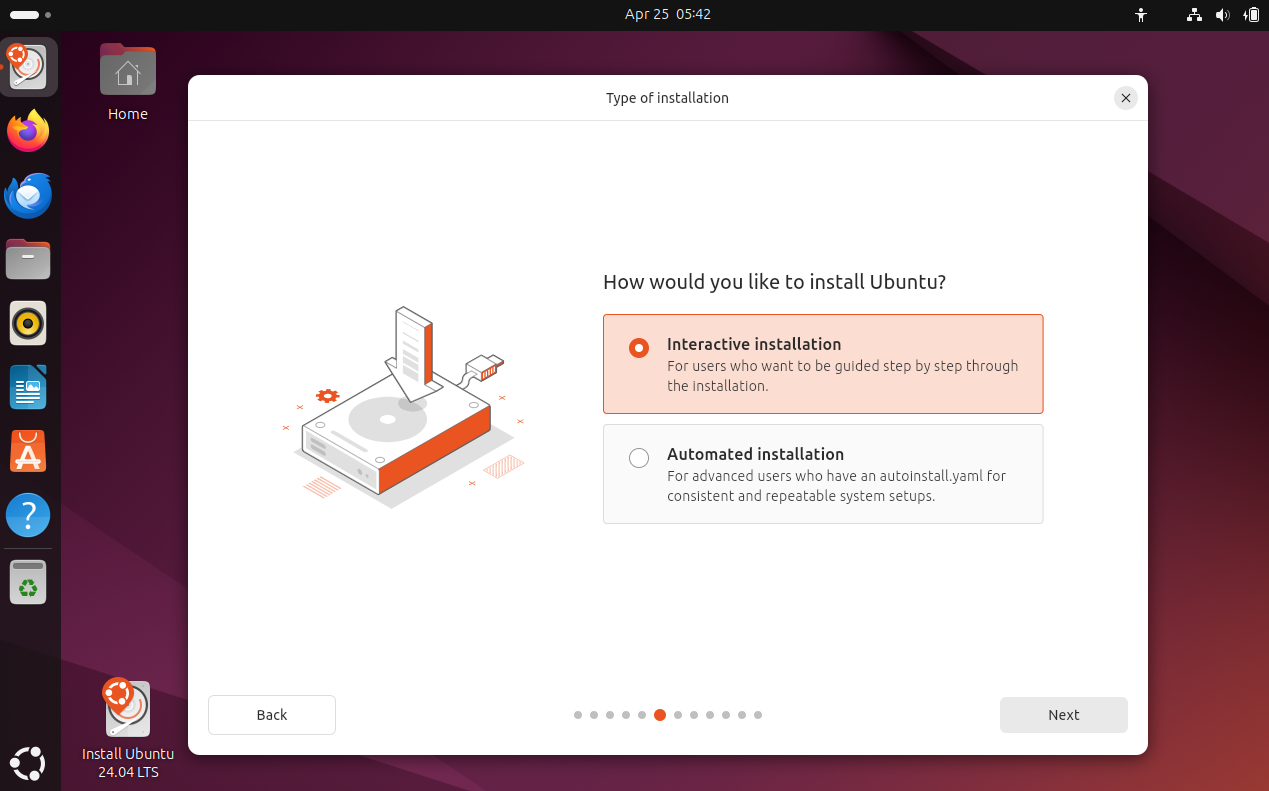
Click on Next
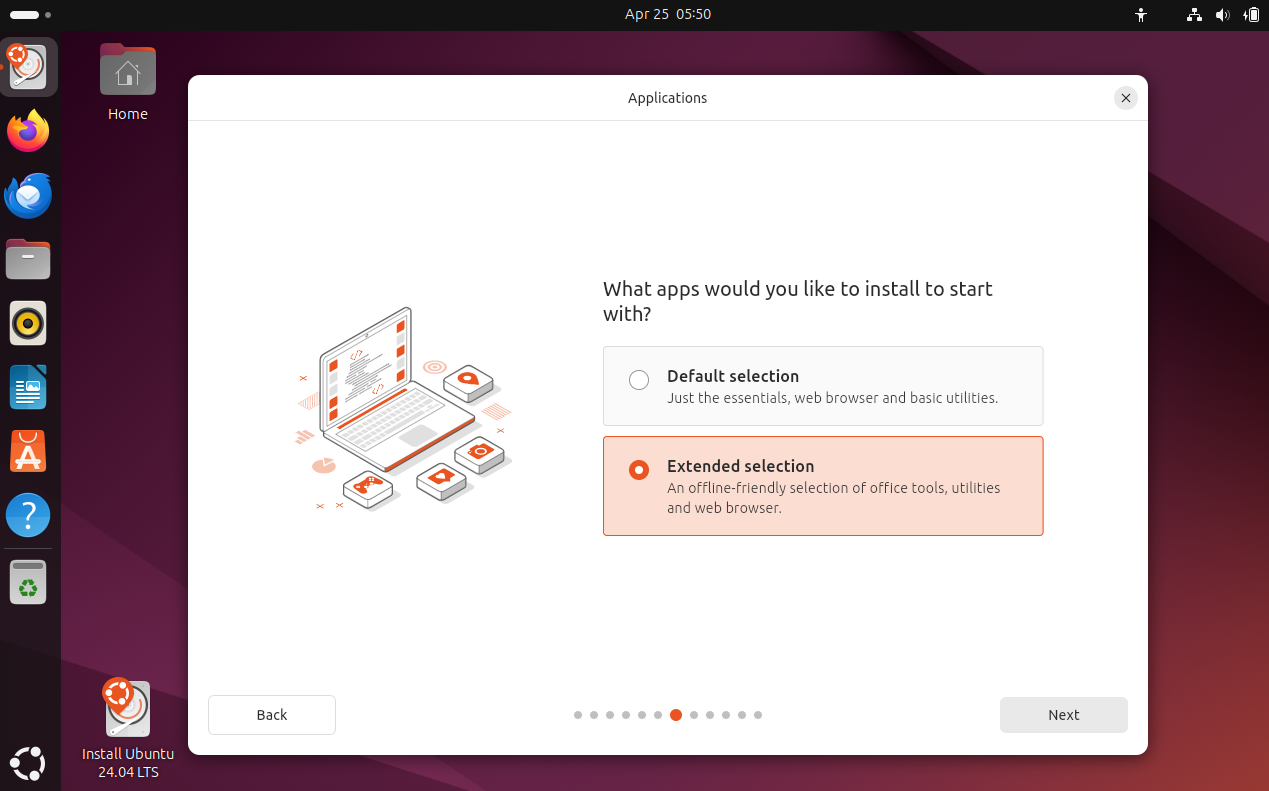
In the following window, choose “Extended Selection” to install desktop tools, utilities and web browser.
If you choose “Default Selection” then installer will install only desktop basic utilities.
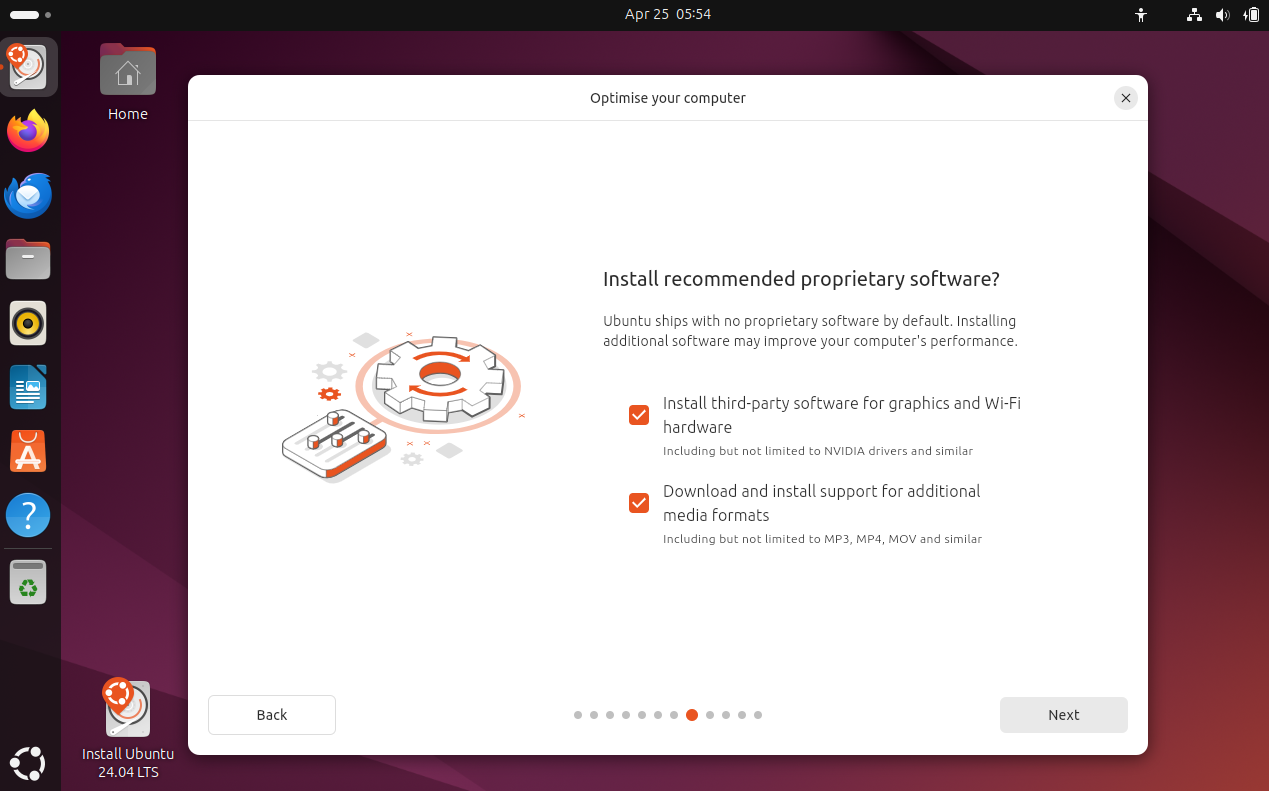
8) Install Third Party Software For Graphics and Wifi
If you want to install updates and third-party software for graphics and wifi during the installation, then select both the options provided your system is connected to internet.
In case, your system is not connected to internet and don’t want to install updates during the installation then untick both the options and then click on Next.
9) Disk Partition Scheme
On this step, installer will prompt you how you want to create partitions scheme on the disk. There are two options:
- Erase Disk and Install Ubuntu: In this method, installer will erase data on the disk and will create the required partitions automatically. If you are new to Linux then you should choose this method.
- Manual Installation: In this method you can create partitions on the disk manually as per your requirement.
In this guide, I will show you how to create manual partition by selecting the ‘Manual Installation’ method.
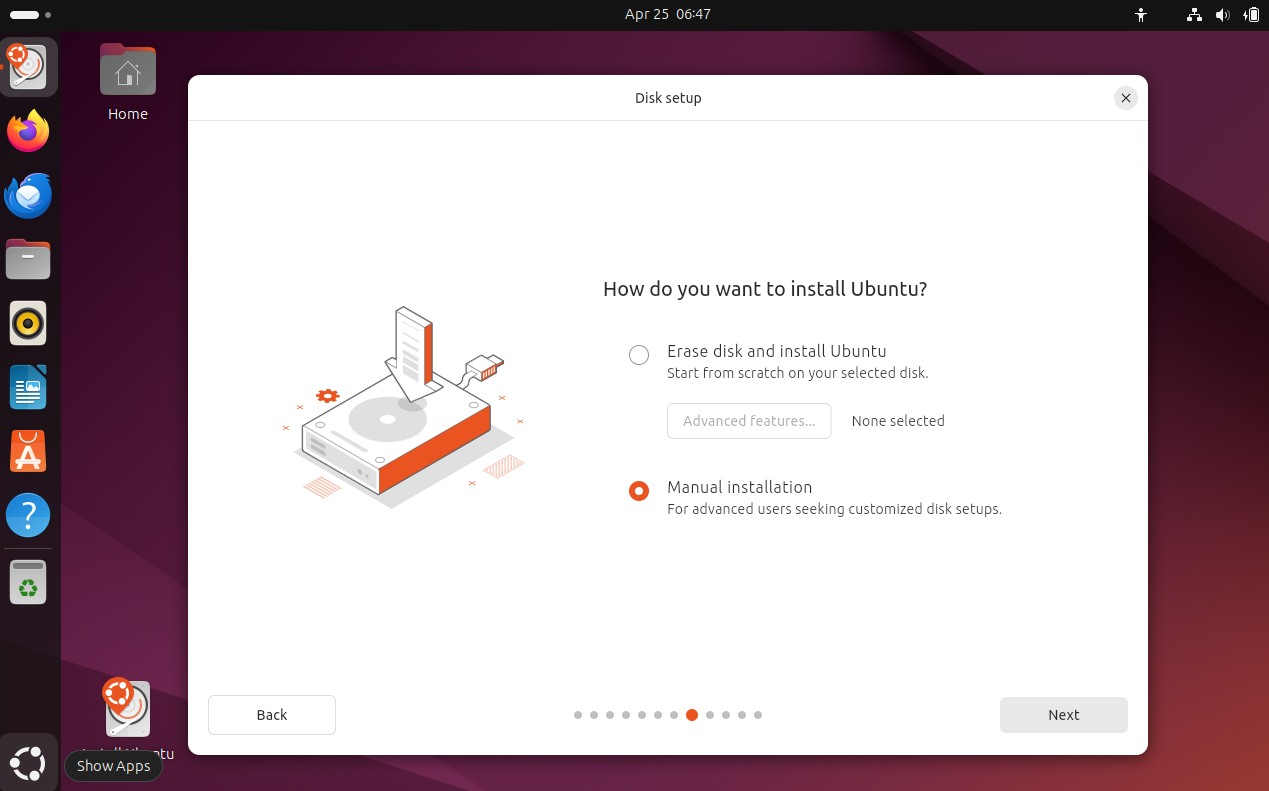
Click “Next” to proceed further,
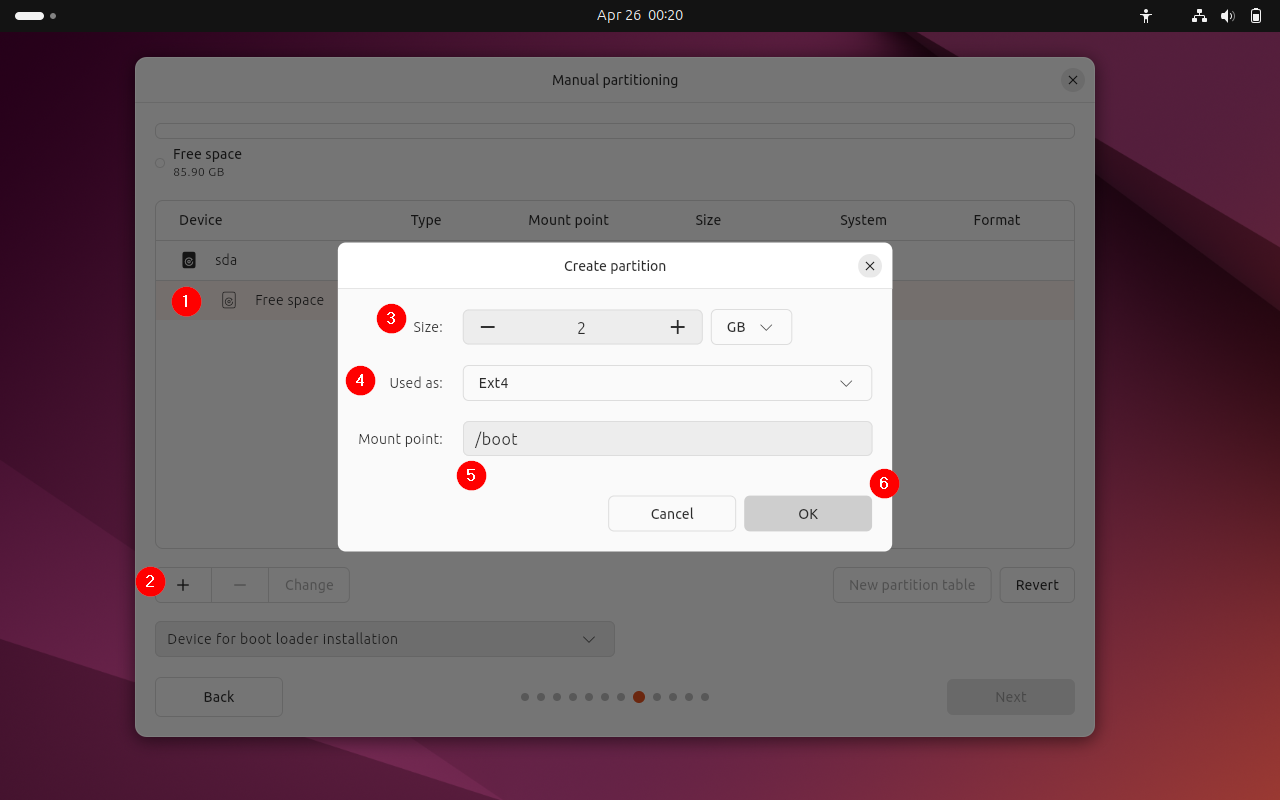
I have around 80GB disk for Ubuntu 24.04, will be creating following partitions:
- /boot 2GB (ext4 file system)
- / 20 GB (ext4 file system)
- /home 50 GB (ext4 file system)
- Swap 2 GB
On the following screen, select the free disk, click on + symbol and start creating partitions.
We will create first partition as /boot of size 2GB.
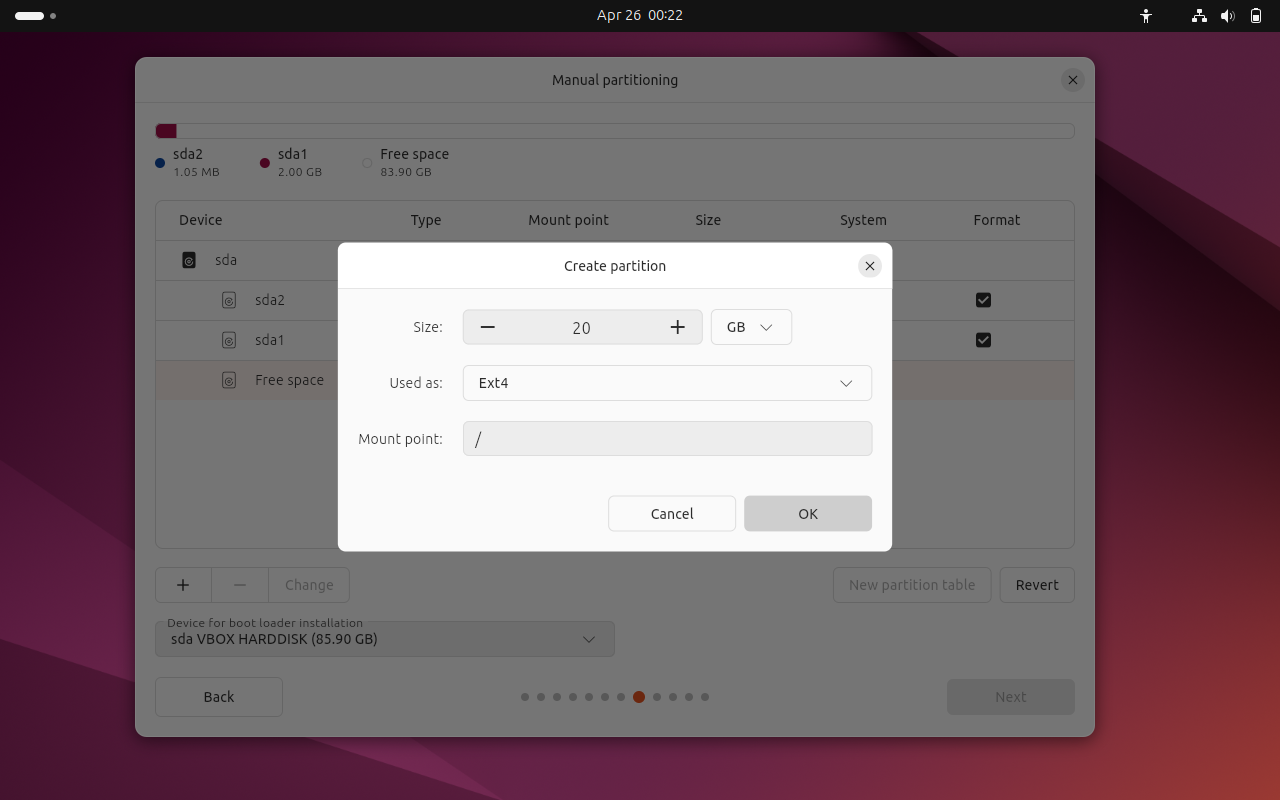
Click on OK and similarly create next partition as / of size 20 GB.
Next, again select the free disk space and create /home partition of size 50 GB.
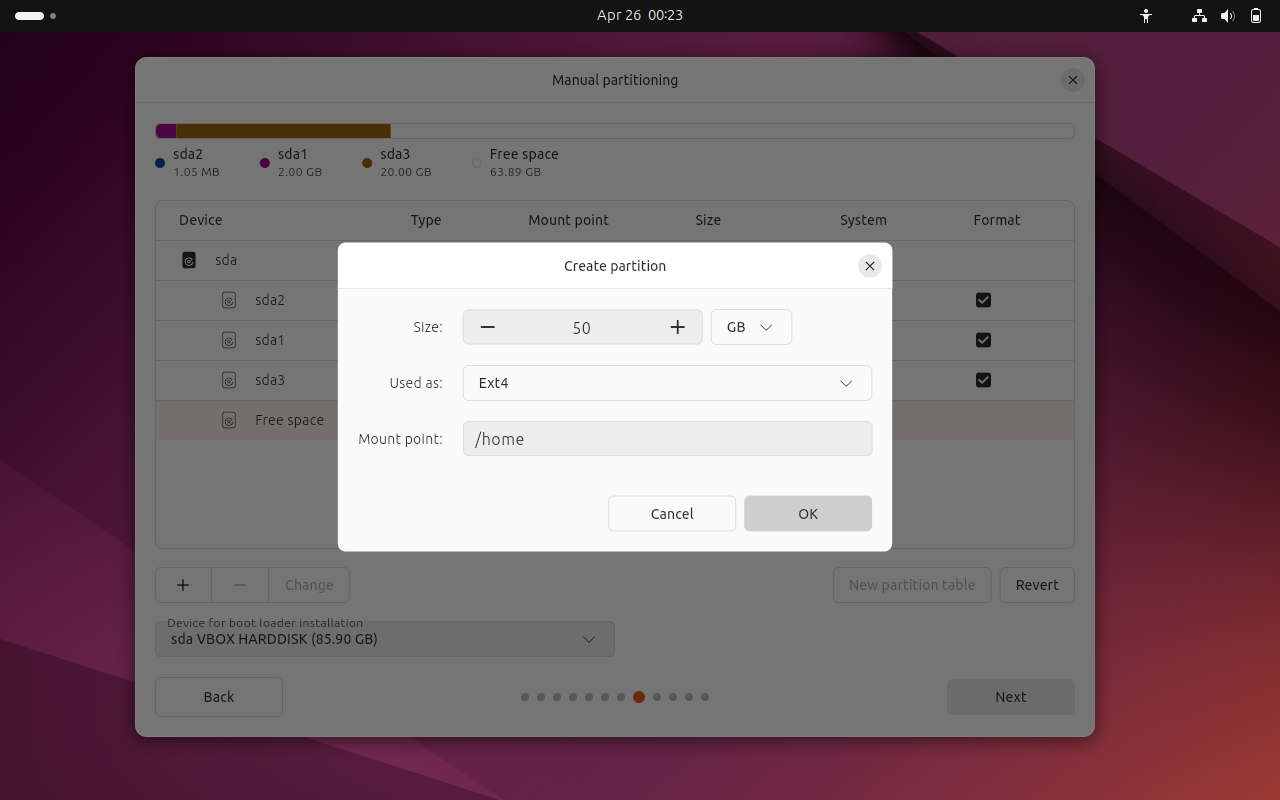
Click OK.
In the last create swap partition of size 2GB as shown below:
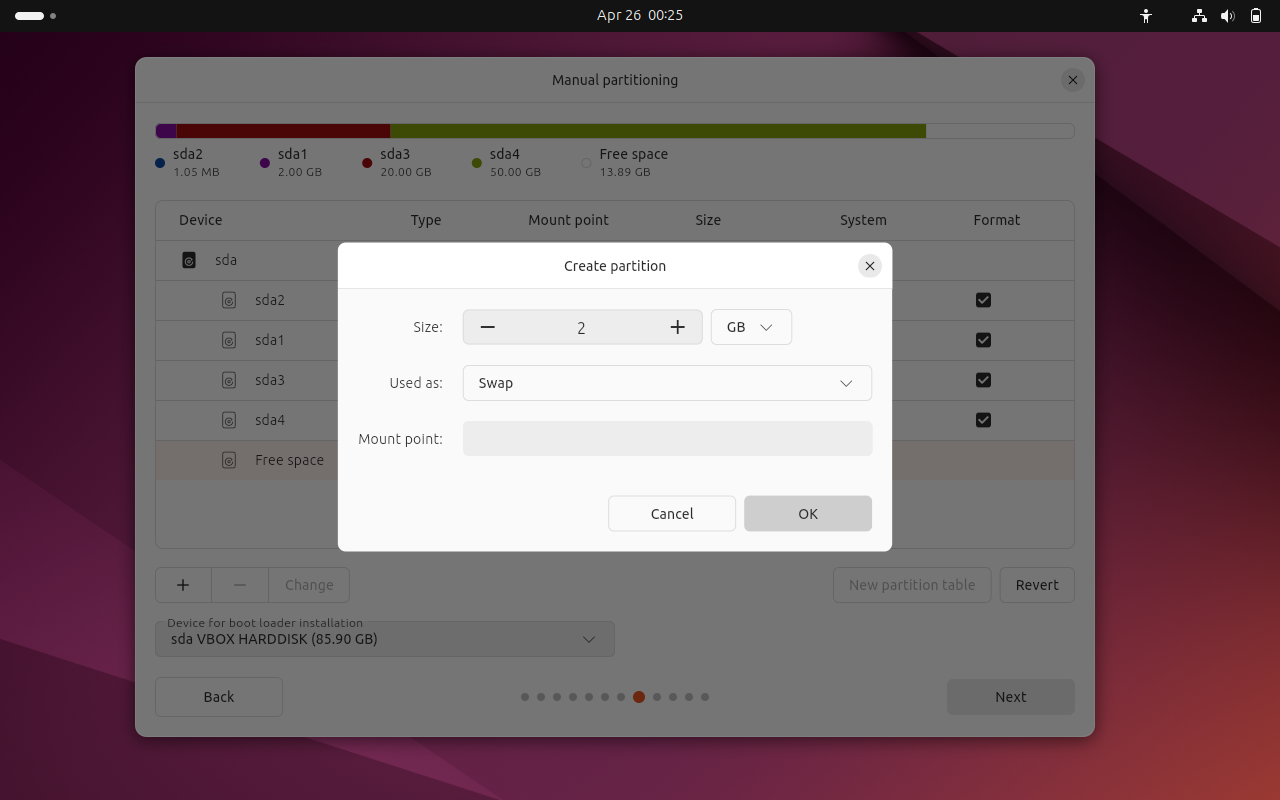
Click OK and then click on Next to proceed further with installation.
10) Create User and Set Hostname
Create a local user and set your system’s hostname, specify the details that suits to your installation.
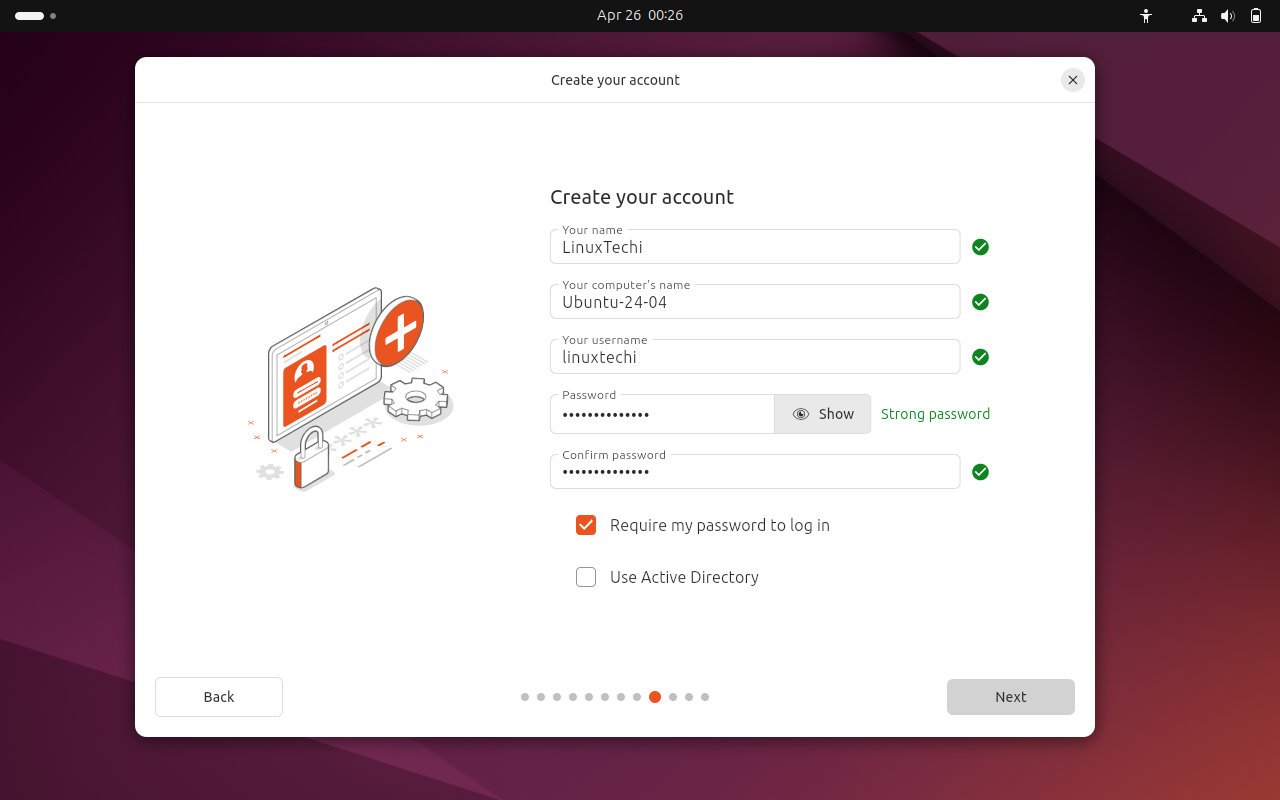
Click Next
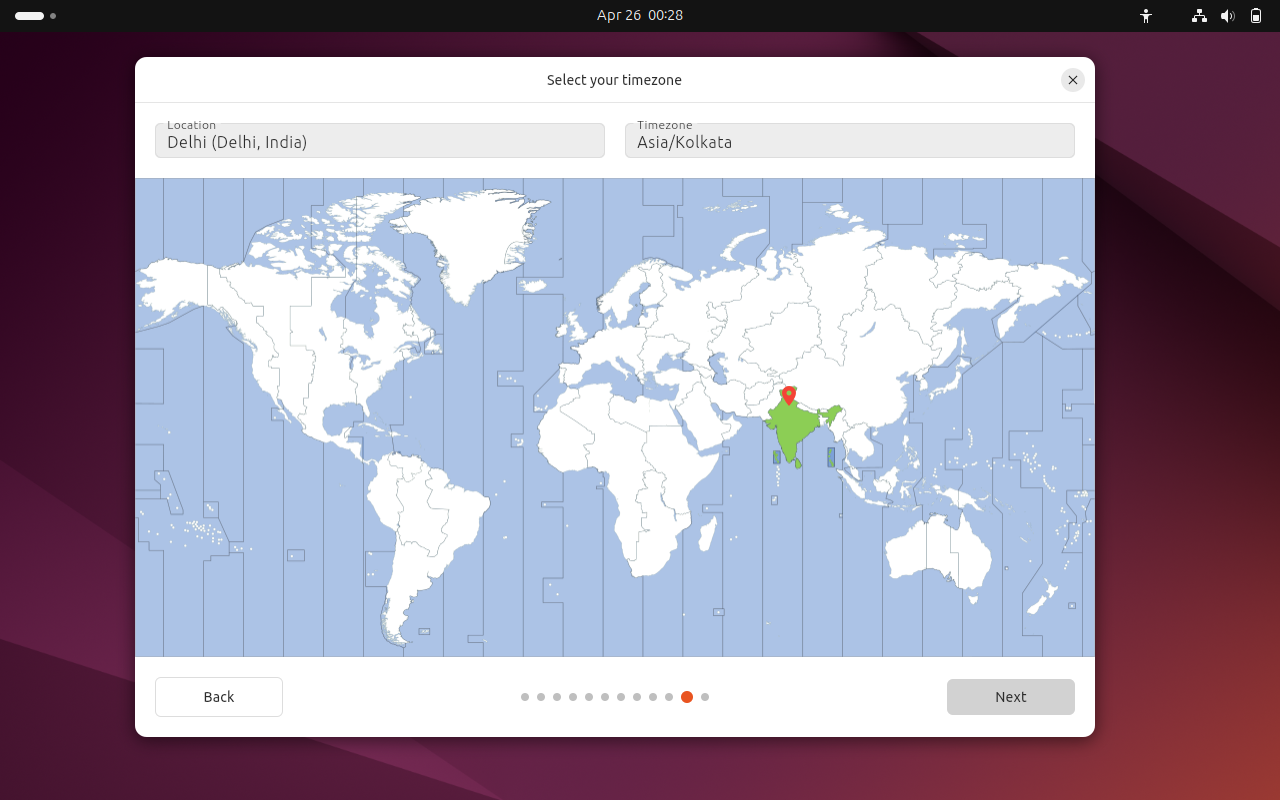
11) Select Your Location and TimeZone
Choose your preferred location and timezone and then click Next.
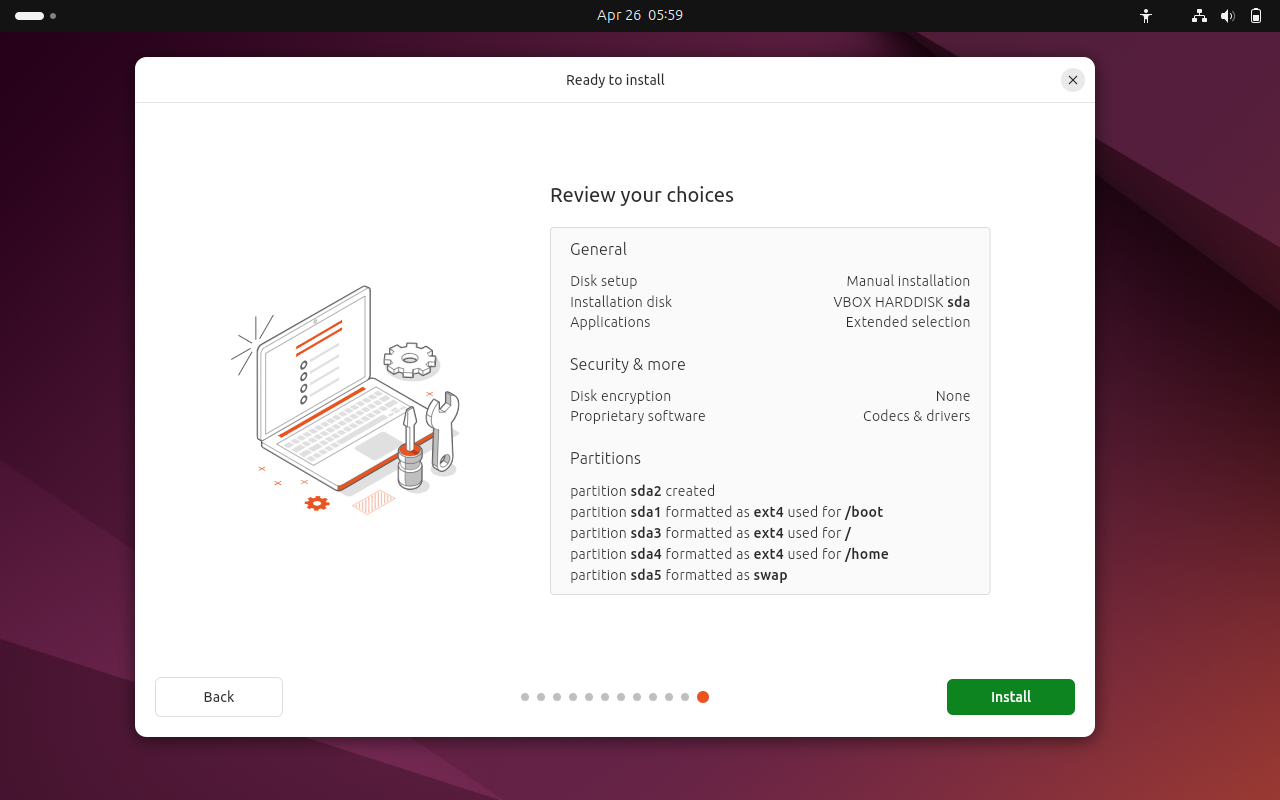
12) Ready to Start Installation
Review your choices and click on “Install” option to begin the installation.
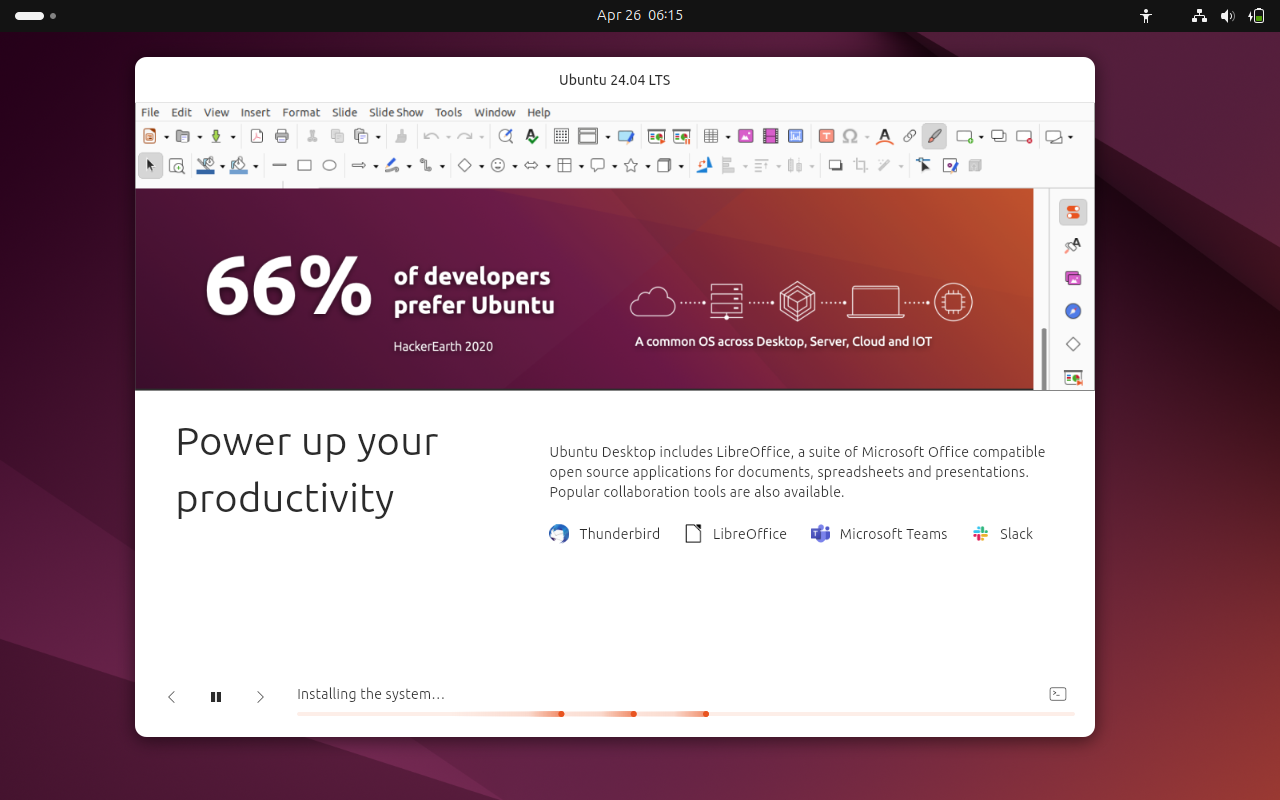
At this point of time installation get started and is in progress.
Once the installation is completed, installer will prompt to reboot the system
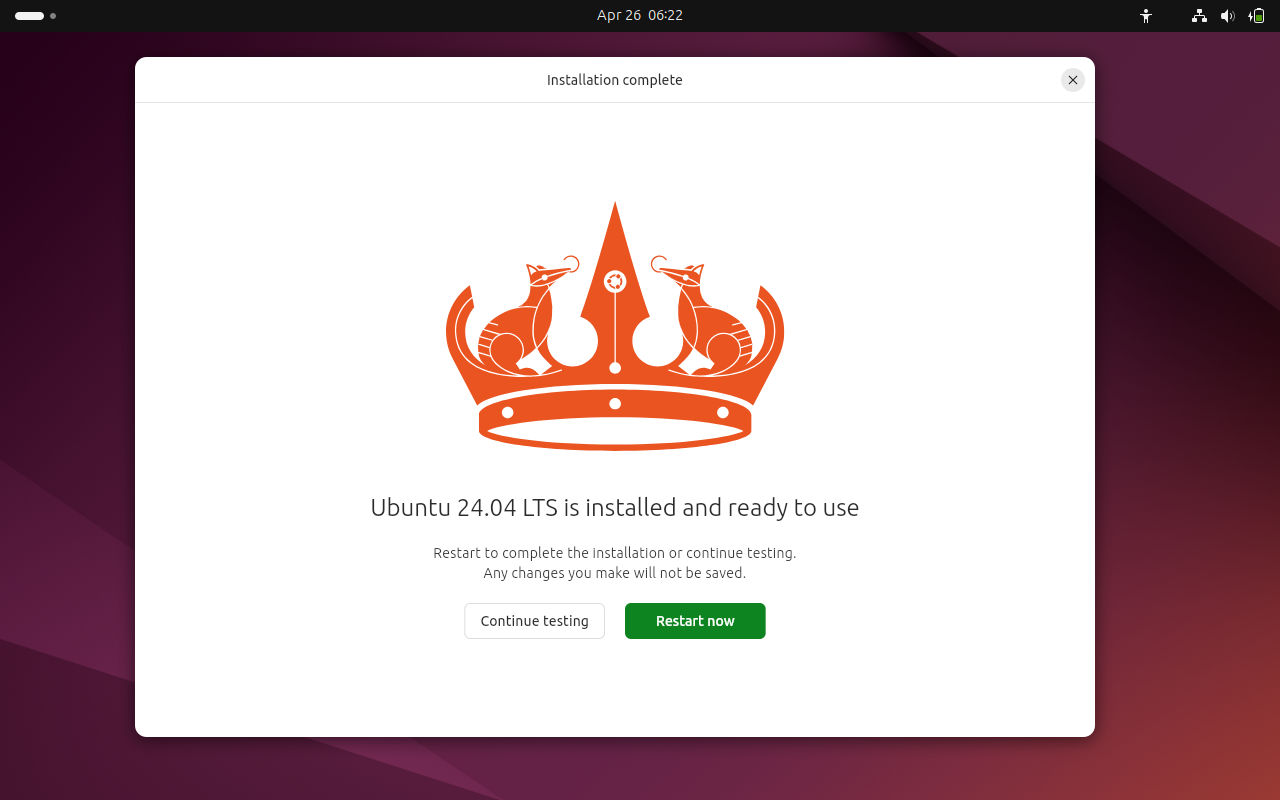
Click on “Restart Now”, it will reboot your system and don’t forget to remove the installation media and change boot medium from USB to Hard disk from the Bios settings.
13) Login and Desktop Screen Post Installation
When the system boots up after the successful installation, we will get the beneath login screen.
Use the same user and its credentials that you have created during the installation (Step 10),
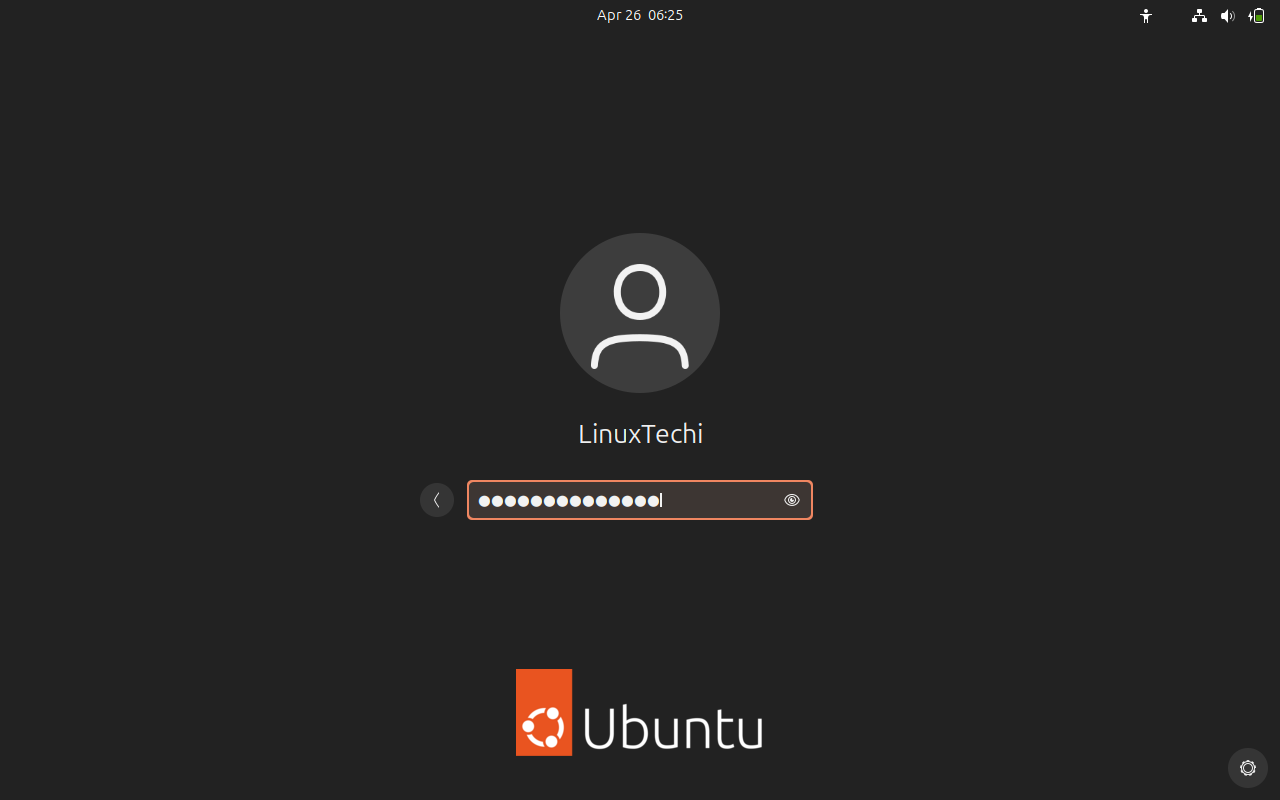
After entering the credentials hit enter and this will take to desktop screen.
We will get following welcome screen, complete the setup with some additional settings.
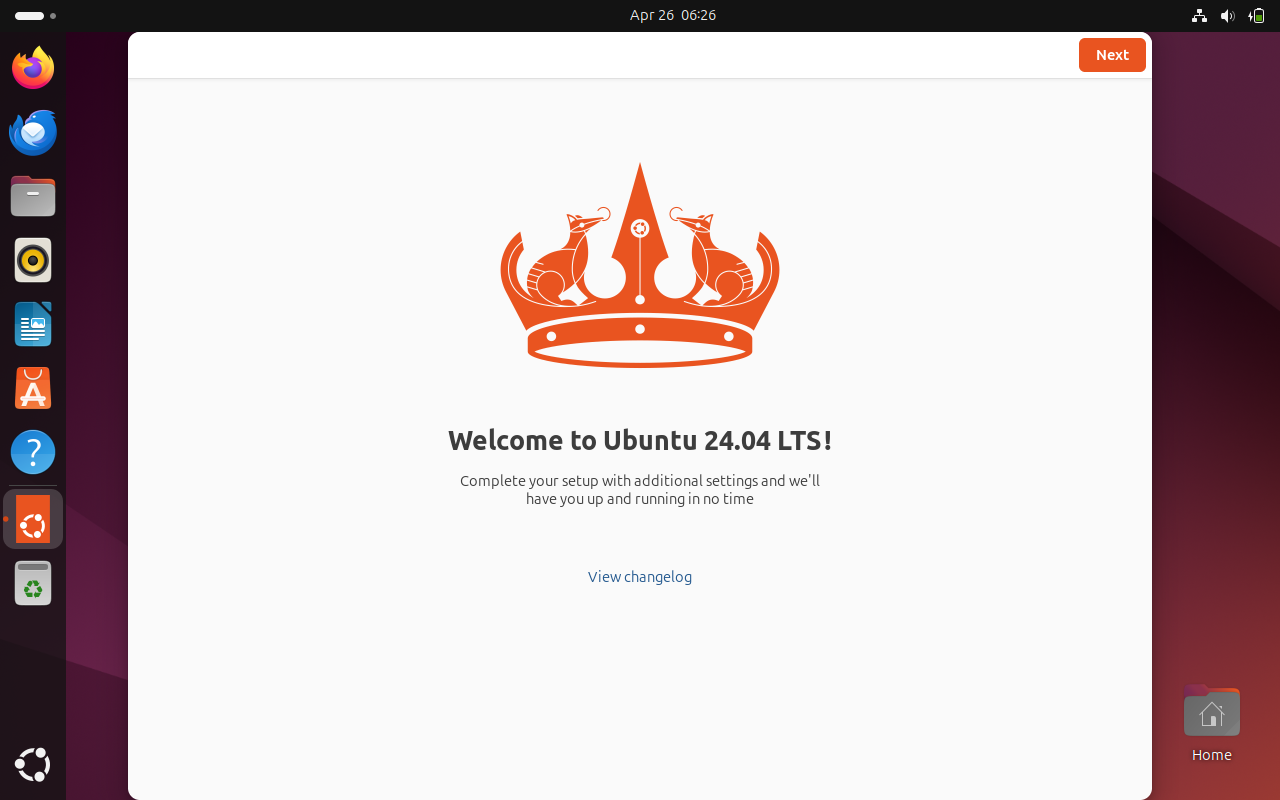
Click on Next
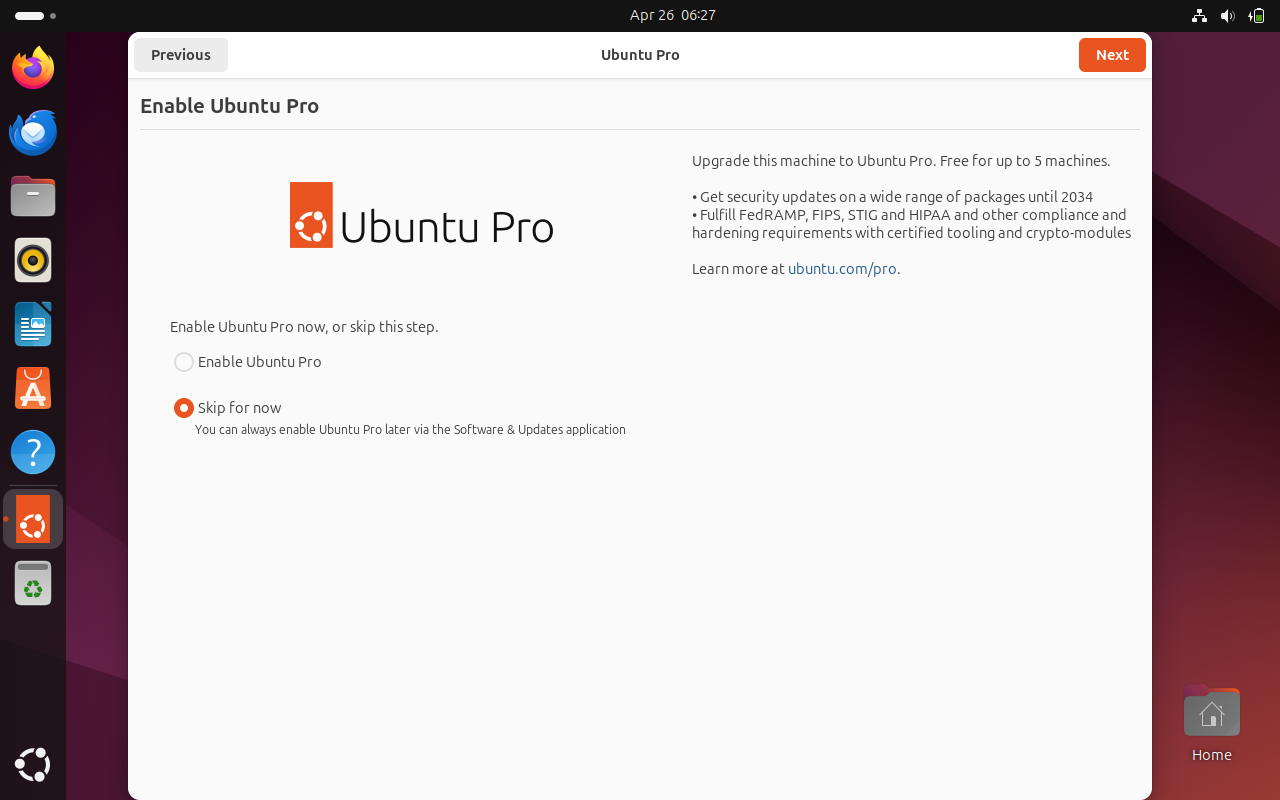
On the following window, disable Ubuntu Pro, choose “Skip for Now” and click Next
Choose “No, don’t share system data”
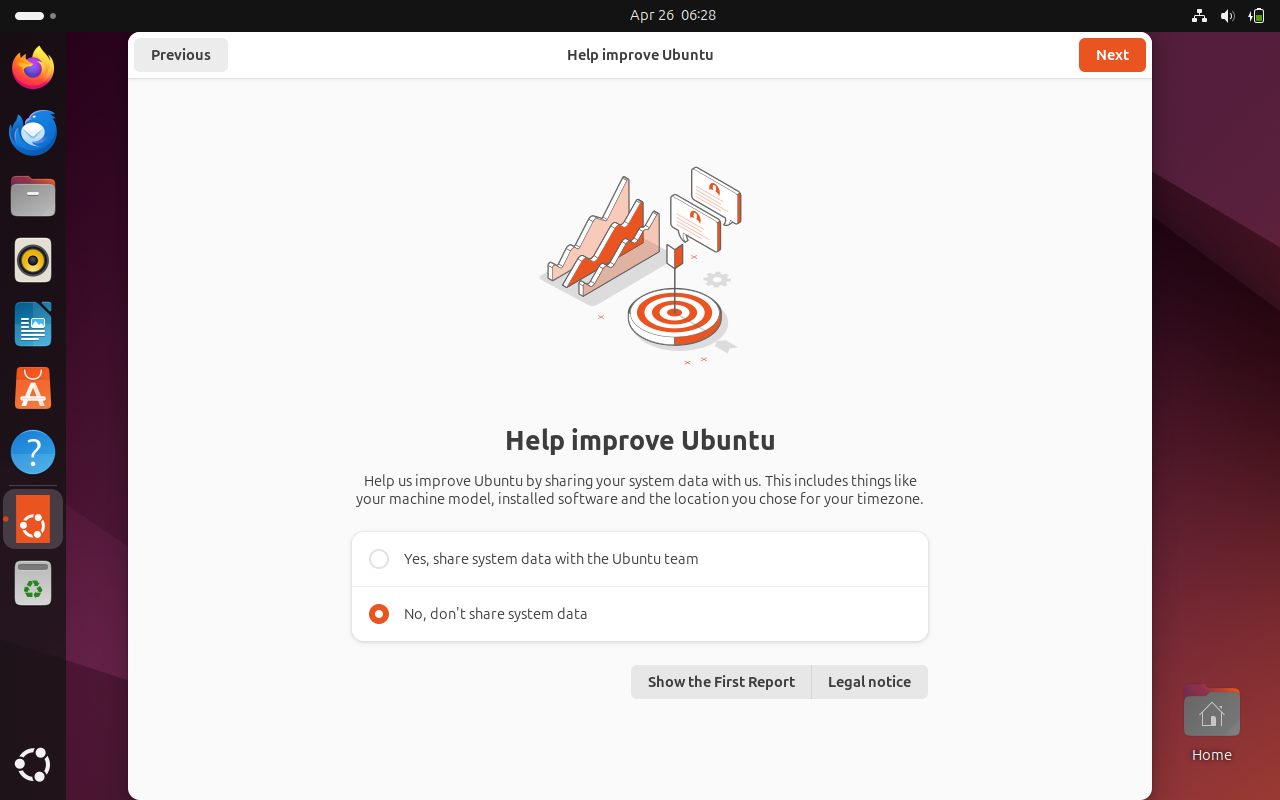
Click on Finish to start using your Ubuntu 24.04.

Next, Open the terminal and install neofetch utility.
$ sudo apt update
$ sudo apt install neofetch -y
$ neofetch
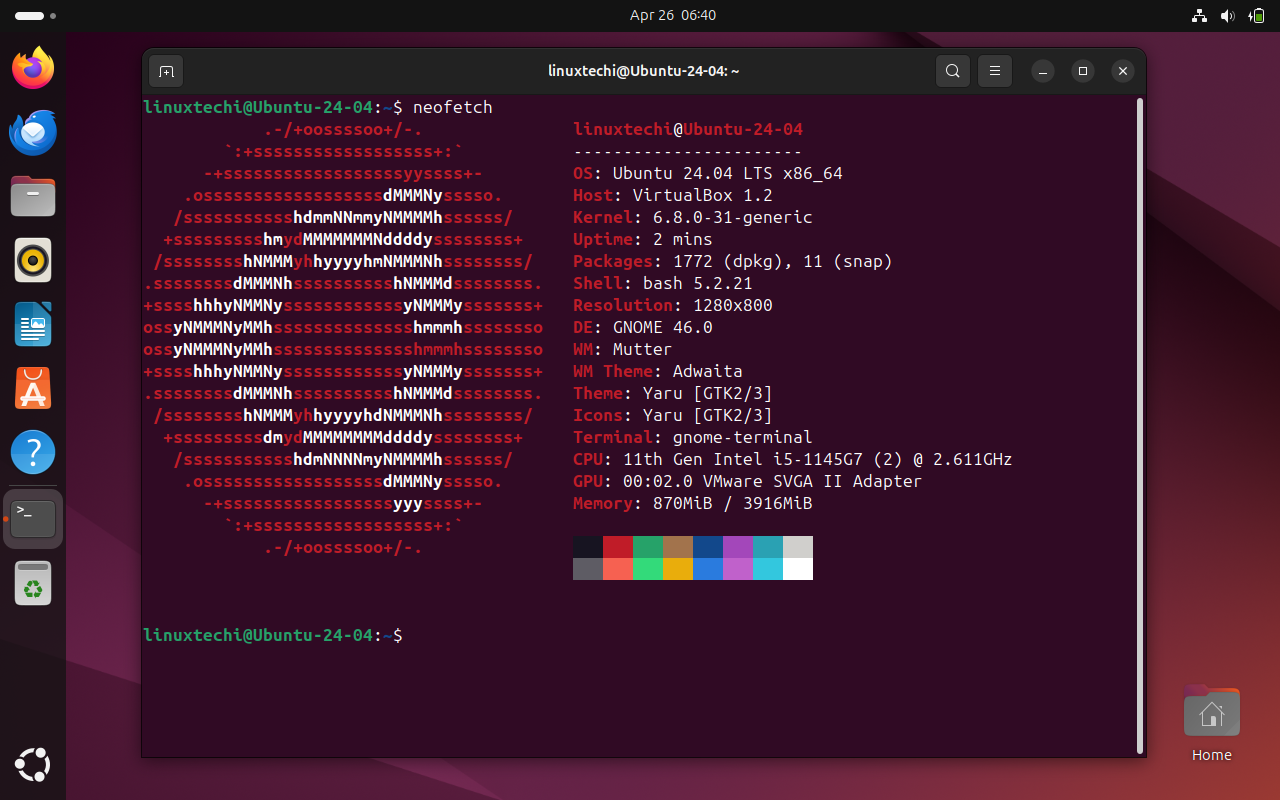
Great, output above shows that we have successfully installed Ubuntu 24.04 LTS on our system. Start exploring this wonderful Linux distribution and have fun 🙂
That’s all from this guide, feel free to post your queries and feedback in below comments section.
Also Read: Top 11 Things to Do After Installing Ubuntu 24.04
Thank you, Pradeep. Your explanation was excellent.
My problem is that Ubuntu 24.04 created a 20 GB partition and installed the system there (I didn’t select “Manual Installation”). Now, when I want to copy any of my old folders into the new system, it tells me there is insufficient space! It is so frustrating! I noticed that you created four partitions to install Ubuntu 24.04; it would be great if you could explain the aim of each one of these partitions. Thanks a lot,
Luis
Please find the explanation below:
/boot (2GB, ext4 file system):
Purpose: The /boot partition contains the bootloader, kernel, and other files needed to start the operating system. It includes the GRUB bootloader and initial RAM disk (initrd) images.
/ (root, 20GB, ext4 file system):
Purpose: The root partition (/) is the top-level directory of the Linux file system hierarchy. It contains all the system files, binaries, libraries, and applications necessary for the operating system to function.
/home (50GB, ext4 file system):
Purpose: The /home partition is where user data and personal files are stored. Each user has a separate directory under /home (e.g., /home/user1, /home/user2), which contains their documents, downloads, and configuration files.
Swap (2GB):
Purpose: The swap partition is used as virtual memory. When the physical RAM is fully utilized, the operating system can move inactive pages from RAM to the swap space to free up memory for active processes. This helps prevent system crashes and keeps the system responsive.