In this blog post, we will show you how to install Ubuntu 22.04 LTS (Jammy Jellyfish), accompanied by detailed screenshots.
Good news for Ubuntu Users, the long-anticipated Ubuntu 22.04 LTS desktop operating system has been officially released by Canonical on April 21, 2022. Codenamed “Jammy Jellyfish,” this release is a Long-Term Support (LTS) version, guaranteeing updates and support for the next five years.
Before delving into the installation, let’s take a moment to explore the new features and enhancements introduced in Ubuntu 22.04 LTS.
- New Logo – Ubuntu 22.04 comes with brand new ubuntu logo.
- Dock Mode Improvements – This release added new functionality to dock that we can change the size of dock.
- Liberty to change theme Colors – It allows you to change the default orange theme and personalize desktop experience.
- Introduction to new screenshot and screencast tool – As GNOME 42 is introduced in Ubuntu 22.04, it has a new screenshot and screencast tool by default.
- Introduction to new flutter based installer – Ubuntu 22.04 LTS comes with flutter based installer which allows you to choose ZFS and LVM while installing Ubuntu on your system.
- New Grub (Boot loader) 2.06 – By default, OS prober feature is disabled in Grub 2.06. You need to enable it if you are planning to have dual boot system.
- Slight Improvement in software Center.
- Allow to configure multi-monitor settings.
- New Linux Kernel 5.15 LTS
- New version of Software like openssl 3.0, Python 3.10, GCC 11 and PHP 8.1.
Prerequisites
- 4 GB RAM or more
- 25 GB free hard disk space
- Dual Core Processor (2 GHz)
- Bootable Installation Media
- Stable Internet Connection (Optional)
Install Ubuntu 22.04 LTS (Jammy Jellyfish)
Without any further ado, let’s deep dive into Ubuntu 22.04 installation steps.
1) Download Ubuntu 22.04 ISO File
Head over to the official Ubuntu website and download the 22.04 LTS ISO file. You can choose between the desktop and server versions, depending on your intended use Use beneath URL:
2) Create Installation Media
Once ISO file is downloaded on your system then burn it into a USB Stick and make it bootable.
Use Rufus on Windows operating to create bootable media and on Linux refer following guide.
3) Boot System with Installation Media
Restart your computer and enter the BIOS/UEFI settings. Set the USB drive as the primary boot device. Save your changes and restart. Your system should now boot from the USB drive, initiating the Ubuntu installation process.
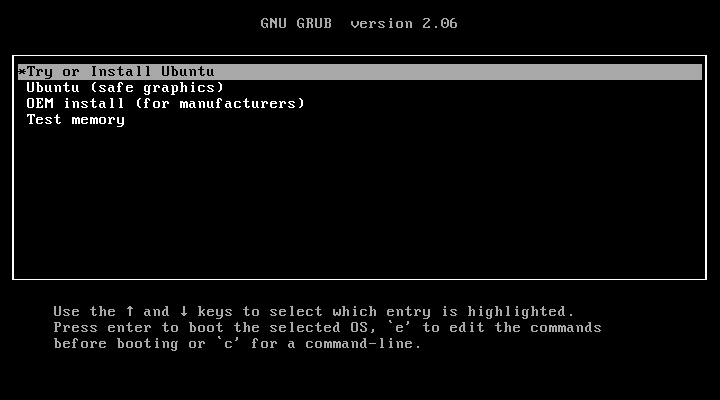
Choose ‘Try or Install Ubuntu’ and hit enter.
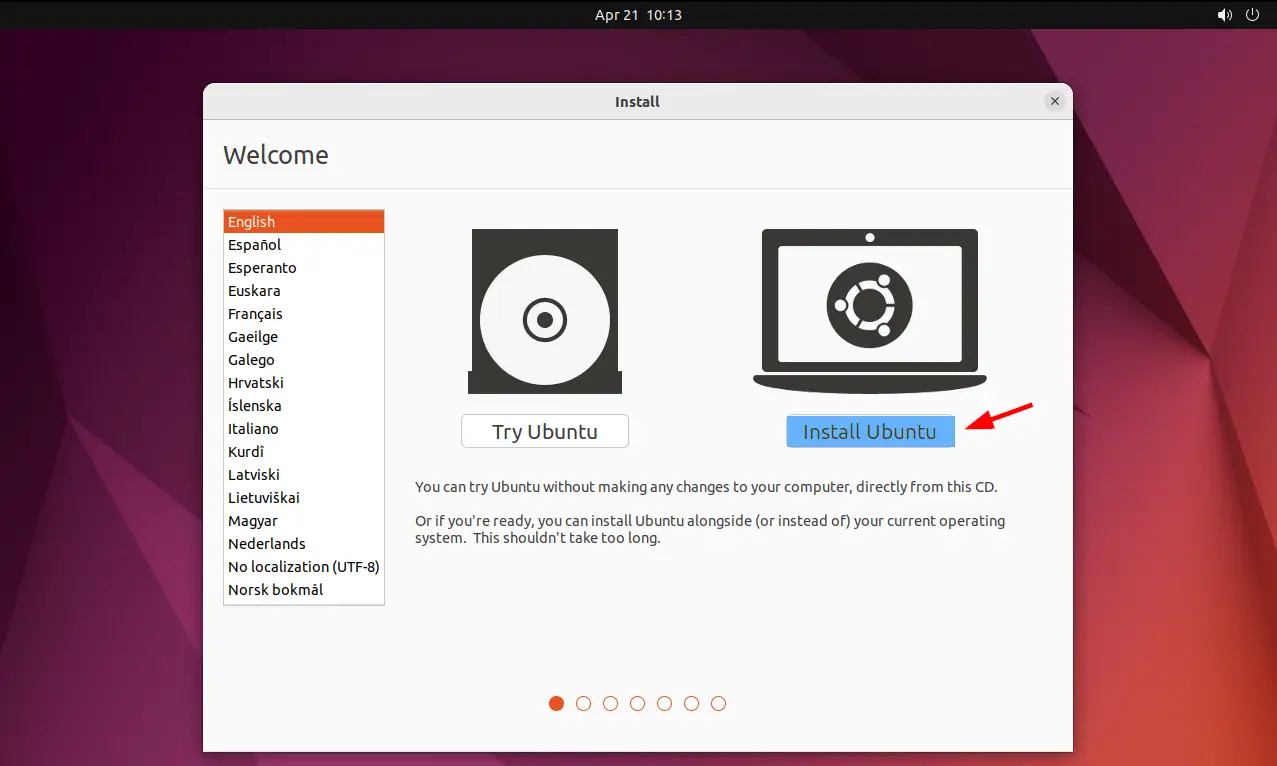
In the next screen, click on ‘Install Ubuntu’
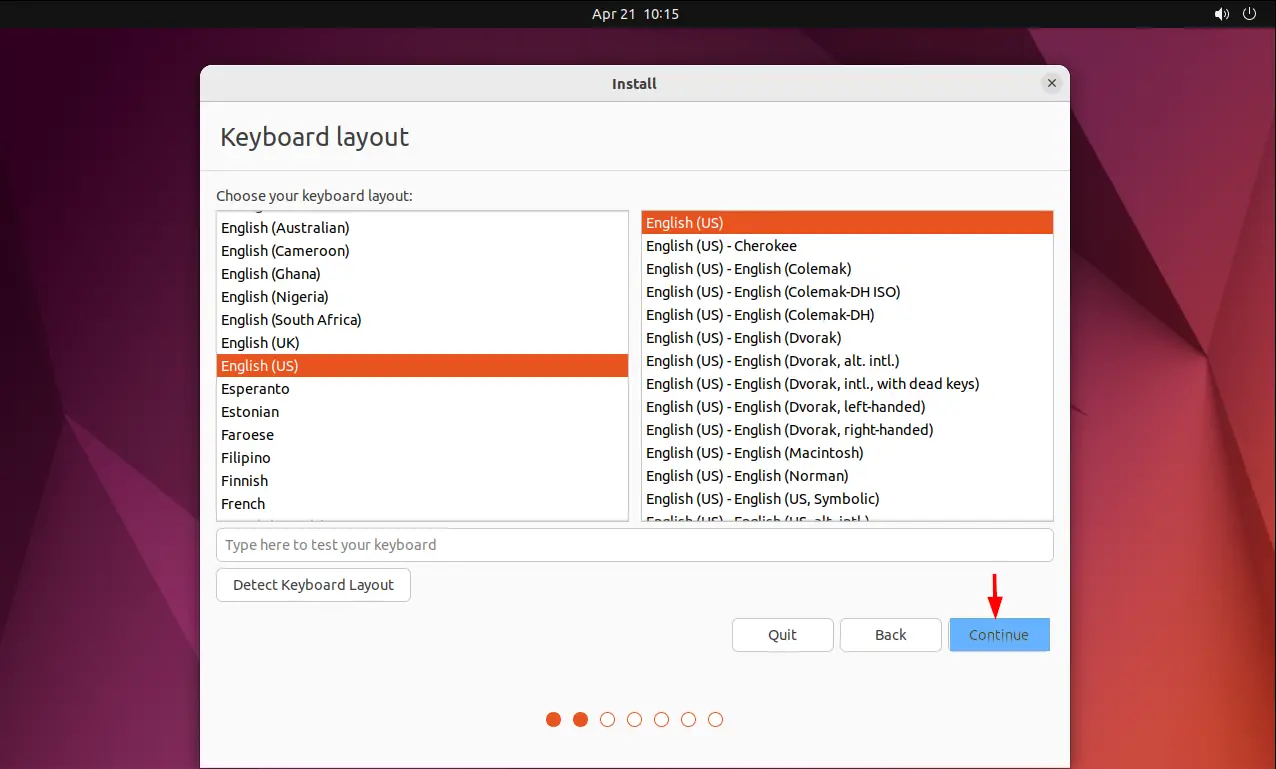
3) Choose Keyboard Layout
Choose your preferred keyboard layout and then click on ‘continue’
4) Prepare Installation
In this step, we must choose the installation type. There two options, Normal and Minimal Installation. In Normal Installation, all GUI related applications will be installed whereas in minimal only basic apps will be installed.
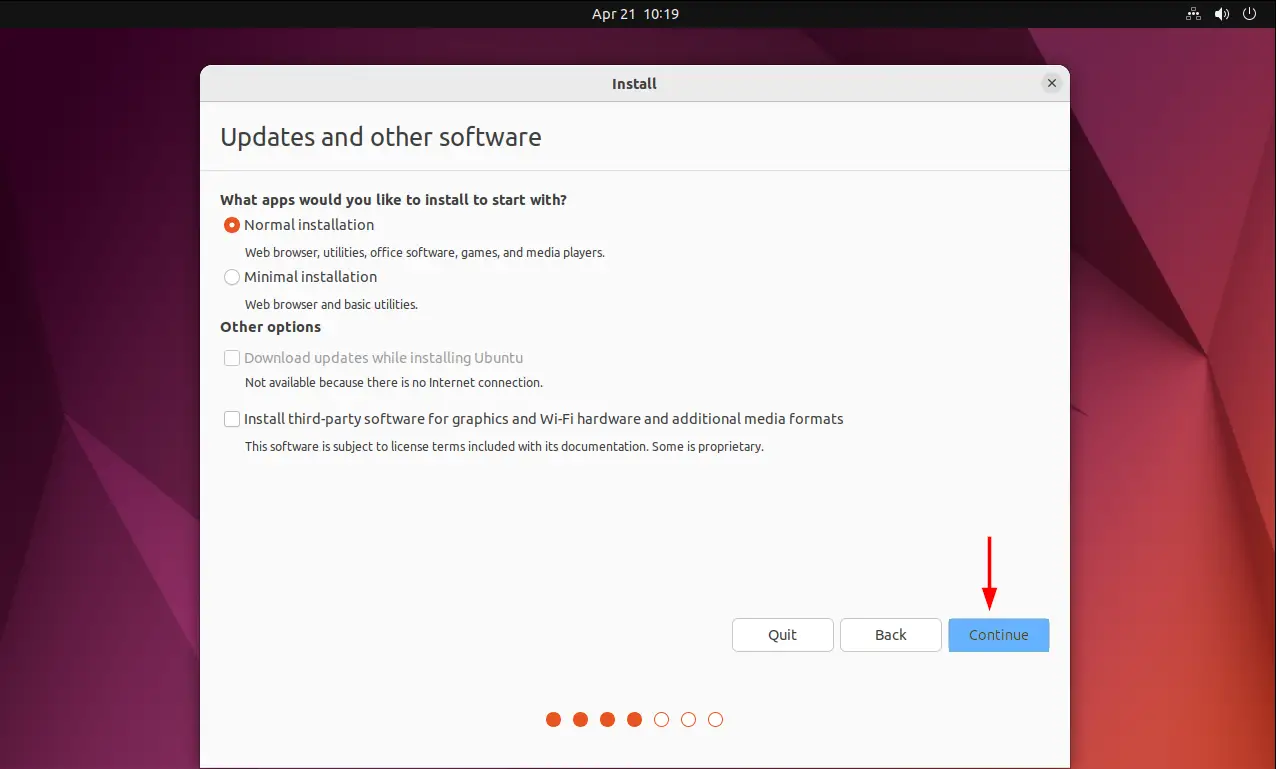
Normal installation is the recommended one to get better desktop experience. When you have internet connection during the installation and want to install all updates & third-party graphics software and wifi drivers and additional media formats then you can choose both the options else keep them as untick.
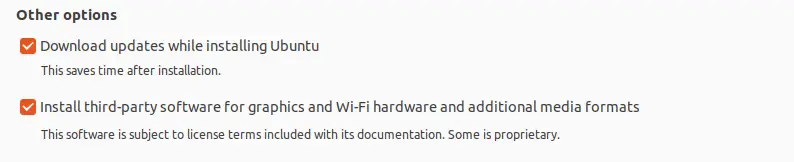
Click on ‘Continue’ to proceed further
5) Choose Installation Type
In this step, we will be prompted to choose the installation type. Here installation type means the partitioning scheme.
Following are two installation type:
- Erase Disk and Install Ubuntu – It will erase the entire disk and will create the partitions automatically.
- Something else – To create own customize partition scheme then choose ‘Something else’.
If you are new to Ubuntu Linux, then it is recommended to go with first option. In this guide, I will demonstrate how to create custom partition scheme via something else option.
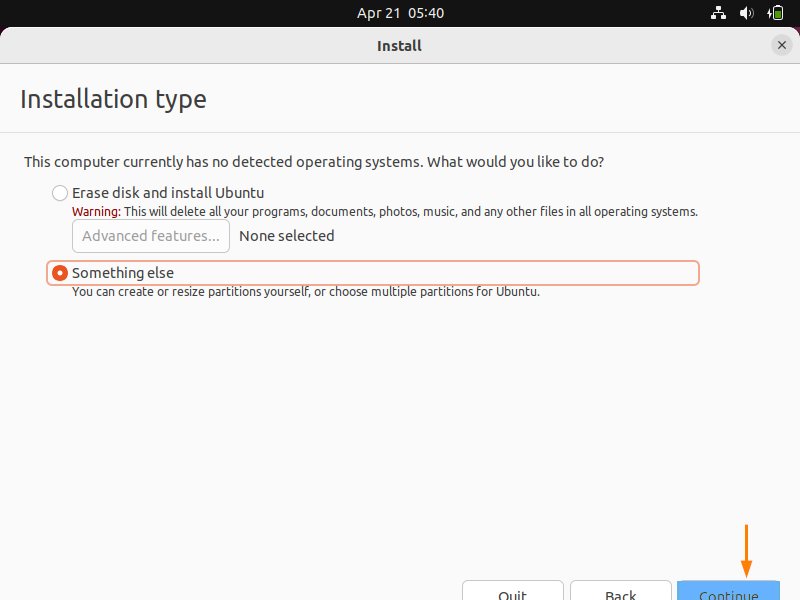
Click on ‘Continue’ and then we will get following screen,

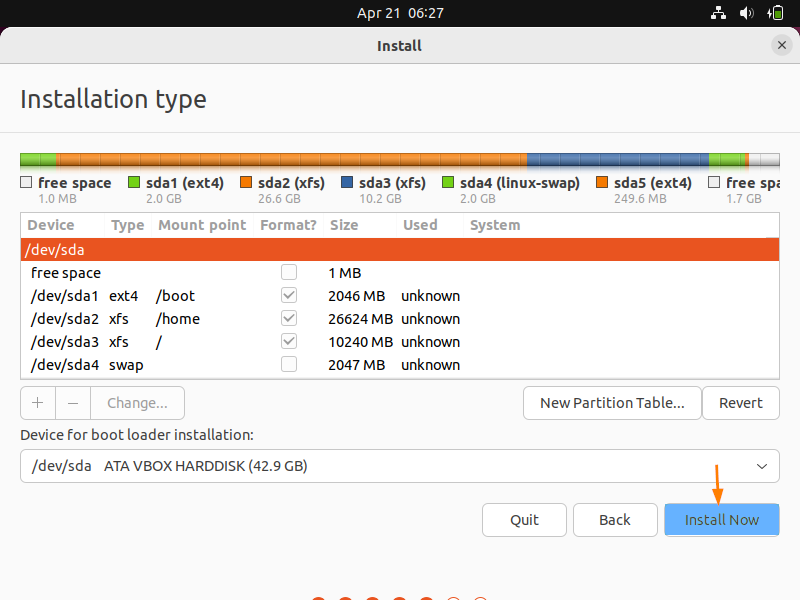
As we can see, we have 40 GB disk space for Ubuntu 22.04 Installation. We are going to create following partitions on it.
- /boot – 2 GB (ext4 file system)
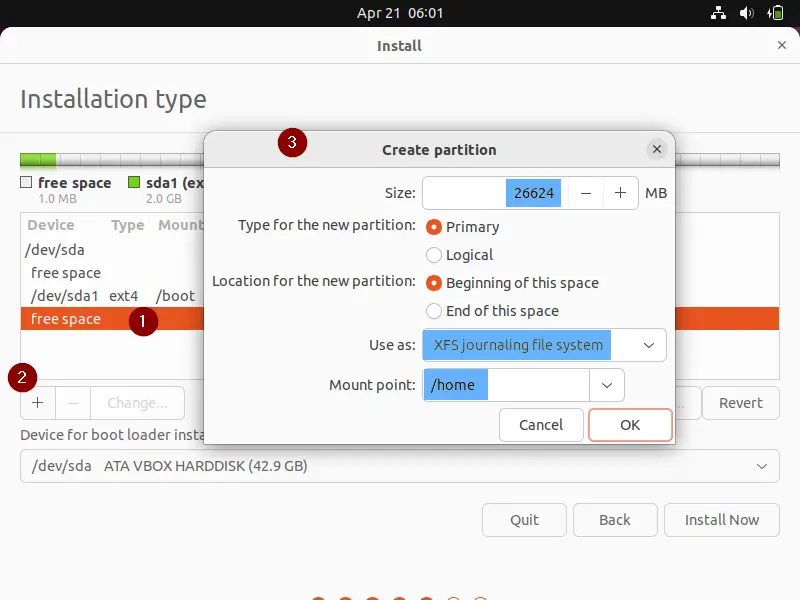
- /home – 26 GB (xfs file system)
- / – 10 GB (xfs file system)
- Swap – 2 GB (xfs file system)
To start creating partition, first create an empty partition table.
Select the Device –> Click on ‘New Partition Table’
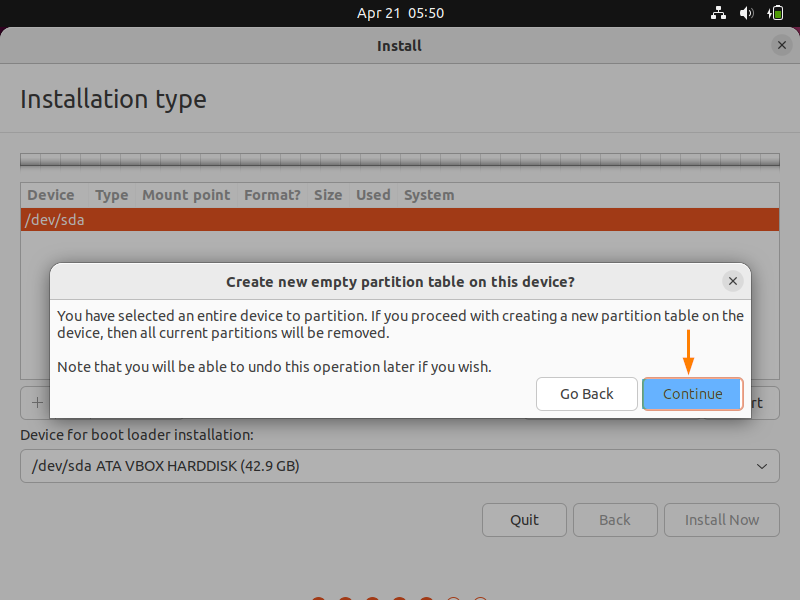
Click on Continue,
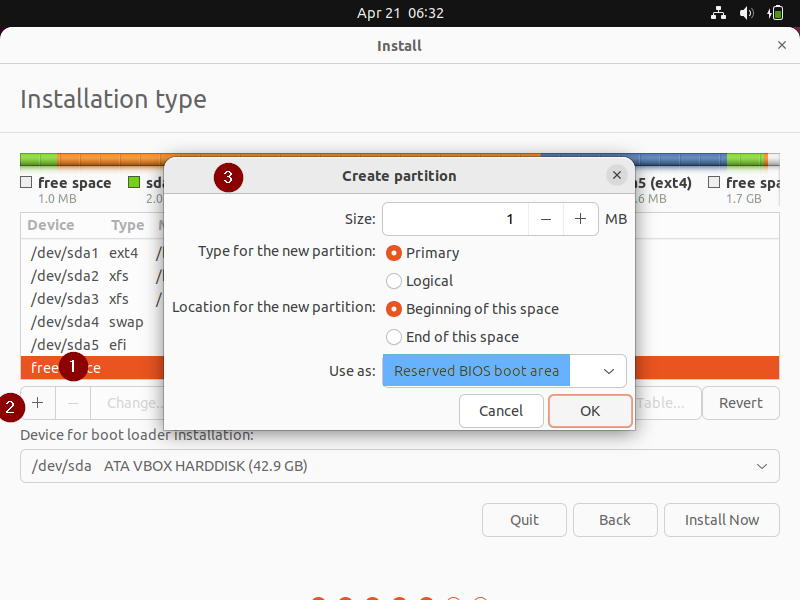
Now Create our first partition as /boot of size 2 GB. Select the Free Space –> Click on + symbol
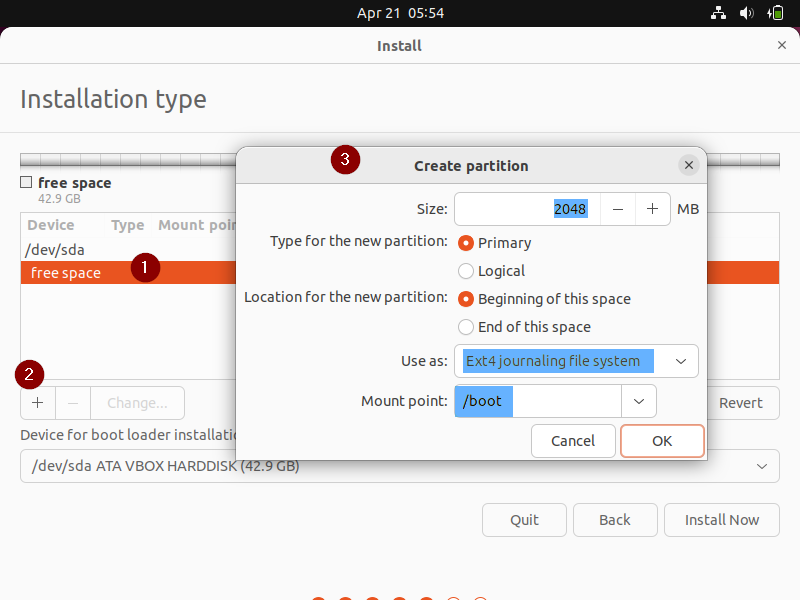
Click on OK.
Similarly Create /home and / partition of size 26 GB & 10 GB respectively.
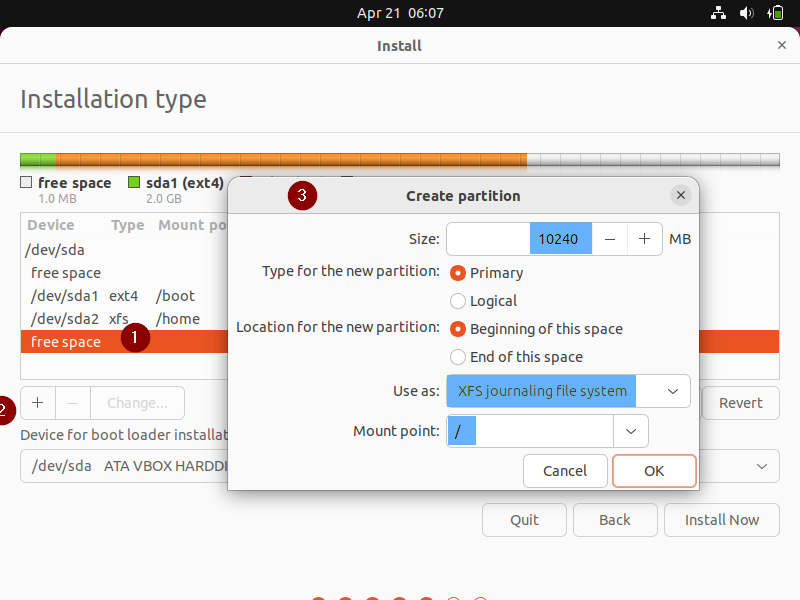
Click on ‘OK’
Finally create our last partition as swap of size 2 GB.
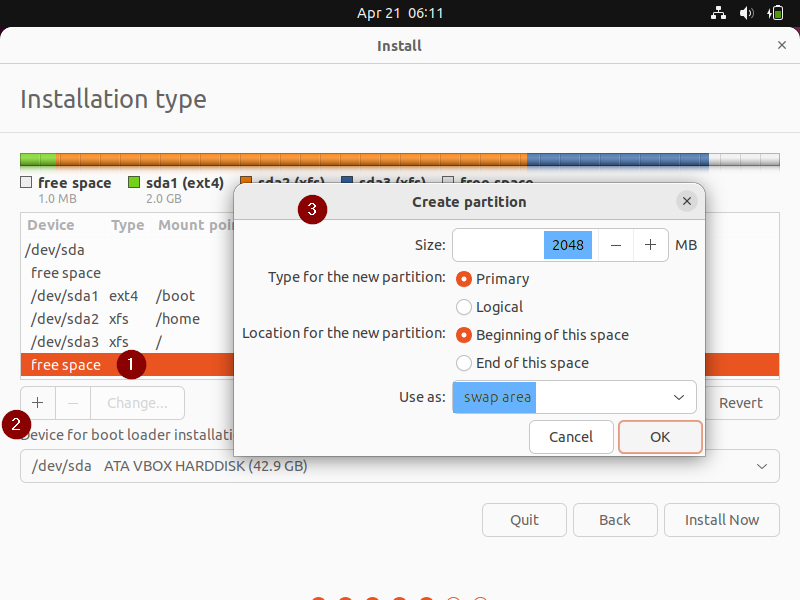
Click on Ok to finish the partition creation.
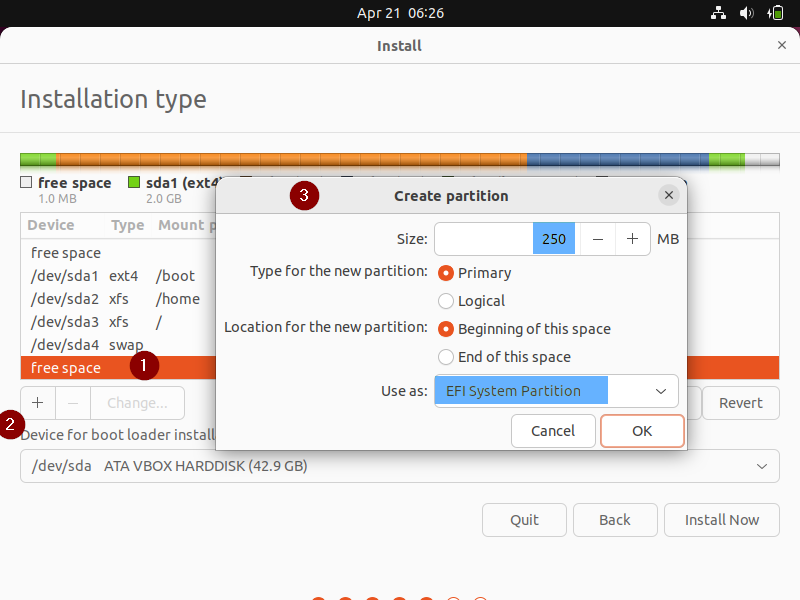
Note : If you are using GPT disk then you must create EFI partition of size between 100 – 250 MB and reserved bios boot area of at least 1MB.
Once you are done with partition scheme, click on ‘Install Now’ option in following screen to further proceed with installation
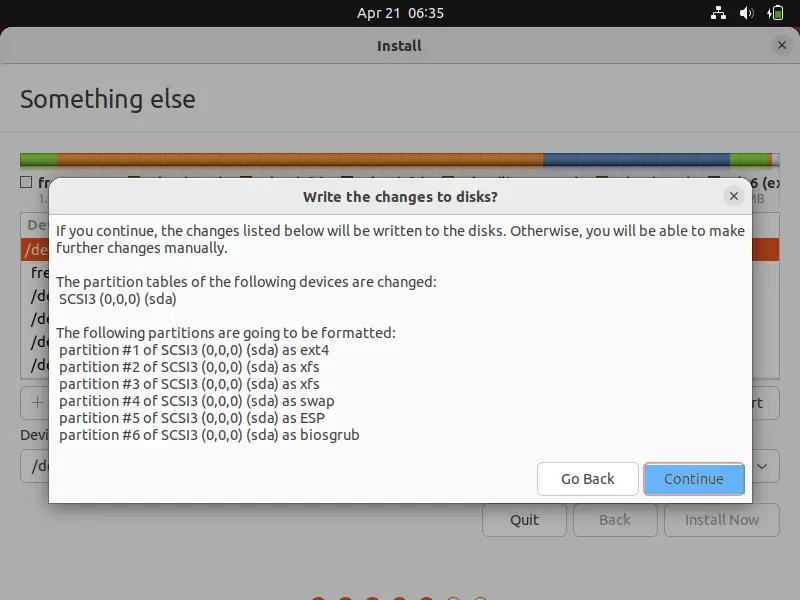
In the next screen, choose ‘Continue’ to write changes to the disk.
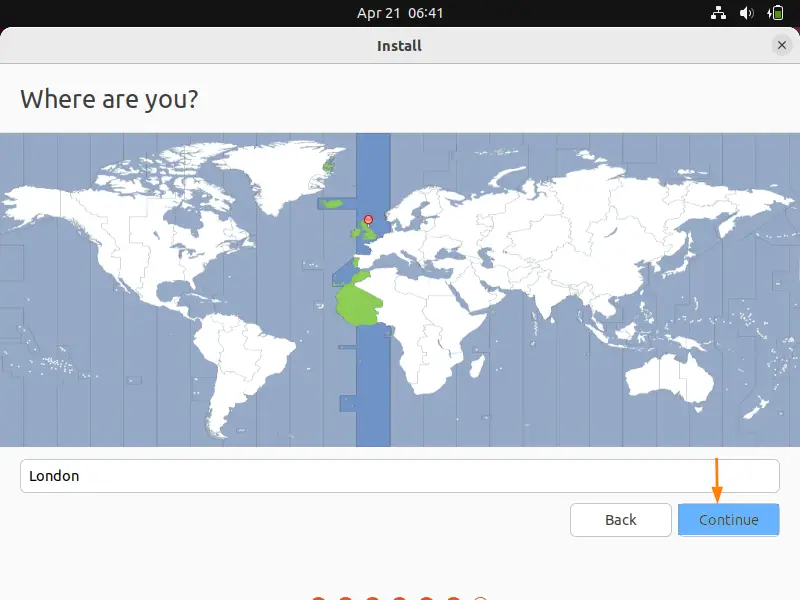
6) Choose Your Preferred Location
Select the location as per your current region, it will configure time zone accordingly.
7) Create User and Set Host name
Enter your name, a computer name, a username, and a strong password. This will be your main account on your Ubuntu 22.04 system. You will be using this user to log in post installation.
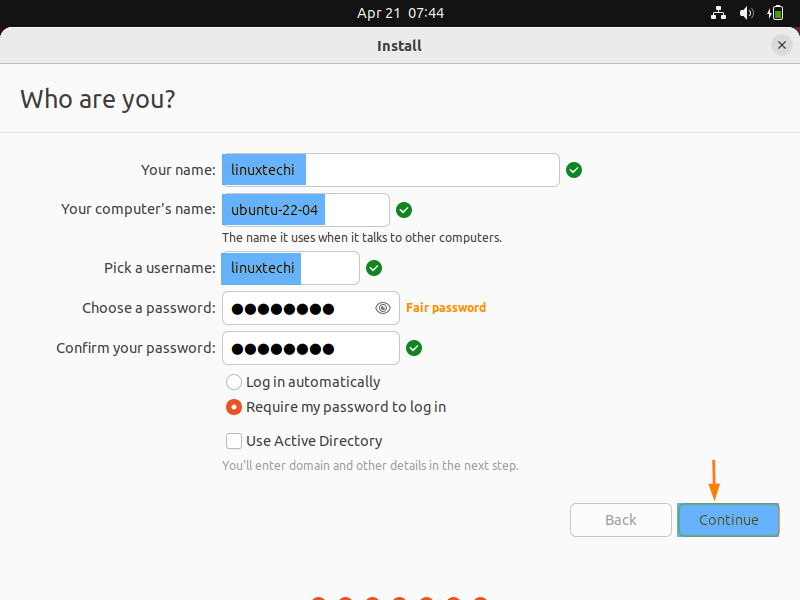
Click on Continue to proceed further with installation
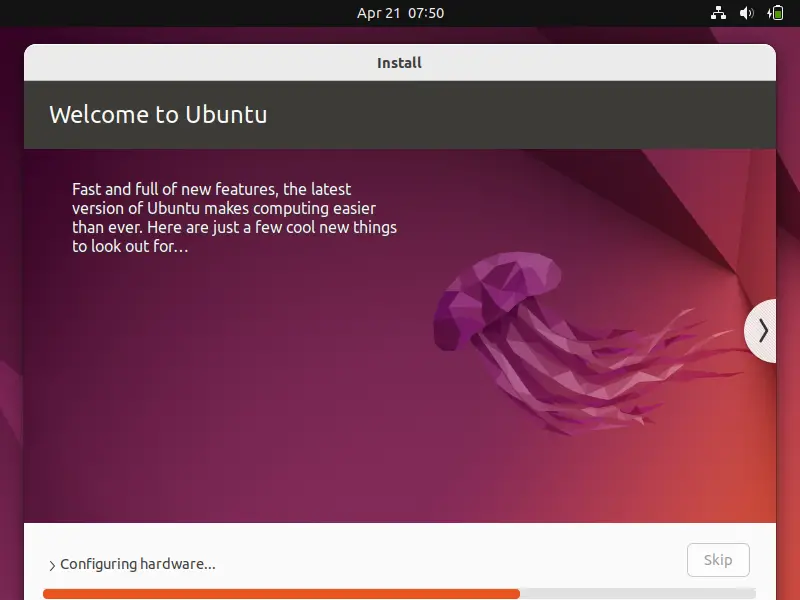
8) Ubuntu 22.04 Installation Started
As we see in the following window, installation has started, and it is in progress.
Once the installation is completed, we will be prompted to reboot the system.
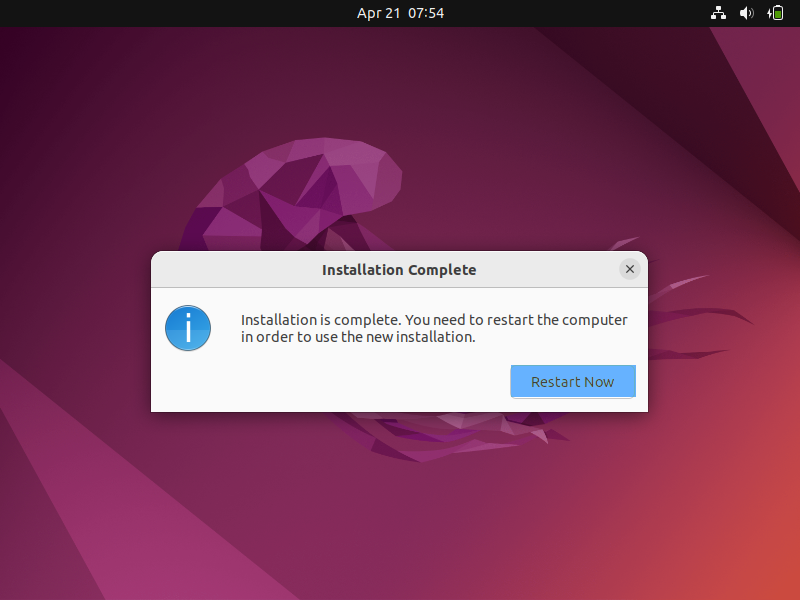
Click on ‘Restart Now’ to reboot the system. Also don’t forget to change boot medium from USB to hard disk from bios settings.
9) Login Screen After Installation
When the system boots up after reboot, we will get the following login screen.
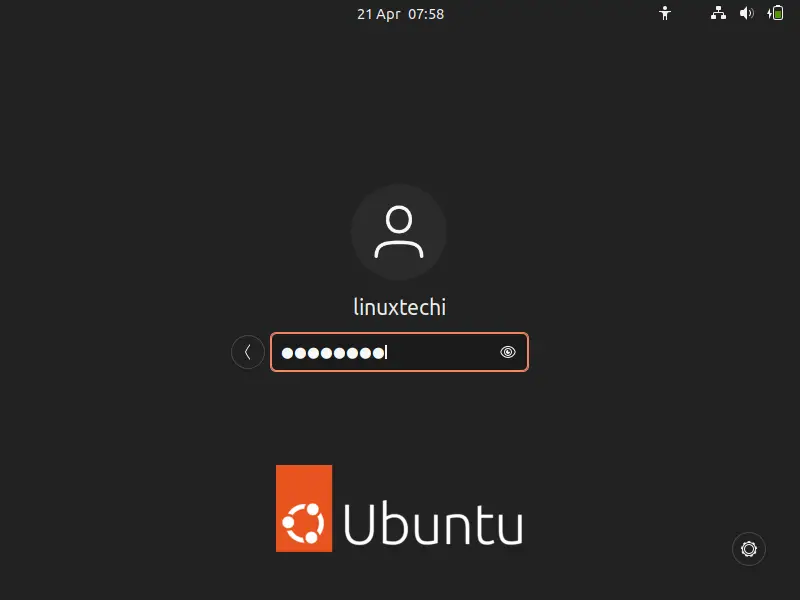
Use the same user’s credentials that you have created during the installation and hit enter,

Congratulations! You’ve successfully installed Ubuntu 22.04 LTS. Take a moment to explore the system, install updates, and customize it according to your preferences. Welcome to the world of open-source computing!
That’s all from this post, I hope you have found it informative and useful. Kindly post your queries and feedback in below comments section.
Read Also : 11 Things To Do After Installing Ubuntu 22.04 LTS
Hi,
How to clean installation without GUI for Ubuntu desktop version 22.04 or 22.10.
I want to install just plug USB disk then all automatically, like timezone, erase disk and install Ubuntu, all standardize with English US.
Thank you.
This is awesome!
Thanks