In this guide, you will learn how to install LEMP stack on an Arch Linux server. LEMP is a popular stack used by web developers for testing and hosting websites and applications. LEMP is an abbreviation for Linux Nginx (pronounced as Engine X) MariaDB / MySQL and PHP. Nginx is a high-performance and stable web server which can also be used as a reverse proxy. It’s popular for serving high traffic sites and is usually preferred to Apache in production servers. MariaDB / MySQL are open source database Engines for storing website data. MariaDB is a fork of MySQL and is mostly preferred since the takeover of MySQL by Oracle. Lastly, we have PHP which is a server-side scripting language used for developing dynamic web pages. We are going to install each of these components and test their installation on Arch Linux.
Let’s begin!
Step 1) Install Nginx Web Server
Before the installation of any package, it’s always a good idea to update the system packages. So, proceed and update Arch packages using the command:
$ sudo pacman -Syy
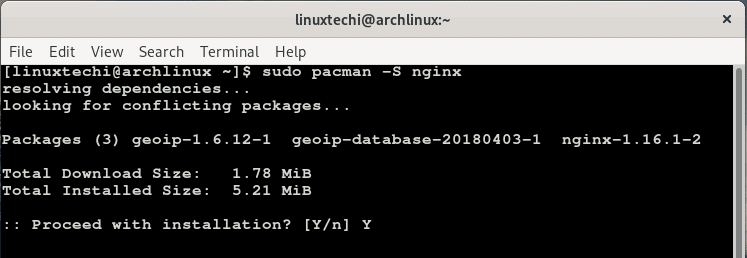
To install Nginx, run the command:
$ sudo pacman -S nginx
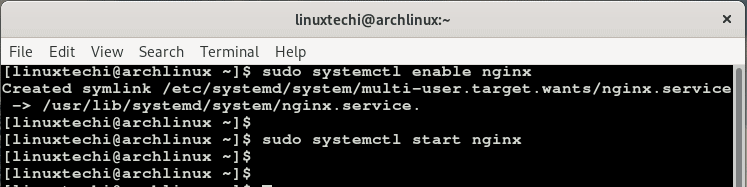
Once installed, enable Nginx to start upon boot and start Nginx service by running the commands.
$ sudo systemctl enable nginx
$ sudo systemctl start nginx
To confirm that Nginx is running, execute the command:
$ sudo systemctl status nginx
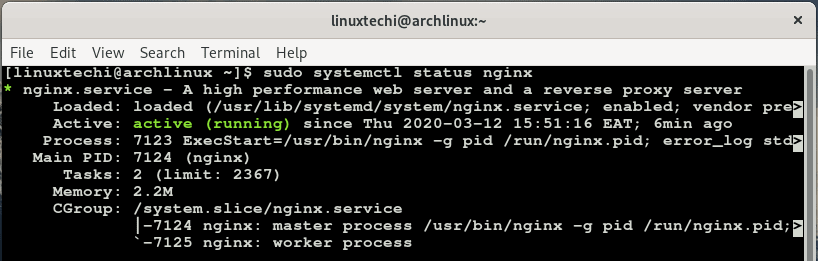
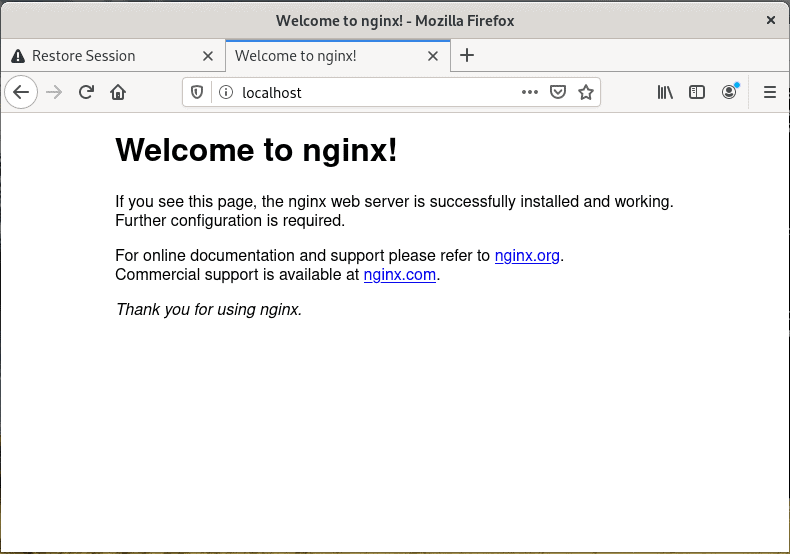
The output indicates that Nginx is up and running. Additionally, you can confirm that the Nginx web server is up by launching your browser and typing your server’s IP address in the URL bar as shown.
http://server-IP
To check the version of Nginx installed, run:
$ nginx -v

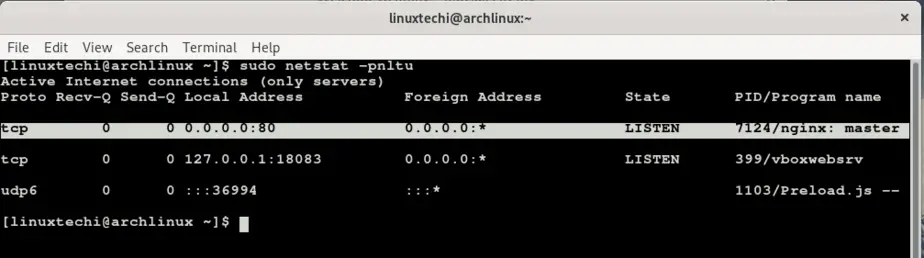
By default, Nginx listens on port 80. To confirm this, use the netstat command as shown:
$ sudo netstat -plntu
Step 2) Install MariaDB database Engine
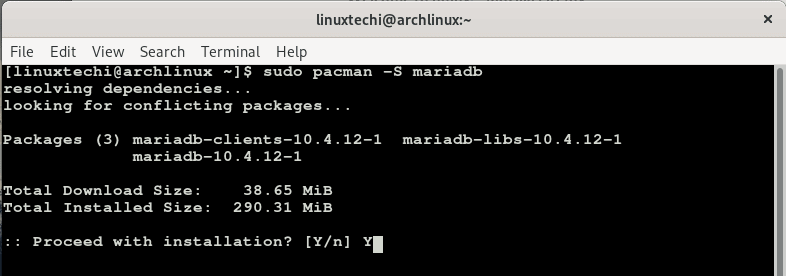
To install MariaDB database engine, run the command:
$ sudo pacman -S mariadb
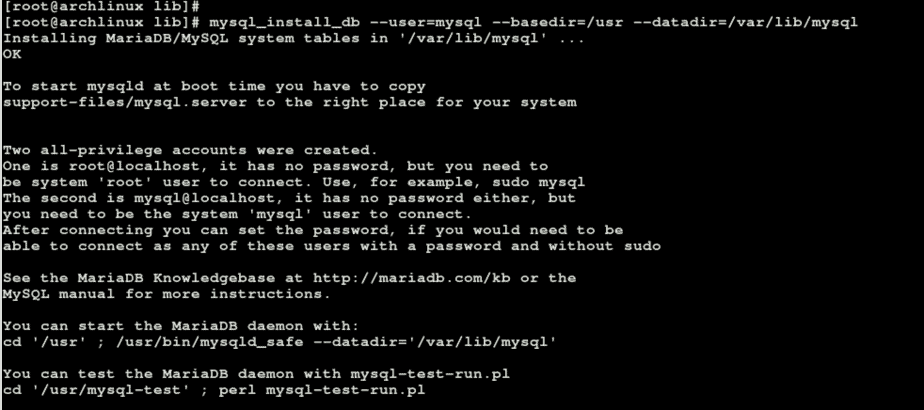
Once installed, proceed and initialize the MariaDB data directory and create system tables as shown below.
$ sudo mysql_install_db --user=mysql --basedir=/usr --datadir=/var/lib/mysql
After the initialization is complete, enable and start the MariaDB service as shown
$ sudo systemctl enable mariadb
$ sudo systemctl start mariadb

By default, upon installation, MariaDB database engine does not have a password for the root user. This can create a loop hole for a potential breach. To prevent that from happening,we need to secure our database engine and enforce a list of other restrictions.
So change to root user and run the command below to begin hardening MariaDB
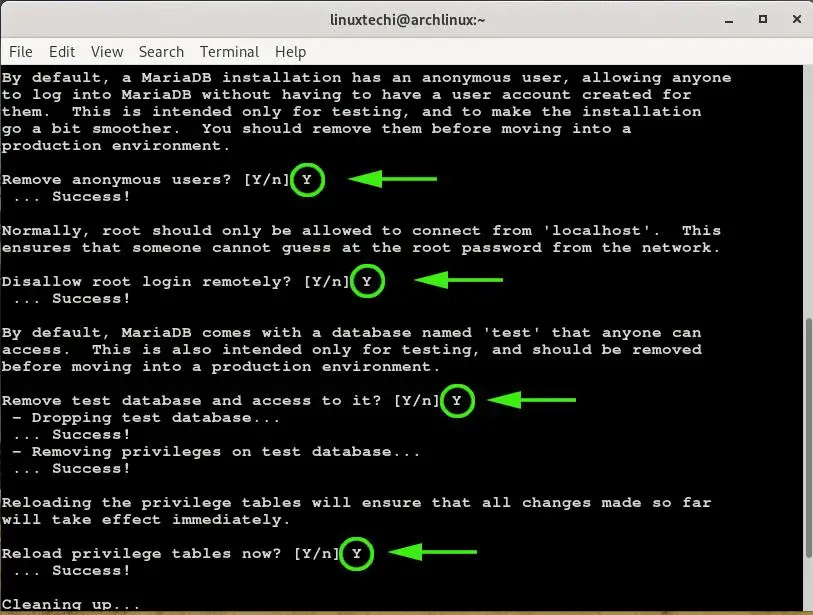
$ mysql_secure_installation
This will start a series of prompts. First, you will be required to set the root password. Initially, you will be notified that the root account is protected and that you can proceed at your discretion and ignore changing the root password.
If you feel that you need to change the password hit ‘Y’ on the keyboard and provide a strong password and confirm it.
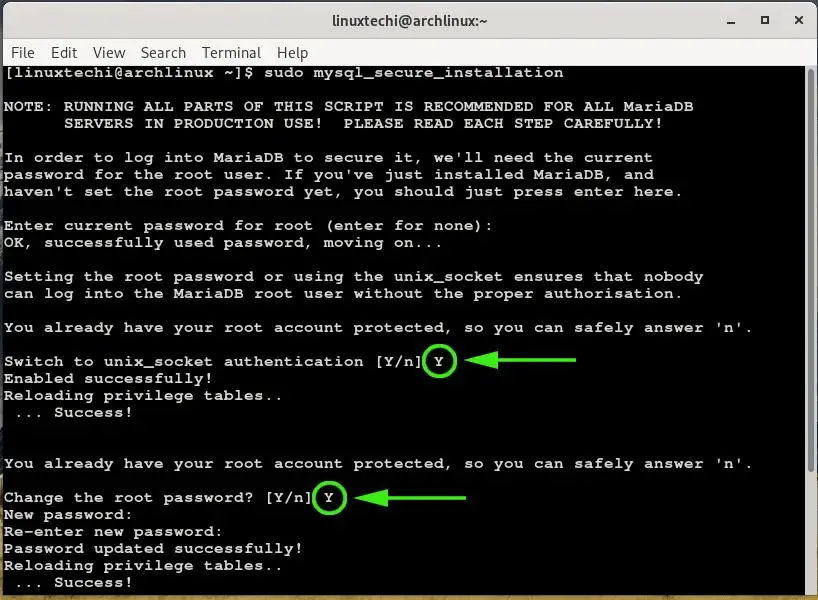
The rest of the prompt will require you to perform a few hardening tweaks to your MariaDB database engine. This includes removing anonymous users, disabling remote root login , removing the test database and finally reloading the privileges tables to which you should answer Yes to all by typing the Y key.
To log in to your database instance, run the command:
$ mysql -u root -p
Enter the mysql root password that you set during “mysql_secure_installation” command
Step 3) Install PHP & PHP-FPM
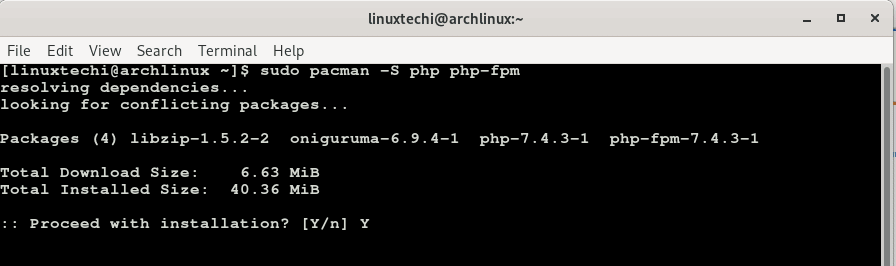
The component to install is PHP-FPM which also bundles PHP. An abbreviation for PHP FastCGI Process Manager , PHP-FPM is a handy web tool that speeds up a website’s performance. It equips your webserver with the ability to handle a huge volume of network traffic simultaneously.
To install PHP-FPM run the command:
$ sudo pacman -S php php-fpm
After the installation is complete, enable the PHP-FPM on boot and start the service by executing the command:
$ sudo systemctl enable php-fpm
$ sudo systemctl start php-fpm
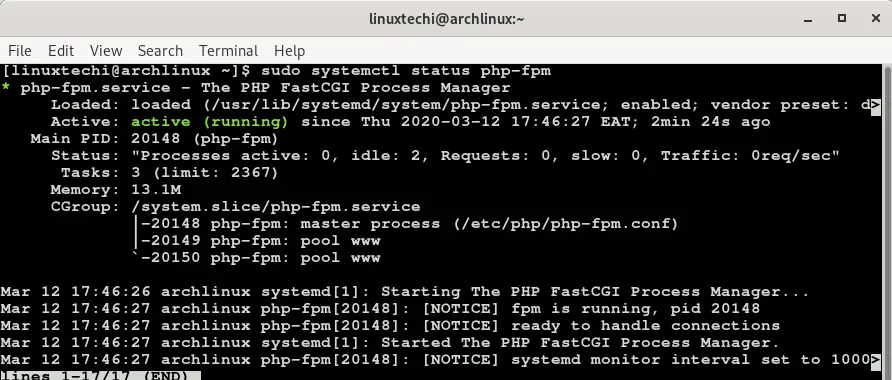
Verify that PHP-FPM is running by running the command:
$ sudo systemctl status php-fpm
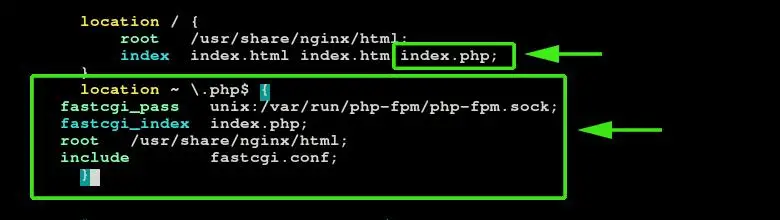
For PHP-FPM to process Nginx web pages, a few modifications are necessary. Let’s head out to the Nginx configuration file
$ sudo vim /etc/nginx/nginx.conf
Append or add the changes appearing in orange as shown below
location / {
root   /usr/share/nginx/html;
index  index.html index.htm index.php;
}
location ~ \.php$ {
fastcgi_pass   unix:/var/run/php-fpm/php-fpm.sock;
fastcgi_index  index.php;
root   /usr/share/nginx/html;
include        fastcgi.conf;
}
Save the file and restart both Nginx and PHP-FPM for the changes to come into effect.
$ sudo systemctl restart nginx
$ sudo systemctl restart php-fpm
To verify that PHP is working, and that PHP-FPM can serve nginx web pages without any glitches, create an info.php file in the /usr/share/nginx/html/ path
$ sudo vim /usr/share/nginx/html/info.php
Append the lines shown below and save the file.
<?php
phpinfo();
?>
Launch your browser and browse your server’s URL as shown
http://server-ip/info.php
You should get a web page displayed as shown clearly displaying the version of PHP and detailed information about the various PHP modules.
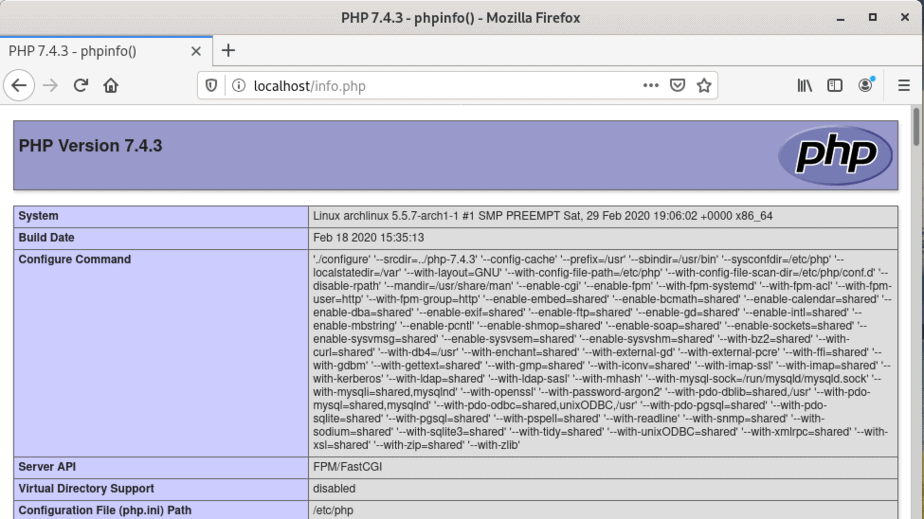
From the webpage, we can clearly see that we have installed the latest version of PHP which is PHP 7.4.3. This can also be confirmed by running the command below in the terminal.
$ php -v

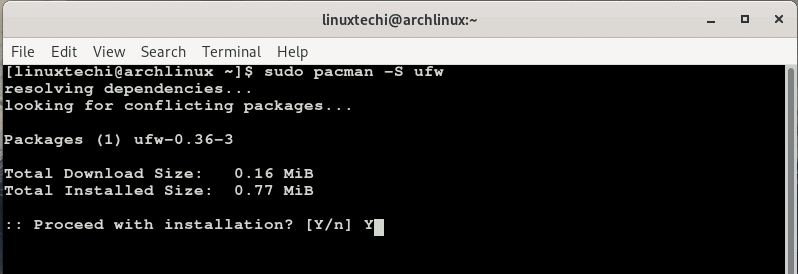
Step 4) Configure the ufw firewall
To allow external connections to our Arch Linux web server, we need to open web ports 80 & 443. But first, let’s install ufw firewall.
$ sudo pacman -S ufw
To allow the port across the firewall, execute the commands:
$ sudo ufw allow 80/tcp
$ sudo ufw allow 443/tcp
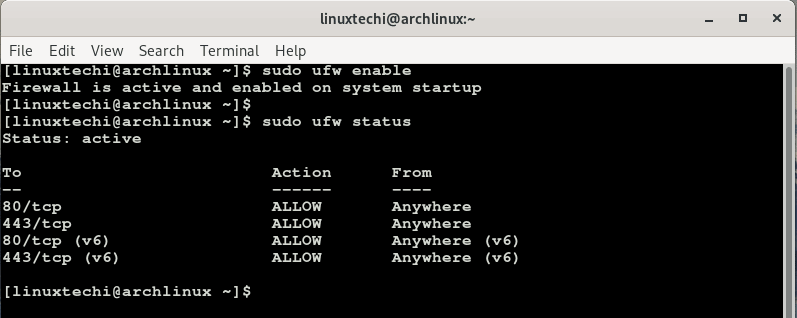
Then enable and reload the firewall for the changes to come into effect
$ sudo ufw enable
To check the status of the firewall run:
$ sudo ufw status
At this point we have successfully installed LEMP stack. As an add-on, we are going to cover the installation of phpMyAdmin which is a PHP front-end utility that helps in easy administration and management of MariaDB / MySQL databases. If you are not a fan of working on a MySQL / MariaDB shell, this tool will provide much reprieve.
To install phpMyAdmin run the command
$ sudo pacman -S phpmyadmin

Next, create a symlink to enable access to phpMyAdmin
$ sudo ln -s /usr/share/webapps/phpMyAdmin/ /usr/share/nginx/html/
Lastly, restart Nginx and PHP-FPM service for the changes to take effect.
$ sudo systemctl restart nginx
$ sudo systemctl restart php-fpm
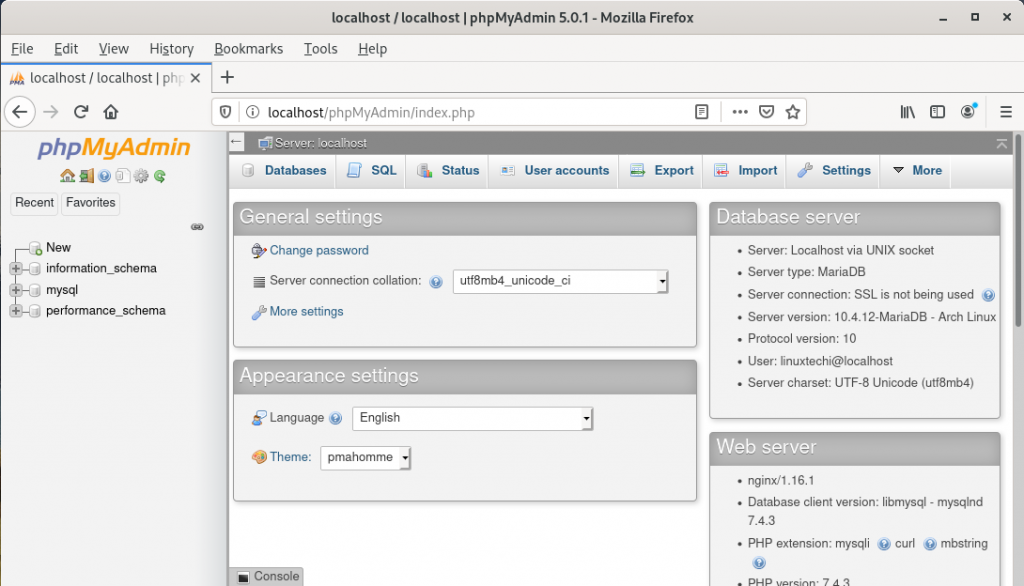
To access phpMyAdmin front end, browse the URL as shown
http://server-ip/phpMyAdmin
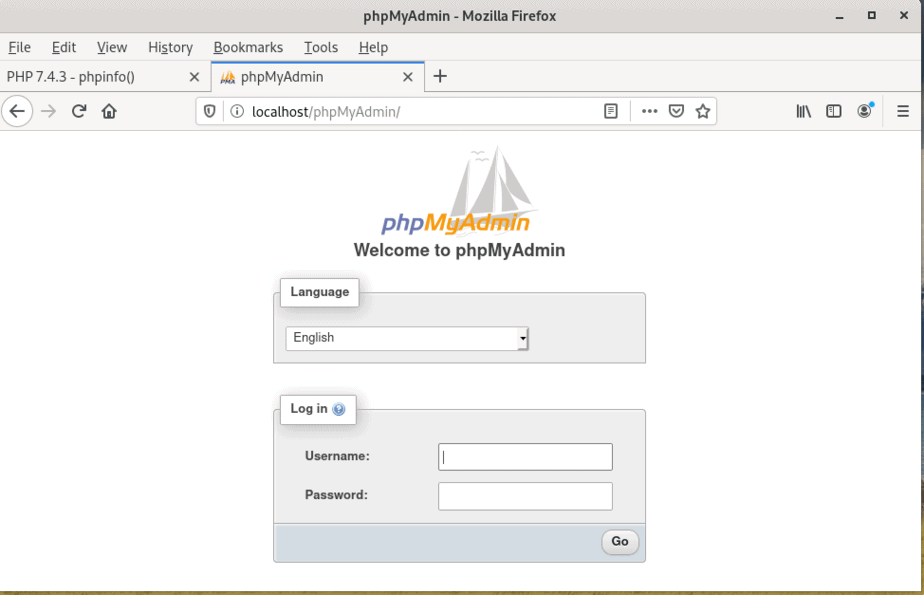
Log in using root credentials and the dashboard will be displayed as shown
And that’s it! We have successfully installed LEMP stack on Arch Linux! We value your feedback. Reach out to use for any comment or feedback.
Also Read : How to Create and Configure Sudo User on Arch Linux
Wonderfully done article. Every step was clear and I was able to install my local LEMP stack perfectly. Thanks to the author!
Great article. I have followed all the steps and everything has gone perfectly (although I have skipped the firewall configuration). The only problem I have encountered has been going to phpMyAdmin, which gave mysqli not activated error. I have activated it by uncommenting the line extension = mysqli in /etc/php/php.ini and restarting php-fpm and everything works fine.
Thank you very much for the article.
Or if you lazy run the following commands
sudo sed -i ‘s/^;extension=mysqli/extension=mysqli/’ /etc/php/php.ini
sudo sed -i ‘s/^;extension=pdo_mysql/extension=pdo_mysql/’ /etc/php/php.ini