Are you looking for an easy guide on how to install Kubernetes (k8s) using kubespray?
The step-by-step guide on this page will show you how to install Kubernetes Cluster using kubespray on linux systems.
Kubespray is a free and open-source tool that provide ansible playbooks to deploy and manage Kubernetes clusters. It is designed to simplify the installation process of Kubernetes clusters across multiple nodes, allowing users to deploy and manage a production-ready Kubernetes cluster quickly and easily.
It supports a range of operating systems, including Ubuntu, CentOS, Rocky Linux and Red Hat Enterprise Linux, and it can deploy Kubernetes on a variety of platforms, including bare metal, public cloud, and private cloud.
In this guide, we are using the following lab,
- Ansible Node (Kubespray Node): Minimal installed Ubuntu 22.04 LTS (192.168.1.240)
- 3 Controller Nodes: Minimal Installed Rocky Linux 9 (192.168.1.241/242/243)
- 2 Worker Nodes: Minimal Installed Rocky Linux 9 (192.168.1.244/245)
Minimum system requirements for kubespray
- Master Nodes: 1500 MB RAM, 2 CPU and 20 GB free disk space
- Worker Nodes: 1024 MB, 2 CPU, 20 GB free disk space
- Ansible Node: 1024 MB, 1CPU and 20 GB disk space
- Internet connectivity on each node
- Regular with sudo admin rights
Without any further delay, let’s deep dive into the installation steps,
Step 1) Configure Kubespray Node
Login to your Ubuntu 22.04 system and install ansible. Run the following set of commands,
$ sudo apt update
$ sudo apt install git python3 python3-pip -y
$ git clone https://github.com/kubernetes-incubator/kubespray.git
$ cd kubespray
$ pip install -r requirements.txt
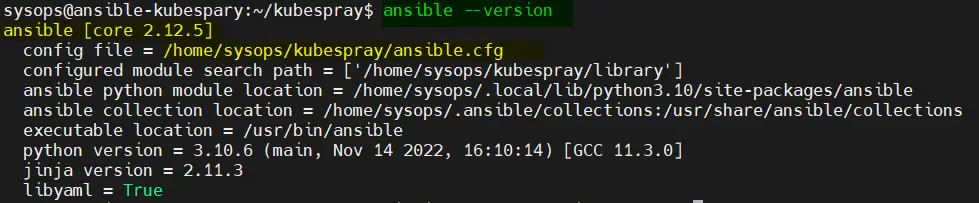
Verify the ansible version, run
$ ansible --version
Create the hosts inventory, run below commands and don’t forget to replace IP address that suits to your deployment.
$ cp -rfp inventory/sample inventory/mycluster
$ declare -a IPS=(192.168.1.241 192.168.1.241 192.168.1.242 192.168.1.243 192.168.1.244 192.168.1.245)
$ CONFIG_FILE=inventory/mycluster/hosts.yaml python3 contrib/inventory_builder/inventory.py ${IPS[@]}
Modify the inventory file, set 3 control nodes and 2 worker nodes
$ vi inventory/mycluster/hosts.yaml
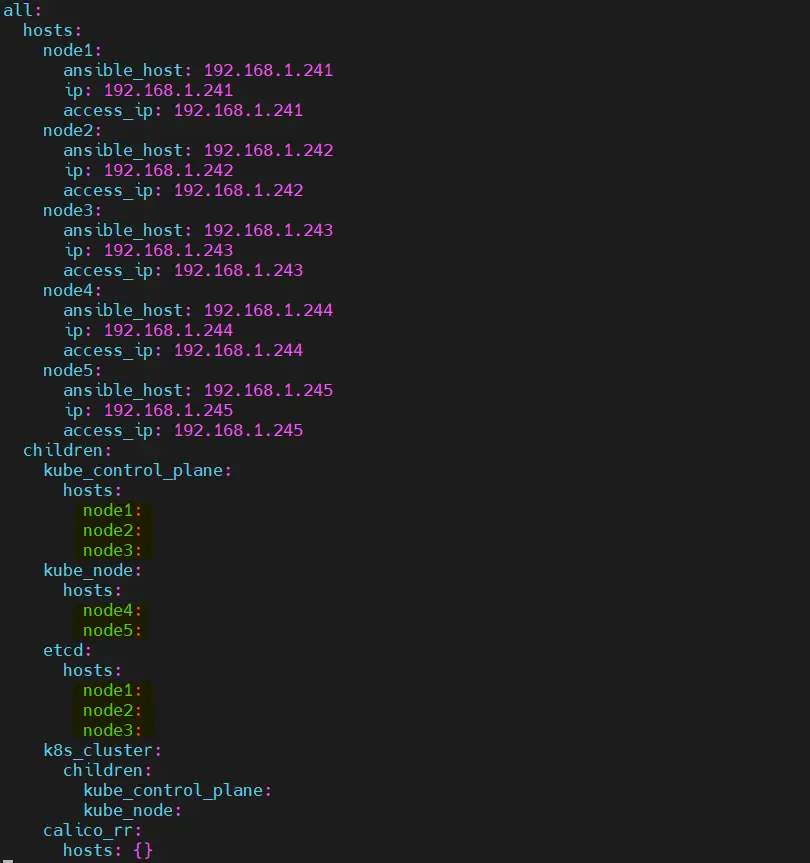
Save and close the file
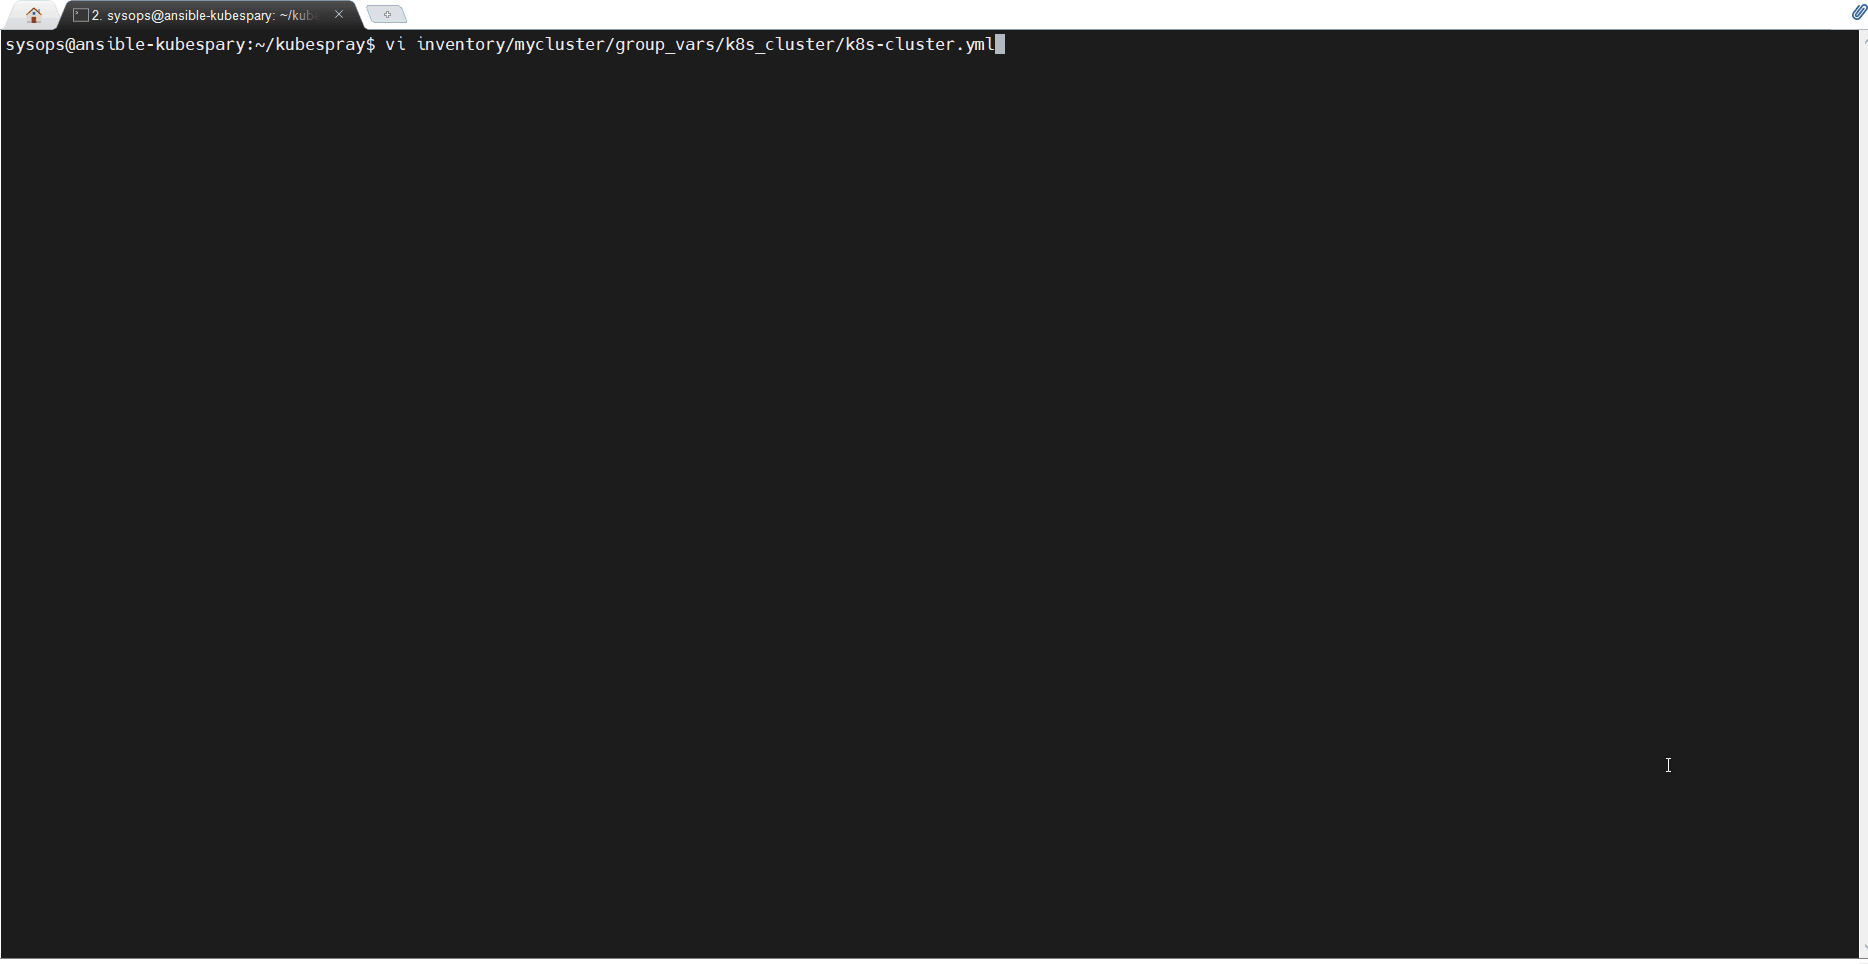
Review and modify the following parameters in file “inventory/mycluster/group_vars/k8s_cluster/k8s-cluster.yml”.
kube_version: v1.26.2
kube_network_plugin: calico
kube_pods_subnet: 10.233.64.0/18
kube_service_addresses: 10.233.0.0/18
cluster_name: linuxtechi.local
To enable addons like kuberenetes dashboard and ingress controller, set the parameters as enabled in the file “inventory/mycluster/group_vars/k8s_cluster/addons.yml”
$ vi inventory/mycluster/group_vars/k8s_cluster/addons.yml
-----------
dashboard_enabled: true
ingress_nginx_enabled: true
ingress_nginx_host_network: true
-----------
save and exit the file.
Step 2) Copy SSH-keys from ansible node to all other nodes
First generate the ssh-keys for your local user on your ansible node,
$ ssh-keygen
Copy the ssh-keys using ssh-copy-id command,
$ ssh-copy-id [email protected]
$ ssh-copy-id [email protected]
$ ssh-copy-id [email protected]
$ ssh-copy-id [email protected]
$ ssh-copy-id [email protected]
Also Read: How to Setup Passwordless SSH Login in Linux with Keys
Also run the following command on each node.
$ echo "sysops ALL=(ALL) NOPASSWD:ALL" | sudo tee /etc/sudoers.d/sysops
Step 3) Disable Firewall and Enable IPV4 forwarding
To disable firewall on all the nodes, run following ansible command from ansible node,
$ cd kubespray
$ ansible all -i inventory/mycluster/hosts.yaml -m shell -a "sudo systemctl stop firewalld && sudo systemctl disable firewalld"
Run following ansible commands to enable IPv4 forwarding and disable swap on all the nodes,
$ ansible all -i inventory/mycluster/hosts.yaml -m shell -a "echo 'net.ipv4.ip_forward=1' | sudo tee -a /etc/sysctl.conf"
$ ansible all -i inventory/mycluster/hosts.yaml -m shell -a "sudo sed -i '/ swap / s/^\(.*\)$/#\1/g' /etc/fstab && sudo swapoff -a"
Step 4) Start Kubernetes deployment
Now, we are all set to start Kubernetes cluster deployment, run following ansible playbook from ansible node,
$ cd kubespray
$ ansible-playbook -i inventory/mycluster/hosts.yaml --become --become-user=root cluster.yml
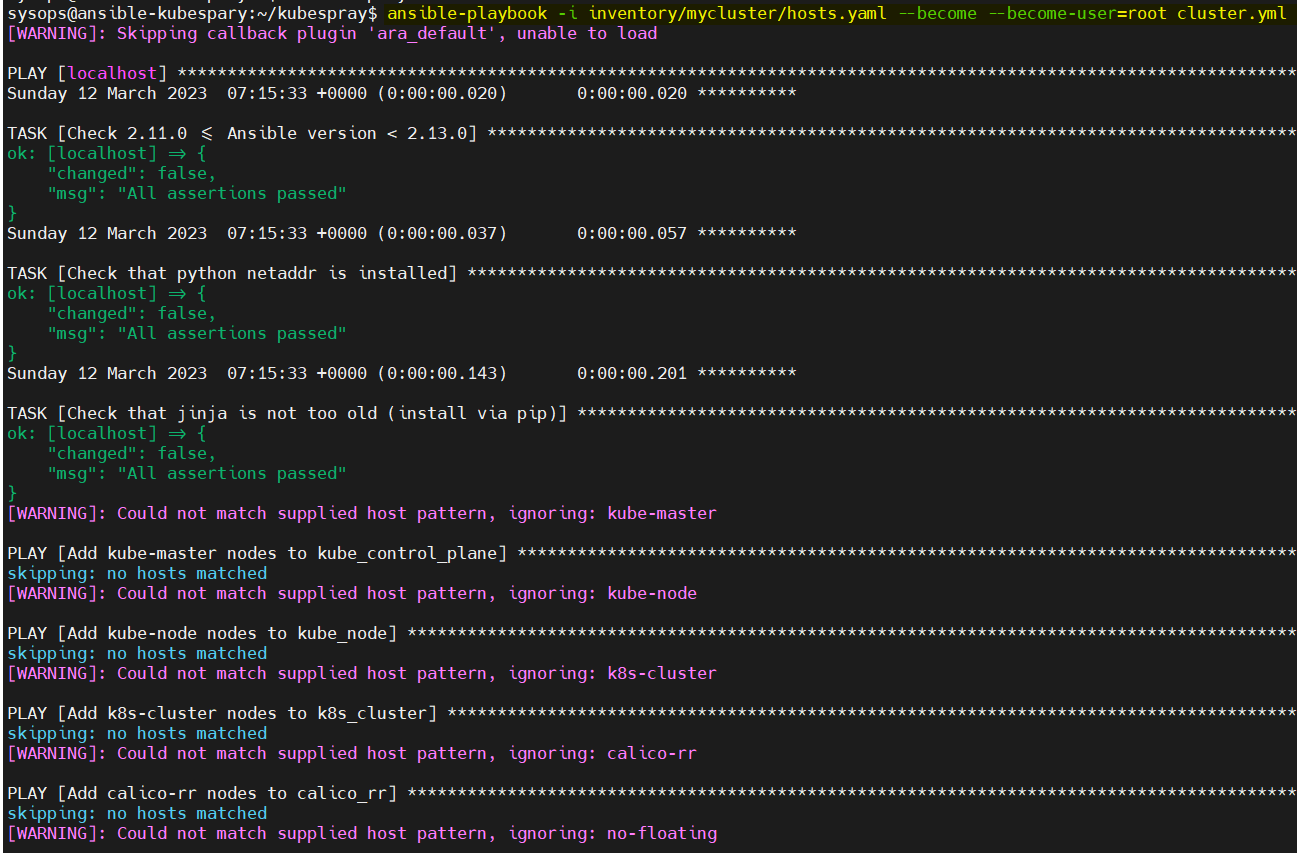
Now monitor the deployment, it may take 20 to 30 minutes depending on internet speed and hardware resources.
Once the deployment is completed, we will get following output on our screen,
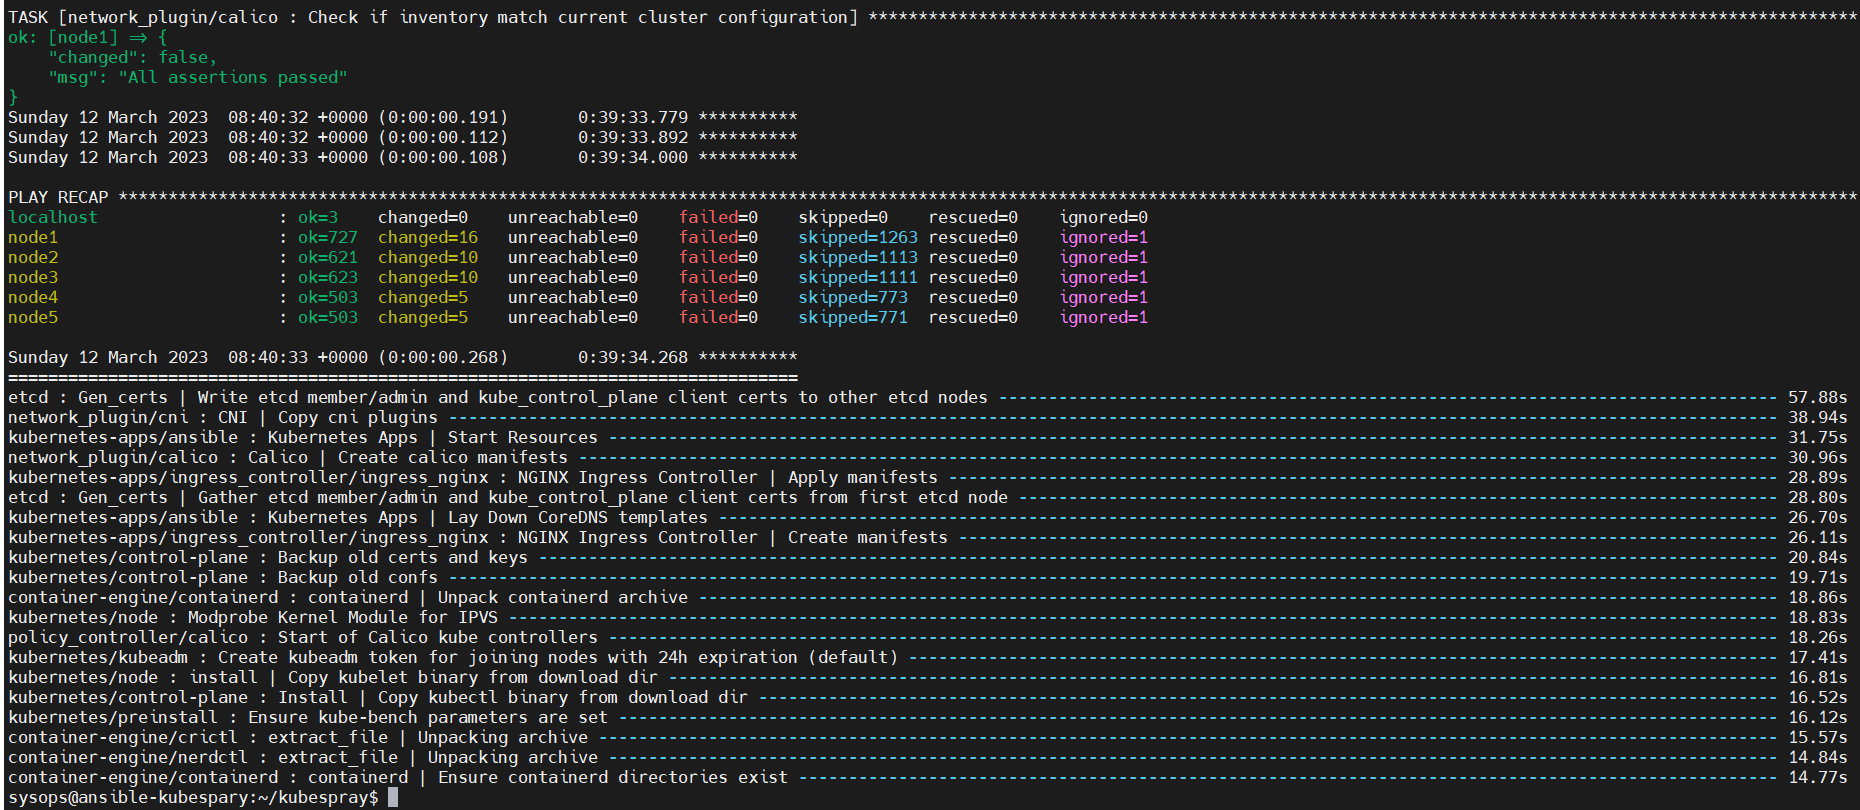
Great, above output confirms that deployment is completed successfully.
Step 5) Access Kubernetes cluster
Login to first master node, switch to root user, run kubectl commands from there,
$ sudo su -
# kubectl get nodes
# kubectl get pods -A
Output,
Perfect, output above confirms that all the nodes in the cluster are in ready state and Pods of all the namespace are up and running. This shows that our Kubernetes cluster is deployed successfully.
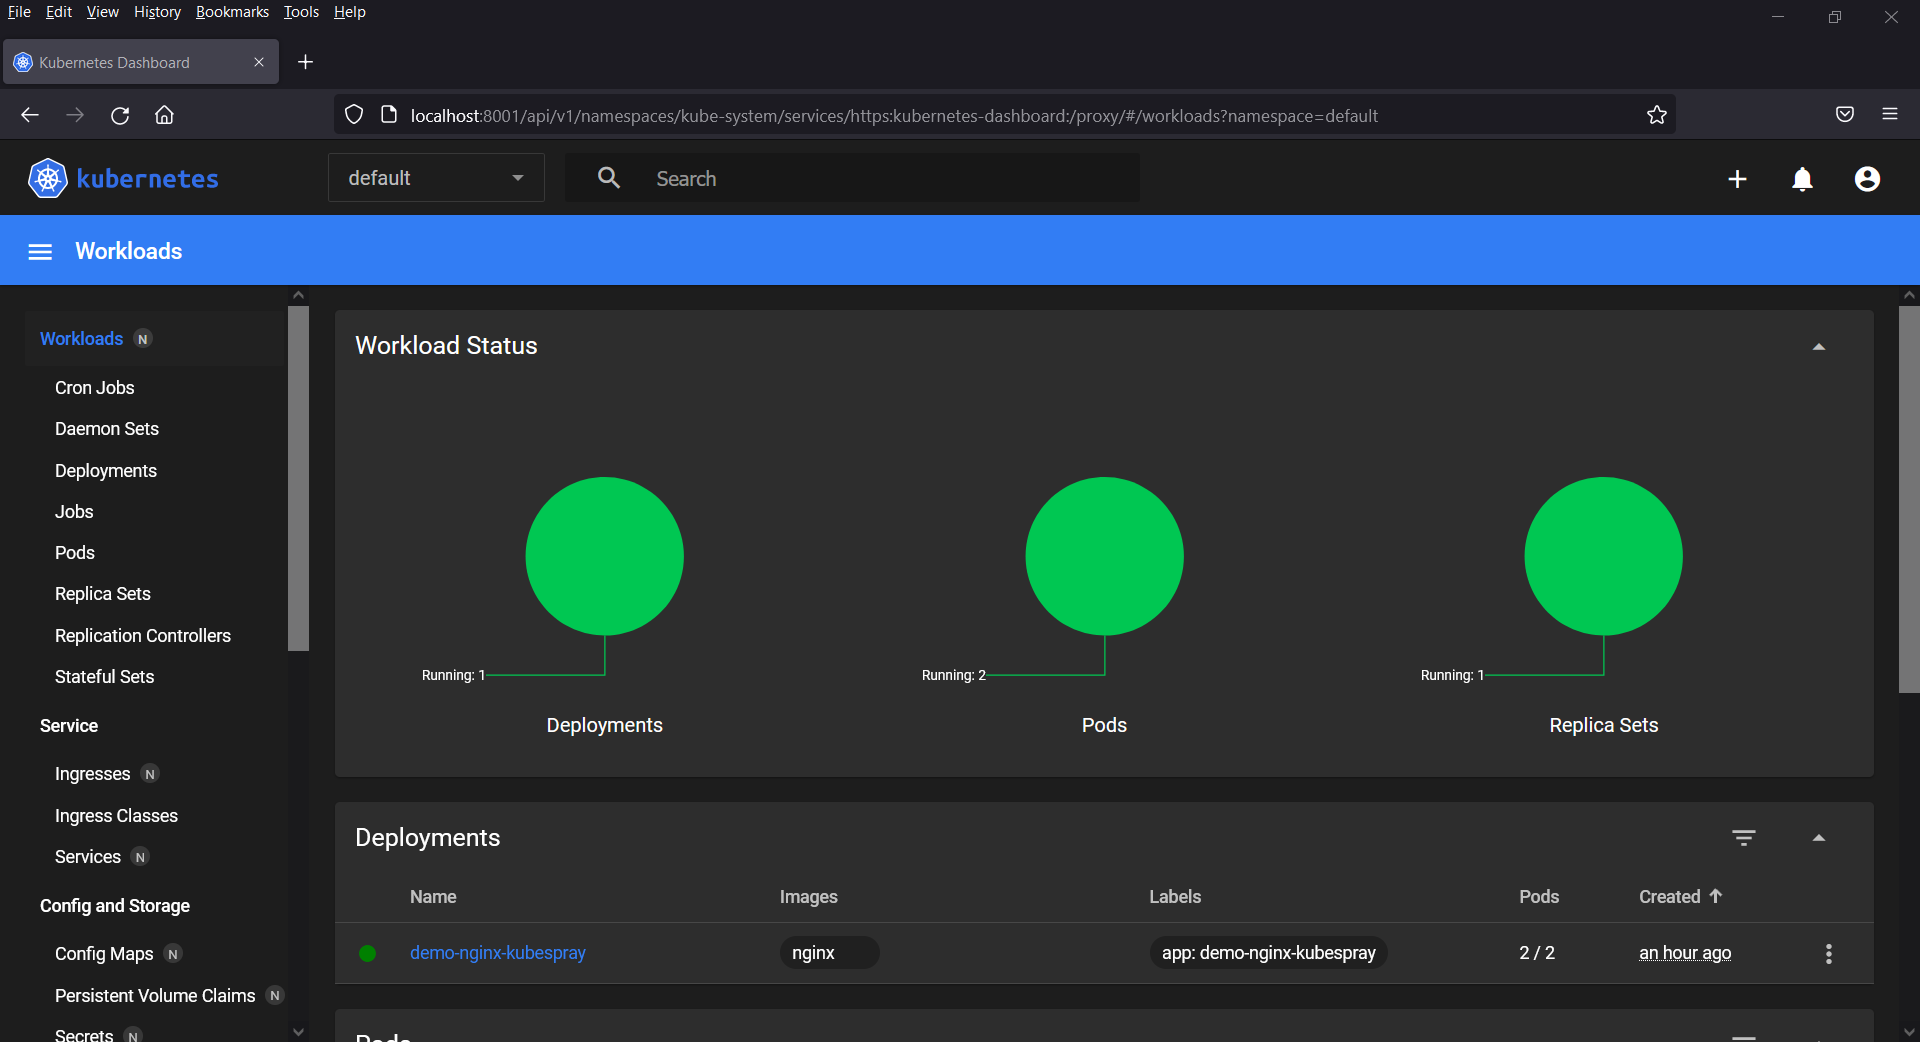
Let’s try to deploy nginx based deployment and expose it as nodeport, run the following kubectl commands
$ kubectl create deployment demo-nginx-kubespray --image=nginx --replicas=2
$ kubectl expose deployment demo-nginx-kubespray --type NodePort --port=80
$ kubectl get  deployments.apps
$ kubectl get pods
$ kubectl get svc demo-nginx-kubespray
Output of above commands,
Now try accessing this nginx application using worker’s IP address and node port (30050)
Either use below curl command or web browser to access this application.
$ curl 192.168.1.245:30050
Or

Perfect, this confirms that application is accessible outside of our cluster.
Step 6) Kubernetes Dashboard (GUI)
To access the Kubernetes dashboard, let’s first service account and assign admin privileges so that it can access dashboard using token.
Create service account with name ‘admin-user’ in kube-system namespace.
$ vi dashboard-adminuser.yml
apiVersion: v1
kind: ServiceAccount
metadata:
  name: admin-user
  namespace: kube-system
save and close the file.
$ kubectl apply -f dashboard-adminuser.yml
serviceaccount/admin-user created
$
Create a cluster role binding,
$ vi admin-role-binding.yml
apiVersion: rbac.authorization.k8s.io/v1
kind: ClusterRoleBinding
metadata:
  name: admin-user
roleRef:
  apiGroup: rbac.authorization.k8s.io
  kind: ClusterRole
  name: cluster-admin
subjects:
- kind: ServiceAccount
  name: admin-user
  namespace: kube-system
save and exit the file.
$ kubectl apply -f admin-role-binding.yml
clusterrolebinding.rbac.authorization.k8s.io/admin-user created
$
Now, create the token for admin-user,
$ kubectl -n kube-system create token admin-user

Copy this token and place it somewhere safe because we will use token to login Kubernetes dashboard.
Connect to first master node from your system using following ssh command
$ ssh -L8001:localhost:8001 [email protected]
Note : Replace IP address that suits to your env.
After login, switch to root user and run ‘kubectl proxy‘ command,
$ sudo su -
# kubectl proxy
Starting to serve on 127.0.0.1:8001

Open the web browser of your system, set the proxy settings as shown below,
Once you are done with proxy settings, paste the following url in browser,
http://localhost:8001/api/v1/namespaces/kube-system/services/https:kubernetes-dashboard:/proxy/#/login

Select the login mechanism as Token and paste the token that you have generated above for admin-user and then click on ‘Sign in’
That’s all from this guide, I hope you found it informative. Kindly do post your queries and feedback in below comments section.
In this example Ricky Linux has been used, can Ubuntu 22.04 be used for Master and Worker Nodes?
Thanks,
~Bish
Hi Bish,
Yes, You can also use Ubuntu 22.04 for master and worker nodes.
It’s great, I spent a day trying several deployment methods, and finally succeeded through your blog.
This is great. Had good success with this. Unless I’m seeing things, I get to the dashboard with or without my browser set to use a proxy. That makes sense to me–I’m going to localhost (which is then tunneled and proxied) with or without my browser telling me to go to localhost.
Nice blog, can you please share the steps to upgrade a k8 cluster using Kubespray?
for example v1.21.6 to 1.26.0