The step-by-step guide on this page will show you how to install Kubernetes cluster using K3s on RHEL 9 or RHEL 8. We will be setting up a single master node and two worker nodes, providing a scalable foundation for the containerized applications.
K3s is a lightweight, easy-to-install, and efficient Kubernetes distribution designed for resource-constrained environments, edge computing, and situations where simplicity and speed are paramount. Developed by Rancher Labs, K3s aims to simplify the deployment and operation of Kubernetes clusters, making it accessible to a broader range of users and use cases.
Prerequisites
- Pre-Install RHEL 9 or 8 Systems
- Local User with Sudo rights
- Minimum 1 GB RAM and 1 CPU core
- Red Hat Subscription with reliable internet connectivity
Lab Details:
- VM1: K3s-master – 192.168.1.110
- VM2: k3s-worker01 – 192.168.1.120
- VM3: k3s-worker02 – 192.168.1.130
Without any further delay, lets jump into Kubernetes installation using k3s.
1) Set Hostname on Each Node
As we are using three node, one master and two worker nodes, set their respective hostname using hostnamectl command.
$ sudo hostnamectl set-hostname "k3s-master" && exec bash     // Run on VM1
$ sudo hostname set-hostname "k3s-worker01" && exec bash      // Run on VM2
$ sudo hostname set-hostname "k3s-worker02"  && exec bash     // Run on VM3
Add the following entries in /etc/hosts file on each node.
192.168.1.110 k3s-master
192.168.1.120 k3s-worker01
192.168.1.130 k3s-worker02
2) Add Firewall rules on Master and Worker Nodes
In case firewall is enabled on your RHEL systems, then allow following ports in firewall on the master node.
$ sudo firewall-cmd --permanent --add-port=6443/tcp
$ sudo firewall-cmd --permanent --add-port=8472/udp
$ sudo firewall-cmd --permanent --add-port=10250/tcp
$ sudo firewall-cmd --permanent --add-port=51820/udp
$ sudo firewall-cmd --permanent --add-port=51821/udp
$ sudo firewall-cmd --permanent --zone=trusted --add-source=10.42.0.0/16
$ sudo firewall-cmd --permanent --zone=trusted --add-source=10.43.0.0/16
$ sudo firewall-cmd --reload
Add following ports in the firewall on worker nodes.
$ sudo firewall-cmd --permanent --add-port=8472/udp
$ sudo firewall-cmd --permanent --add-port=10250/tcp
$ sudo firewall-cmd --permanent --add-port=51820/udp
$ sudo firewall-cmd --permanent --add-port=51821/udp
$ sudo firewall-cmd --permanent --zone=trusted --add-source=10.42.0.0/16
$ sudo firewall-cmd --permanent --zone=trusted --add-source=10.43.0.0/16
$ sudo firewall-cmd --reload
3) Install Required Tools
Install curl and wget on each node using the following dnf command.
$ sudo dnf install curl wget -y
4) Download and Install Kubernetes Cluster Using K3s on RHEL 9 | 8
Run following command on master node only,
$ curl -sfL https://get.k3s.io | sh -
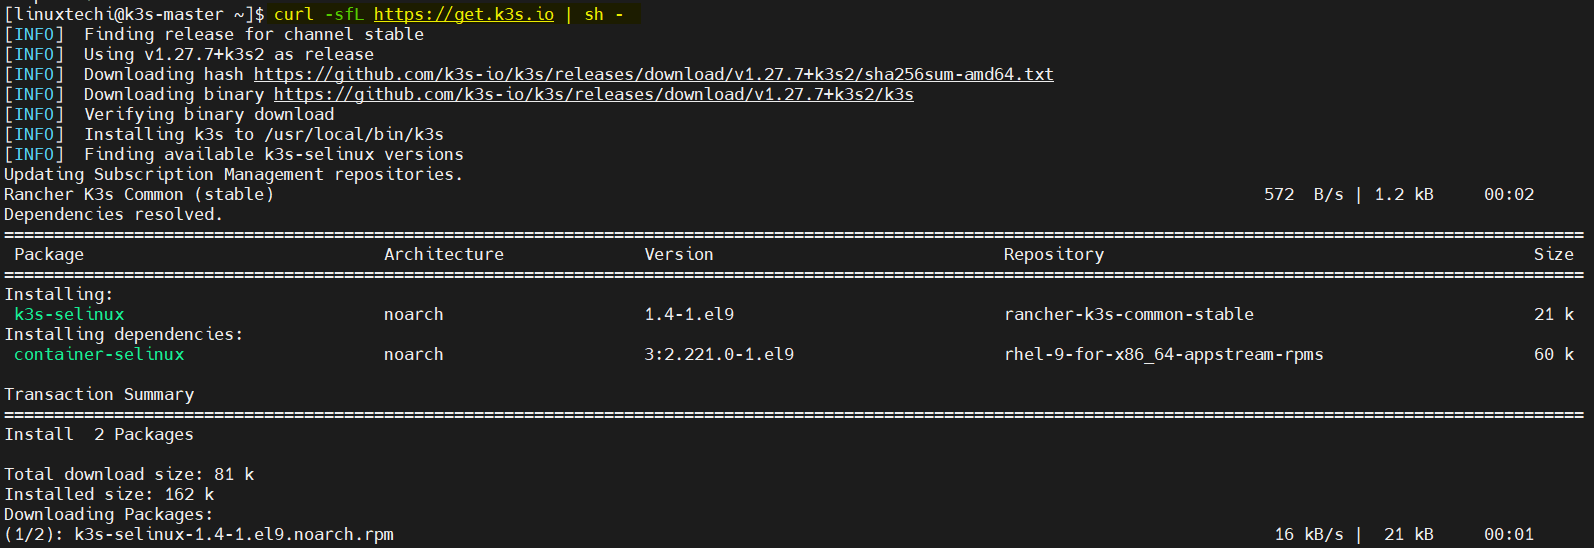
This script installs K3s and starts the service automatically.
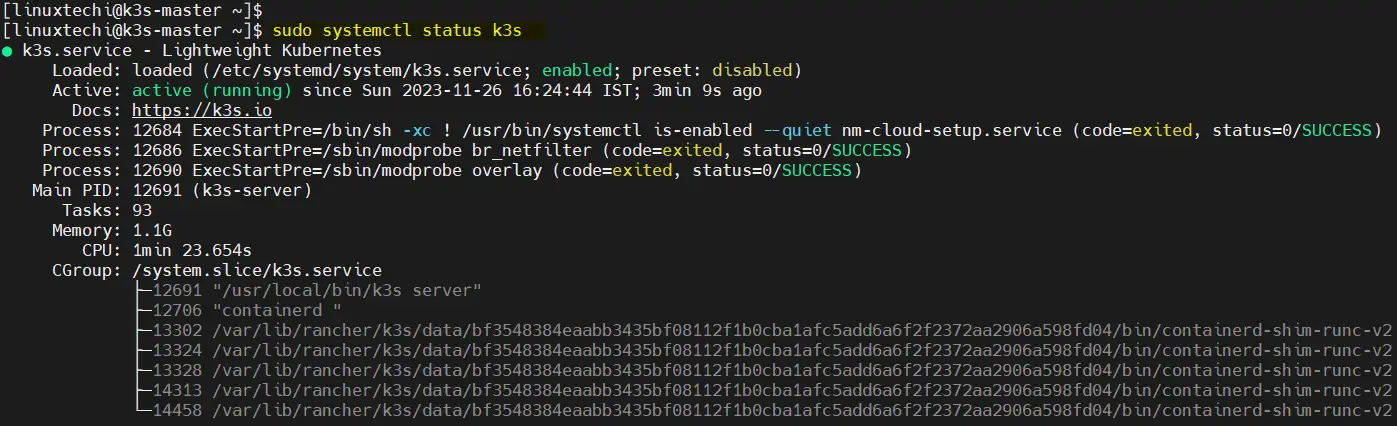
Post k3s successful installation, verify k3s service using following command.
$ sudo systemctl status k3s
5) Configure Kubectl on Master node
In order to interact with Kubernetes cluster, we must configure kubectl utility, execute the following set of commands on master node.
$ mkdir ~/.kube
$ sudo cp /etc/rancher/k3s/k3s.yaml ~/.kube/config
$ sudo chown $USER ~/.kube/config
$ sudo chmod 600 ~/.kube/config
$ export KUBECONFIG=~/.kube/config
Now, try to get node and cluster information using beneath kubectl commands.
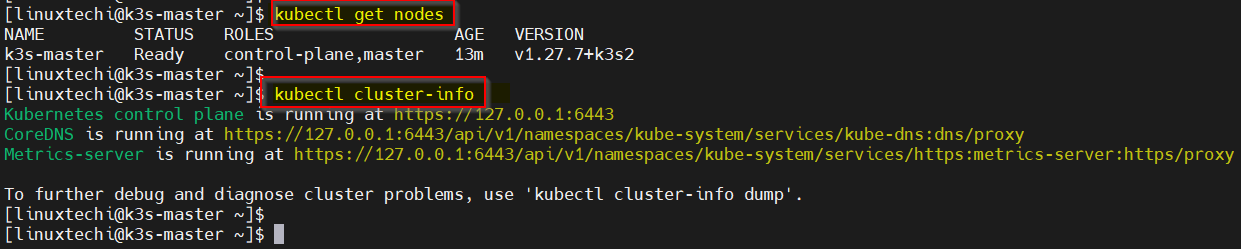
Output above confirms that our master node is in Ready State and also Control plane, CoreDNS and Metrics-server are up and running.
In the next step, we will join our two worker nodes to this cluster.
6) Join Worker Nodes to K3s Kubernetes Cluster
The K3s installation generates a token for worker nodes to join the cluster. Retrieve it from the master node:
$ sudo cat /var/lib/rancher/k3s/server/node-token

Copy the token as you will need it in the next steps.
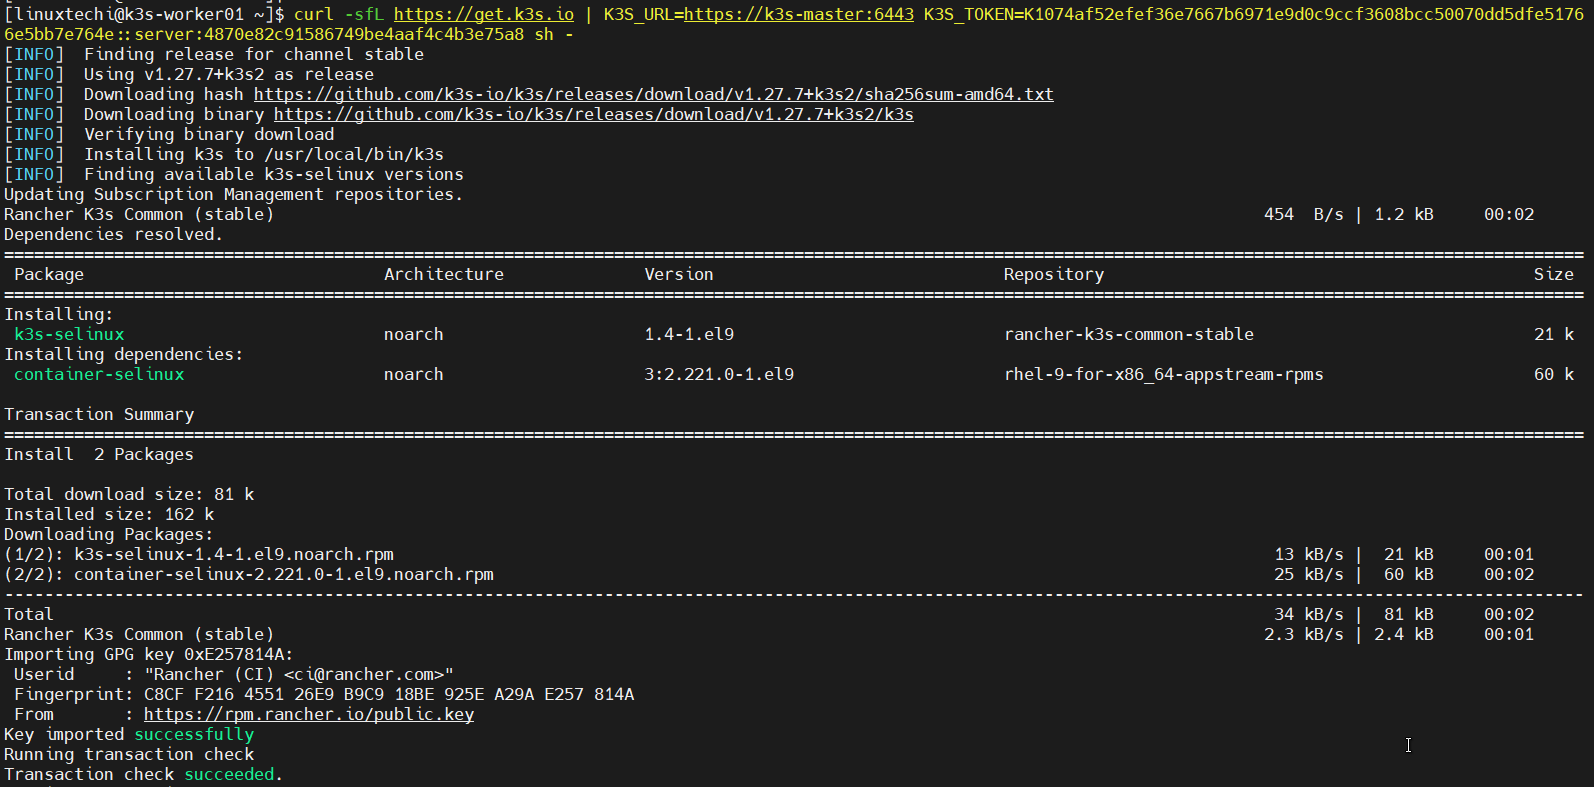
Now login to the worker nodes, run beneath command.
$ curl -sfL https://get.k3s.io | K3S_URL=https://k3s-master:6443 K3S_TOKEN=<token> sh -
Replace <token> with the token you copied.
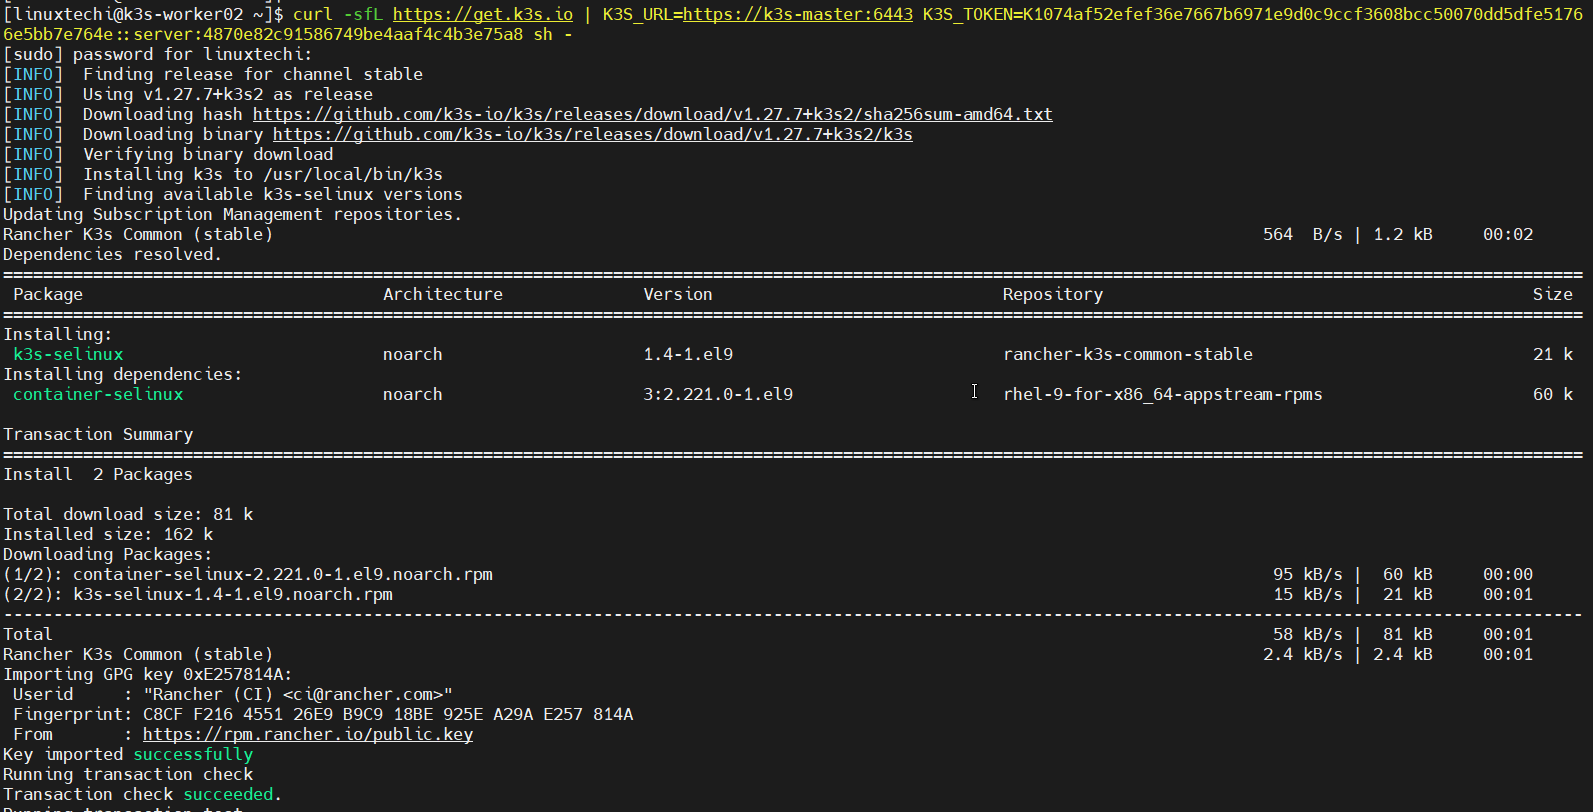
$ curl -sfL https://get.k3s.io | K3S_URL=https://k3s-master:6443 K3S_TOKEN=K1074af52efef36e7667b6971e9d0c9ccf3608bcc50070dd5dfe51766e5bb7e764e::server:4870e82c91586749be4aaf4c4b3e75a8 sh -
Output from k3s-worker01
Output from k3s-worker02
Now head back to master node and run ‘kubectl get node‘ command to verify whether worker nodes have joined the cluster or not.
$ kubectl get nodes
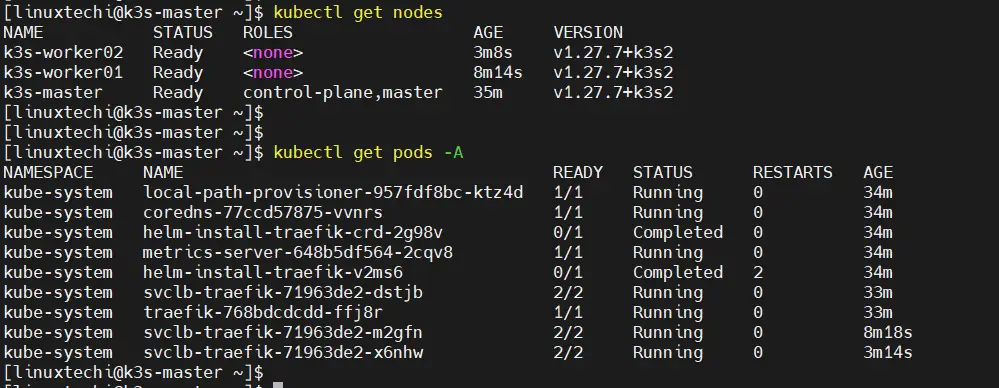
Perfect, above output confirms that worker nodes have joined the cluster successfully.
7) Test K3s Kubernetes Cluster Installation
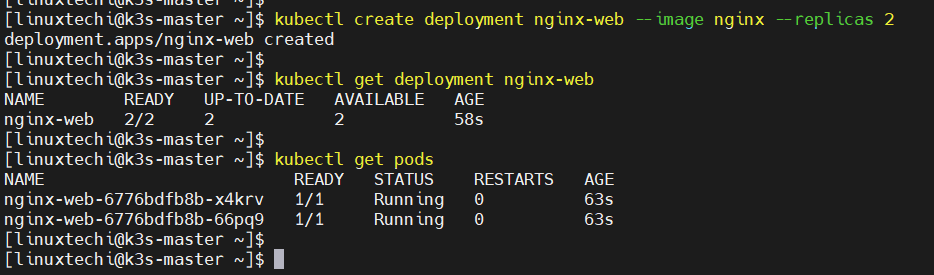
To test k3s Kubernetes cluster installation, lets deploy a nginx based application, run beneath command from master node.
$ kubectl create deployment nginx-web --image nginx --replicas 2
$ kubectl get deployment nginx-web
$ kubectl get pods
Expose the above created deployment with NodePort type.
$ kubectl expose deployment nginx-web --type NodePort --port 80
$ kubectl get svc nginx-web

Now try to access above deployed nginx application using curl command.
$ curl http://<Any-Worker-Node-IP>:30016
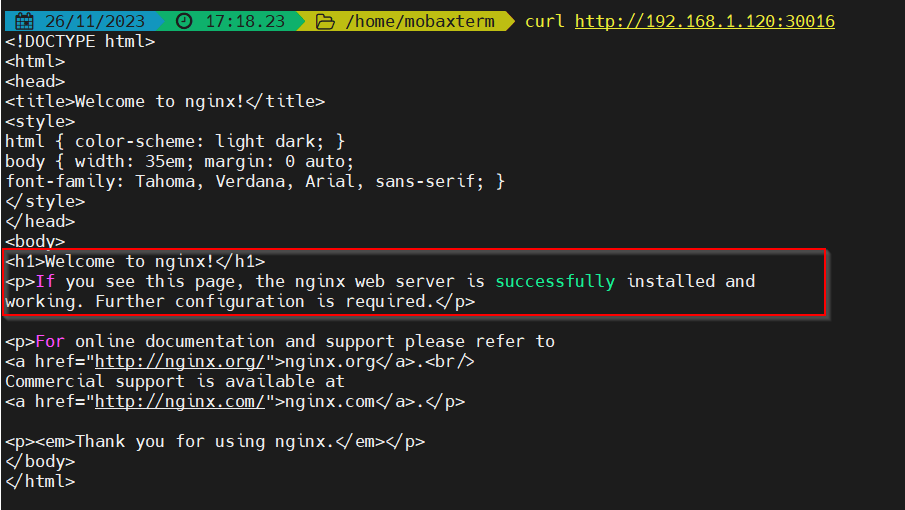
Great, output above confirms that our k3s Kubernetes cluster is working fine as we able to access our nginx sample application.
That’s all from this guide, we hope you have found it informative and useful. Feel free to post your queries and feedback in below comments section.