KVM is an open source virtualization technology which converts your Linux machine into a type-1 bare-metal hypervisor that allows you to run multiple virtual machines (VMs) or guest VMs
KVM stands for Kernel based Virtual machine, as the name suggests KVM is a kernel module, once it is loaded into the kernel , then your Linux machine will start working as a KVM hypervisor. In this article we will demonstrate how to install KVM on RHEL 8 or CentOS 8 system but before start installing KVM on your system, first we have to make sure that your system’s processor supports hardware virtualization extensions like Intel VT or AMD-V and enabled it from BIOS.
RHEL 8 / CentOS 8 KVM Lab Details:
- OS = RHEL 8 / CentOS 8
- Hostname = rhel8-kvm
- Ethernet Cards = ens32 – 192.168.1.4 & ens36 – 192.168..1.12
- RAM = 4 GB
- CPU = 2
- Disk = 40 GB Free Space (/var/libvirtd)
Let’s Jump into the KVM installation steps
Step:1) Verify Hardware Virtualization is enabled or not
Open the terminal and execute the beneath egrep command
[root@rhel8-kvm ~]# egrep -c '(vmx|svm)' /proc/cpuinfo
2
[root@rhel8-kvm ~]#
If output of above egrep command is equal to 1 or more than 1 then this confirms that hardware virtualization is enabled and supported.
Alternate way to check whether hardware virtualization is enabled or not , execute the beneath command,
[root@rhel8-kvm ~]# lscpu | grep Virtualization:
Virtualization:      VT-x
[root@rhel8-kvm opt]#
If there is no output in above command then it confirms that Virtualization is not enabled from BIOS.
Note: To enable hardware virtualization reboot your system, go to bios settings and then look for Intel VT or AMD virtualization option and enable one of this option which which suits to your system architecture.
Step:2) Install KVM and its dependent packages using dnf
Run the following dnf command to install KVM and its dependent packages,
[root@rhel8-kvm ~]# dnf install qemu-kvm qemu-img libvirt virt-install libvirt-client virt-manager -y
Once above packages has been installed successfully, then run the below command to confirm whether KVM module has been loaded into the kernel or not,
root@rhel8-kvm ~]# lsmod | grep -i kvm
kvm_intel             245760  0
kvm                   745472  1 kvm_intel
irqbypass              16384  1 kvm
[root@rhel8-kvm ~]#
Step:3) Enable and Start libvirtd service
Run the following systemctl command to enable and start libvirtd service,
[root@rhel8-kvm ~]# systemctl enable libvirtd
[root@rhel8-kvm ~]# systemctl start libvirtd
Step:4) Create Network bridge and attach Interface to it
In RHEL 8 and CentOS 8, network scripts are deprecated, We have to use Network Manager (nmcli / nmtui) to configure network and network bridges.
I have two Ethernet cards on my server, ens36 will attached to bridge br0 and ens32 will be used for management .
[root@rhel8-kvm ~]# nmcli connection show
NAME    UUID                                  TYPE      DEVICE
ens32   1d21959d-e2ea-4129-bb89-163486c8d7bc  ethernet  ens32
ens36   1af408b6-c98e-47ce-bca7-5141b721f8d4  ethernet  ens36
virbr0  d0f05de4-4b3b-4710-b904-2524b5ad11bf  bridge    virbr0
[root@rhel8-kvm ~]#
Delete the existing connection of interface “ens36”
[root@rhel8-kvm ~]# nmcli connection delete ens36
Connection 'ens36' (1af408b6-c98e-47ce-bca7-5141b721f8d4) successfully deleted.
[root@rhel8-kvm ~]#
Create a Network Bridge with name “br0” using mcli command,
[root@rhel8-kvm ~]# nmcli connection add type bridge autoconnect yes con-name br0 ifname br0
Connection 'br0' (62c14e9d-3e72-41c2-8ecf-d17978ad02da) successfully added.
[root@rhel8-kvm ~]#
Assign the same IP of ens36 to the bridge interface using following nmcli commands,
[root@rhel8-kvm ~]# nmcli connection modify br0 ipv4.addresses 192.168.1.12/24 ipv4.method manual
[root@rhel8-kvm ~]#  nmcli connection modify br0 ipv4.gateway 192.168.1.1
[root@rhel8-kvm ~]# nmcli connection modify br0 ipv4.dns 192.168.1.1
Add ens36 interface as bridge salve to the network bridge br0,
[root@rhel8-kvm ~]# nmcli connection add type bridge-slave autoconnect yes con-name ens36 ifname ens36 master br0
Connection 'ens36' (0c2065bc-ad39-47a7-9a3e-85c80cd73c94) successfully added.
[root@rhel8-kvm ~]#
Now bring up the network bridge using beneath nmcli command,
[root@rhel8-kvm ~]# nmcli connection up br0
Connection successfully activated (master waiting for slaves) (D-Bus active path: /org/freedesktop/NetworkManager/ActiveConnection/9)
[root@rhel8-kvm ~]#
Verify the connections using following command,
[root@rhel8-kvm ~]# nmcli connection show
NAME    UUID                                  TYPE      DEVICE
br0     00bcff8f-af85-49ad-9196-974de2d9d9d1  bridge    br0
ens32   1d21959d-e2ea-4129-bb89-163486c8d7bc  ethernet  ens32
ens36   eaef13c9-c24e-4a3f-ae85-21bf0610471e  ethernet  ens36
virbr0  d0f05de4-4b3b-4710-b904-2524b5ad11bf  bridge    virbr0
[root@rhel8-kvm ~]#
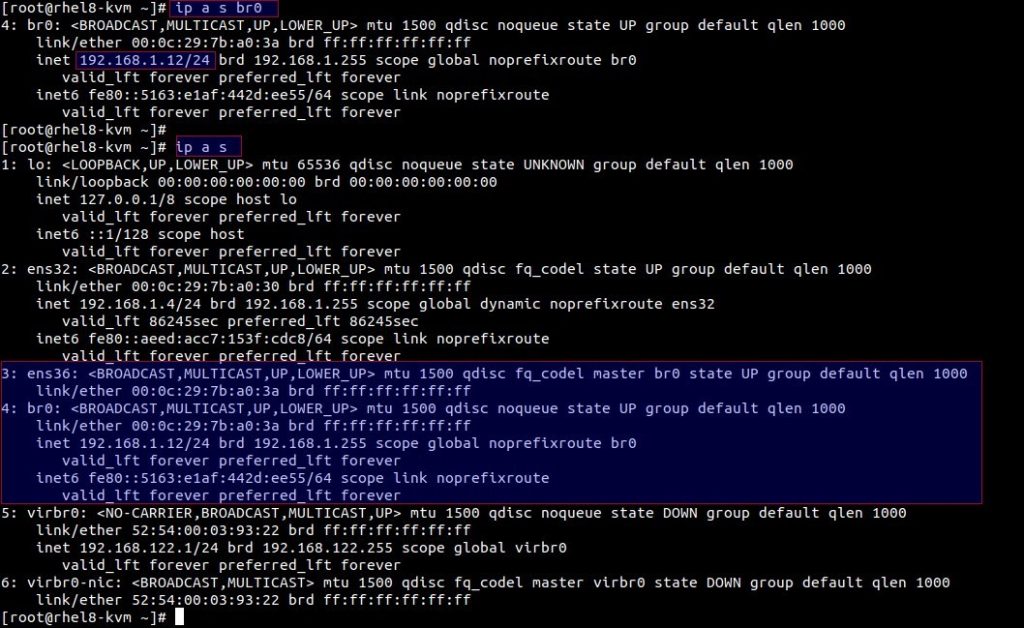
View the bridge (br0) details and status using ip command,
Note: If you want to use network-scripts in RHEL 8 system then install network-scripts packages,
~ ]# dnf install network-scripts -y
Step:5) Creating and Managing KVM Virtual Machines
In RHEL 8 / CentOS 8, there are different ways to create and manage KVM virtual machines,
- virt-manager (GUI)
- Command Line tools (virt-install & virsh)
During the KVM installation we have already installed virt-manager and virt-install packages.
Creating Virtual Machines using virt-manager GUI tool:
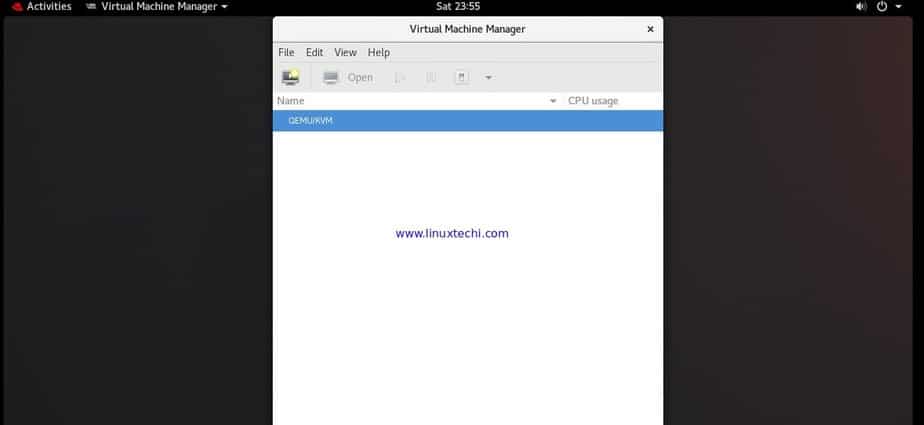
Run the virt-manager command from command line or Access virt-manager from RHEL 8 / CentOS 8 Desktop
Click on Monitor Icon to create a new guest VM (Virtual Machine),
Choose Local Installation Media as ISO,
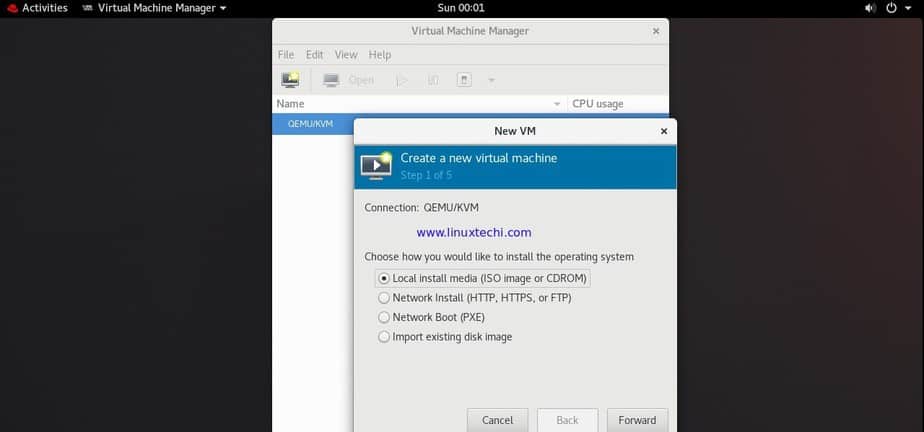
Click on forward,
In the next screen, browse the OS installation ISO file , in my case i have placed Ubuntu 18.04 LTS server ISO file under /opt folder,
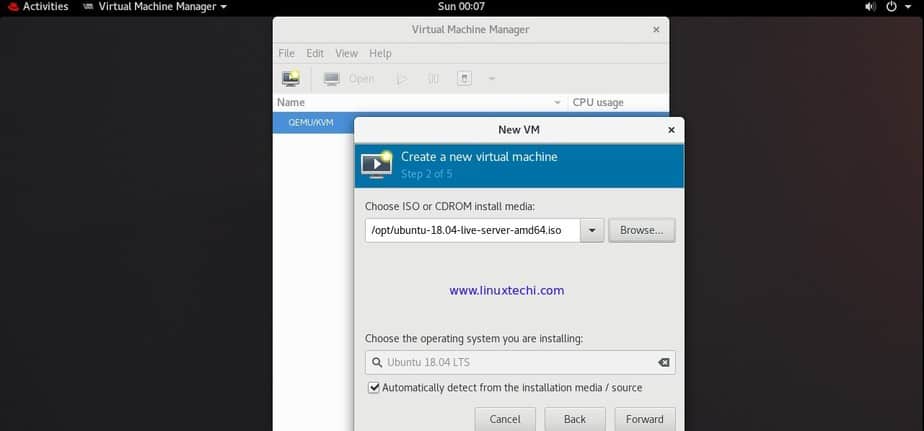
click on Forward to Proceed further,
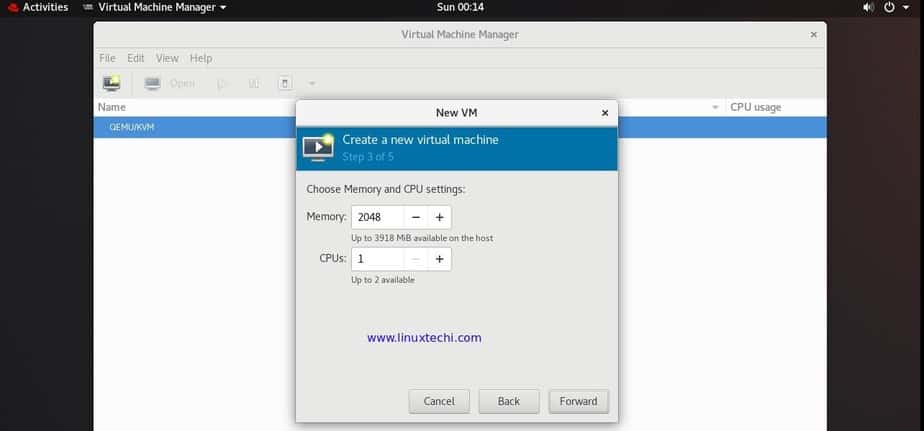
In the next window you will be prompted to specify RAM and vCPU for your virtual machine, so specify the values that suits your installation and then click on Forward,
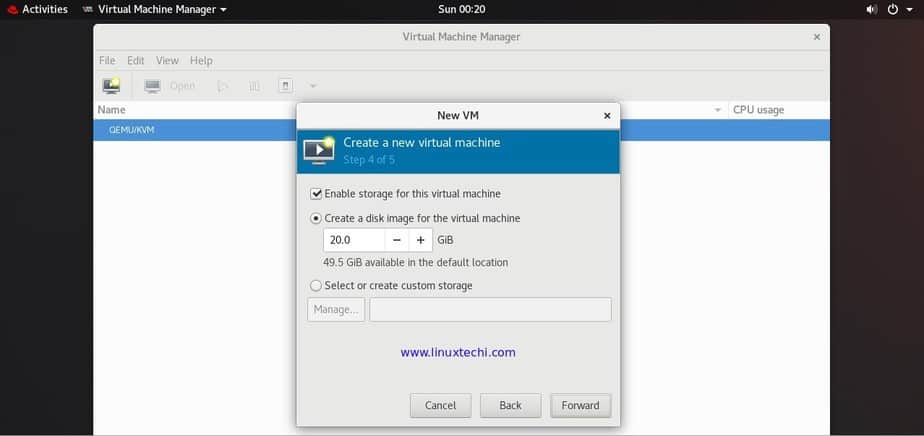
In next window specify disk size for your Virtual Machine and the click on Forward, in my case i am giving disk space for my VM as 20 GB,
In the next window, specify the name of VM and choose the Network that you want to attach to VM’s Ethernet card, as we had created network bridge “br0” for vms networking, so choose bridge“br0”.
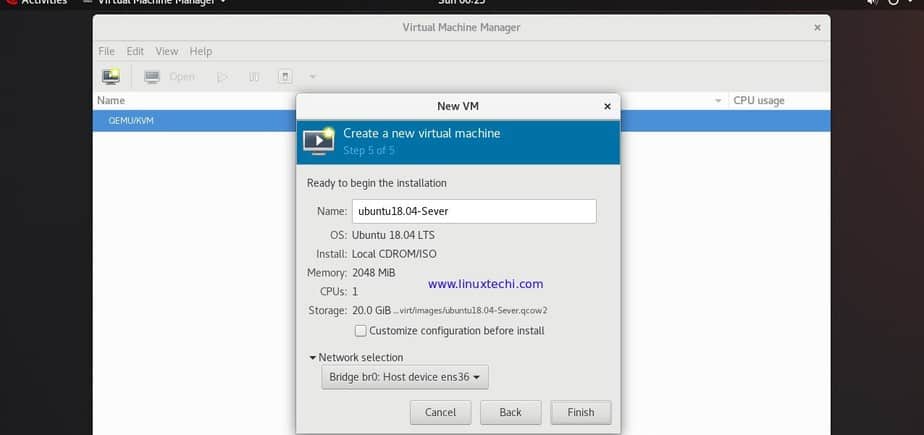
Click on Finish to proceed with VM creation and its OS installation,
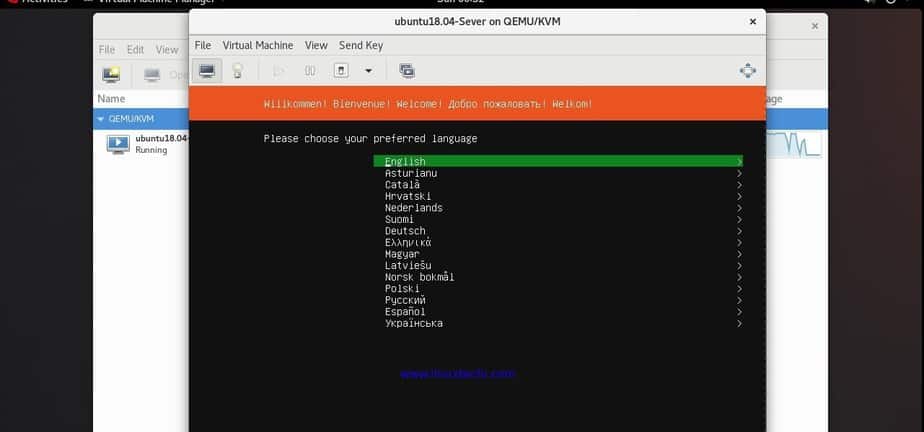
Follow the screen Instructions and complete the Installation.
Creating KVM Virtual Machine from Command Line
if you are fan of command line then there is a command line tool for you called “virt-install” to create virtual machines. Once the Virtual machines are provisioned then vms can be managed via command line tool “virsh“.
Let’s assume we want to create CentOS 7 VM using virt-install, i have already placed CentOS 7 ISO file under /opt folder,
Execute beneath command to provision a VM
[root@rhel8-kvm ~]# virt-install -n CentOS7-Server --description "CentOS 7 Virtual Machine" --os-type=Linux --os-variant=rhel7 --ram=1096 --vcpus=1 --disk path=/var/lib/libvirt/images/centos7-server.img,bus=virtio,size=20 --network bridge:br0 --graphics none --location /opt/CentOS-7-x86_64-DVD-1511.iso --extra-args console=ttyS0
Output of command would be something like below,
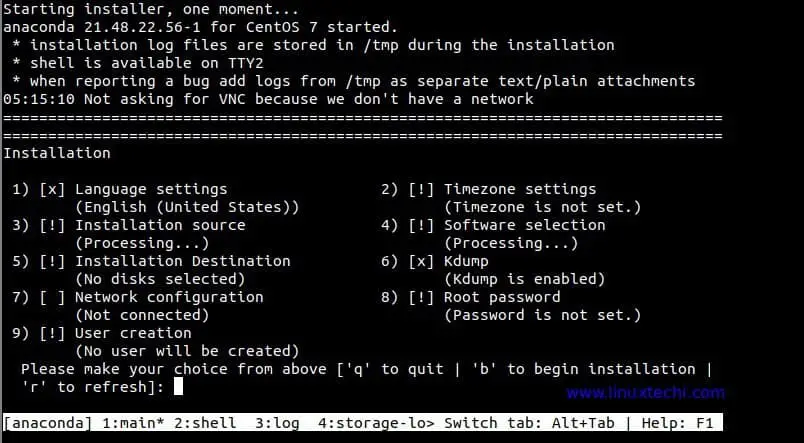
Follow screen instructions to complete CentOS 7 Installation. That’s all from this tutorial, i hope these steps helped you to setup KVM on your RHEL 8 system, please do share your feedback and comments.
Also Read: How to Install VirtualBox 6.0 on CentOS 8 / RHEL 8
Excellent article! Thank you!
I followed this but afterward I cannot communicate with other systems in the same network. The bridge is up with the correct ipv4 config and my ethernet interface is connected/enslaved to the bridge.
Thanks! This article helped me a lot, with this setup under CentOS 8 the samba shares on the host machine (machine running KVM, CentOS 8) showed up under explorer on the Windows 10 virtual machine.