In this guide, we will cover how to install Rocky Linux 9 step by step with screenshots.
Rocky Enterprise Software Foundation has released its latest operating system ‘Rocky Linux 9’. Rocky Linux is free and open-source operating system for workstation and servers. It is considered as drop-in replacement for CentOS Linux.
‘Blue Onyx’ is the Code name for Rocky Linux 9, it is the clone of RHEL 9. The main difference between Rocky Linux and RHEL is that it has its own open-source build system called ‘Peridot’.
New Updates and Features of Rocky Linux 9
- Gnome 40 is the default Desktop Environment.
- Support for Direct Access (DAX) operations on XFS file system
- Updated runtime and compilers like GCC 11.2.1, LLVM (13.0.1), Rust (1.58.1), and Go (1.17.1).
- Updated development tool chain like Python 3.9, Node.js 16, Ruby 3.0.3, Perl 5.32 & PHP 8.0
- By Default, root user authentication disabled over ssh.
- Updated OpenSSL 3.0 and improved cockpit web console.
- Community support till May 31st, 2032.
Prerequisites
- 2 GB RAM or more
- 2 CPU Core (1.1 GHz Processor or higher)
- 20 GB hard disk space
- Boot Media (USD or DVD)
- Internet Connectivity (Optional)
Without any delay, let’s jump into Rocky Linux 9 installation steps,
1) Download Rocky Linux 9 ISO File
Use the following official URL to download ISO file,
Once you have downloaded the iso file, make a bootable media (USB/DVD) using the downloaded iso.
In Windows, you can use ‘Rufus’ software to make bootable USB drive using ISO file. In Linux, refer the following
2) Boot System with Bootable Media
Head to the system on which you are planning to install Rocky Linux 9, reboot it and change the boot medium from hard disk to USB from its bios settings.
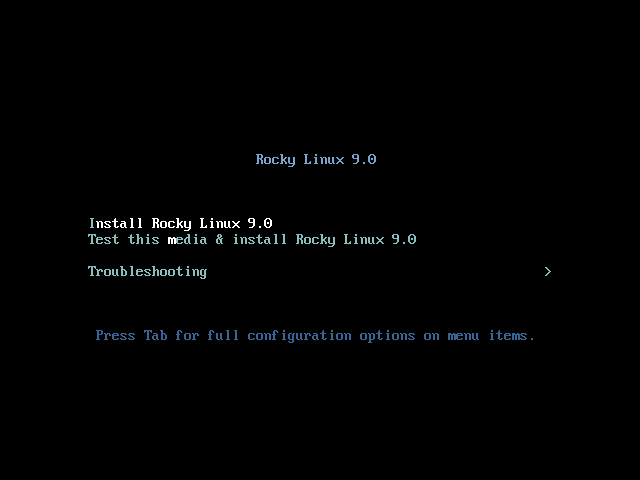
Once the system boots up with bootable media then we will get the following screen,
Choose the first option, ‘Install Rocky Linux 9.0’ and hit enter.
3) Choose Preferred Language
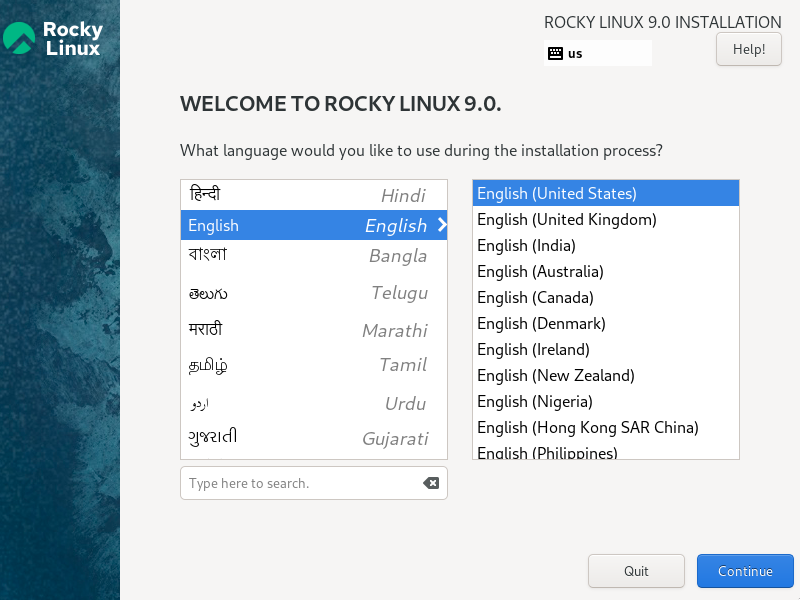
Select your preferred language for the installation and then click on Continue,
4) Installation Summary
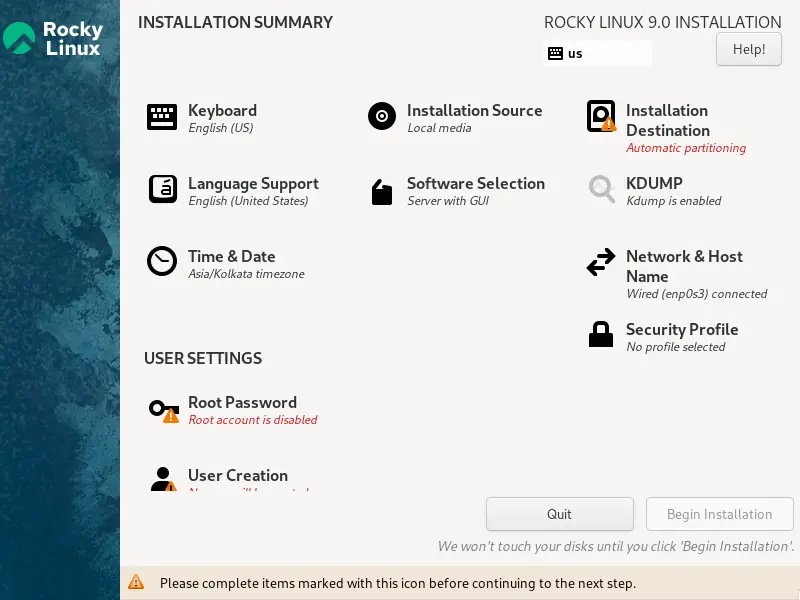
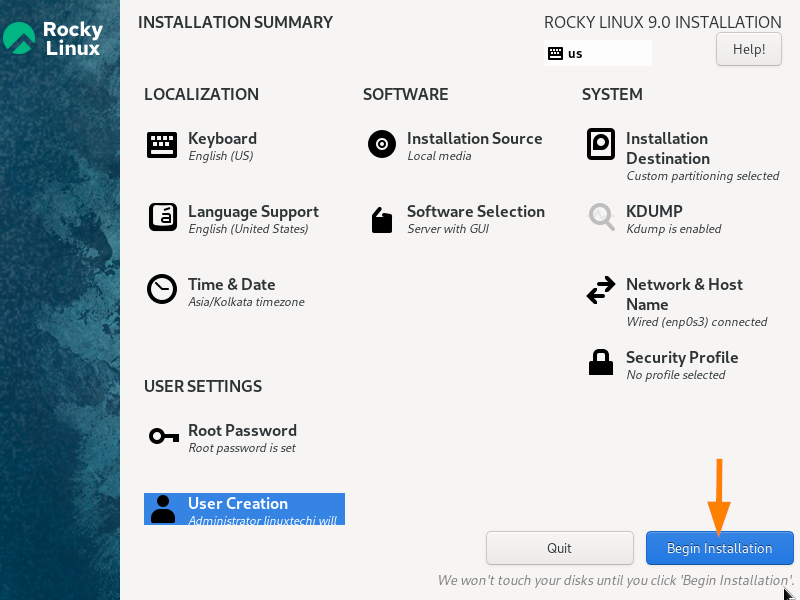
In this step, we will get the following initial installation summary. To begin the installation, first we must complete marked items like ‘Installation Destination’ and ‘User settings’.
Apart from the marked items, we can also change the existing items, just click on them and change it as per your requirement.
Configure Installation Destination
In this item, we will specify the partition scheme for Rocky Linux. Click on ‘Installation Destination’.
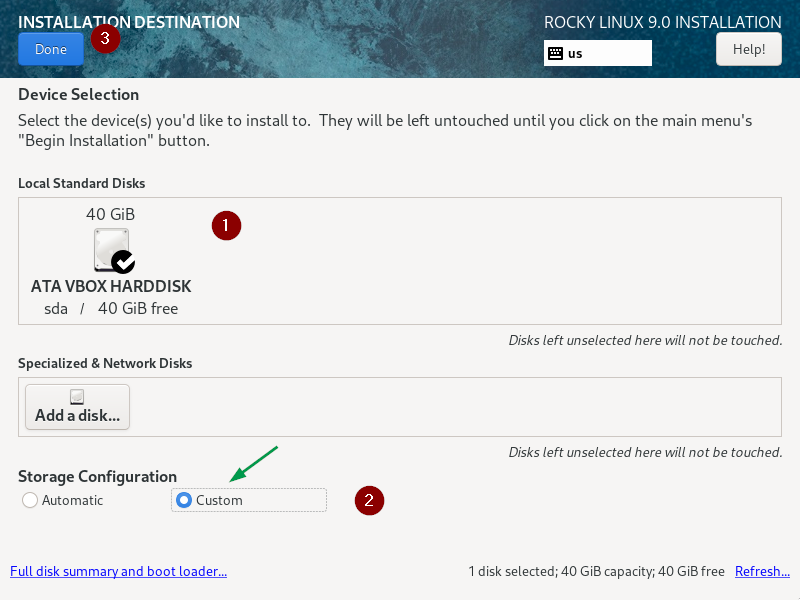
Here we can choose either automatic or custom option for storage configuration or partition scheme.
In automatic option, partitions will be created automatically by installer on the disk whereas custom option allows us to create manual partitions on disk.
In this guide, I am going with ‘Custom’ option, Click on ‘Done’
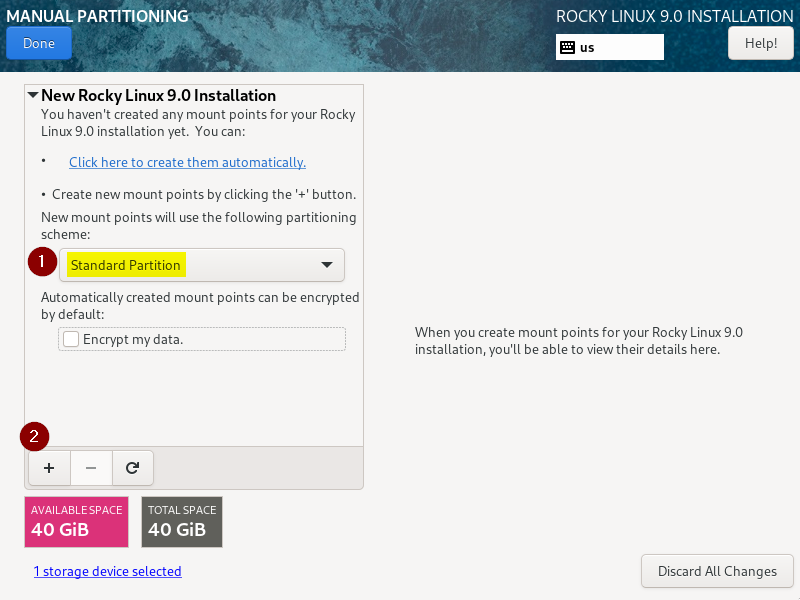
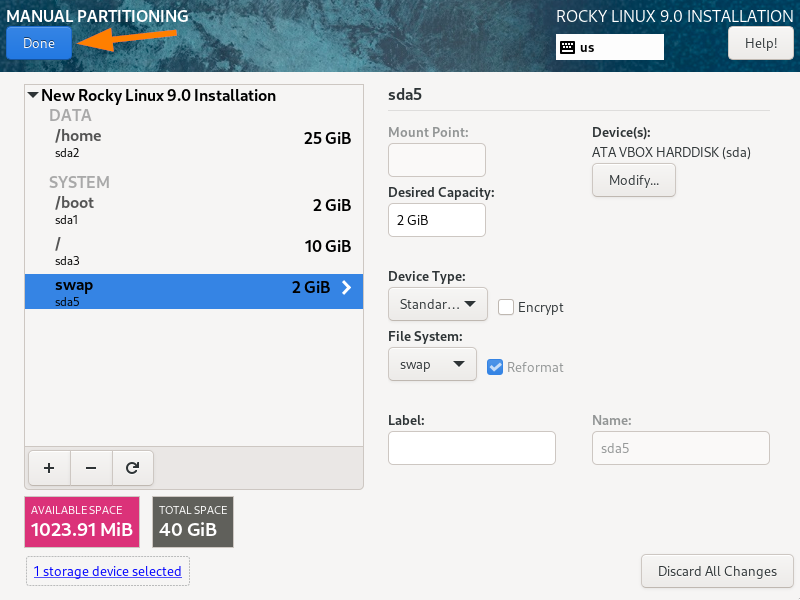
On the 40 GB disk, we will create following partitions,
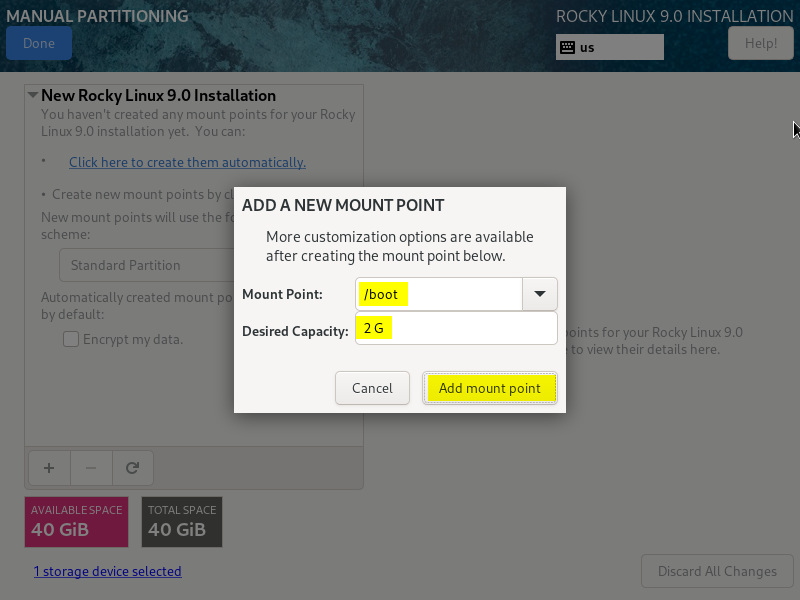
- /boot : 2GB (xfs file system)
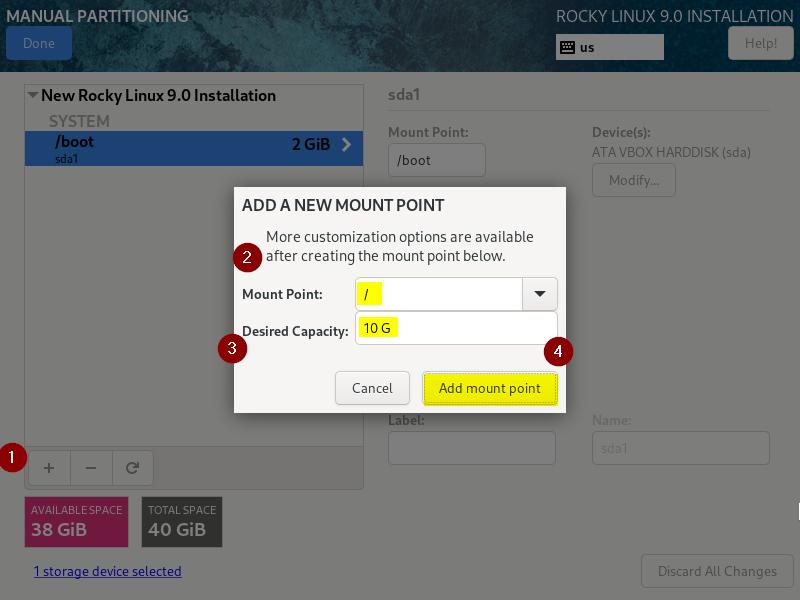
- / : 10 GB (xfs file system)
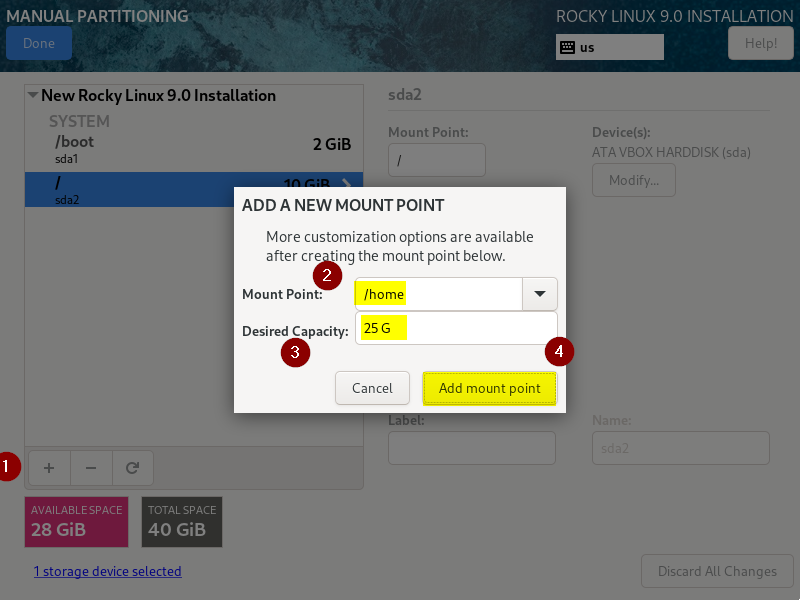
- /home : 25 GB (xfs file system)
- Swap : 2 GB
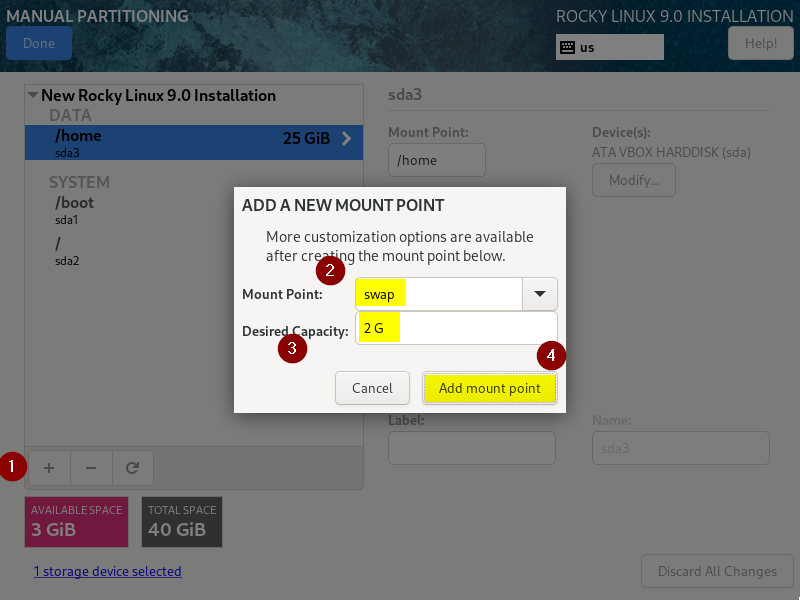
To start creating partitions, choose ‘Standard Partition’ scheme and then click on + symbol.
Create first partition as /boot of size 2 GB,
Click on ‘Add mount point’
Similarly create next two partitions / and /home of size 10 GB and 25 GB respectively.
Now create last partition as swap of size 2GB,
Once you are done with manual partitioning, click on Done to finish this item.
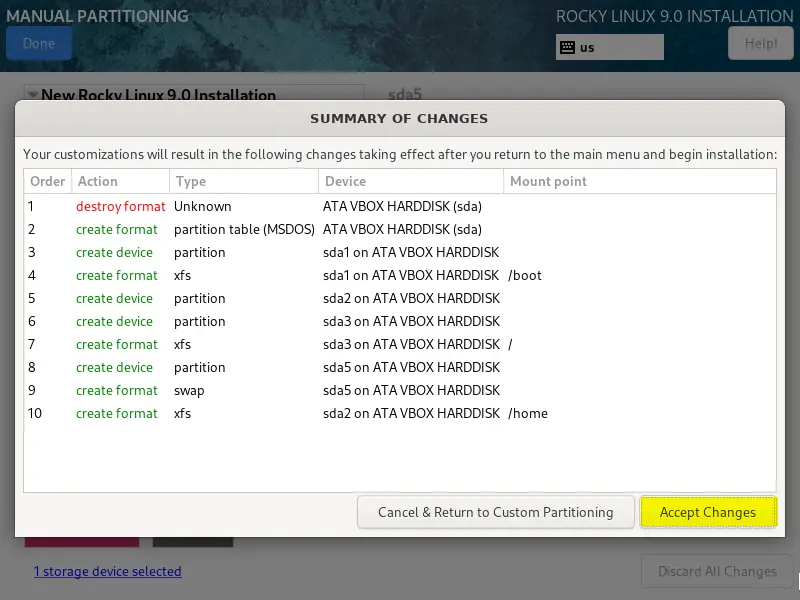
Choose ‘Accept Changes‘ to write changes to the disk. It will also take back to installation summary screen.
Configure User Settings
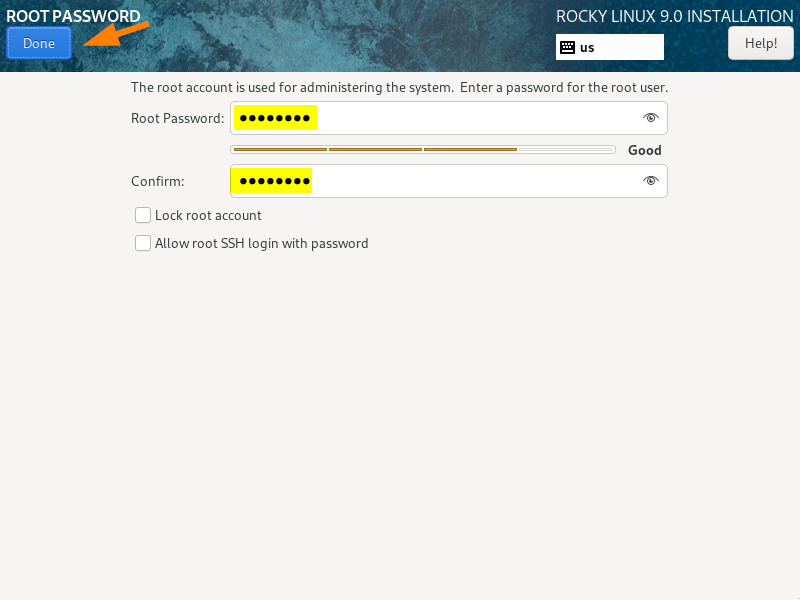
Under User Settings, Click on ‘Root Password’.
Set the root password and then click on Done,
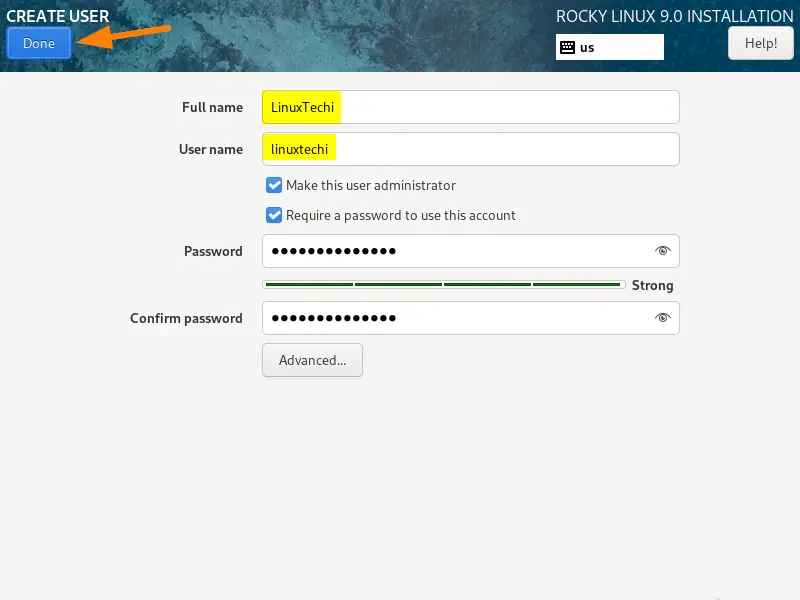
From ‘User Settings’ again , click on ‘User Creation’, Specify the local user details like username and password.
Click on ‘Done’, it will take back to installation summary.
Now, we are ready to initiate the installation, click on ‘Begin Installation’.
5) Installation Started
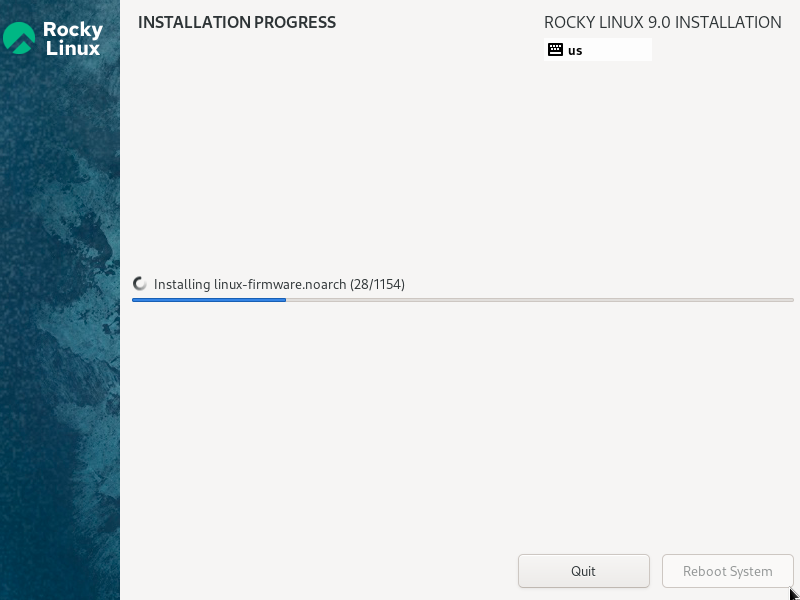
In this step, installation got started and is in progress,
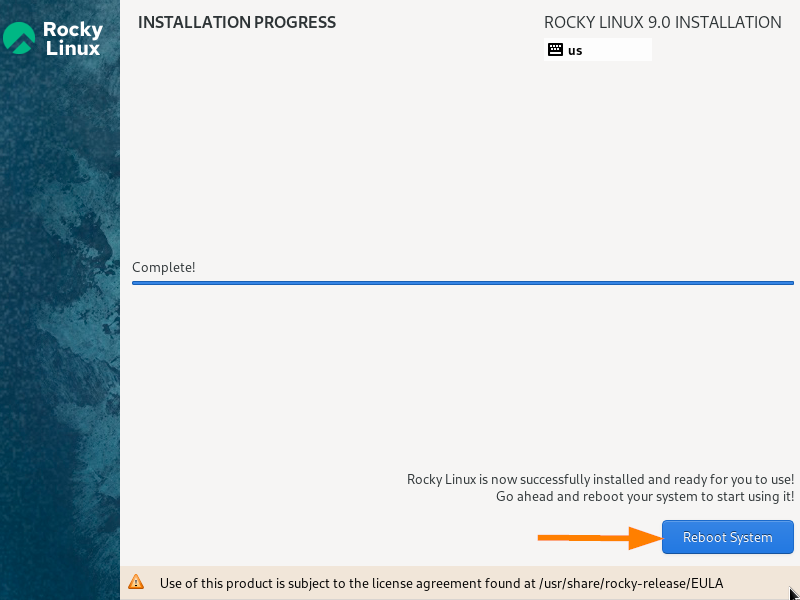
Once the installation is completed, installer will instruct to reboot the system.
Click on ‘Reboot System’.
Note: Don’t forget to change the boot medium from USB to hard disk from bios settings.
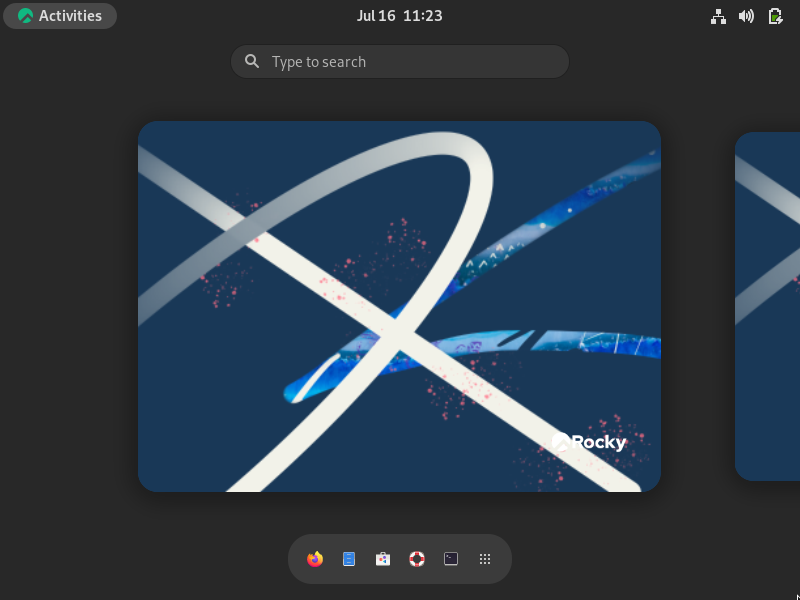
6) Login Screen and Desktop Environment Post Installation
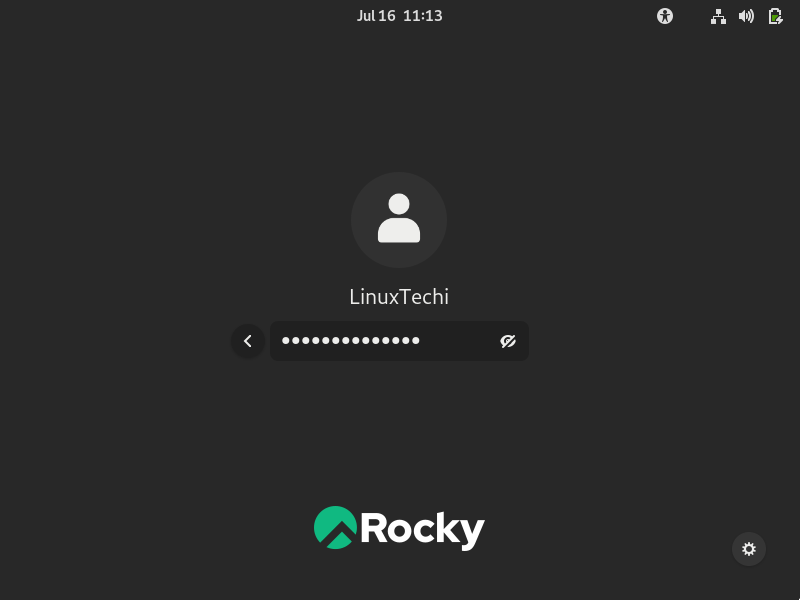
When the system boots up after the successful installation, we will get following login screen,
Use the same user’s credentials that we have created during the installation, press enter to login.
Open the terminal, run following commands one after the another,
$ sudo dnf install epel-release -y
$ sudo dnf install neofetch -y
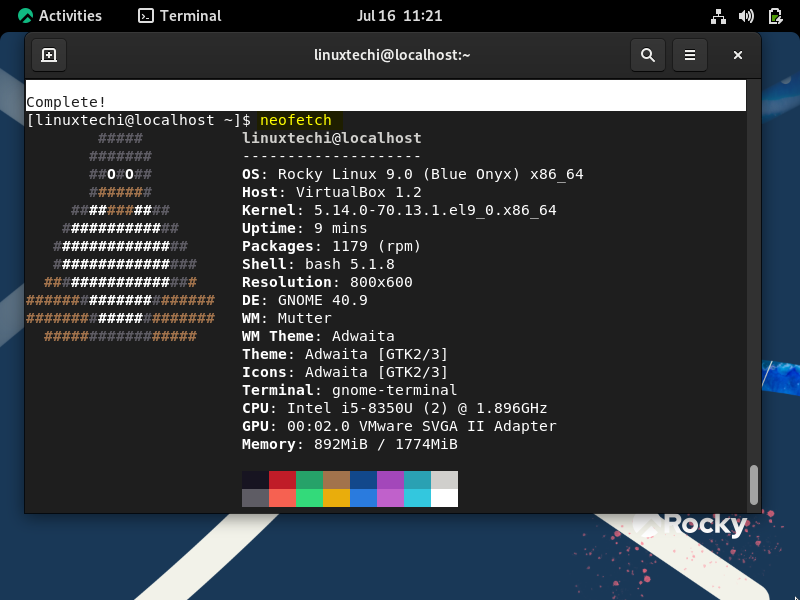
Now, to verify the system details, run neofetch command,
$ neofetch
That’s all from this guide, I hope you found it useful. Kindly do post your queries and feedback in below comments section.
