This blog post will show you how to install KVM on Ubuntu 22.04 step-by-step. At the tail end of this post, we will demonstrate how you can create a virtual machine once the installation of KVM is complete.
KVM, an acronym for Kernel-based Virtual Machine is an opensource virtualization technology integrated into the Linux kernel. It’s a type 1 (bare metal ) hypervisor that enables the kernel to act as a bare-metal hypervisor.
KVM allows users to create and run multiple guest machines which can be either Windows or Linux. Each guest machine runs independently of other virtual machines and the underlying OS ( host system ) and has its own computing resources such as CPU, RAM, network interfaces, and storage to mention a few.
Prerequisites
- Pre Installed Ubuntu 22.04
- 2 vCPUs & 4 GB RAM
- Stable Internet Connectivity
1) Update Ubuntu 22.04
To get off the ground, launch the terminal and update your local package index as follows.
$ sudo apt update
2) Check if Virtualization is enabled
Before you proceed any further, you need to check if your CPU supports KVM virtualization. For this to be possible, your system needs to either have a VT-x( vmx ) Intel processor or an AMD-V (svm) processor.
This is achieved by running the following command. if the output is greater than 0, then virtualization is enabled. Otherwise, virtualization is disabled and you need to enable it.
$ egrep -c '(vmx|svm)' /proc/cpuinfo

From the above output, you can deduce that virtualization is enabled since the result printed is greater than 0. If Virtualization is not enabled, be sure to enable the virtualization feature in your system’s BIOS settings.
In addition, you can verify if KVM virtualization is enabled by running the following command:
$ kvm-ok
For this to work, you need to have installed the cpu-checker package, otherwise, you will bump into the error ‘Command ‘kvm-ok’ not found’.
Directly below, you will get instructions on how to resolve this issue, and that is to install the cpu-checker package.
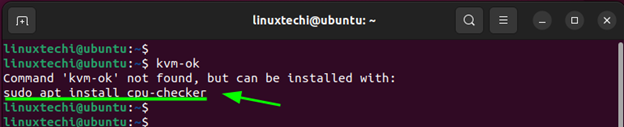
Therefore, install the cpu-checker package as follows.
$ sudo apt install -y cpu-checker
Then run the kvm-ok command, and if KVM virtualization is enabled, you should get the following output.
$ kvm-ok

3) Install KVM on Ubuntu 22.04
Next, run the command below to install KVM and additional virtualization packages on Ubuntu 22.04.
$ sudo apt install -y qemu-kvm virt-manager libvirt-daemon-system virtinst libvirt-clients bridge-utils
Let us break down the packages that we are installing:
- qemu-kvm – An opensource emulator and virtualization package that provides hardware emulation.
- virt-manager – A Qt-based graphical interface for managing virtual machines via the libvirt daemon.
- libvirt-daemon-system – A package that provides configuration files required to run the libvirt daemon.
- virtinst – A set of command-line utilities for provisioning and modifying virtual machines.
- libvirt-clients – A set of client-side libraries and APIs for managing and controlling virtual machines & hypervisors from the command line.
- bridge-utils – A set of tools for creating and managing bridge devices.
4) Start & Enable Virtualization Daemon
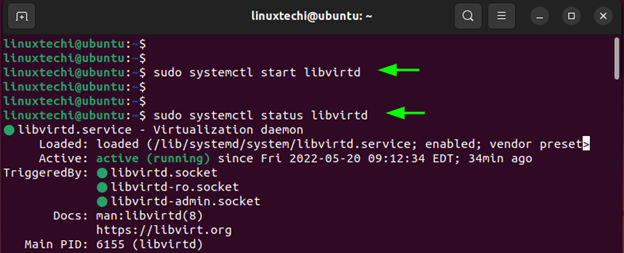
With all the packages installed, enable and start the Libvirt daemon.
$ sudo systemctl enable --now libvirtd
$ sudo systemctl start libvirtd
Confirm that the virtualization daemon is running as shown.
$ sudo systemctl status libvirtd
In addition, you need to add the currently logged-in user to the kvm and libvirt groups so that they can create and manage virtual machines.
$ sudo usermod -aG kvm $USER
$ sudo usermod -aG libvirt $USER
The $USER environment variable points to the name of the currently logged-in user. To apply this change, you need to log out and log back again.
5) Create Network Bridge (br0)
If you are planning to access KVM virtual machines outside from your Ubuntu 22.04 system, then you must map VM’s interface to a network bridge. Though a virtual bridge named virbr0, created automatically when KVM is installed but it is used for testing purposes.
To create a network bridge, create the file ‘01-netcfg.yaml’ with following content under the folder /etc/netplan.
$ sudo vi /etc/netplan/01-netcfg.yaml
network:
  ethernets:
    enp0s3:
      dhcp4: false
      dhcp6: false
  # add configuration for bridge interface
  bridges:
    br0:
      interfaces: [enp0s3]
      dhcp4: false
      addresses: [192.168.1.162/24]
      macaddress: 08:00:27:4b:1d:45
      routes:
        - to: default
          via: 192.168.1.1
          metric: 100
      nameservers:
        addresses: [4.2.2.2]
      parameters:
        stp: false
      dhcp6: false
  version: 2
save and exit the file.
Note: These details as per my setup, so replace the IP address entries, interface name and mac address as per your setup.
To apply above change, run ‘netplan apply’
$ sudo netplan apply
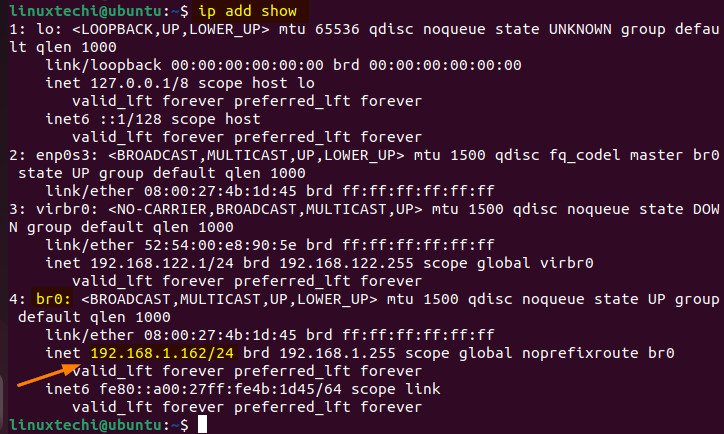
Verify the network bridge ‘br0’, run below ip command
$ ip add show
6) Launch KVM Virtual Machines Manager
With KVM installed, you can begin creating your virtual machines using the virt-manager GUI tool. To get started, use the GNOME search utility and search for ‘Virtual machine Manager’.
Click on the icon that pops up.
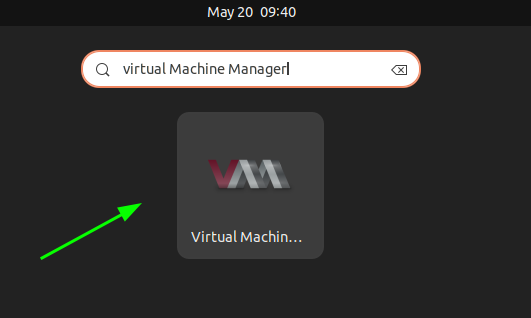
This launches the Virtual Machine Manager Interface.
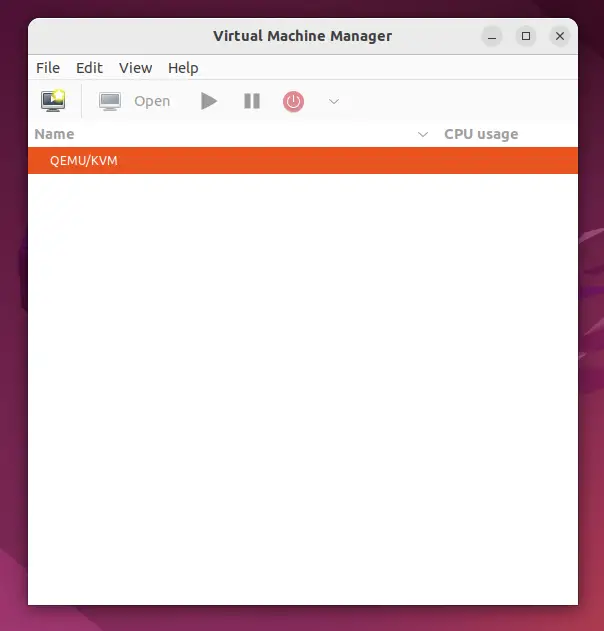
Click on “File” then select “New Virtual Machine”. Alternatively, you can click on the button shown.
![]()
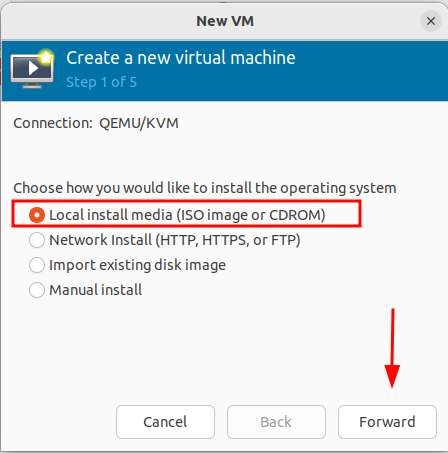
This pops open the virtual machine installation wizard which presents you with the following four options:
- Local install Media ( ISO image or CDROM )
- Network Install ( HTTP, HTTPS, and FTP )
- Import existing disk image
- Manual Install
In this guide, we have downloaded a Debian 11 ISO image, and therefore, if you have an ISO image, select the first option and click ‘Forward’.
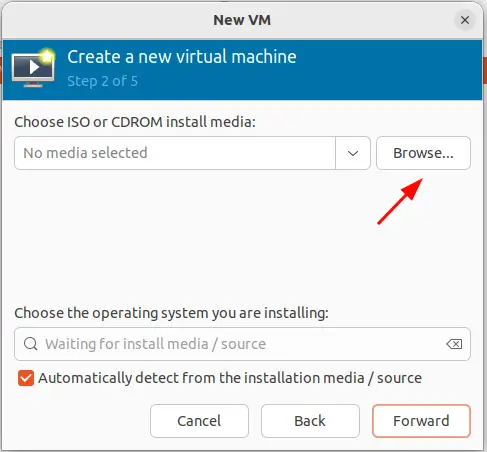
In the next step, click ‘Browse’ to navigate to the location of the ISO image,
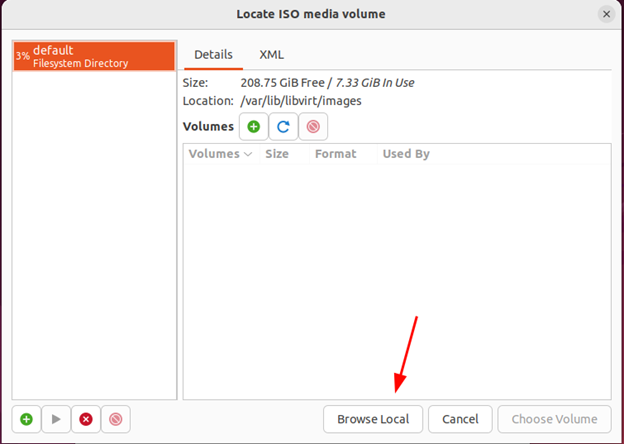
In the next window, click ‘Browse local’ in order to select the ISO image from the local directories on your Linux PC.
As demonstrated below, we have selected the Debian 11 ISO image. Then click ‘Open’
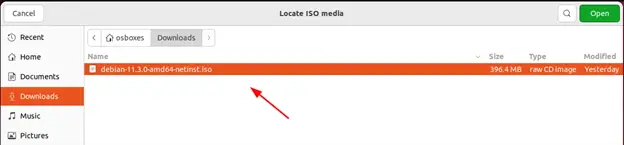
Once the ISO image is selected, click ‘Forward’ to proceed to the next step.

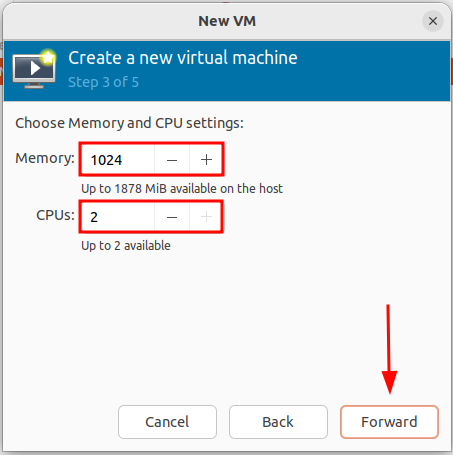
Next, define the RAM and the number of CPU cores for your virtual machine and click ‘Forward’.
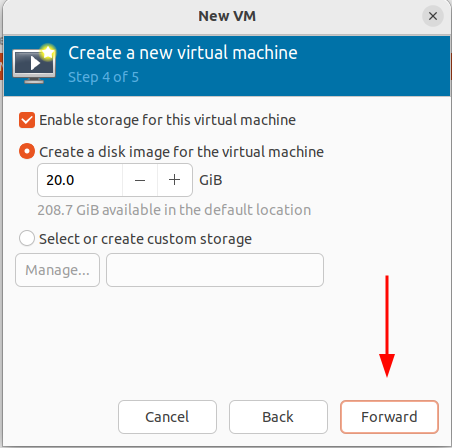
In the next step, define the disk space for your virtual machine and click ‘Forward’.
To associate virtual machine’s nic to network bridge, click on ‘Network selection’ and choose br0 bridge.
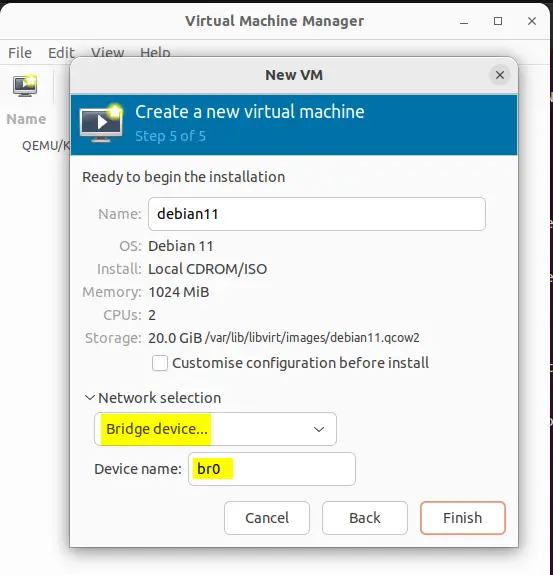
Finally, click ‘Finish’ to wind up setting the virtual machine.

Shortly afterward, the virtual machine creation will get underway.
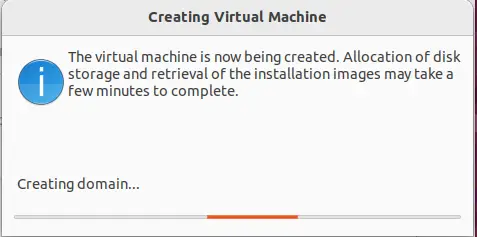
Once completed, the virtual machine will start with the OS installer displayed. Below is the Debian 11 installer listing the options for installation. From here, you can proceed to install your preferred system.

Conclusion
And that’s it. In this guide, we have demonstrated how you can install the KVM hypervisor on Ubuntu 22.04. Your feedback on this guide is much welcome.
Read Also: How to Create KVM Virtual Machine Snapshot with Virsh Command
Hi James, thanks for this great article, I would like to add a little comment.
If you want to let host machine to access the vm machine by SSH, and let the vm machine to access internet by the host machine ethernet, there is a additional package should be installed.
sudo apt install libnss-libvirt
Thanks for a detailed tutorial. However, I am facing an issue with creating a network bridge. I created the `/etc/netplan/01-netcfg.yaml` file as described in step 5, but this resulted in Ubuntu no longer connecting to the WiFi. It now shows a LAN icon in the top right corner. Deleting the file and running `sudo netplan apply` again solved the issue. I presume Ubuntu instead attempts to use the bridge to connect to the Internet.
Is there a way this can be avoided?
So I upgraded my Ubuntu 20.04 LTS hypervisor to 22..04 LTS.
systemctl status libvirtd says:
VMM is missing/removed and Storage Pool no longer showing up.
tried to re-install via APT, APT-GET ‘virt-manager’ and ‘virtinst’ packages, neither one is found.
Anyone else encountering this issue after Ubuntu 22.04 LTS ‘jammy jellyfish’ upgrade from 20.04 LTS?