Hello techies, in this post, we will show you how to install Debian 12 desktop edition step-by-step.
Debian 12, code name Bookworm has been released on 10th June 2023 with lot of new features and improvements. Some of the new features are listed below:
- Linux Kernel 6.1
- Support for pipewire
- New wallpapers
- Updated Installer
- Updated Software Packages
Minimum System Requirements for Debian 12
- 2 GB RAM or more
- Dual Core Processor or higher
- 20 GB Disk Space or more
- Bootable Media (USB or DVD)
- Internet Connectivity (Optional)
Without any further delay, let’s jump into Debian 12 installation steps,
1) Download Debian 12 ISO File
From the following Debian official portal, download the ISO file,
Once the ISO file is downloaded then burn it into a flash drive (USB) or DVD and make it bootable. On windows, use Rufus tools to create a bootable media and on Linux use following,
2) Boot the System with bootable media
Boot the target system with bootable media (USB or DVD), we will be presented the following screen.
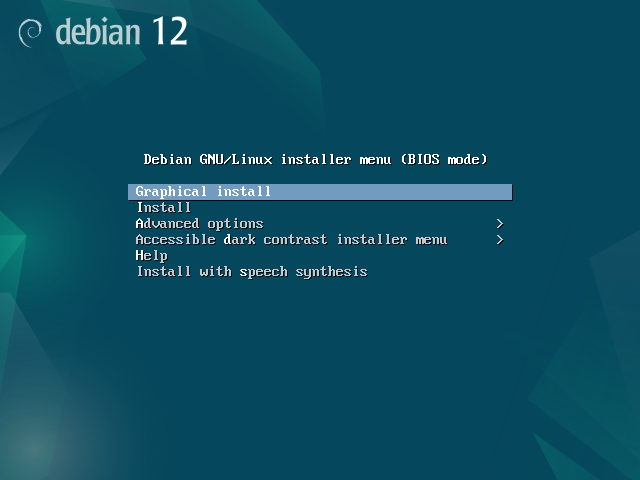
Choose “Graphical Install” and press enter,
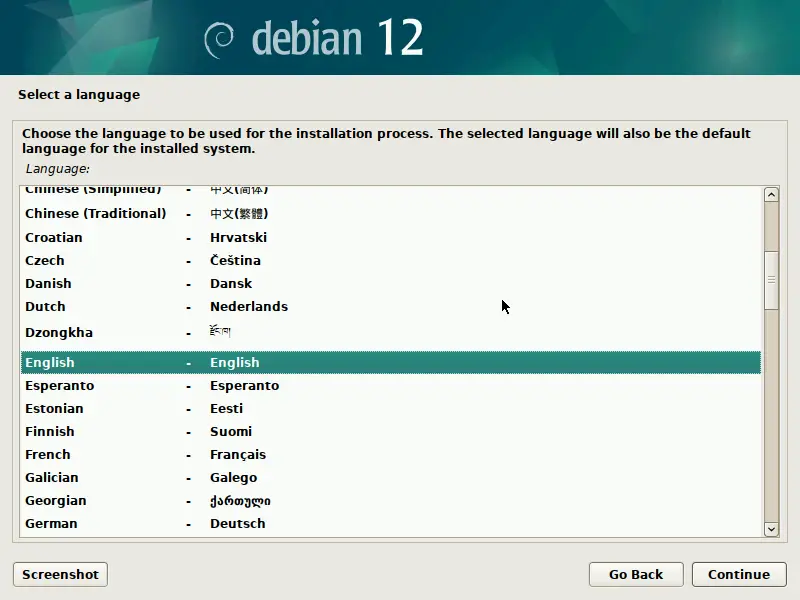
3) Select Preferred Language for Debian 12 Installation
Select your preferred language and then click on ‘Continue’
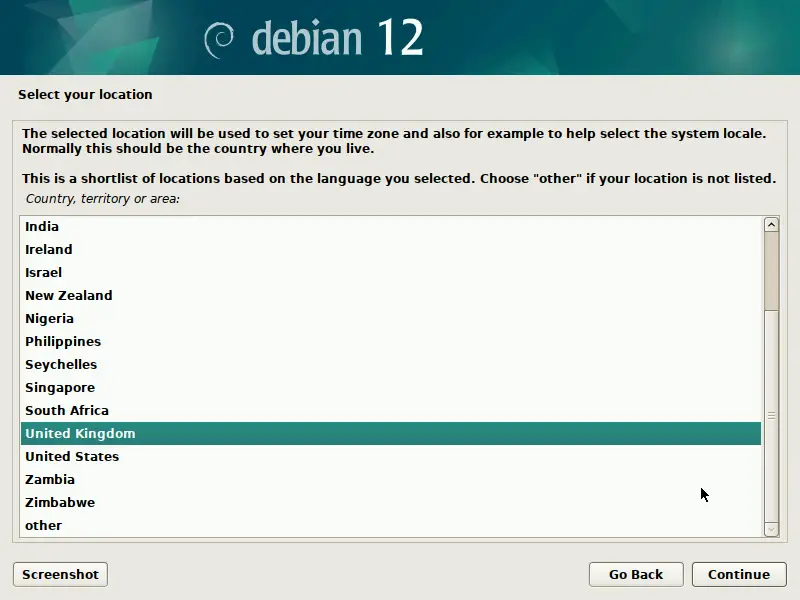
4) Choose Your Location
In this step, choose your preferred location and then click Continue
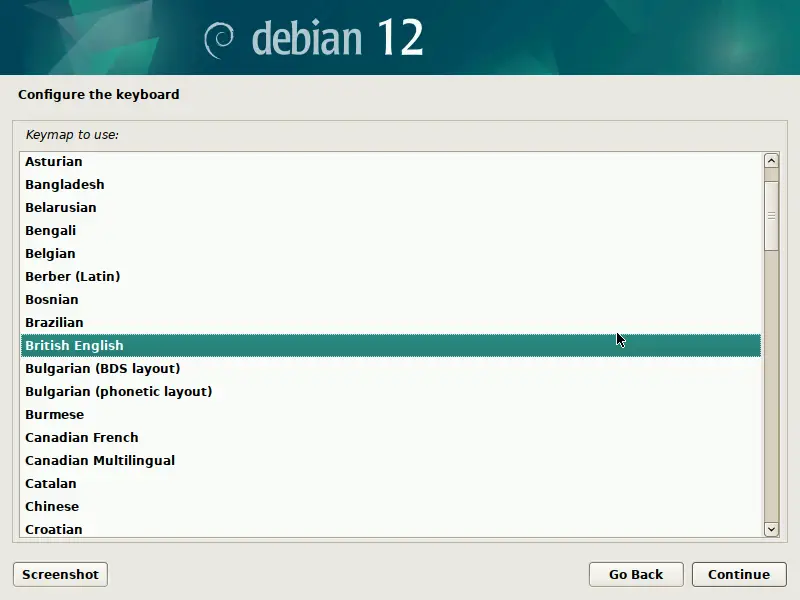
5) Configure Keyboard
Based on your location, choose your keyboard layout accordingly.
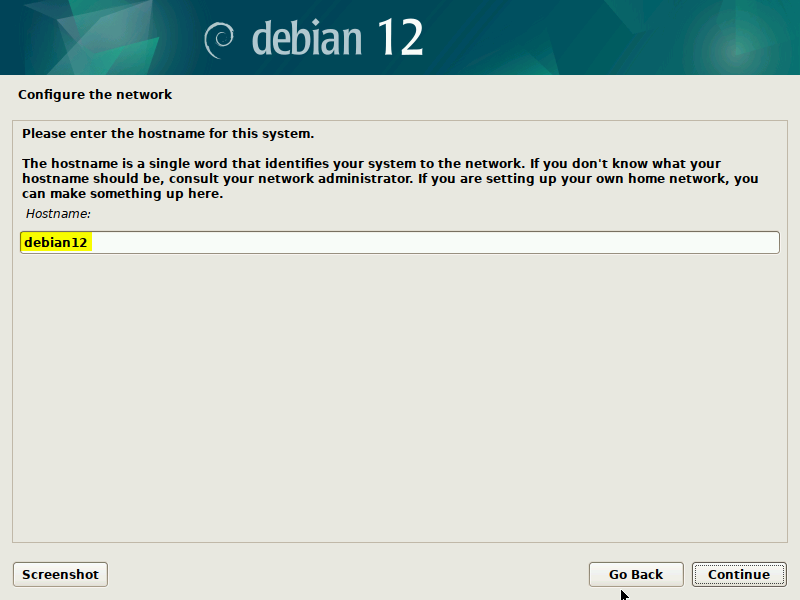
6) Set Hostname and Domain Name
Set the hostname for your system as per your choice,
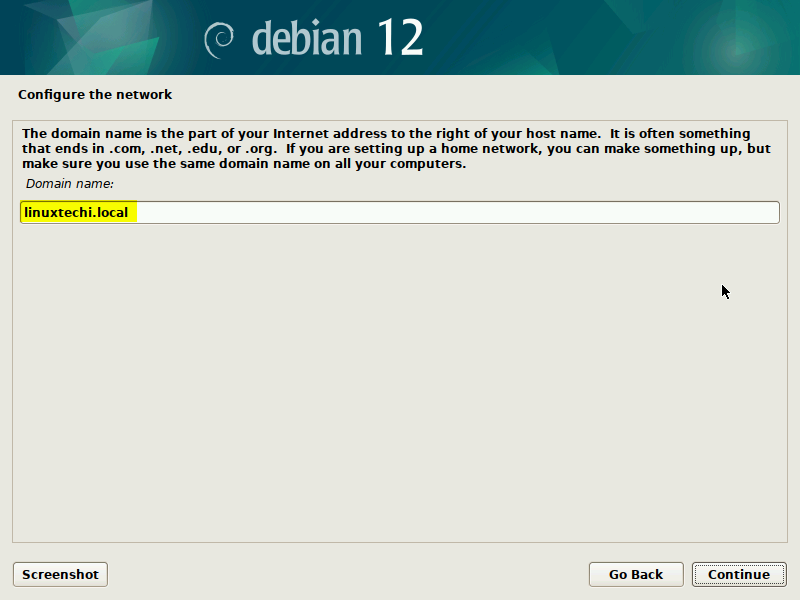
Click Continue and then you will be prompted to set domain name for your system, so set it accordingly.
7) Set Password for Root User
In this step, you will be asked to set password for the root user,
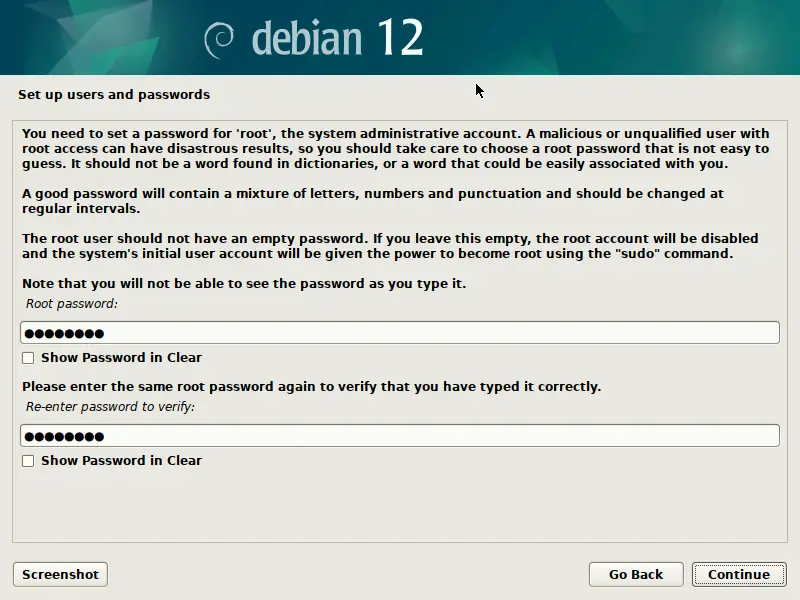
Click Continue to proceed further.
8) New Local User Details
At this step, you will be asked to fill in the new local user details like Full Name, username, password. So, specify the details according to your installation.
Full Name of User: LinuxTechi
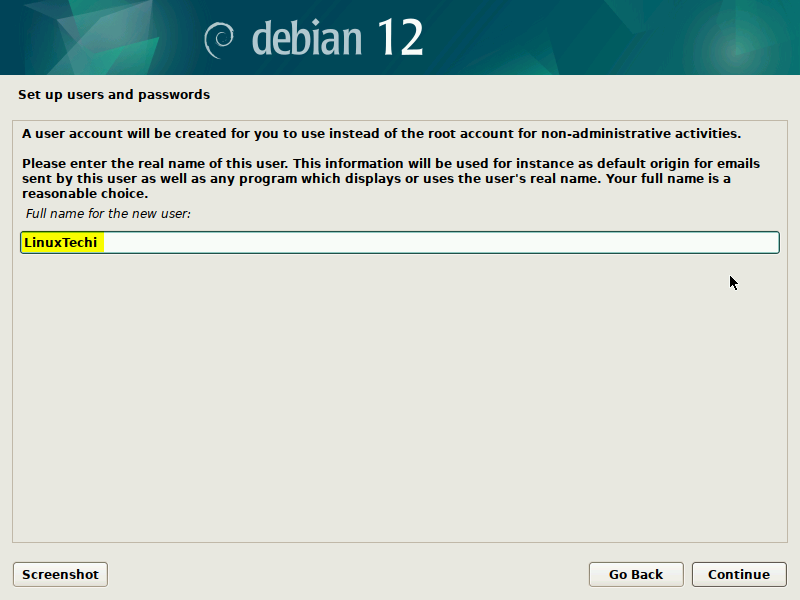
User Name: linuxtechi
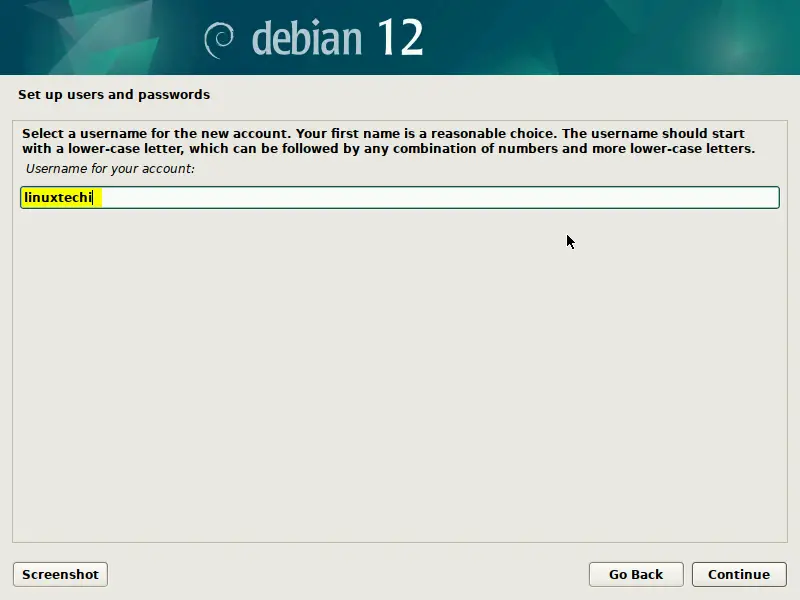
password: xxxxxxxx
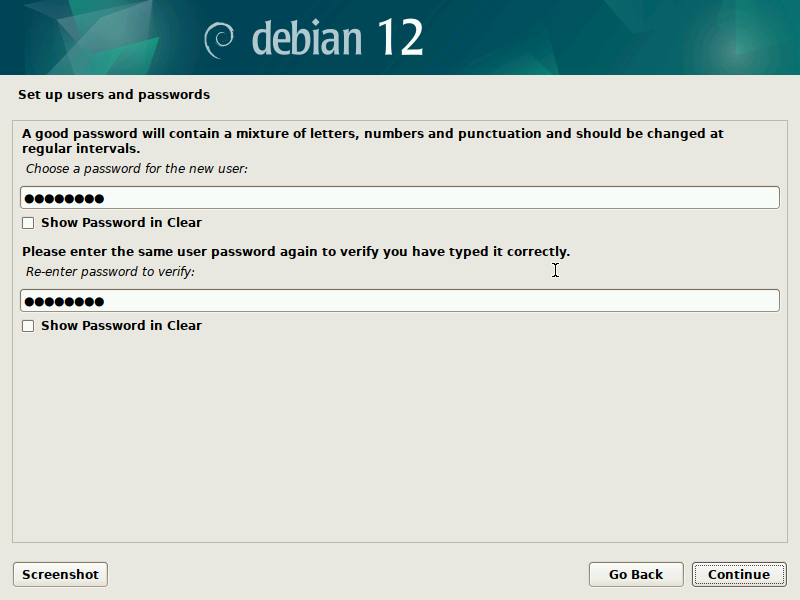
Click Continue to proceed further,
9) Select Partitioning Scheme
In Debian 12, installer offers following partitioning scheme,
- Guided – use entire disk (This will create partition automatically on the whole disk)
- Guided – use entire disk and setup LVM (This will create LVM based partitions automatically on the whole disk)
- Guided – use entire disk and set up encrypted LVM (This will create LVM based partitions and will encrypt the disk)
- Manual – This will allow you to create manual custom partitions.
In this post, we will go with 2nd option,
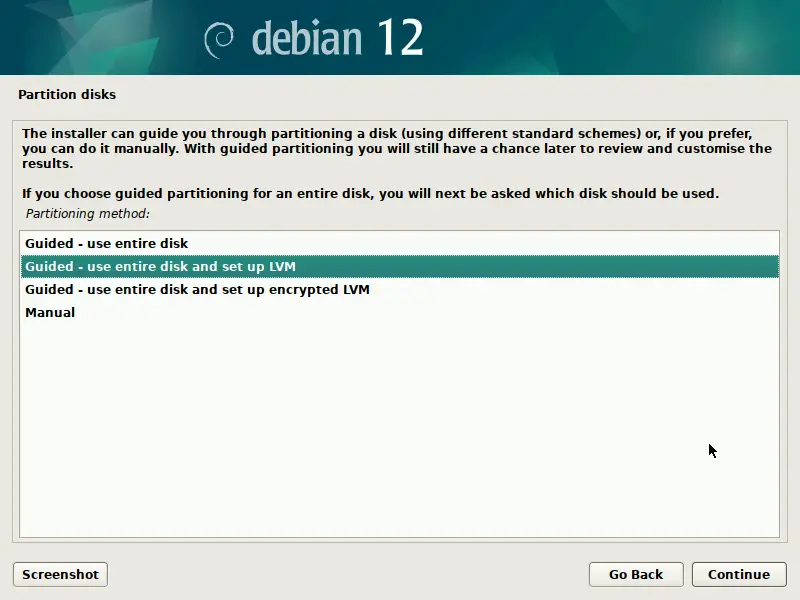
Choose the 2nd option and then click on Continue,
In the next screen, select the disk and click on continue,

In the following window, you will be asked to choose partitioning disk scheme. So choose accordingly that suits your installation.
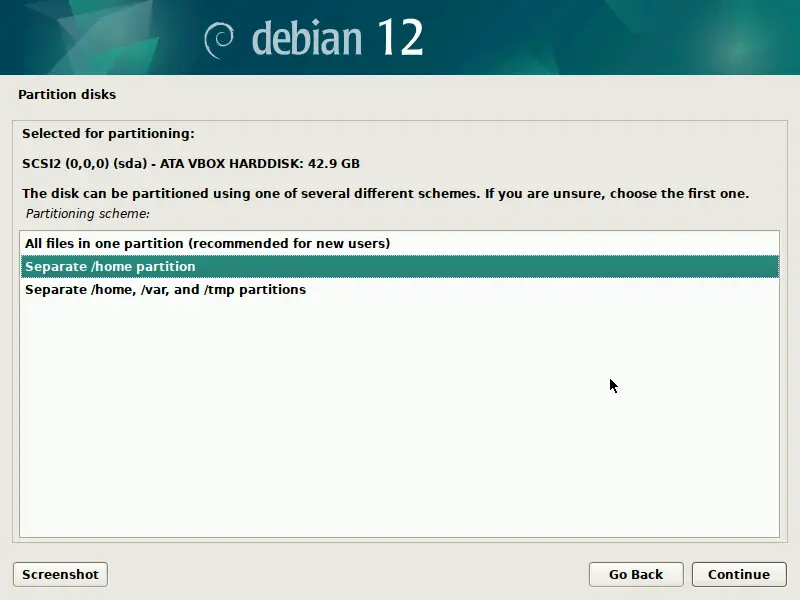
Choose “Separate /home partition” option and click Continue.
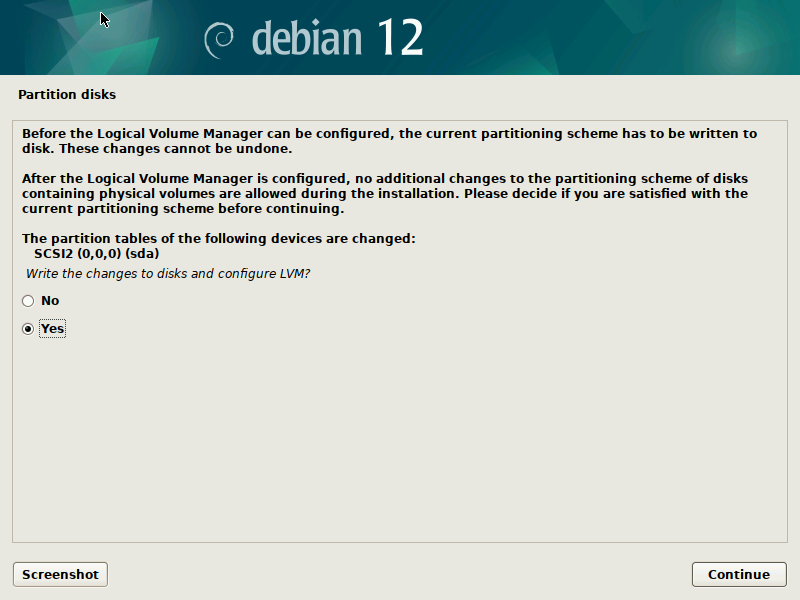
Select “Yes” to write changes to disk in the beneath screen,
In the following screen, specify the size of disk that you want to use for Debian 12 installation. I am going to use whole disk.
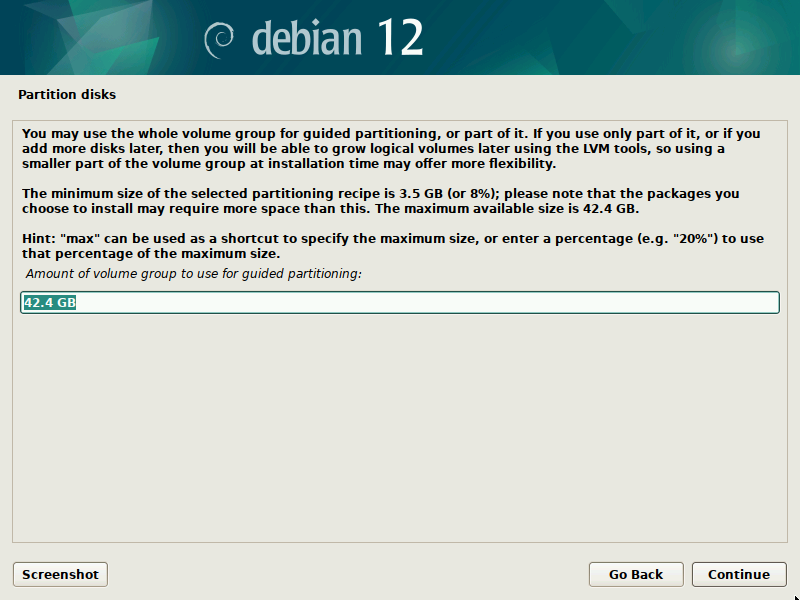
Click on Continue to proceed further with installation
Choose “Yes” in the following window to format the LVM partitions for Debian 12 installation.
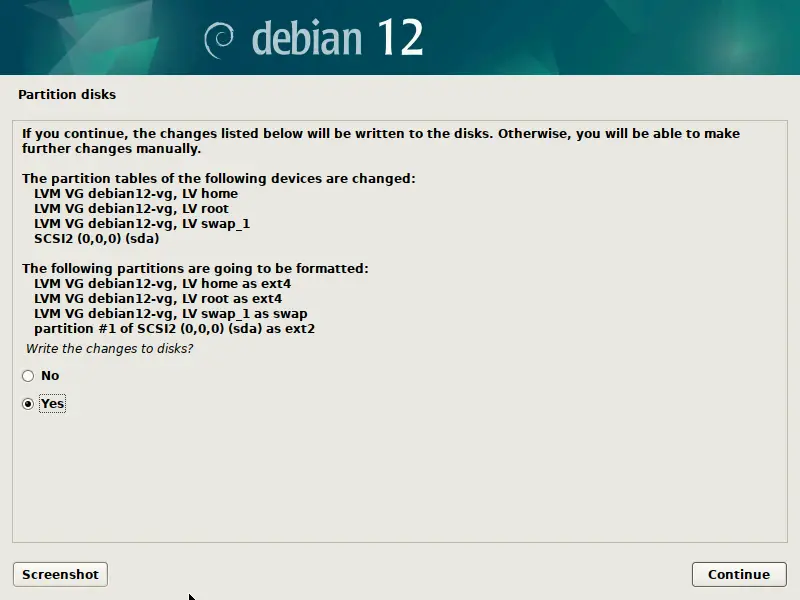
Click Continue
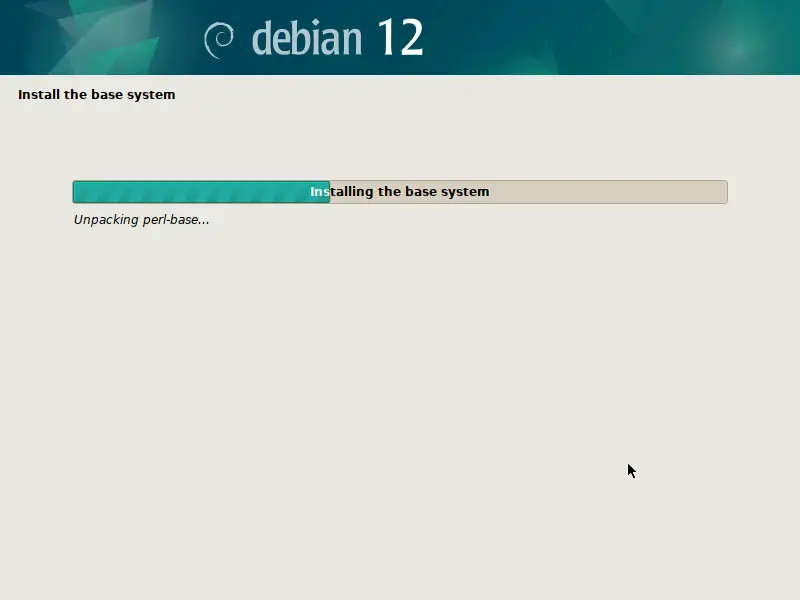
10) Debian 12 Installation Started
At this step, Debian 12 installation has been started and is in progress,
Select “No” to skip scanning media

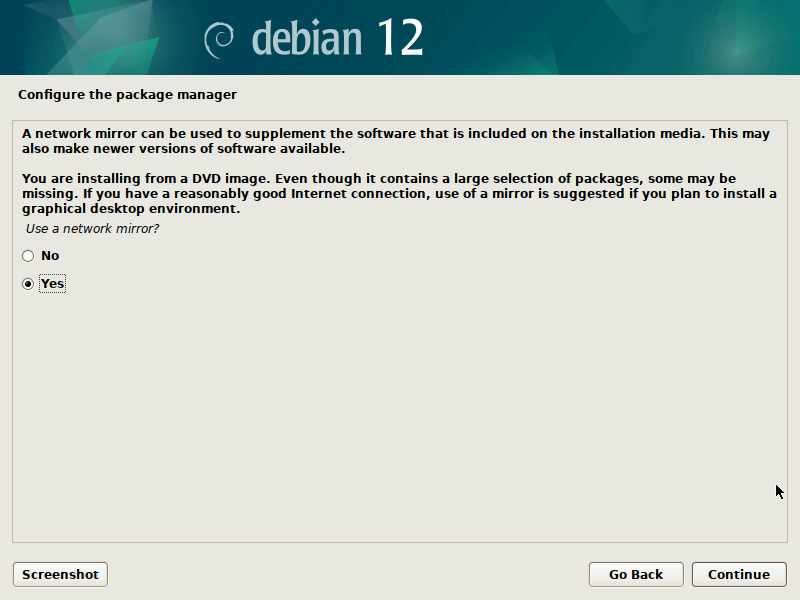
In the following window, choose “Yes” to configure network mirror
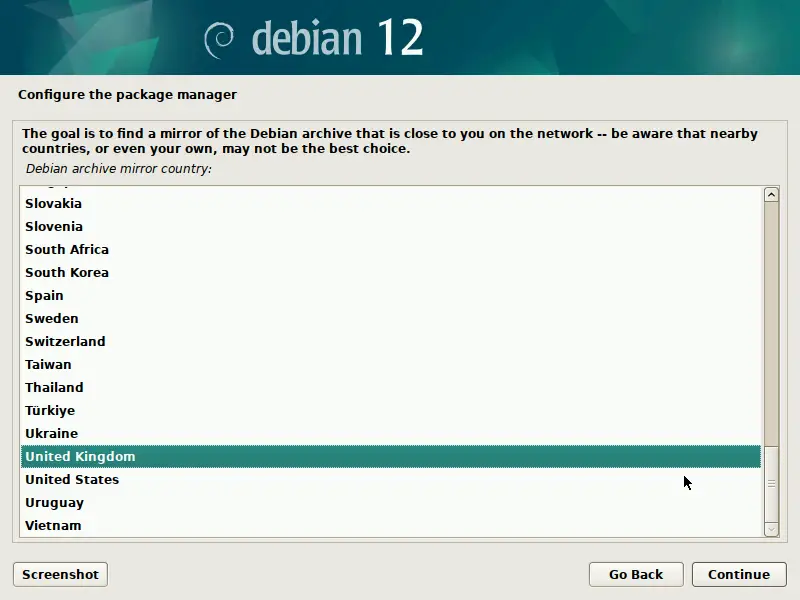
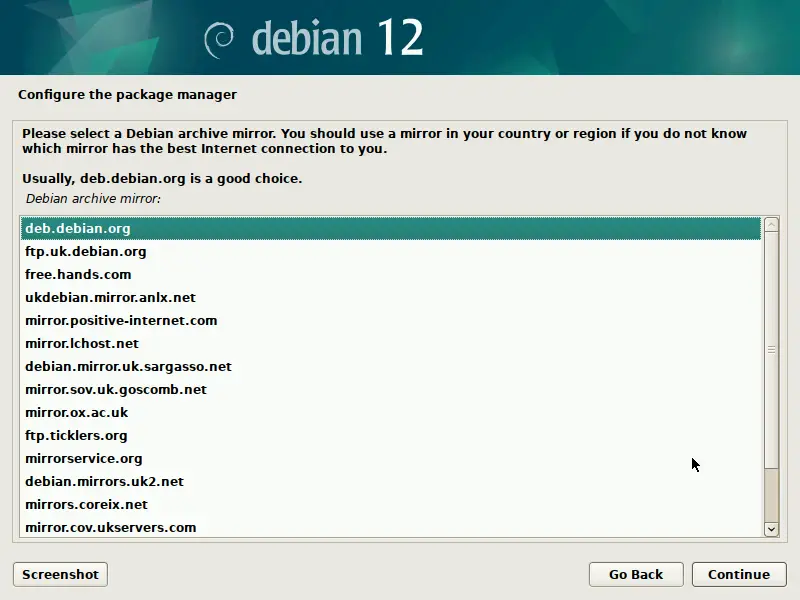
Select the archive mirror country and urls in following window and click continue
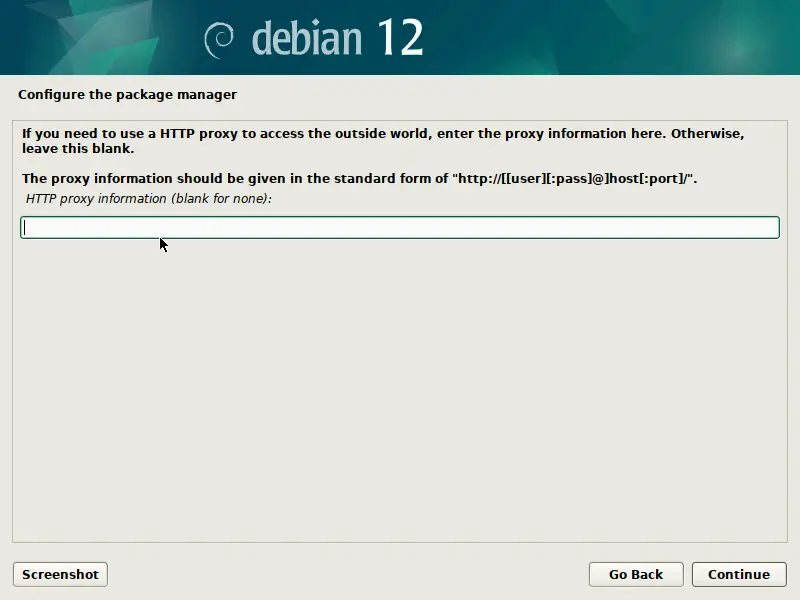
In case your system is running behind any proxy server then specify the proxy details in the following screen else skip it.
Click on Continue to proceed further with installation,
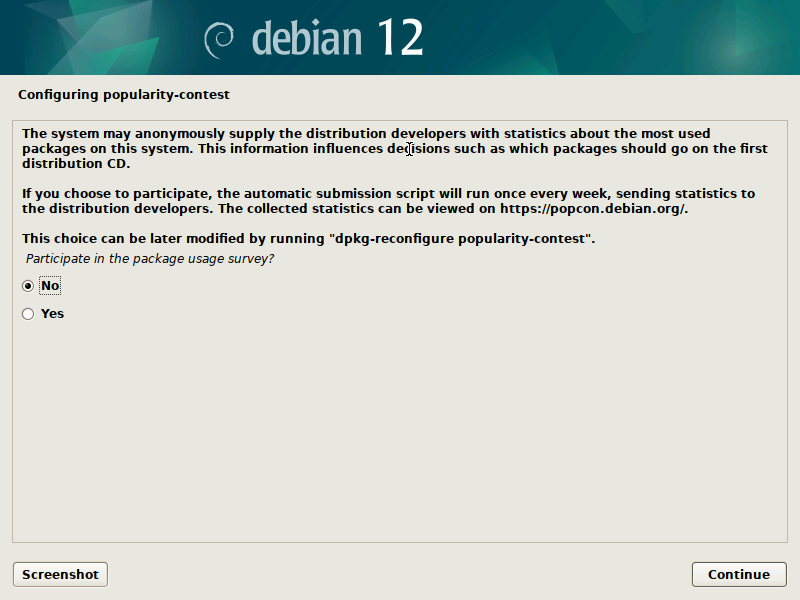
Choose “No” in the following screen to skip participation in package survey.
Now, select the Desktop environment and packages that you want to install.
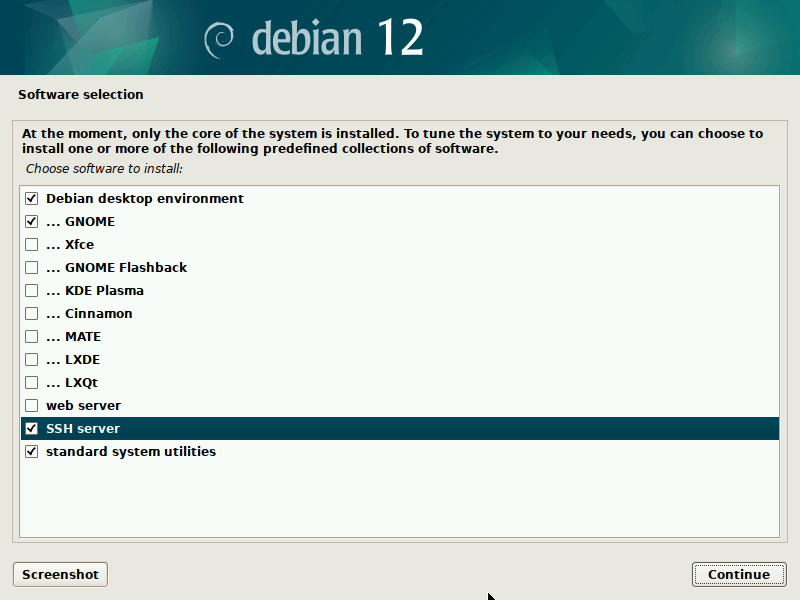
Click Continue to proceed further with installation
In the following window, select “Yes” to install Grub on primary hard drive.
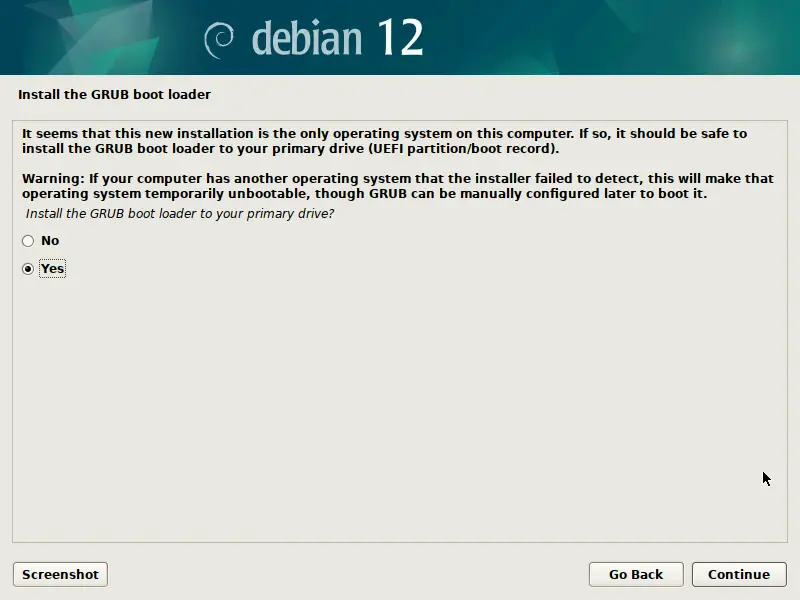 \
\Click Continue
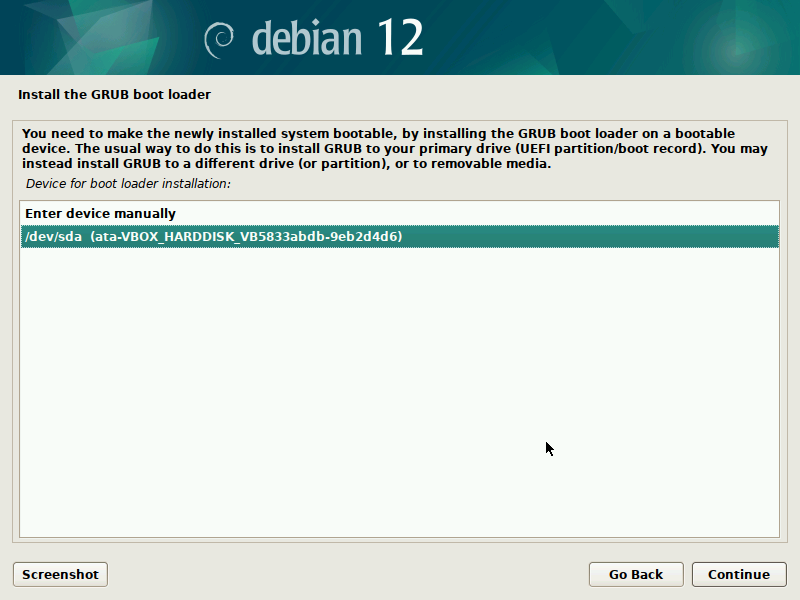
Click on Continue to install Grub on /dev/sda drive,
Once the Debian 12 installation is completed, installer will prompt us to reboot the system.
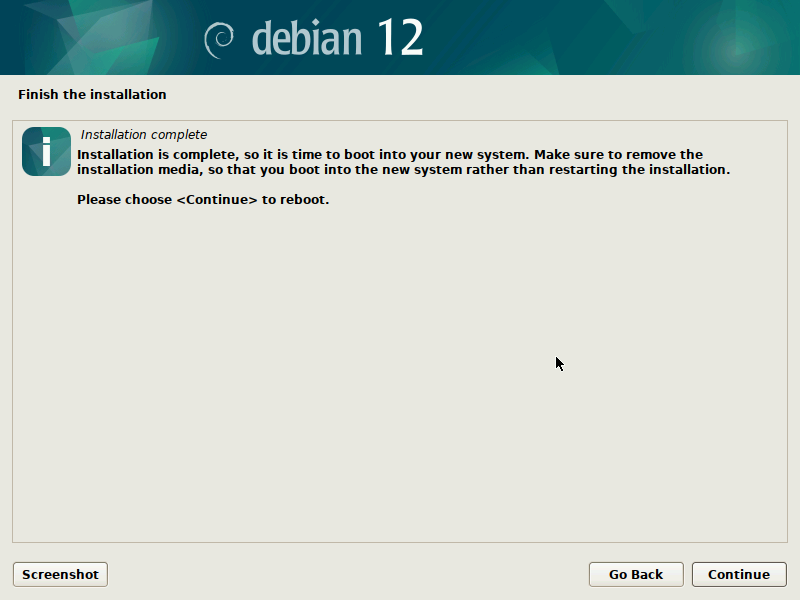
Click on Continue to reboot the system as installation is completed.
11) Login Screen and Desktop Post Installation
When system boots up post Debian 12 installation, we will get following login screen, use the same username and its credentials that we have created during the installation.
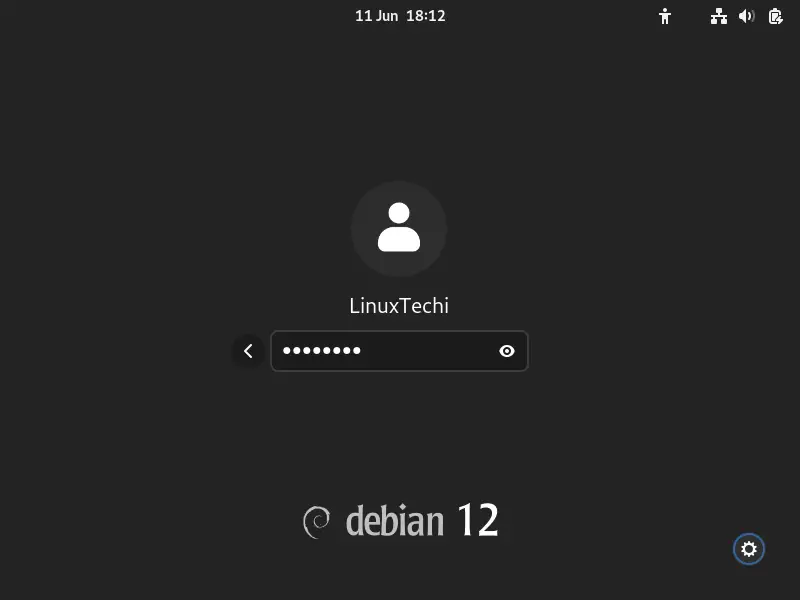
After entering the credentials, hit enter
Open the terminal and run the following commands,
$ lsb_release -a
$ cat /etc/os-release
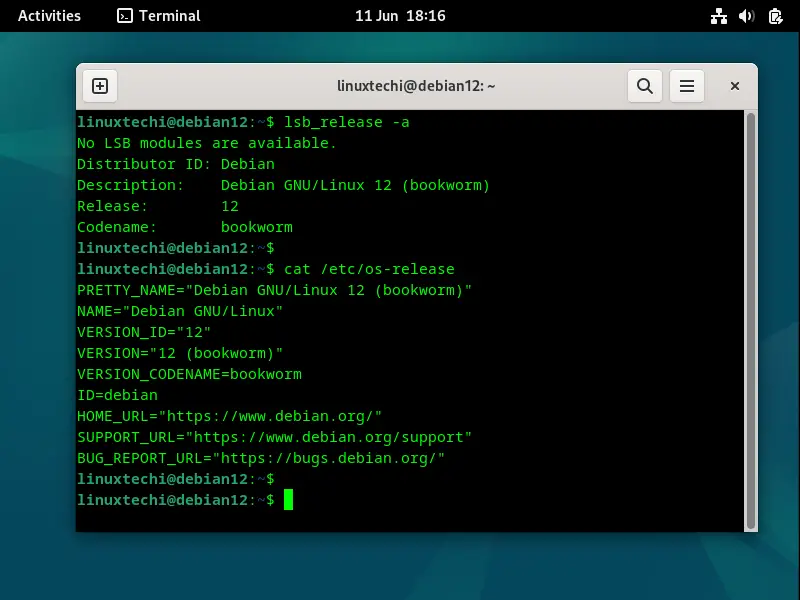
Great, this confirms that we have successfully installed Debian 12.
That’s all from this post, Kindly do post your queries and feedback in below comments section.
Well done, easy to follow and no hiccups…
Thank you…
I got a simple request but haven’t found an answer, yet. I’m trying to install Deb12 on my surface laptop 3 but my keyboard stops working after I select an installation method. I read somewhere that I can mount the USB installation data to the RAM. Freeing up a port, so I can use an external keyboard to finish the installation.
Does any of this sound familiar, mounting the installation media data to RAM?
I’m also asking for other reasons… I’m a self-taught late bloomer.
I really do appreciate the help, thanks
I think you can just connect a basic USB keyboard for the install and then enable the built-in keyboard after install according to instructions on the internet which I don’t remember right now.
Didn’t read fully about the port. You should be able to install with trackpad alone and then enable the built-in keyboard after first boot. Or this could be irrelevant to you.
I intended to install Debian in partition nvme…p11. Never got beyond the partition step. I cleaned that partition to zeros. Never found a step to format it again. Installer would not let me go to the ‘install basic’ step.