Nginx is arguably one of the most widely used free and opensource web server used in hosting high-traffic websites. It is well known for its stability, stellar-performance, low resource consumption, and lean configuration. Some of the popular sites powered by Nginx include WordPress.com, GitHub, Netflix, Airbnb, Hulu, Eventbrite, Pinterest, and SoundCloud to mention a few.
While powerful and stable, the default configurations are not secure and extra tweaks are required to fortify the web server and give it the much-needed security to prevent attacks and breaches.
In this article, we touch base on some of the steps you can take to harden and secure your Nginx web server and get the most out of it.
1) Implement SSL Certificate
One of the preliminary and crucial steps in hardening your Nginx web server is to secure it by using an SSL certificate. The SSL certificate is a cryptographic digital certificate that encrypts traffic between your web server and the web browsers of your site’s visitors. It also forces your site to use the secure HTTPS protocol and drop HTTP which sends traffic in plain text. By so doing, communication back and forth is secured and kept safe from hackers who might try to eavesdrop and steal confidential information such as usernames, passwords, and credit card information.
You can take advantage of the Free Let’s Encrypt SSL certificate that is easy to install and configure and is valid for 90 days. Once you have it installed, you can verify the strength of the SSL encryption by testing your domain on SSL Labs. The results are shown below.
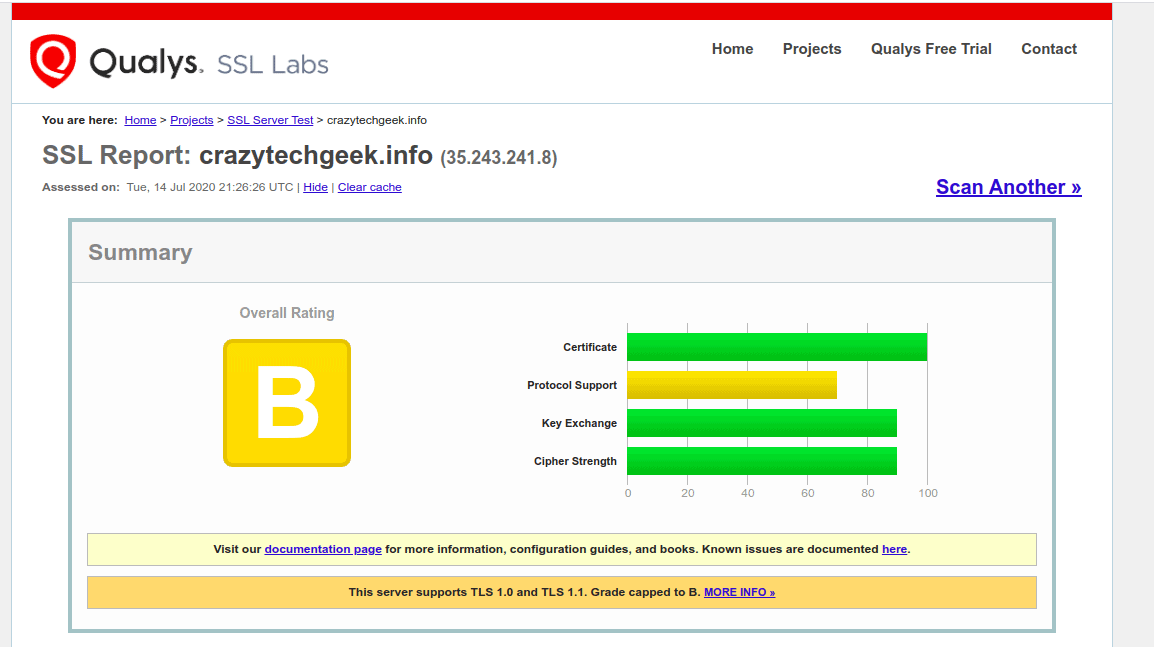
As you can see, the domain we are using scored a grade B, due to weak protocol support highlighted in Yellow. We still need to make a few tweaks to take it to Grade A. Let’s see how we can improve on the Protocol support in the next step.
2) Disable weak SSL / TLS protocols
As you have seen from the results, implementing SSL does not necessarily imply that your site is fully secured. Deprecated versions such as TLS 1.0, TLS 1.1, and SSL 3 are considered weak and present vulnerabilities that hackers can exploit and eventually compromise your web server. These protocols are prone to vulnerabilities such as POODLE, BEAST and CRIME.
In fact, most popular and widely used web browsers have announced the end of support for TLS 1.0 and TLS 1.1 within the deadlines shown.
- Browser Name Date
- Google Chrome January 2020
- Mozilla Firefox March 2020
- Safari/Webkit March 2020
- Microsoft Edge June 2020
With this information at hand, it would be prudent to conform with the latest security protocols, and at the time of writing this article, the latest protocol is TLS 1.2 with TLS 1.3 expected later in 2020.
To implement TLS 1.2 and TLS 1.3, we are going to edit 2 files:
- /etc/nginx/nginx.conf – This is the main nginx configuration file
- /etc/nginx/sites-available/example.com (or /default)
If you are running Let’s Encrypt SSL, be sure to edit the following files
- /etc/nginx/nginx.conf
- /etc/letsencrypt/options-ssl-nginx.conf
Use the following steps to disable weak SSL / TLS Protocols
Step 1) Edit the nginx.conf file
Firstly, ensure you take a backup of the /etc/nginx/nginx.conf file before making any changes. Then open the file using the text editor of your choice
$ sudo vi /etc/nginx/nginx.conf
Locate the following line
ssl_protocols TLSv1 TLSv1.1 TLSv1.2; # Dropping SSLv3, ref: POODLE
To disable the weak protocols, simply delete TLSv1 and TLSv1.1 protocols and append TLSv1.2 & TLSv1.3 at the end.
ssl_protocols TLSv1.2 TLSv1.3 ; # Dropping SSLv3, ref: POODLE
This should appear as follows on line 36
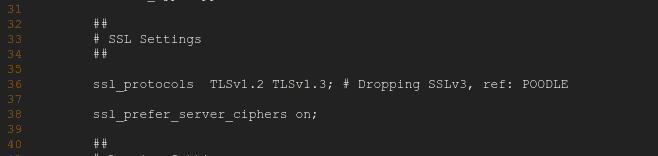
Save and exit the configuration file.
Step 2) Edit the Nginx server block file
Obsolete protocols may still be sitting in your respective Nginx server block configuration files. The block configuration files are contained in the /etc/nginx/sites-available/ directory.
Therefore, proceed and modify your block configuration file
$ sudo vi /etc/nginx/sites-available/example.com
OR
$ sudo vi /etc/nginx/sites-available/default
As before, scroll and locate the following line
ssl_protocols TLSv1 TLSv1.1 TLSv1.2;
Again, delete the TLSv1 and TLSv1.1 protocol and add the TLSv1.3 at the end.
NOTE: If you are using Let’s Encrypt SSL, modify the SSL file:
$ sudo vi /etc/letsencrypt/options-ssl-nginx.conf
For the changes to persist, restart Nginx web server
$ sudo systemctl restart nginx
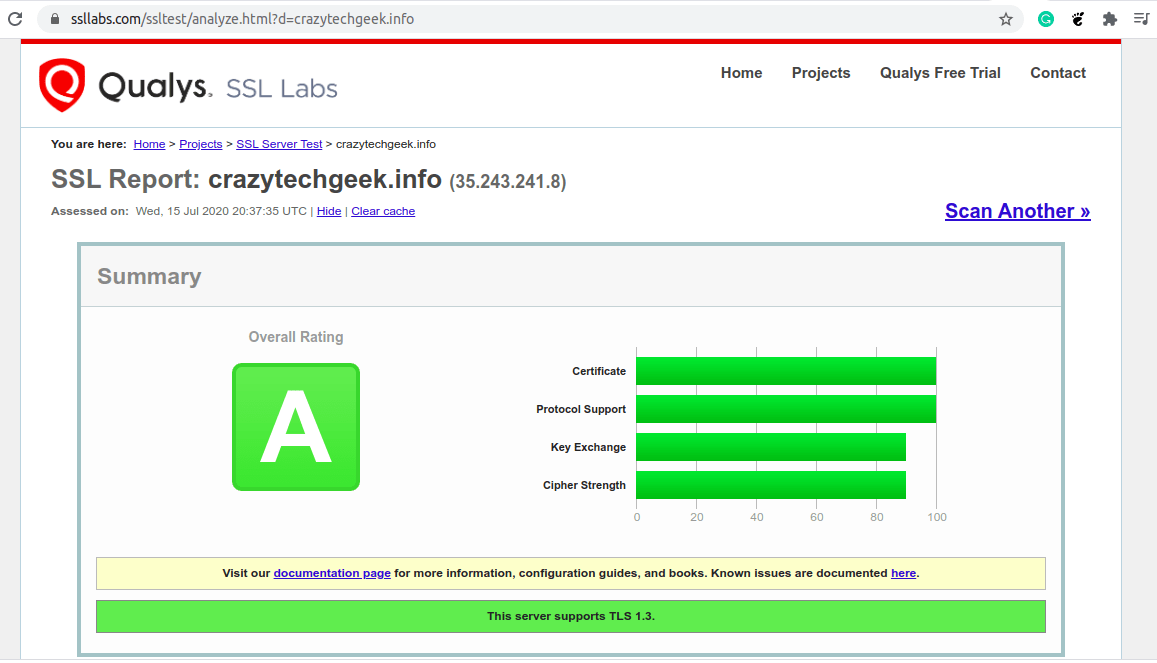
Now head over to the SSL Labs test and test your domain once again. This time, you should get an A rating as shown.
3) Prevent Information disclosure
Part of hardening your server involves limiting information disclosure on your web server as much as possible. Information can be leaked through HTTP headers or error reporting. Some of this information includes the version of Nginx you are running, and you really wouldn’t want to disclose that to hackers.
By default, Nginx displays HTTP header information when you run the command:
$ curl -I http://localhost
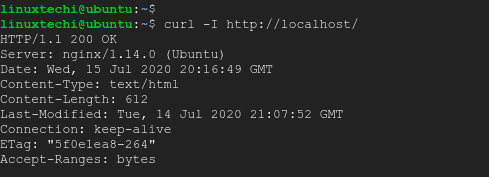
From the output on the second line, you can see that the version of Nginx and the Operating system it is running on has been disclosed
Server: nginx/1.14.0 (Ubuntu)
The version would also be displayed on a web browser if an error page such as a 404-error page is displayed as shown.
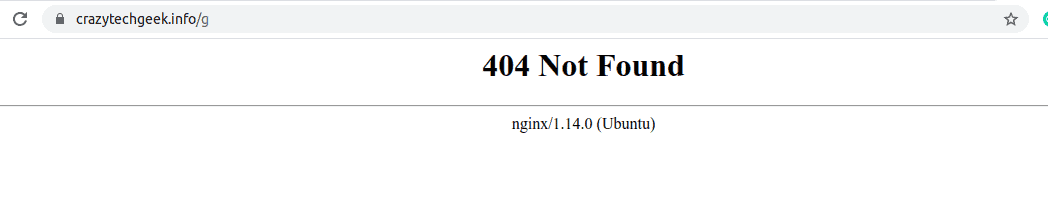
To avoid this information leakage, edit the nginx.conf file and under the http { section, uncomment the following line
server_tokens off;
Save the changes and exit. Then restart the webserver for the changes to reflect.
$ sudo systemctl restart nginx
Now reload the error page and notice the difference. The version and the OS Nginx is running has been omitted.

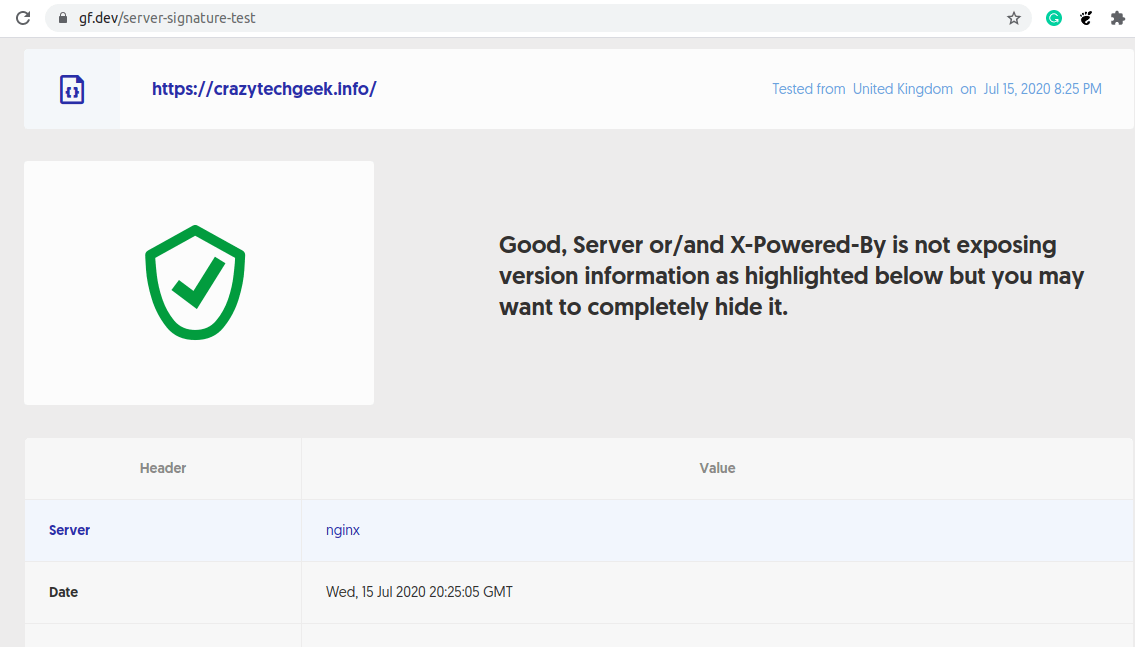
Another way you can check how much information is leaking from your web server is by visiting the Server Signature Site and check your domain. If all is good, you will get the following output.
4) Get rid of unwanted HTTP methods
Another sound practice is to disable unwanted protocols that are not going to be implemented by the webserver. The line below will permit the implementation of GET, POST, and HEAD methods and exclude all the other methods including TRACE and DELETE. Add the following line in your server block file.
location / {
limit_except GET HEAD POST { deny all; }
}
5) Disable weak cipher suites
Besides the implementation of SSL, make it your goal to disable weak and insecure ciphers including the RC4 ciphers. These come bundled by default solely for the purpose of backward compatibility with previous Nginx releases and there’s no good reason to have them since they serve as potential vulnerabilities that can be exploited. Therefore, in your ssl.conf file, replace the ciphers with the following cipher suite.
'EECDH+AESGCM:EDH+AESGCM:AES256+EECDH:AES256+EDH';+AESGCM:EDH+AESGCM:AES256+EECDH:AES256+EDH';
6) Remove any unnecessary modules
To further minimize the threat landscape, it’s advisable to remove any unnecessary modules from the default server settings. Best practice demands that you keep a lean profile and only enable the modules that are used in serving content from the webserver. Be cautious, though, not to uninstall or remove the modules that you may require. As a recommendation, perform tests in a QA or test environment before deciding which modules should be disabled and which ones are necessary for your web server.
7) Prevent Better Overflow
In memory management, a buffer is a storage location that temporarily accommodates data as is it begin transferred from one memory location to another.
When the data volume exceeds the capacity of the memory buffer, a buffer overflow occurs. In other words, buffer overflows happen when a program writes more data on a block of memory that it can hold or handle.
An attacker can exploit this vulnerability to send malicious code that can compromise a system. As standard practice, it is recommended to make a few tweaks to the Web server to mitigate such issues. Add the lines of code below to the nginx.conf file.
##buffer policy
client_body_buffer_size 1K;
client_header_buffer_size 1k;
client_max_body_size 1k;
large_client_header_buffers 2 1k;
##end buffer policy
8) Prevent XSS attacks
An XSS ( cross-site scripting ) attack is an attack where a hacker uses a web application to inject malicious code or a browser-side script into a trusted site. When a visitor to the site visits the site, the script is downloaded and can access various browser resources such as cookies and session token.
One of the prevention measures against such type of attack is to append the line below in the ssl.conf file.
add_header X-XSS-Protection "1; mode=block";
9) Avoid Clickjacking attacks
To steer clear of clickjacking attacks, append the X-Frame-Options in the HTTP header in the nginx.conf file as shown
add_header X-Frame-Options "SAMEORIGIN";
Once done, save and restart Nginx web server.
10) Deny automated user agents
To keep your server safe from bots and other automated scripts that may be deployed by attackers to retrieve information from your site, it’s prudent to explicitly deny specific user agents which can ultimately lead to deny-of-service attacks DOS. Append the following line in the nginx.conf file.
if ($http_user_agent ~* LWP::Simple|BBBike|wget) {
return 403;
}
11) Prevent Image hotlinking
Hotlinking is a practice where a user links an image to your website instead of directly uploading the image on their site. When this happens, your image appears on their site and the flip side to this is that you end up paying for extra bandwidth.
To prevent this from happening, look for location directive inside Nginx configuration file and append the following snippet
# Stop deep linking or hot linking
location /images/ {
  valid_referers none blocked www.example.com example.com;
   if ($invalid_referer) {
     return   403;
   }
}
You can also specify the image extensions as shown:
valid_referers blocked www.example.com example.com;
if ($invalid_referer) {
    rewrite ^/images/uploads.*\.(gif|jpg|jpeg|png)$ http://www.example.com/banned.jpg last
}
12) Keep Nginx updated
Easy right? Keeping your web server up to date is one of the ways you can secure your server. Updating your web server applies the required patches that address pre-existing vulnerabilities that can be exploited by hackers to compromise your server.
That was a round-up of some of the key measures you can take to harden your Nginx web server and secure it from common exploitation techniques. This will go a long way in protecting your website files and the visitors on your site as well.
Also Read : How to Configure NGINX as TCP/UDP Load Balancer in Linux


I want to install let’s encrypt SSL on my website ‘http://linuxbuz.com’. Is there any article related to let’s encrypt on your website?