In this guide, we will explore how to install GitLab Runner on Ubuntu 22.04 step-by-step.
Gitlab is a powerful, open-source, and feature-rich code repository and collaborative software development platform that offers a central location for hosting software code. It’s a perfect alternative for GitHub and an ideal platform for handling big DevOps projects. Its CI/CD capabilities help development teams to seamlessly automate, build, and test their code as well as track any issues.
Gitlab runner is an agent used to execute jobs defined in gitlab-ci.yml file on your local machine. The file defines various stages of your CI/CD pipeline including building, testing, and deploying stages. The runner executes tasks and relays results to GitLab.
1) Update Apt Repository Index
To hit the ground running, log into your server and update the local APT cache.
$ sudo apt update
Once the cache is updated, head over to the next step.
2) Download GitLab Runner Installer Script
GitLab is not hosted or provided by Ubuntu default repositories. Instead, Gitlab provides an installation script that simplifies the installation process. So, download and run the Gitlab runner installer script as shown.
$ curl -L "https://packages.gitlab.com/install/repositories/runner/gitlab-runner/script.deb.sh" | sudo bash

The script updates the local cache, installs the requisite packages required, and adds the Gitlab runner repository to the sources list directory defined as /etc/apt/sources.list.d. The system will use this repository to install GitLab Runner.
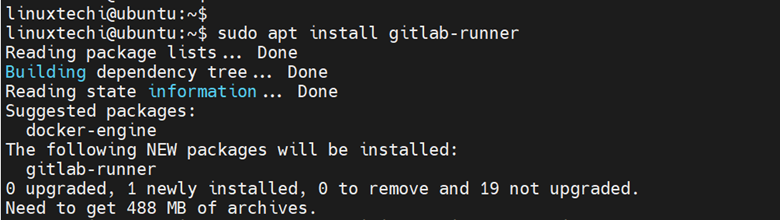
3) Install GitLab Runner on Ubuntu 22.04
With the repository in place, the system now knows where to install Gitlab runner. To install GitLab runner, use the apt package manager as follows.
$ sudo apt install gitlab-runner
To confirm the version of GitLab runner installed, run the command:
$ sudo gitlab-runner -version
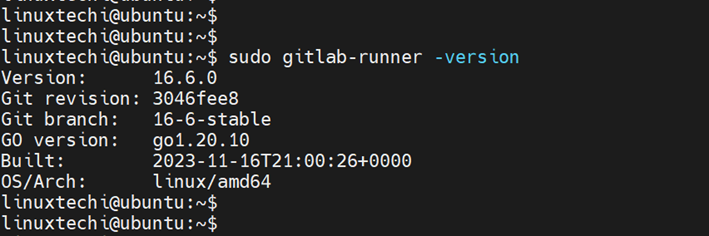
From the output, you can see that we have installed the latest version which is GitLab Runner 16.6.0.
4) Verify GitLab Runner’s Status
By default, GitLab Runner auto-starts once installed, and you can verify this as shown.
$ sudo gitlab-runner status

If for some reason the service is not running, you can start it as shown.
$ sudo gitlab-runner start
You can also set it to start on system boot by enabling the service.
$ sudo gitlab-runner enable
5) How To Register GitLab Runner on GitLab
Once you have installed GitLab Runner, you need to register it with your Gitlab account. This links your runner with the projects on your Gitlab account and helps in the execution of CI/CD tasks.
As a prerequisite, you need to have a GitLab account with a pre-existing project and a Project Runner in place.
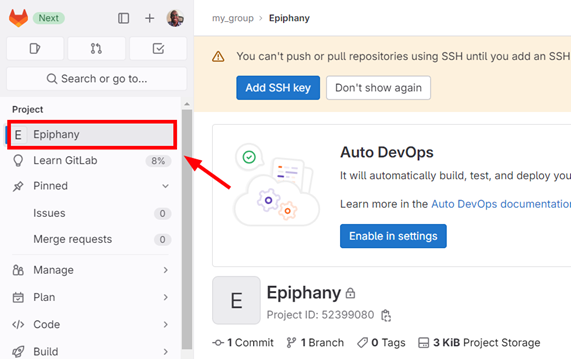
To register your GitLab Runner, head over to the left sidebar and click on your project. In our case, we have a project called ‘Epiphany‘.
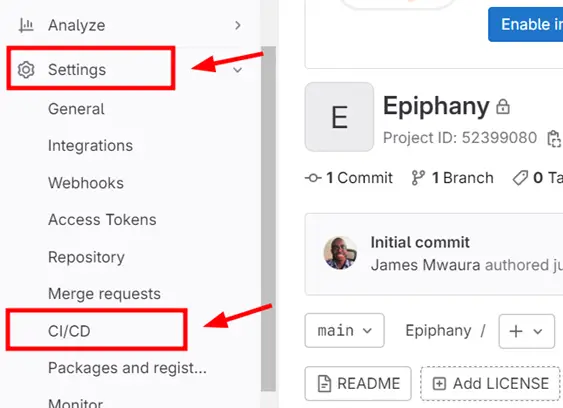
Next, head over to ‘Settings‘ –> ‘CI/CD‘.
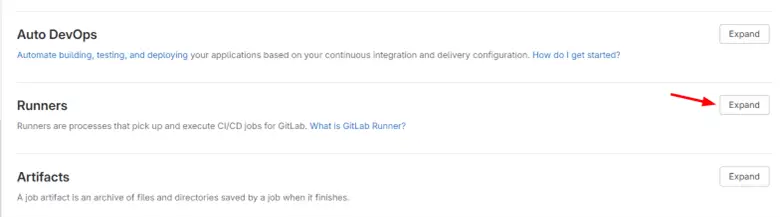
In case you don’t have a runner, here’s how to create it. In the ‘Runners‘ section, click ‘Expand‘.
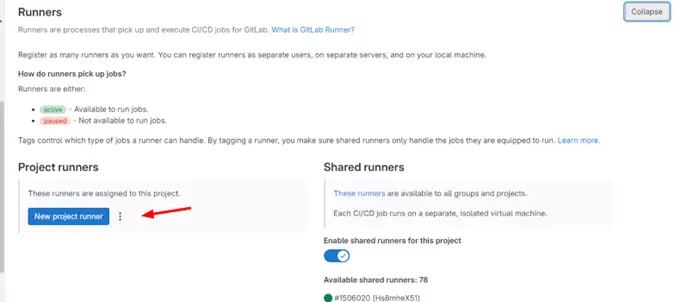
Next, click ‘New Project Runner‘ to create a project runner
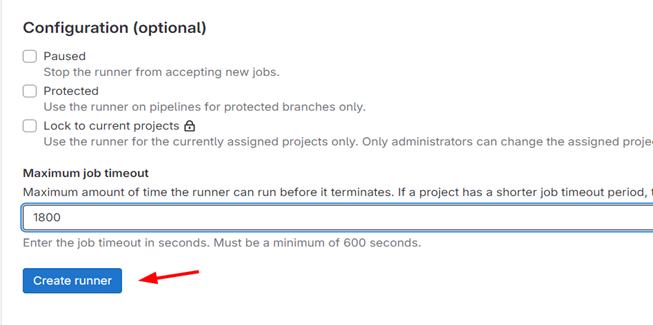
Be sure to fill in all the necessary fields and click ‘Create Runner’
With the runner already created, copy the token value which will be used to register the GitLab Runner from the command line.
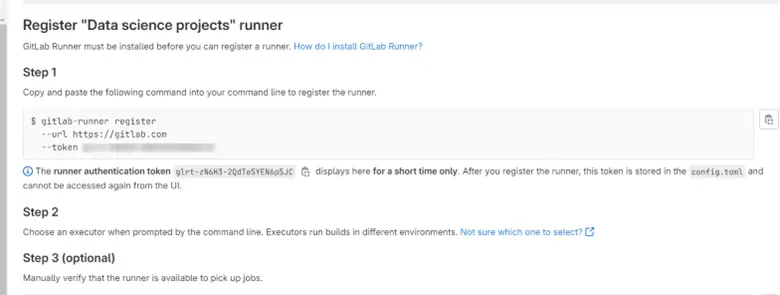
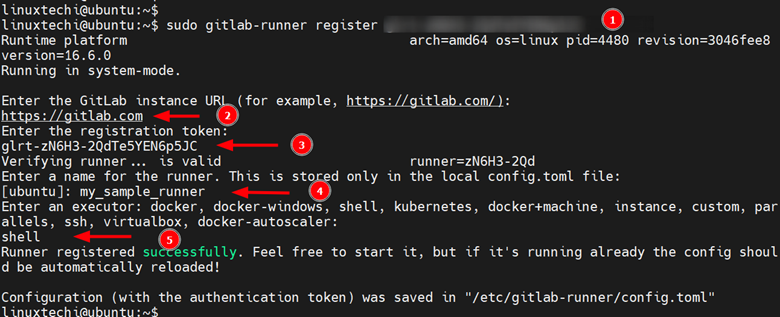
Back on the command line, run the following command to register the runner where token-number is the token value that you copied.
$ sudo gitlab-runner register token-number
The command walks you through a series of prompts:
First, you will be required to provide the GitLab URL instance: Type https://gitlab.com and hit ENTER.
Next, you will be prompted for the registration token. Key in the same token value you copied and press ENTER.
Next, provide an executor. If you are unsure of what to provide, simply go with ‘Shell’.
Finally, you will get the notification that the Runner has successfully been registered.
The configuration – together with the authentication token – will be saved in the /etc/gitlab-runner/config configuration file.
Conclusion
That wraps up our guide today. In this guide, we have demonstrated how to install GitLab Runner on Ubuntu 22.04. We have also gone a step further to illustrate how to register a GitLab Runner instance with GitLab. Feel free to post your queries and feedback in below comments section.
Also Read: How to Install GitLab on Ubuntu 22.04 Step-by-Step