If you are a Fedora distribution lover and always try the things at Fedora Workstation and Servers, then it is good news for you as Fedora has released its latest OS edition as Fedora 30 for the Workstation and Server. One of the important updates in Fedora 30 from its previous release is that it has introduced Fedora CoreOS as a replacement of Fedora Atomic host.
Some other noticeable updates in Fedora 30 are listed beneath:
- Updated Desktop Gnome 3.32
- New Linux Kernel 5.0.9
- Updated Bash Version 5.0, PHP 7.3 & GCC 9
- Updated Python 3.7.3, JDK12, Ruby 2.6 Mesa 19.0.2 and Golang 1.12
- Improved DNF (Default Package Manager)
In this article we will walk through the Fedora 30 workstation Installation steps for laptop or desktop.
Following are the minimum system requirement for Fedora 30 workstation,
- 1GHz Processor (Recommended 2 GHz Dual Core processor)
- 2 GB RAM
- 15 GB unallocated Hard Disk
- Bootable Media (USB / DVD)
- nternet Connection (Optional)
Let’s Jump into Installation steps,
Step:1) Download Fedora 30 Workstation ISO File
Download the Fedora 30 Workstation ISO file on your system from its Official Web Site
https://getfedora.org/en/workstation/download/
Once the ISO file is downloaded, then burn it either in USB drive or DVD and make it bootable.
Step:2) Boot Your Target System with Bootable media (USB Drive or DVD)
Reboot your target machine (i.e. machine where you want to install Fedora 30), Set the boot medium as USB or DVD from Bios settings so system boots up with bootable media.
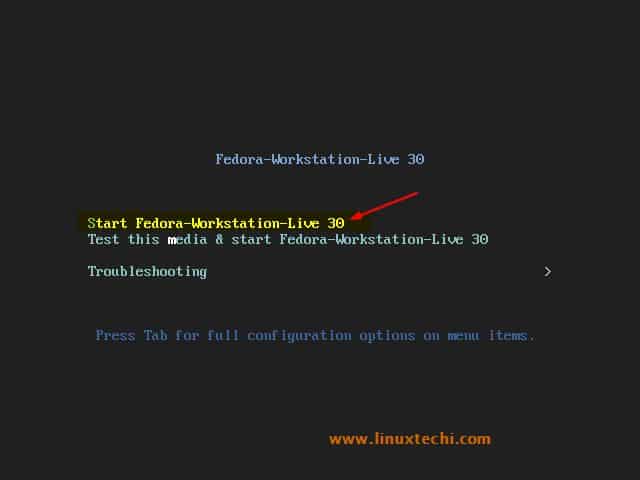
Step:3) Choose Start Fedora-Workstation-30 Live
When the system boots up with bootable media then we will get the following screen, to begin with installation on your system’s hard disk, choose “Start Fedora-Workstation-30 Live“,
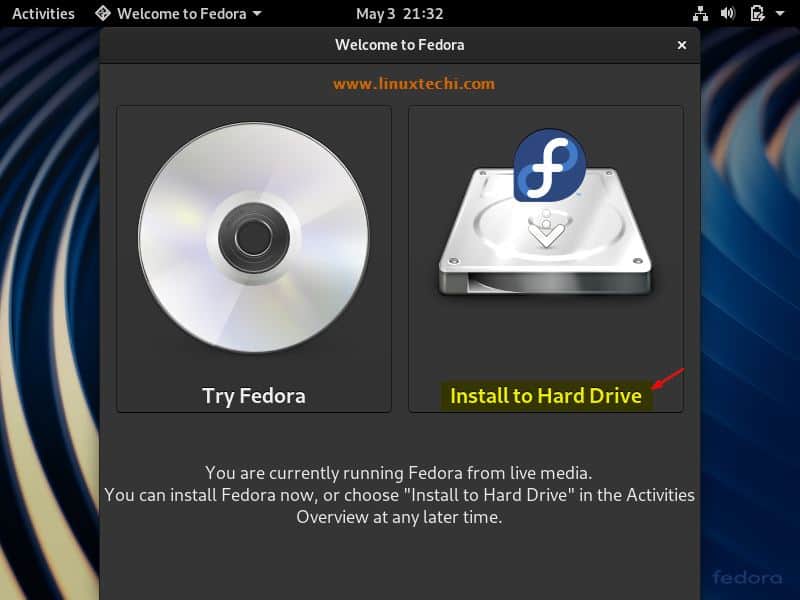
Step:4) Select Install to Hard Drive Option
Select “Install to Hard Drive” option to install Fedora 30 on your system’s hard disk, you can also try Fedora on your system without installing it, for that select “Try Fedora” Option
Step:5) Choose appropriate language for your Fedora 30 Installation
In this step choose your language which will be used during Fedora 30 Installation,

Click on Continue
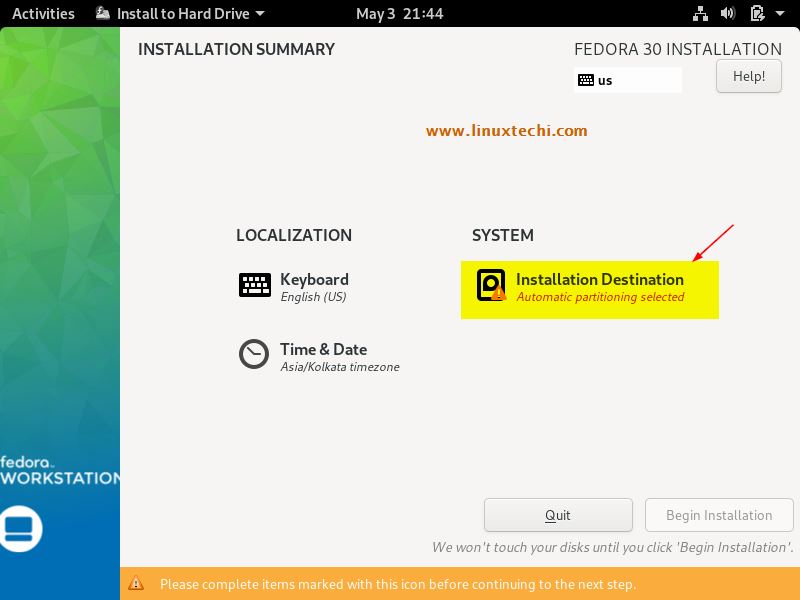
Step:6) Choose Installation destination and partition Scheme
In the next window we will be present the following screen, here we will choose our installation destination, means on which hard disk we will do installation
In the next screen we will see the local available hard disk, select the disk that suits your installation and then choose how you want to create partitions on it from storage configuration tab.
If you choose “Automatic” partition scheme, then installer will create the necessary partition for your system automatically but if you want to create your own customize partition scheme then choose “Custom” option,
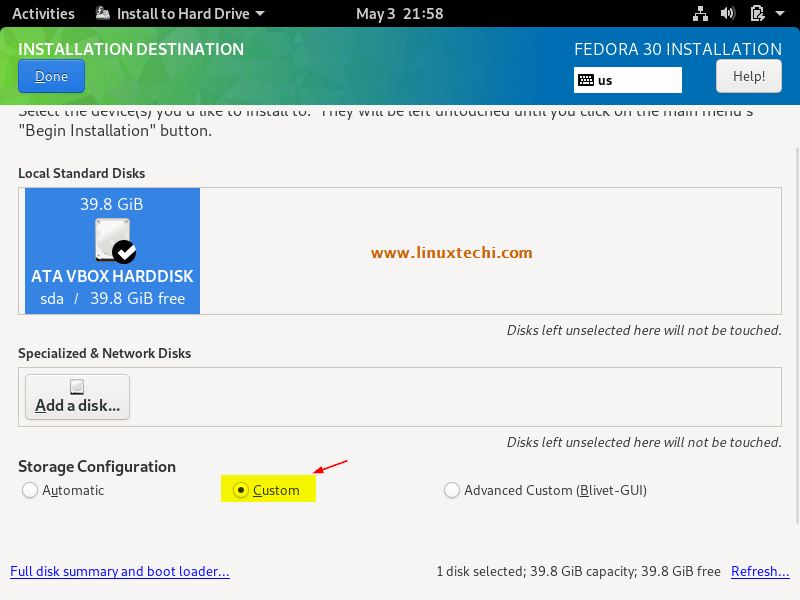
Click on Done
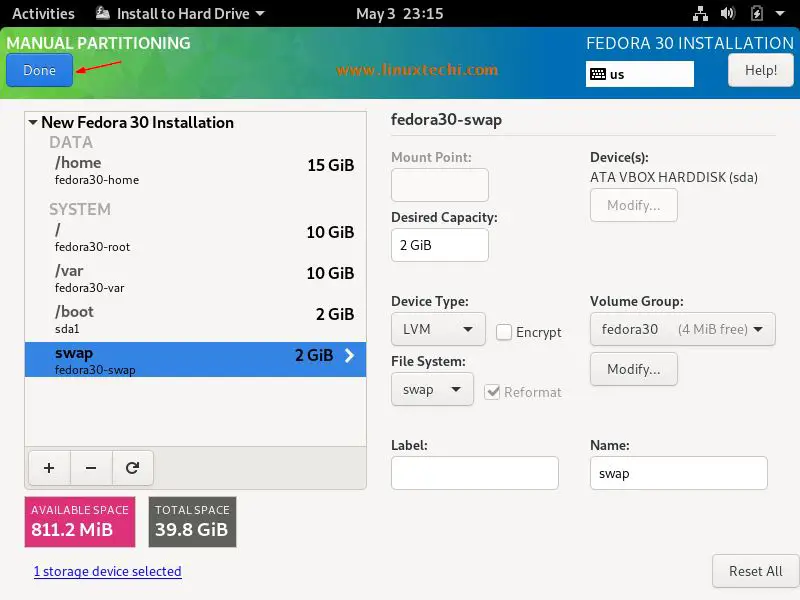
In this article I will demonstrate how to create LVM based custom partitions, in my case I have around 40 GB unallocated hard drive, so I will be creating following partitions on it,
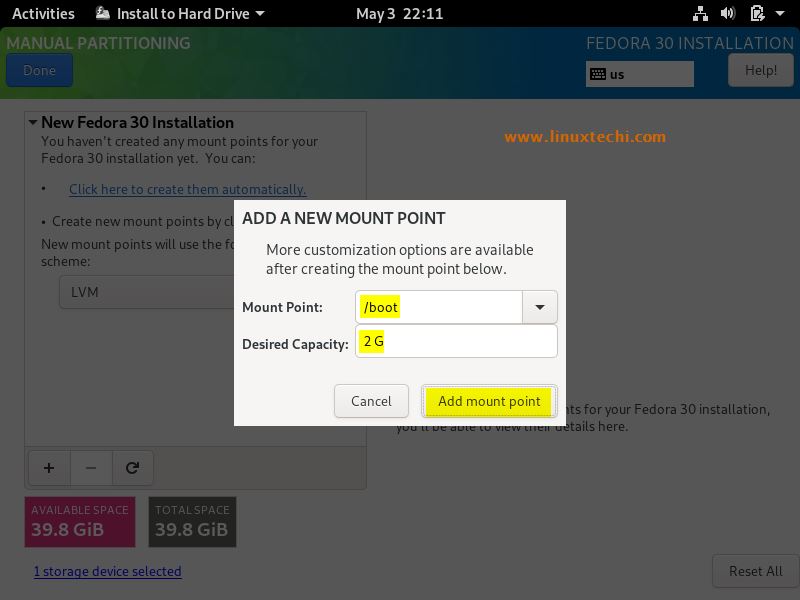
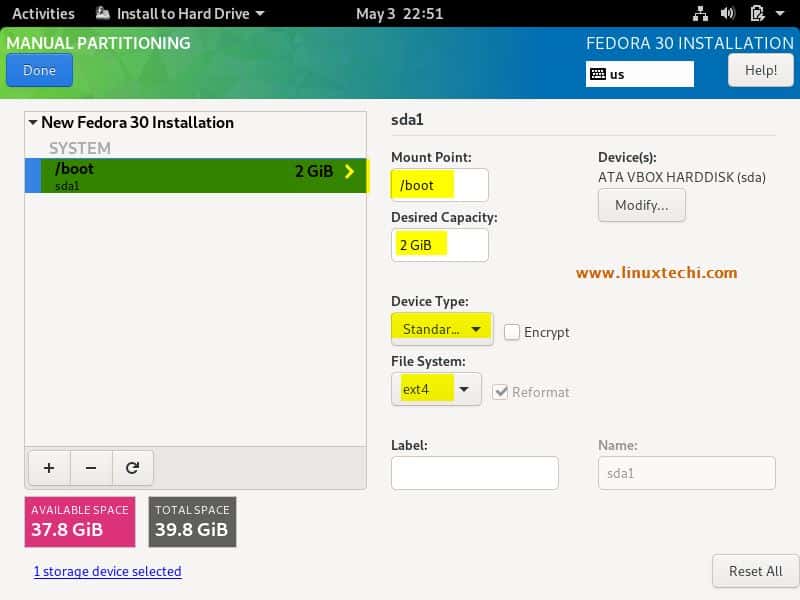
- /boot = 2 GB (ext4 file system)
- /home = 15 GB (ext4 file system)
- /var = 10 GB (ext4 file system)
- / = 10 GB (ext4 file system)
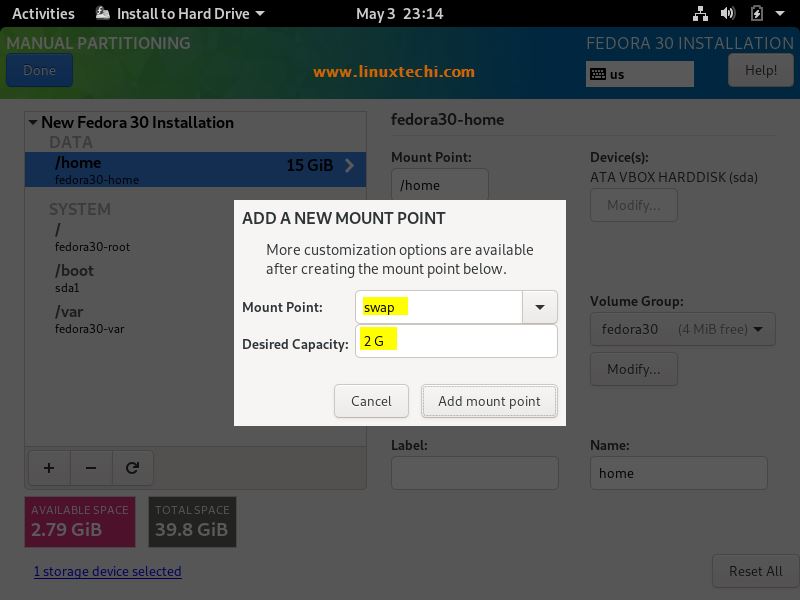
- Swap = 2 GB
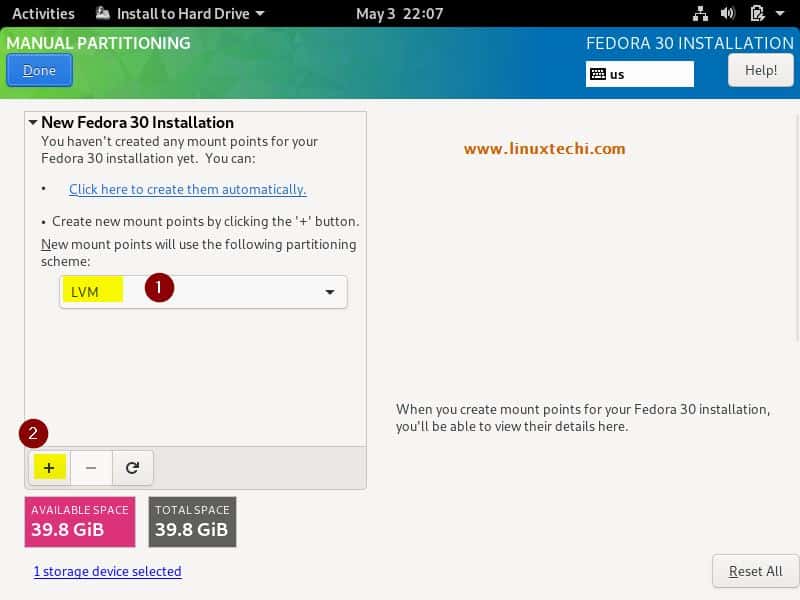
Select “LVM” as partitioning scheme and then click on plus (+) symbol,
Specify the mount point as /boot and partition size as 2 GB and then click on “Add mount point”
Now create next partition as /home of size 15 GB, Click on + symbol
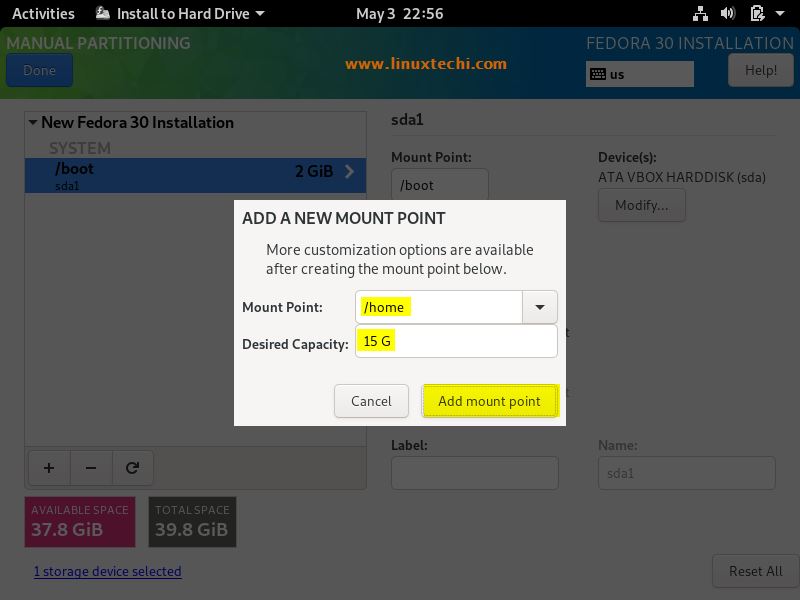
Click on “Add mount point”
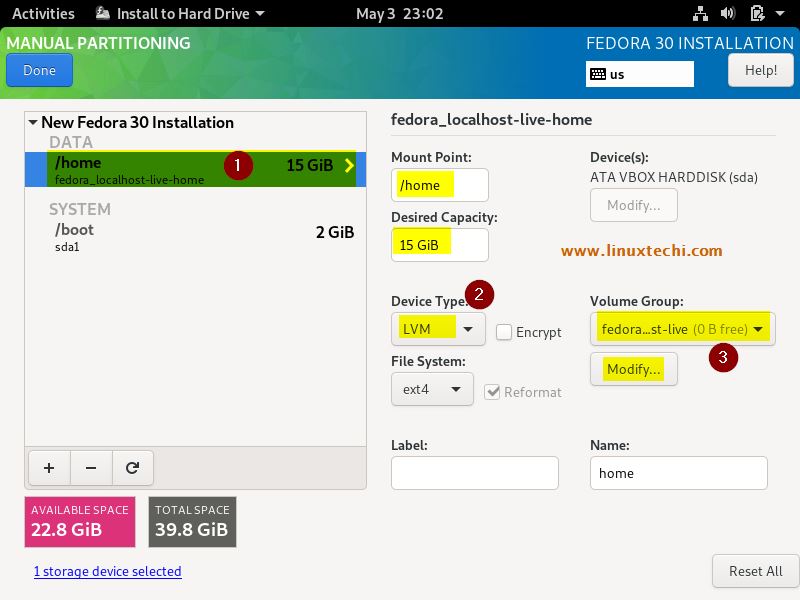
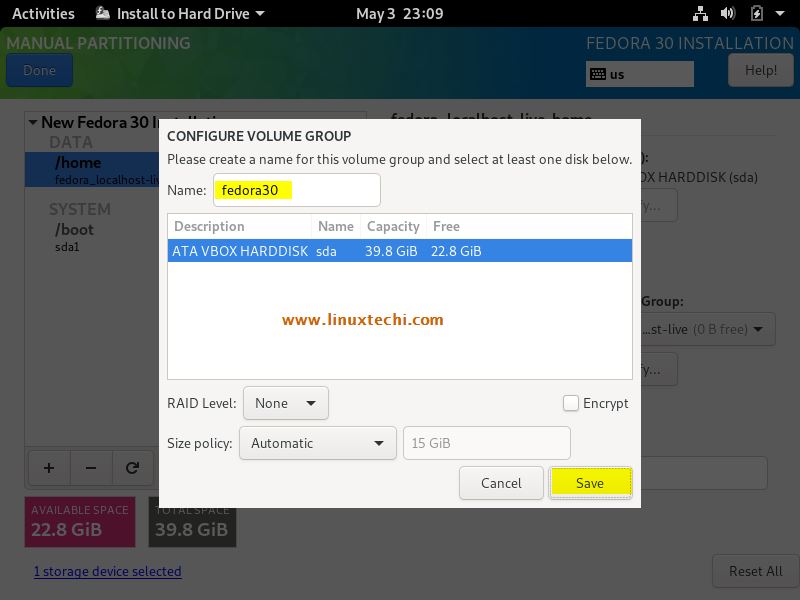
If you might have noticed, /home partition is created as LVM partition under default Volume Group, if you wish to change default Volume Group name then click on “Modify” option from Volume Group Tab,
Mention the Volume Group name you want to set and then click on Save. Now onward all the LVM partition will be part of fedora30 volume group.
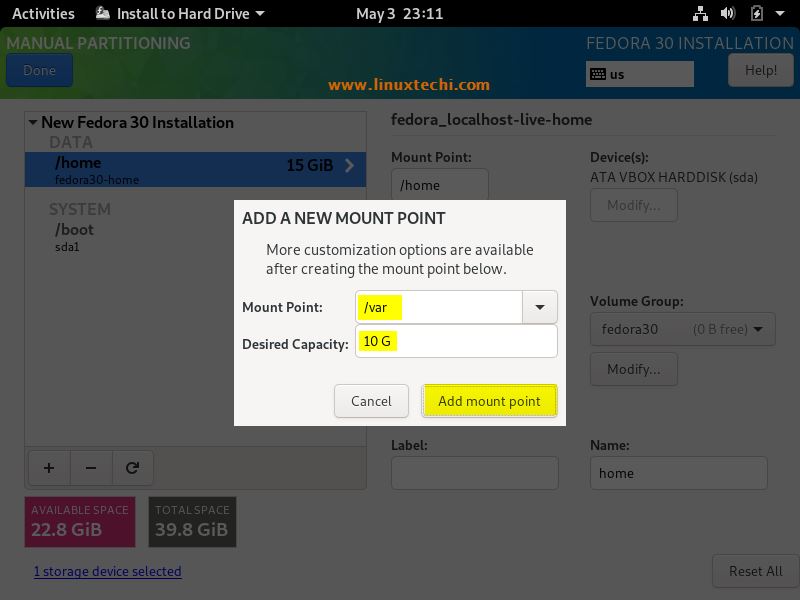
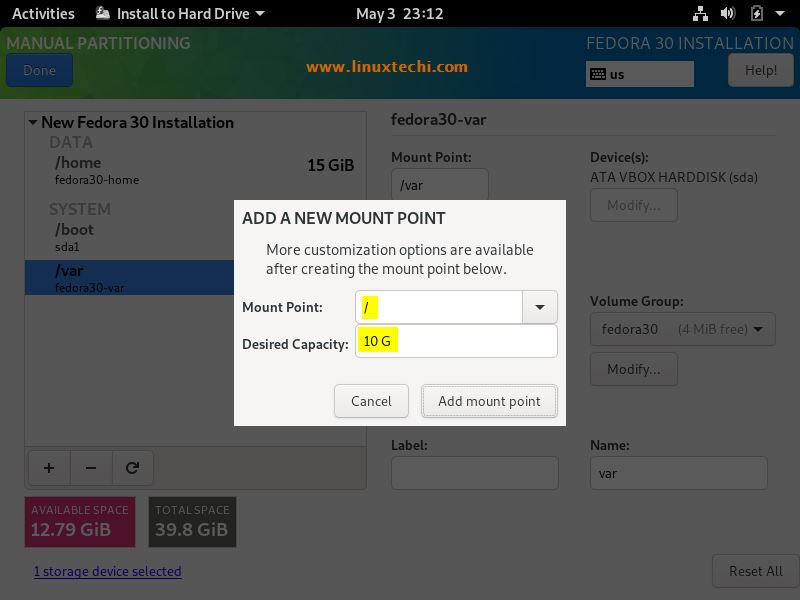
Similarly create the next two partitions /var and / of size 10 GB respectively,
/var partition:
/ (slash) partition:
Now create the last partition as swap of size 2 GB,
In the next window, click on Done
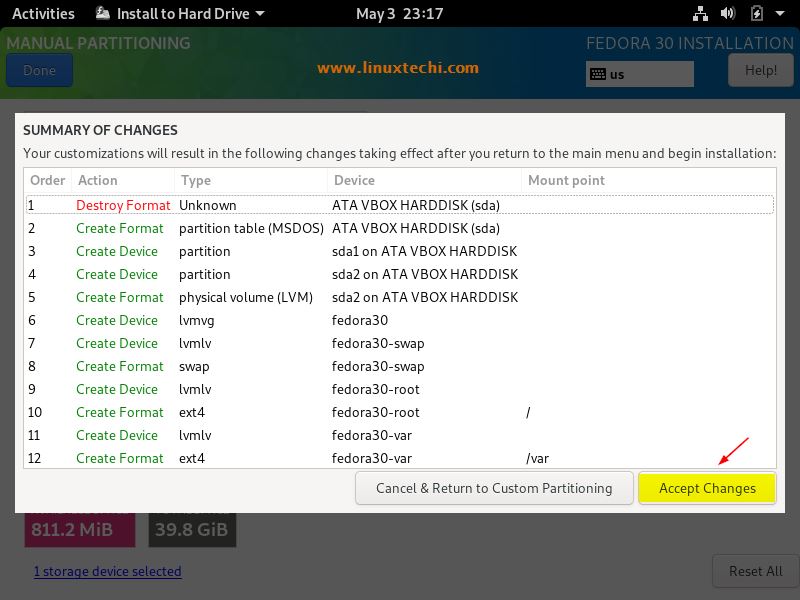
In the next screen, choose “Accept Changes”
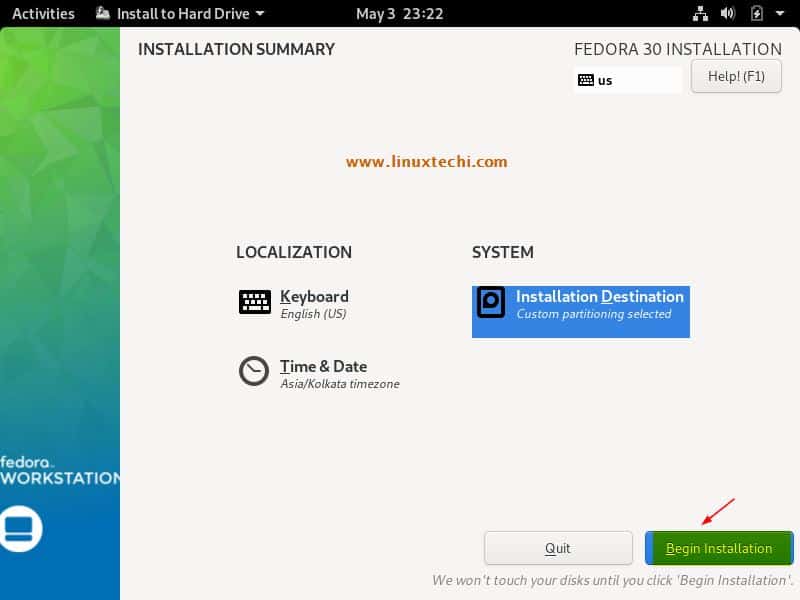
Now we will get Installation Summary window, here you can also change the time zone that suits to your installation and then click on “Begin Installation”
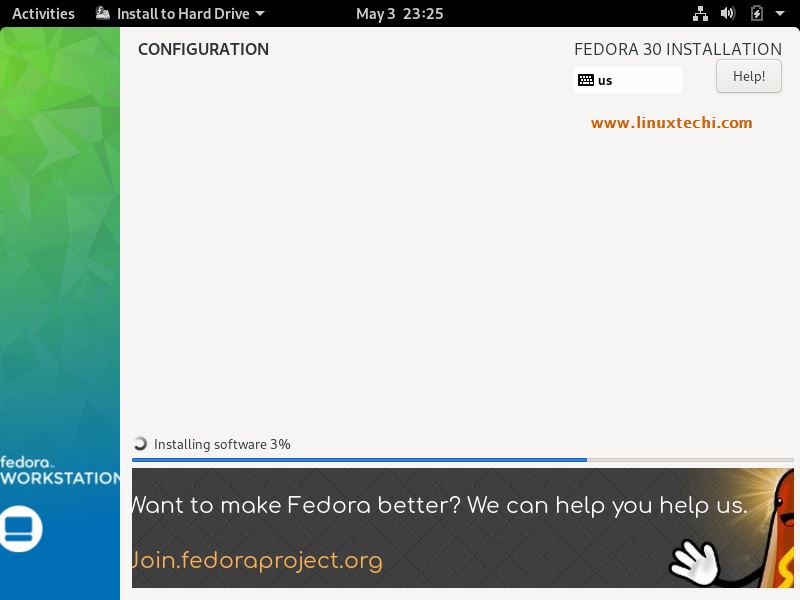
Step:7) Fedora 30 Installation started
In this step we can see Fedora 30 Installation has been started and it is in progress,
Once the Installation is completed, you will be prompted to restart your system
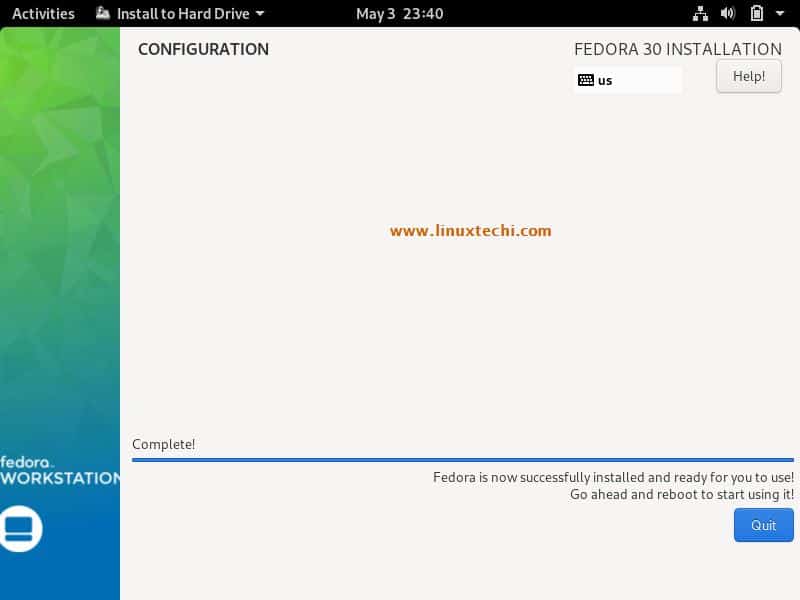
Click on Quit and reboot your system.
Don’t forget the Change boot medium from Bios settings so your system boots up with hard disk.
Step:8) Welcome message and login Screen after reboot
When we first time reboot Fedora 30 system after the successful installation, we will get below welcome screen,
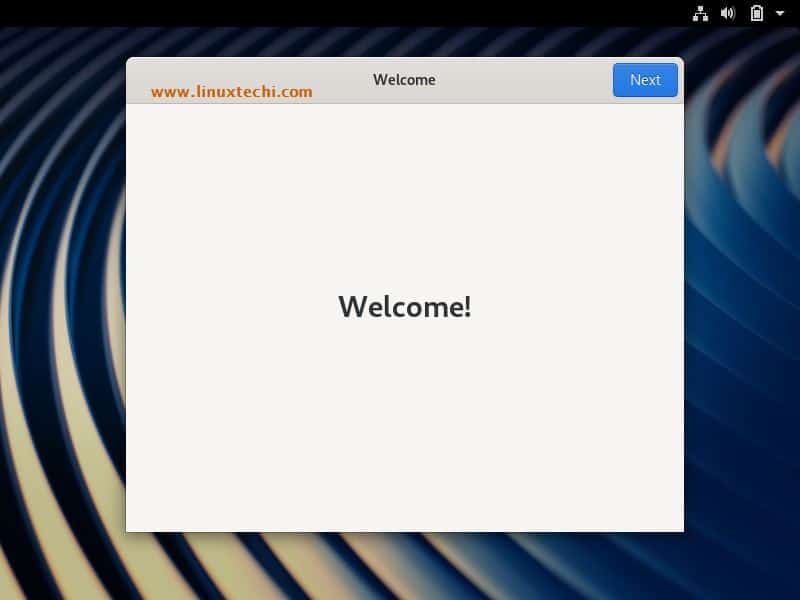
Click on Next
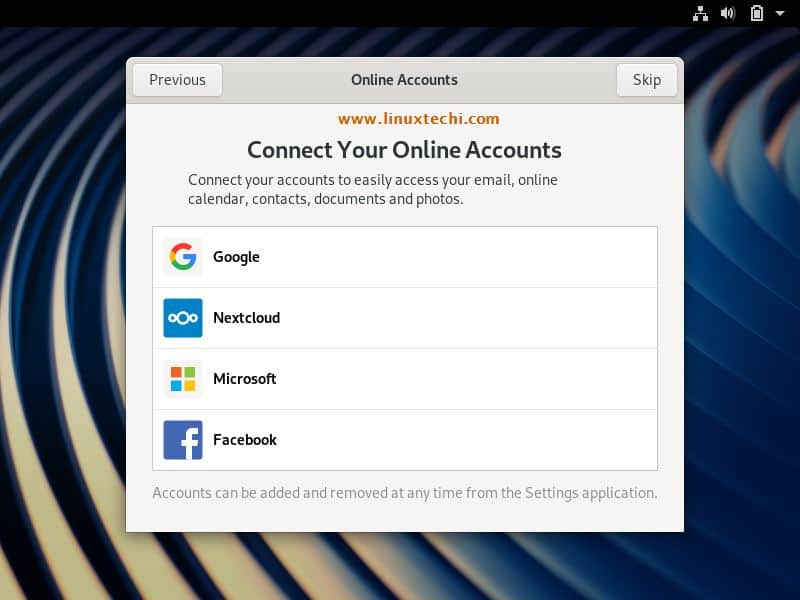
In the next screen you can Sync your online accounts or else you can skip,
In the next window you will be required to specify the local account (user name) and its password, later this account will be used to login to the system
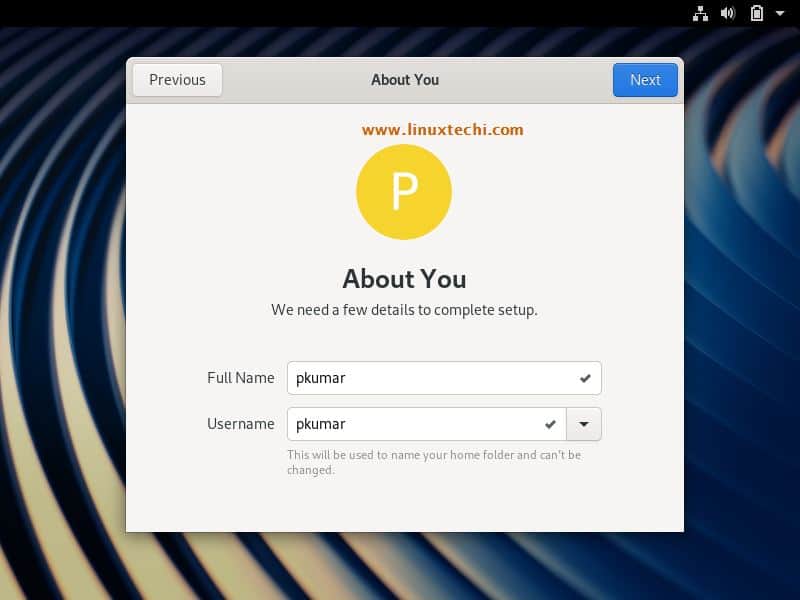
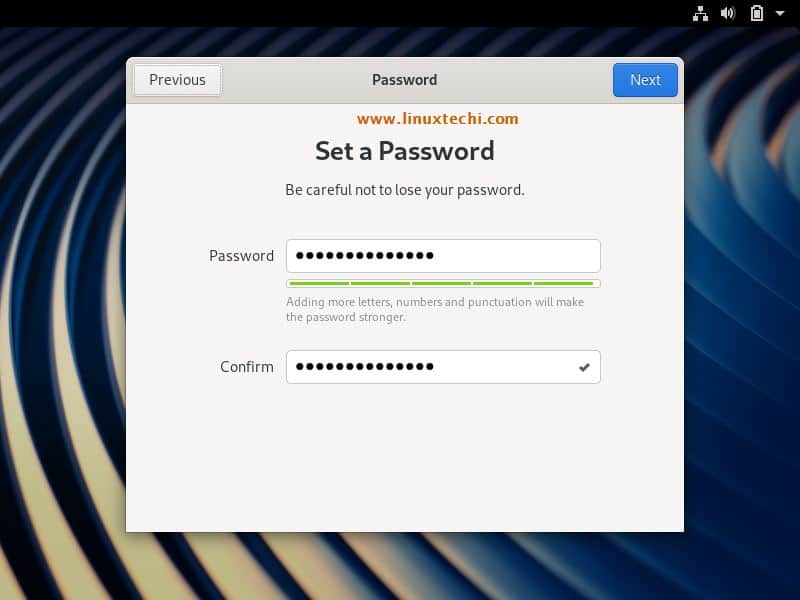
Click on Next
And finally, we will get below screen which confirms that we are ready to use Fedora 30,
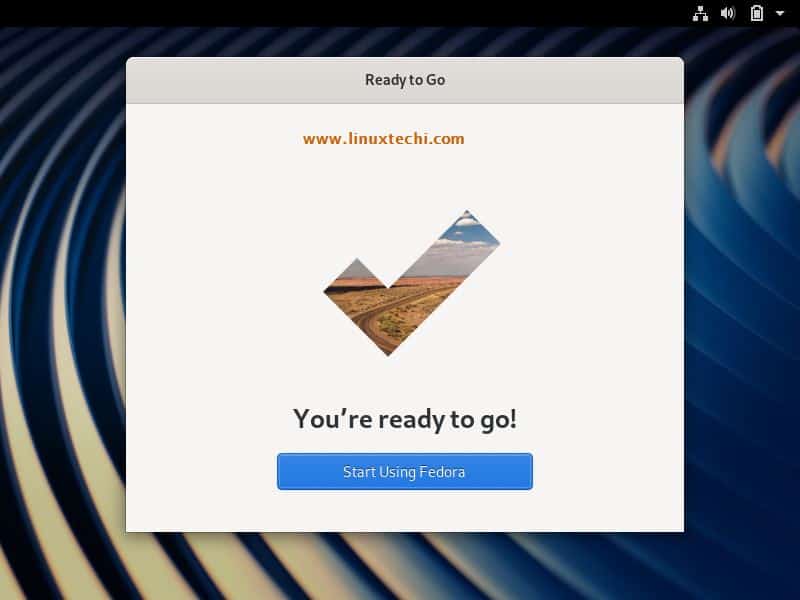
Click on “Start Using Fedora”

Above Gnome Desktop Screen confirms that we have successfully installed Fedora 30 Workstation, now explore it and have fun ?
In Fedora 30 workstation, if you want to install any packages or software from command line use DNF command.
Read More On: 26 DNF Command Examples for Package Management in Fedora Linux
I used a live DVD to install Fedora 30 on my free drive 262 Gig. Went thru all the stops and rebooted and nothing Still have windows, no boot manager, no linux.
Nowhere during the installation of Fedora 30 did it ask me about creating an administrator account. I find that, once installed, I can’t do sudo commands and don’t have rights to access the sudoers file. What am I missing?
Hi Mister Ricky.
Just change the root password and then su will work. To do this just type “sudo passwd root” follow the prompts and it will let you change the password. Once this is done, then you use su like normal.
Nothing is appearing after clicking on “install to hard drive” on Virtual Box and in my Dell Venue 8 pro, seems like the “Install to Hard drive” is not turning on, any help..?
hi just installed Fedora -KDE- live 30 on dell inspiron 5565 system asked to quit and reboot (Step:8) but can’t seem to find the hard drive to boot up from keeps pointing to the pendrive, i need help
Hi,
Change the Boot medium from USB to Hard disk from Bios Setup.
Thanking you for the post
How to clone the hdd to another hdd using softwares [ex:amoei,norton ghost,acronis and redo]
Am expecting step by step guide with screenshots very soon
Thanking you
i need to install 32bit fedora on my machine, and by default it installs 64bit, please help with the same.
Excellent tutorial! Thank you!