Good News for Linux Desktop geeks, recently Elementary OS 5.0 also known as Juno has been released. Elementary OS is one of the exciting Linux distribution based on Ubuntu. It comes with own pantheon desktop environment and can be considered as alternative option for MacOS and Windows.
Some of the new features that are included in this release are:
- Nigh Light Mode- Using this option we can set colours of desktop screen based on Sunrise and Sunset timings
- Parent Controls – Using this options parents can set the time limits and internet use for their kids.
- Updated Application Center
- Introduction of Elementary Color palette,
- Modified sound notifications
- Introduction of new payment system for applications in app store.
In this article we will discuss how to install Elementary OS 5.0 on Laptop & desktop with customize partitions.
Minimum system requirements for Elementary OS 5.0 (Juno)
- Dual Core 64-bit processor / Intel i3
- 1 GB RAM
- 15 GB Disk Space
- Internet Access (optional)
Elementary OS 5.0 Installations steps
Step:1) Download Elementary OS 5.0 ISO File
ISO file of elementary OS 5.0 or Juno is available on its official web site. Use the below URL to download it,
Download Elementary OS 5.0 “Juno”
Step:2) Prepare Bootable media for Elementary OS 5.0
Once you have downloaded the elementary iso file, create a bootable media either as DVD or USB using the iso file.
Read More : How to Create Bootable USB Disk / DVD on Ubuntu / Linux Mint
Reboot the target system on which you will perform elementary OS 5.0 installation and make sure to change the boot medium as “DVD or USB”
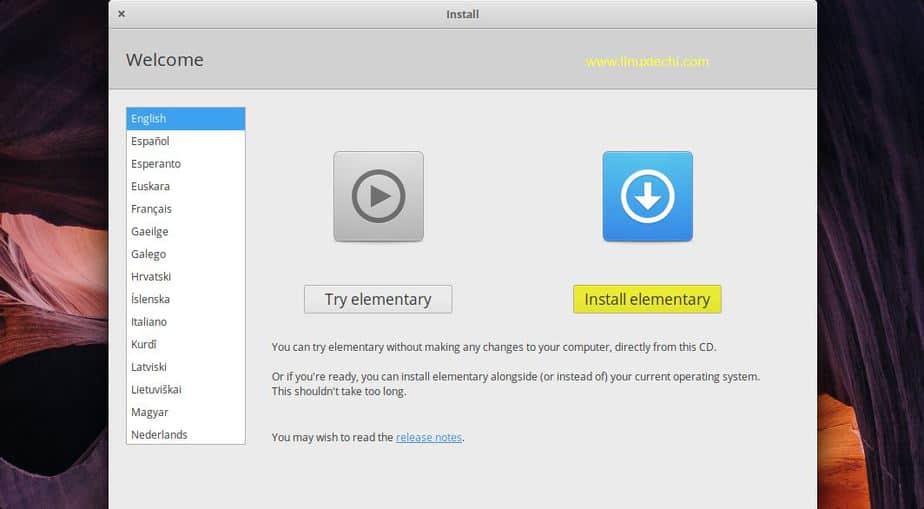
Step:3: Choose Install Elementary OS
When the system boots up with bootable media, then we will get below screen, Click on “Install elementary” option
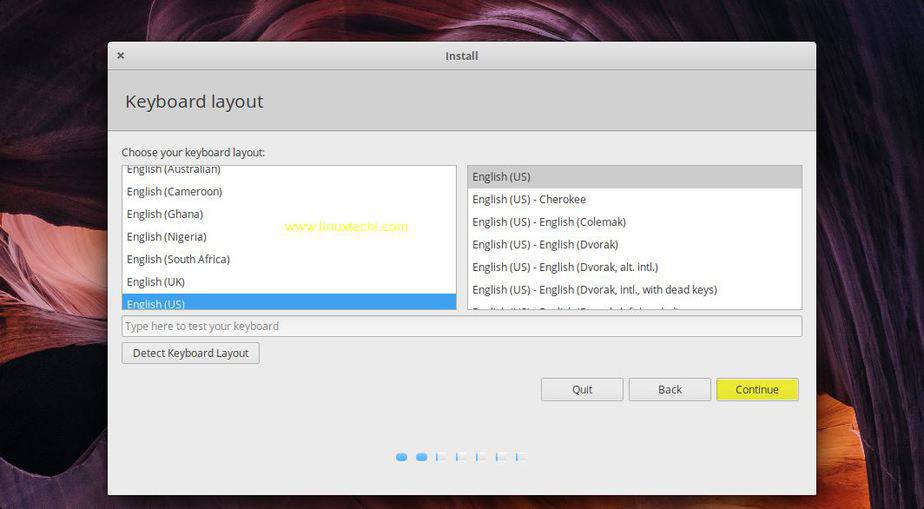
Step:4) Select Your Preferred Keyboard Layout
Select your preferred keyboard layout for your elementary OS 5.0 installation and then click on continue
Step:5) Download Updates and software during Elementary OS Installation
If your system is connected to internet and want to download latest updates of elementary OS 5.0 during the installation, then select the first option and if you want to download software like third party graphics software and media software then select the second option too.
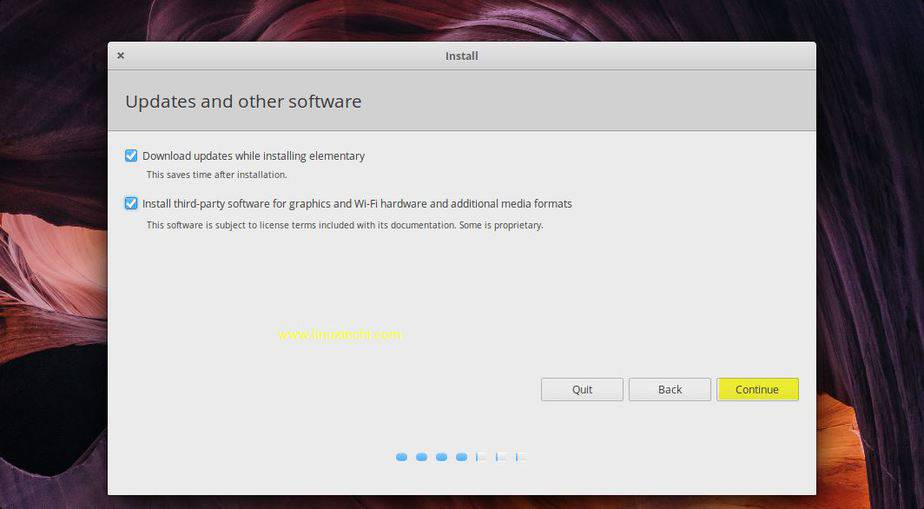
Click on Continue
Step:6) Choose your preferred Installation type
At this step, you will get following installation type for Elementary OS 5.0,
- Erase disk and Install elementary
- Encrypt the new elementary installation for security
- Use LVM with new elementary Installation
- Something else
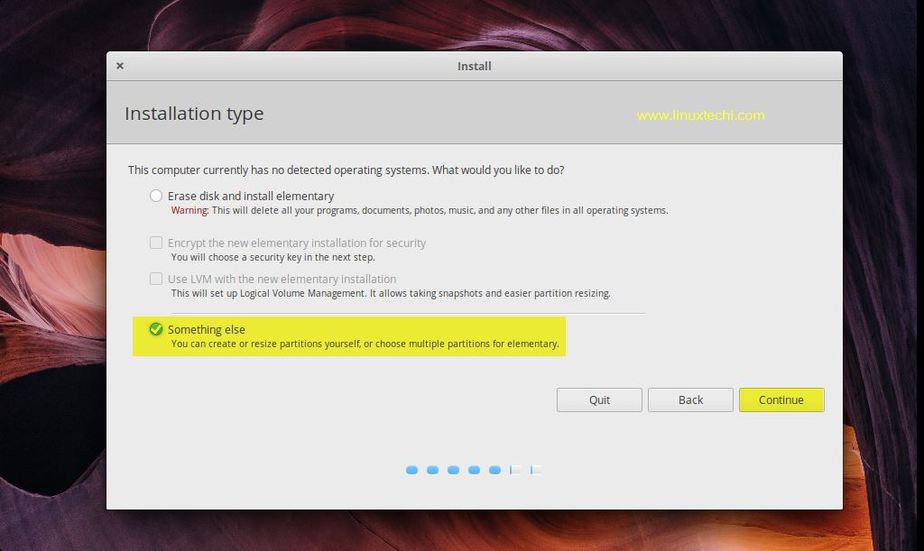
If you are new to Linux and does not want to create own partitions then select the first option, it will delete everything from the disk and installer will automatically create partitions on the disk.
If you are planning to have own customize partitions, then select “Something else“.
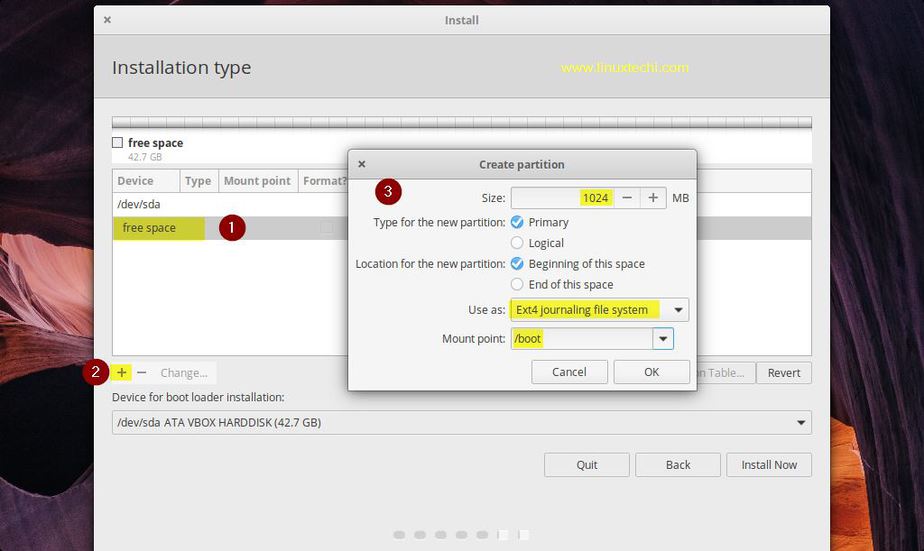
In my case I have around 40 GB disk space for elementary OS installation and will create following customize partitions by choosing the option “Something else”
- /boot = 1 GB (ext4 file system)
- /home = 20 GB (ext4 file system)
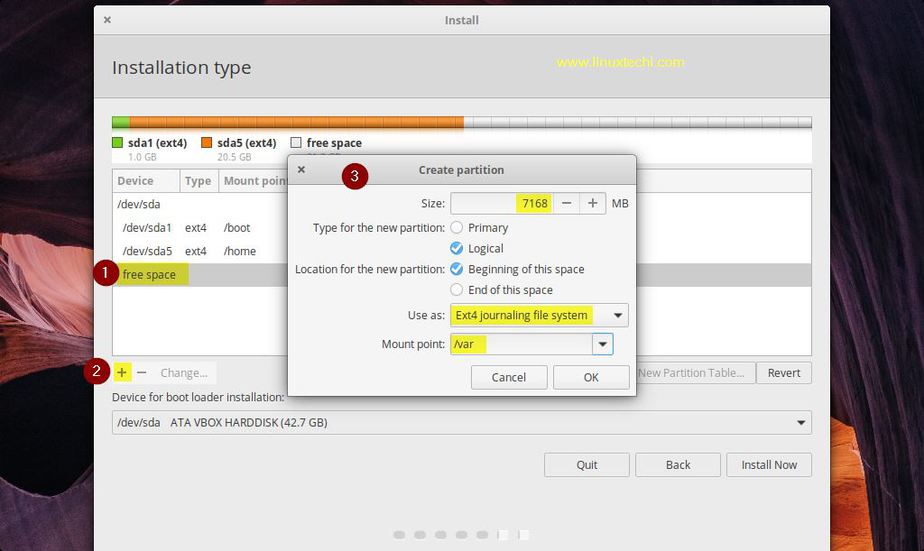
- /var = 7 GB (ext4 file system)
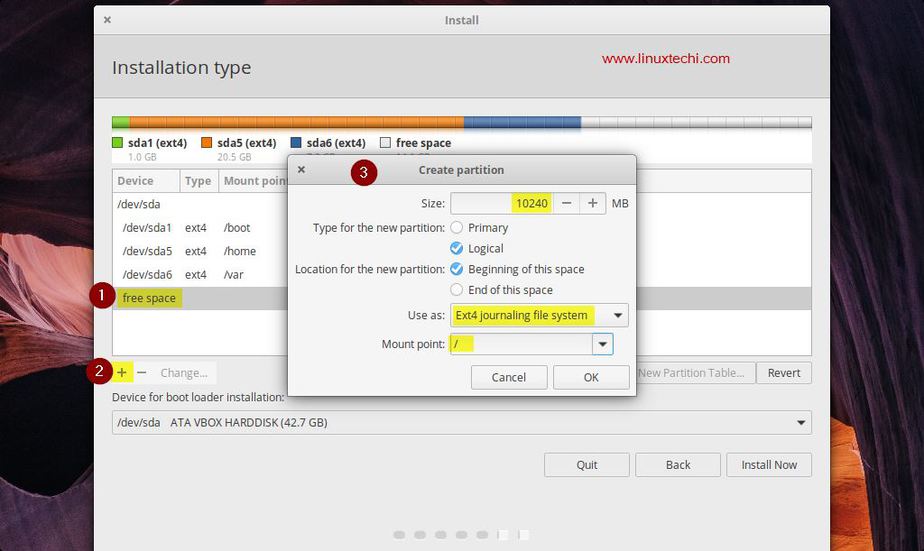
- / = 10 GB (ext4 file system)
- Swap = 2 GB
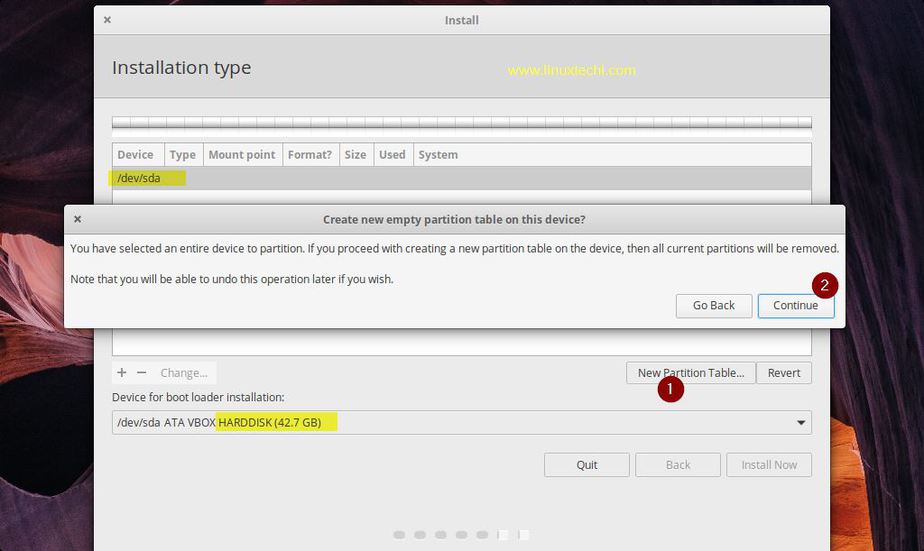
Create an empty partition table on the entire disk, Click on “New Partition Table” and then click on “Continue”
Now create your first partition as /boot of size of size 1 GB, Select the free disk and then click in “+” symbol and specify size, file system type and mount point
Similarly Create partition of /home (20 GB), /var (7GB) and / (10 GB) respectively.
/home partition
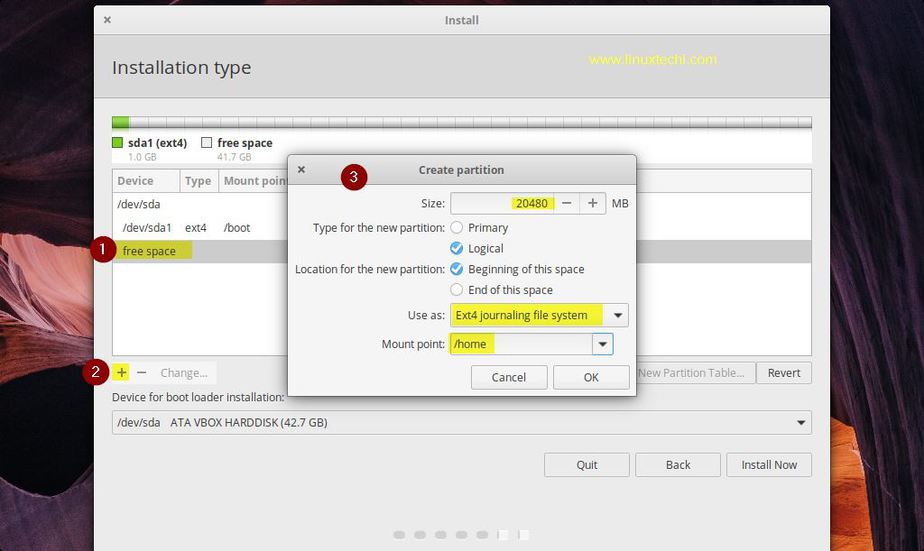
Click on OK
/var partition
/ or slash root partition
In the last create Swap partition of size 2 GB
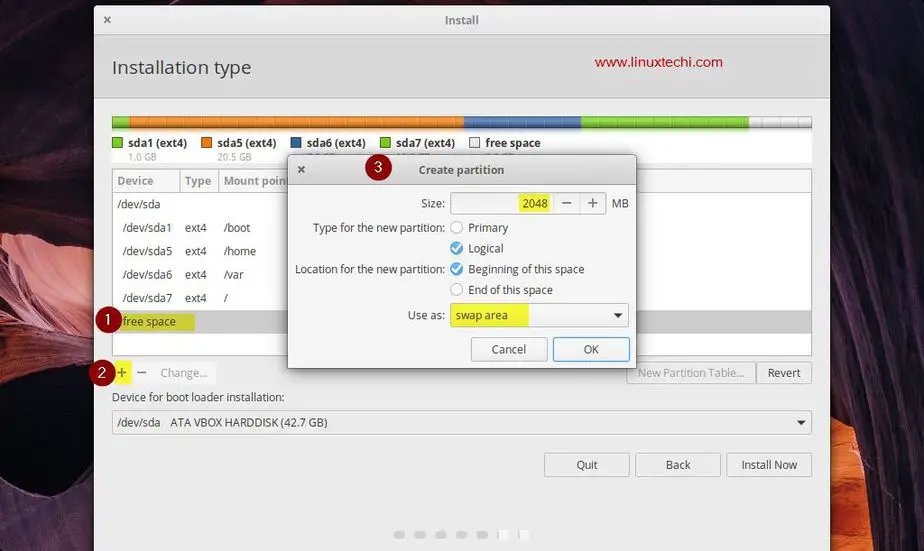
Click on OK
Once you are done with partitions then click on “Install Now” option and then click on “Continue” to write the changes to disk,

Step:7) Select your preferred Location for Time Zone
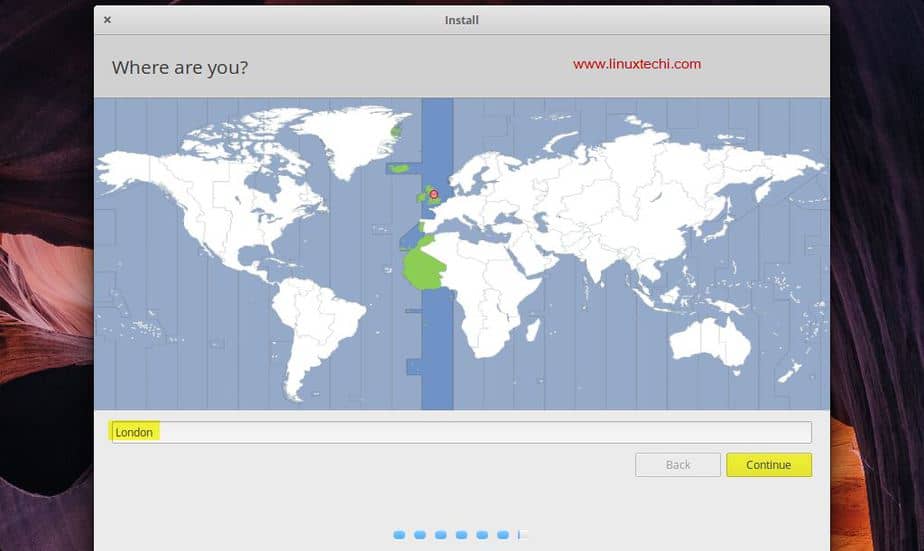
Click on Continue to proceed,
Step:8) Set Your System Hostname and Create User Credentials
Set the hostname for your system and create user and specify its password, in my case I have used the followings,
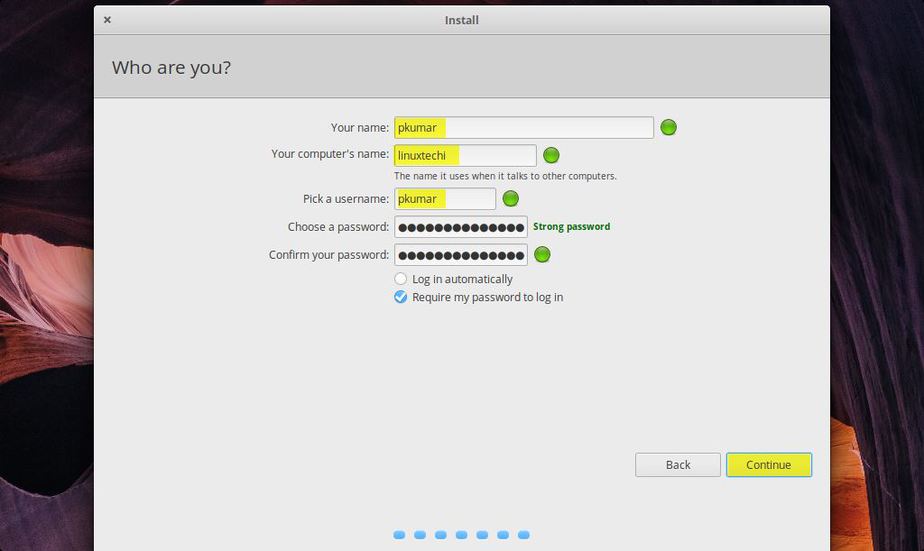
Click on Continue to start the installation
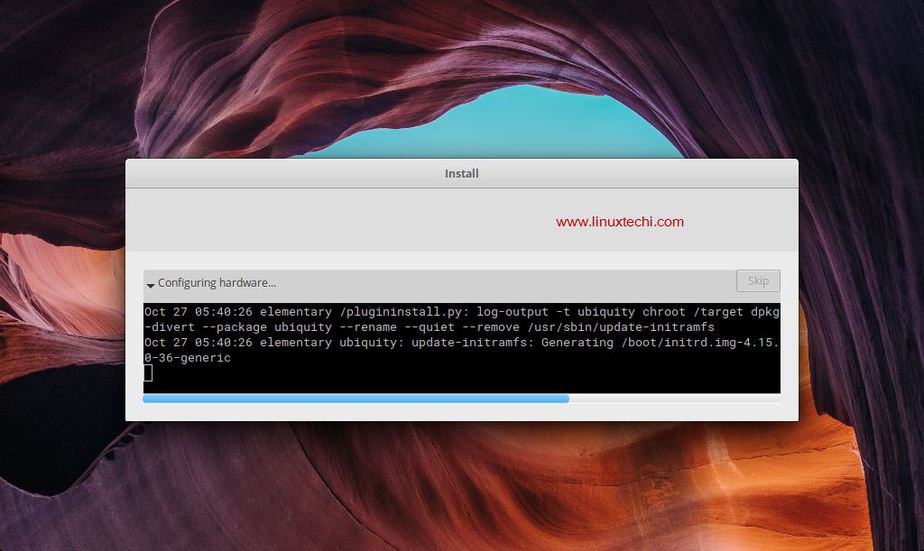
Step:9) Installation Progress of Elementary OS 5.0
As we can see, installation has been started and is in progress.
Once the installation is completed successfully, installer will prompt us to reboot the system,

Click on “Restart Now” to reboot the system and also make sure you change the boot medium as “disk” so that system boots up with hard disk.
Step:10) Elementary OS 5.0 Login Screen and Desktop
When the system comes up after the reboot, we will get below screen, use the same user credentials that we have created during the installation.

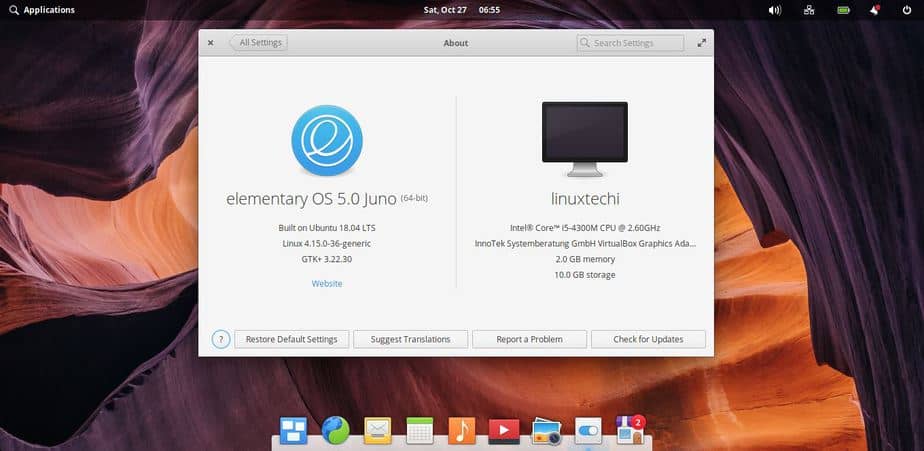
This confirms that Elementary OS 5.0 “Juno” has been installed successfully. Now explore this exciting Linux distribution and have fun ?
Im having trouble between step 9 and 10, when i choose restart and change the boot option to hard drive, and ive even taken the usb out, it immediatly shuts off and restarts to the boot screen over and over, if the usb is inserted it goes to the black screen sating install emementary again.
Did you get Installation completed message, also check how many disks are attached to your system and on which disk Bootloader has been installed.
Hello and thank you for such a detailed walkthrough, sorry for the dumb question this will be the first time I install Linux on my main rig. I have split my 250GB boot NVME and my desired Linux partition sits @ 112695MB
My questions is what should my /boot, /var, /Home, /swop be?
Many thanks