Linux Mint 20, also referred to as Ulyana, was released in June 2020 and packs with a basket of new features and enhancements to improve your overall user experience. If you have Windows 10 already on your PC and would like to reap the full benefits of the latest Mint release, you can install it alongside Windows 10.
Upon booting, you will be presented with the option of booting into either Linux Mint 20 or Windows 10. In this guide, we show you how to dual boot Windows 10 and Linux Mint 20.
Prerequisites
Before embarking on configuring the dual-boot setup, ensure that the following requirements are met:
- A bootable installation medium of Linux Mint 20 (Either USB or DVD)
- A fast and stable internet connection
Note : In Windows 10, we can make a bootable USB drive from ISO file using Rufus software. Use the following URL to download Linux Mint 20:
Step 1) Create a free partition on Windows for Linux installation
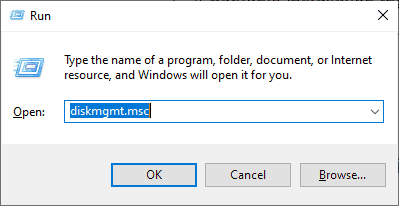
To start off, we need to partition the hard drive and create a separate partition for installation of Linux Mint. So, launch the disk management utility by pressing ‘Windows key + R’ to open the run dialogue. Then type diskmgmt.msc and hit ‘ENTER’.
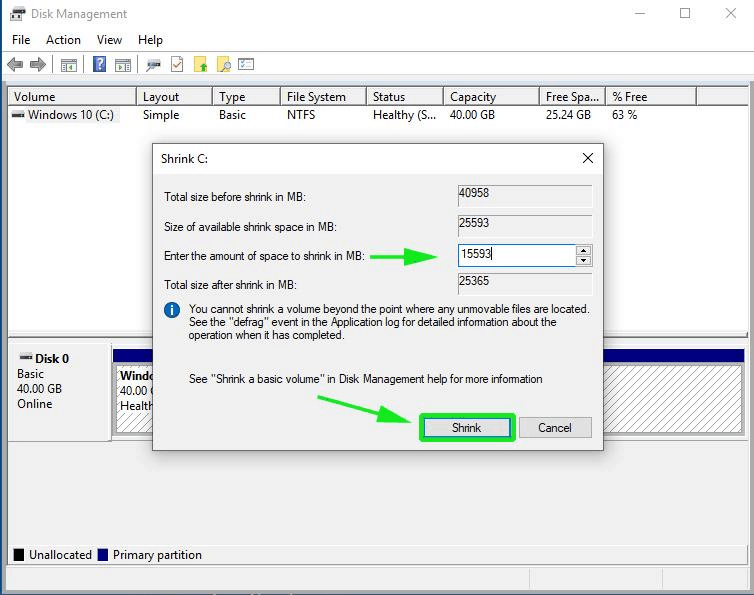
The Disk Management utility lists all the hard drives attached to the PC and their partitions. In our example, we only have a single hard drive with one partition. We are going to shrink this partition and create a free partition for our Linux Mint 20 installation. Right click on the partition and select the ‘Shrink’ option

On the pop-up that appears, specify the amount of space that you’d like to shrink the partition to. In this case, we have allocated 15593 MB to the partition that we are going to install Linux Mint on. Once done, click on the ‘Shrink’ button to shrink the volume and create the free partition.
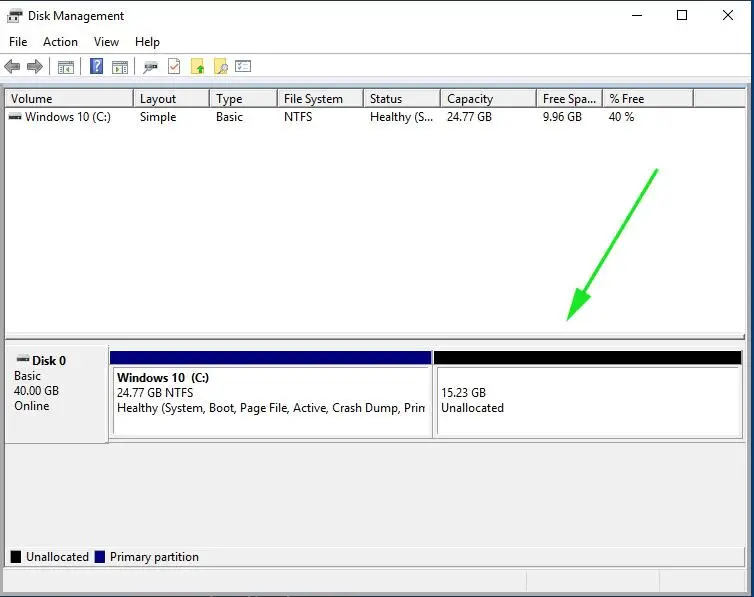
The unallocated space is now ready to be used for the installation of Linux Mint.
All you have to do now is to plug in your bootable USB drive and reboot your PC. Be sure to change the BIOS settings and assign your USB/DVD medium the highest boot priority. Thereafter, save the changes and once again, reboot your system.
Step 2) Begin the Installation of Linux Mint 20
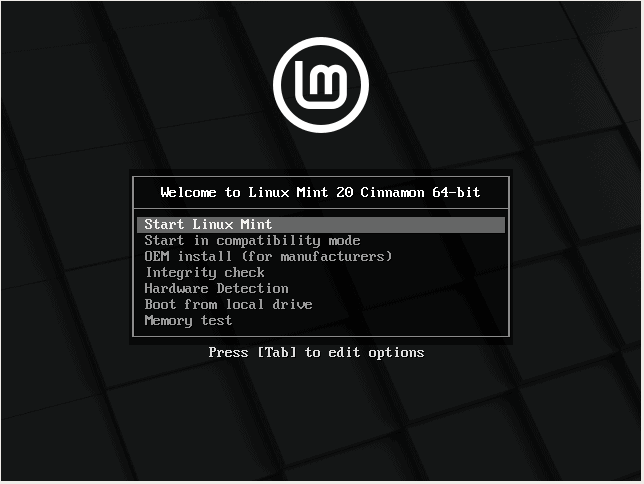
Upon rebooting, a grub menu will be displayed with a list of options shown. Select the first option to begin the installation.
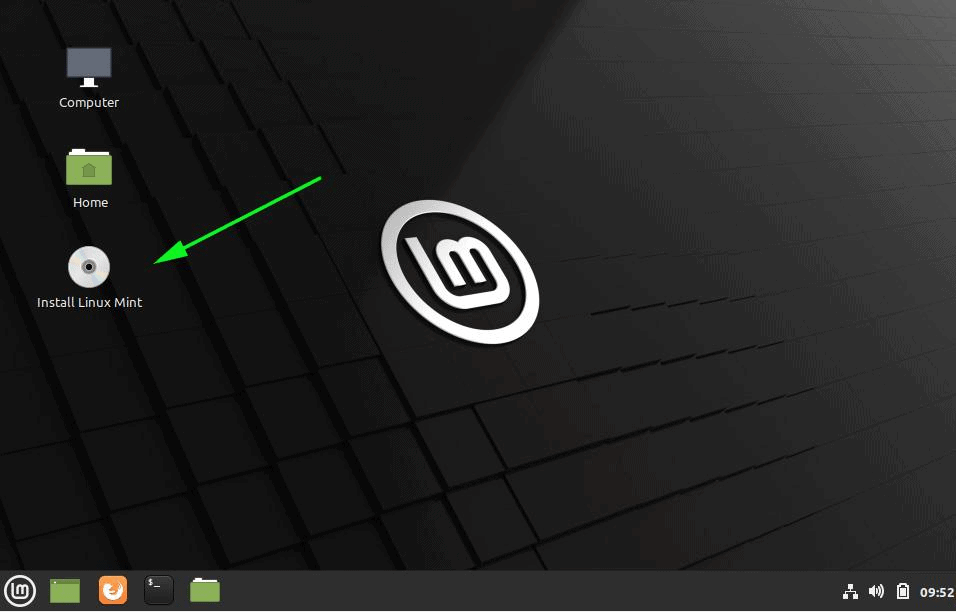
This ushers you to the Linux Mint 20 desktop. Mint gives you an option to try out Mint without necessarily installing it. You can explore the new look and various features. But since we are interested in installing Mint, simply click on the ‘Install Linux Mint’ icon as shown.
Step 3) Choose Language and Keyboard Layout
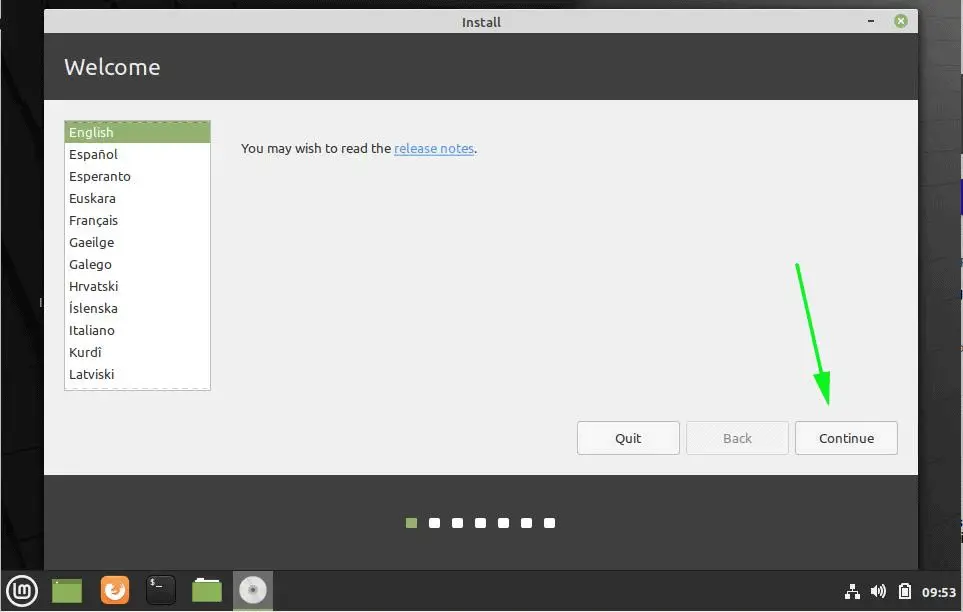
On the welcome page, select your preferred installation language and click on the ‘Continue’ button.
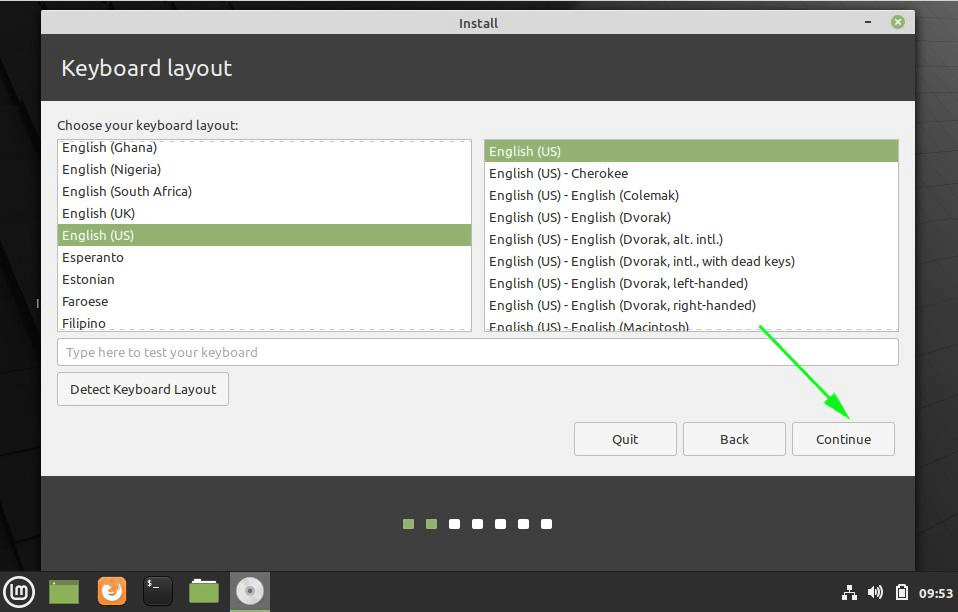
Next, select your keyboard layout as shown and click ‘Continue’.
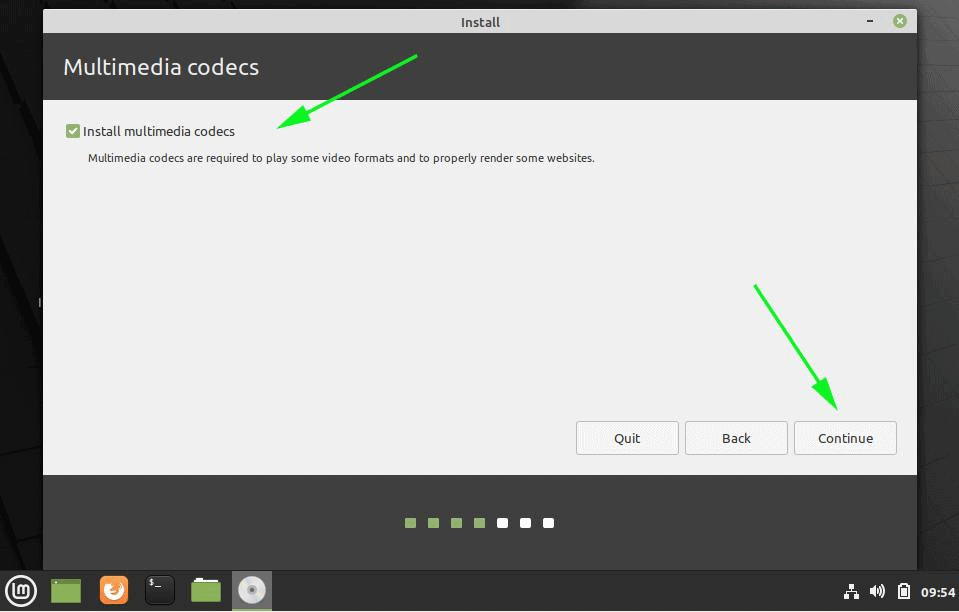
Step 4) Choose to ‘Install multimedia codecs’ during the installation
In the this step, check off the ‘Install multimedia codecs’ checkbox to install the latest multimedia codecs to enable you to play specific video formats such as MPEG-4, AVI and WMA.
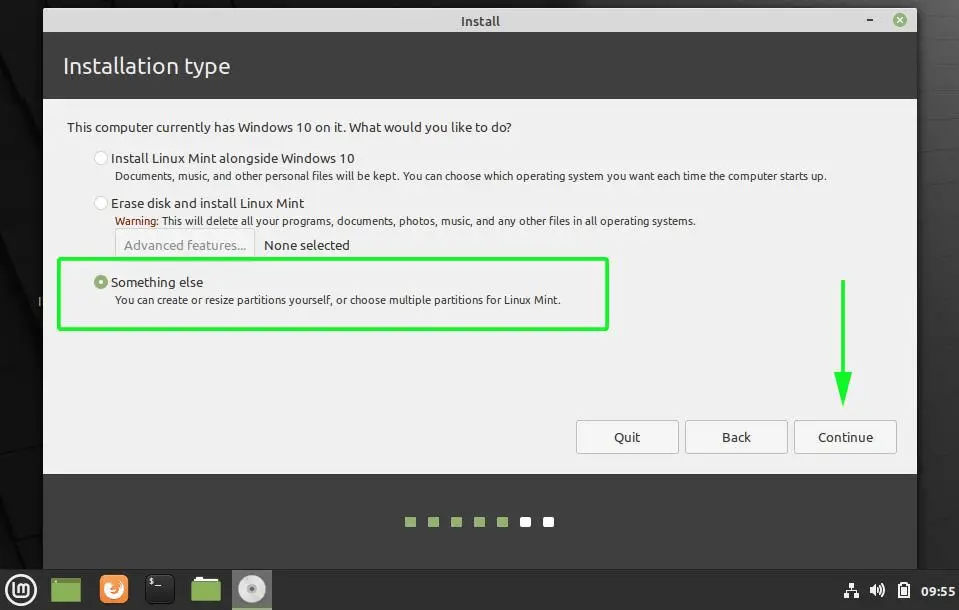
Step 5) Choose Installation type
This step gives you 3 options of how you’d like to install Linux Mint.
The first option allows you to Install Linux Mint alongside Windows 10. The installer will intelligently partition the hard drive to accommodate all the Linux partitions and reserve the NTFS partitions used by Windows 10. Select this option if you are not familiar with manual partitioning.
The second option – ‘Erase Disk and install Linux Mint’ – entirely erases the hard drive and lets you install Linux Mint. But that’s not what we want. We want to have a dual-boot setup where we shall have an option of booting into either Windows or Linux Mint upon rebooting. So steer clear from this option.
The last option ‘Something else’ , allows you to manually partition the hard drive. It gives you the flexibility to determine which partitions to create for your Mint installation and the disk space to assign those partitions. This opt is recommended for seasoned Linux users who are familiar with manual partitioning.
For this guide, we will go with this option since the first option is fairly easy. So click on ‘Something else’ and click the ‘Continue’ button.
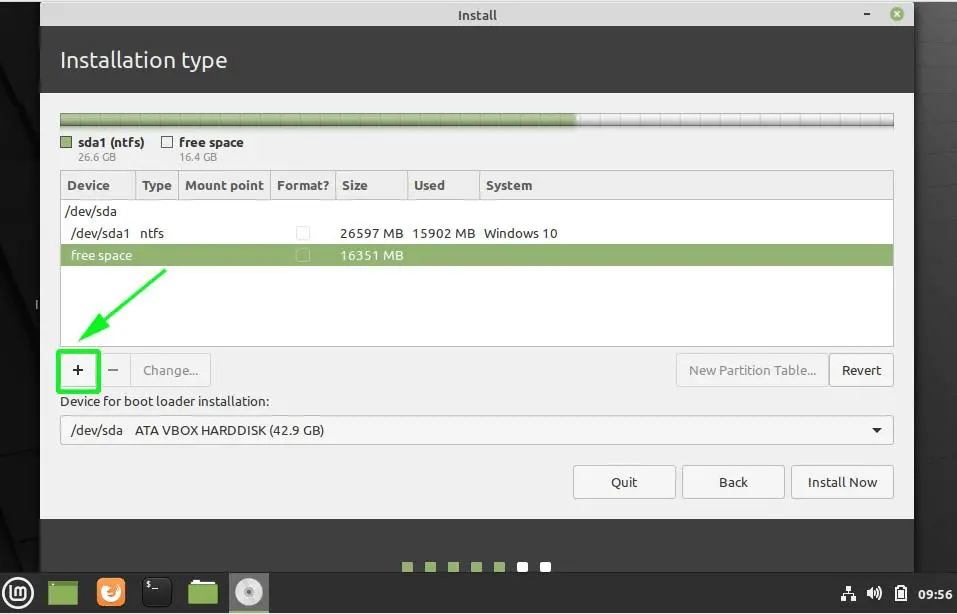
The next window will list all the partitions on your hard drive. As you will notice, you already have the Windows 10 NTFS partition and the free space we created earlier on by shrinking the hard drive.
We will use the free space to create partitions for Linux Mint 20. Therefore, select the free space entry and click on the plus sign [ + ] button.
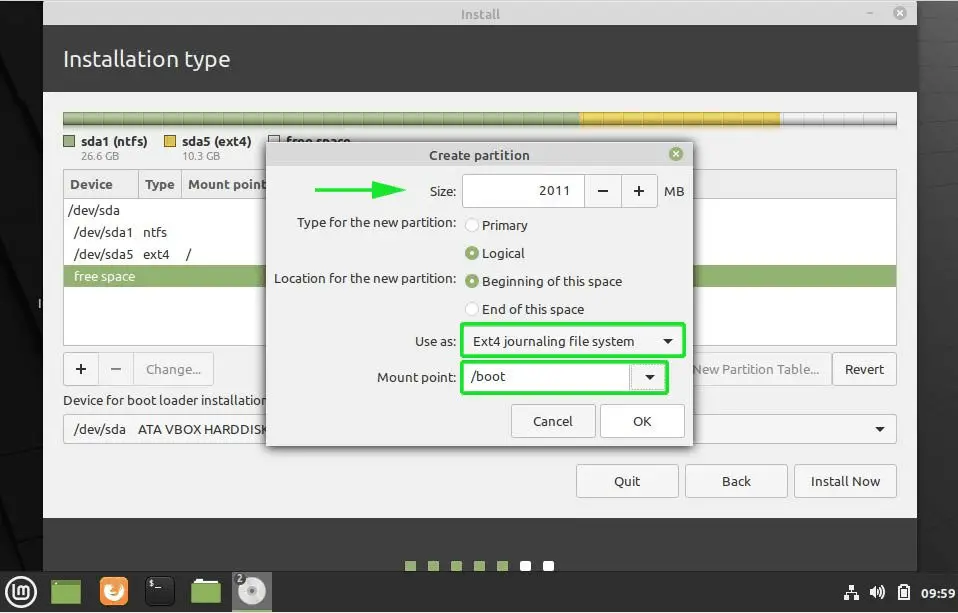
We are going to create the following mount points (Partitions)
- Root partition – / – 10340 MB
- Boot partition – /boot – 2000 MB
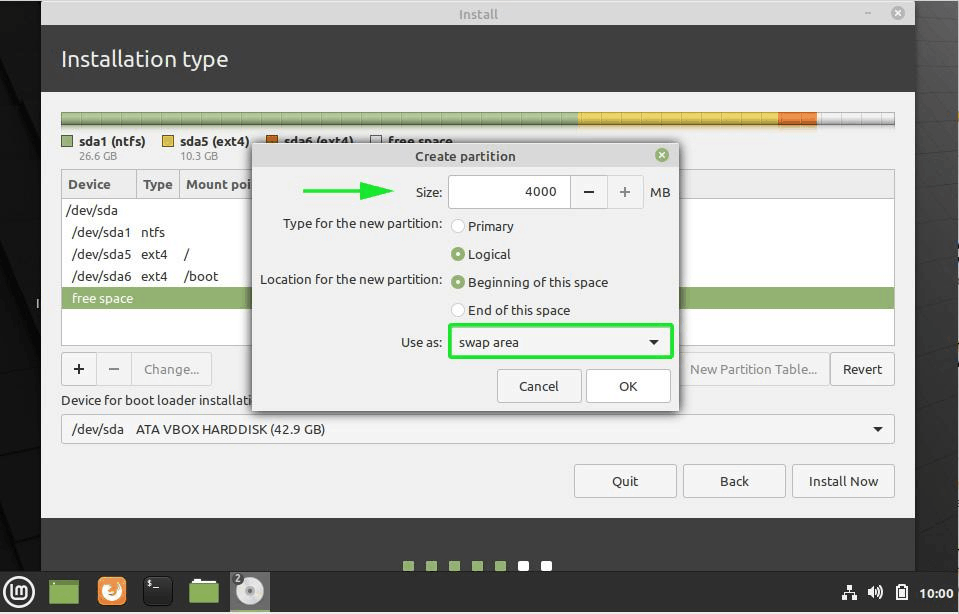
- Swap filesystem – 4000 MB
On the ‘create partition’ pop-up, specify the size of the root partition, filesystem to be used and mount point ( / ). Then Click ‘OK’

If you look closely, the root partition, labelled /dev/sda5 has been created.

To create the boot partition, repeat the same procedure by clicking the plus sign [ + ] and once again specifying the size of the partition, file system and choosing the partition type as /boot as shown.
The boot partition will be created labelled as /dev/sda6.
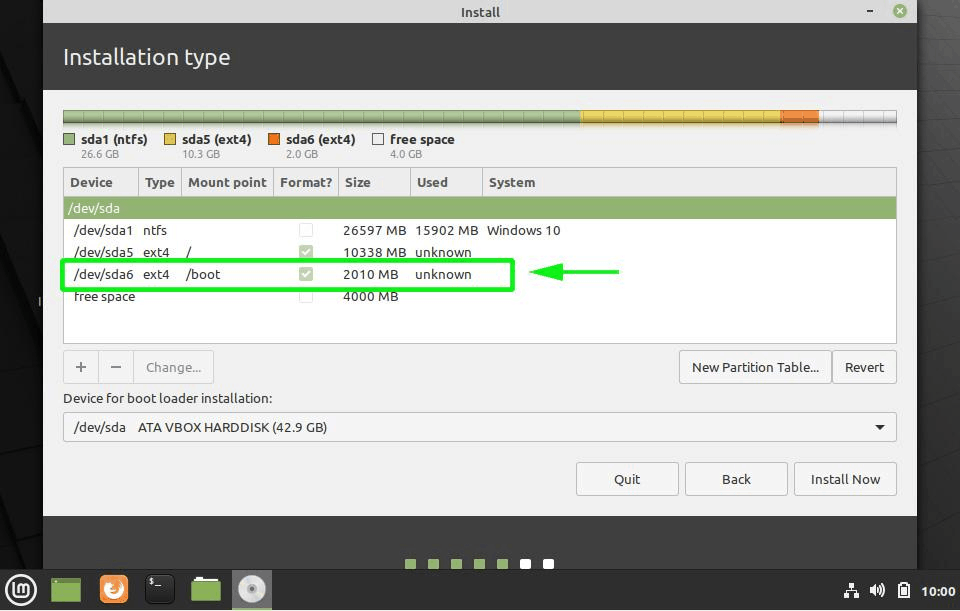
Finally create the swap filesystem. Swap is a virtual space that is created on the hard disk and comes in handy when the RAM is almost getting depleted. It supplements the RAM and avoids instances of processes getting killed when the RAM is overwhelmed.
The complete partition table should resemble what we have below with both Windows and Linux partitions. To proceed with the installation click the ‘Install Now’ button.
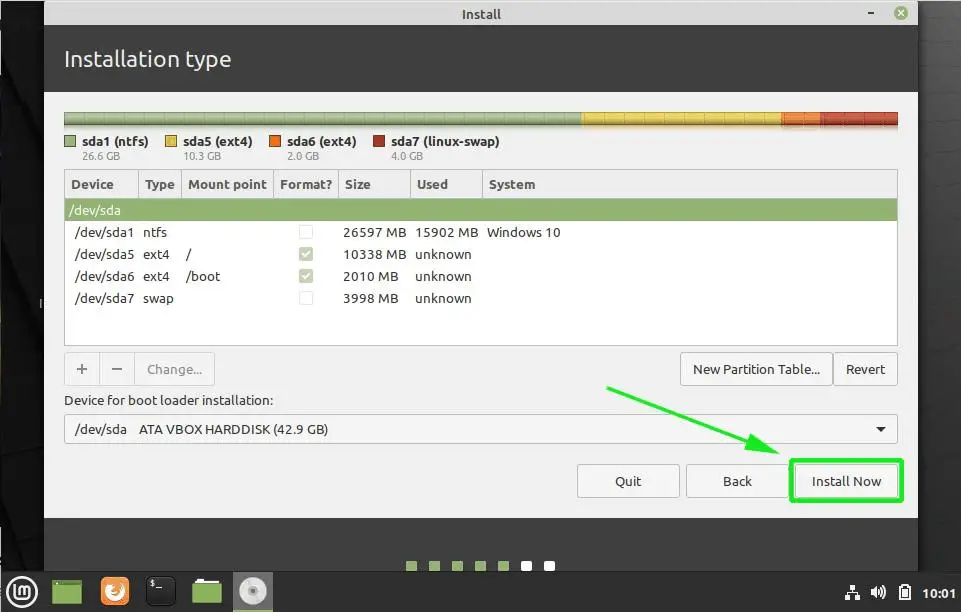
Next, you will be prompted to write changes to the disk. Click on the ‘Continue’ button to save the partitions on your hard drive.
Step 6) Choose your preferred language and user credentials
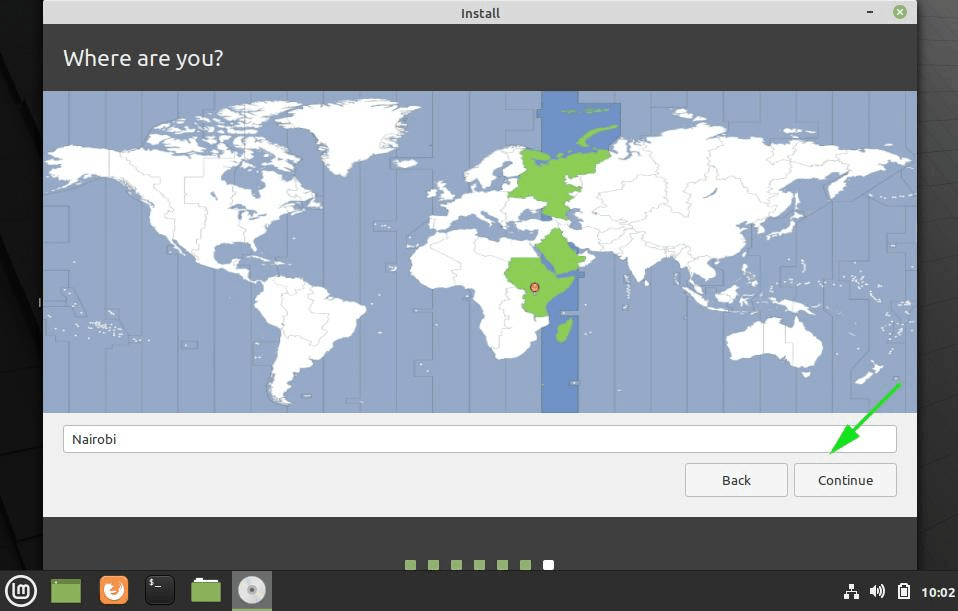
In this step, you will be required to select your location on the world map. If you are connected to the internet during the installation process, your location will be auto-detected. Otherwise, simply click on the world map provided to select your location and click on the ‘Continue’ button.
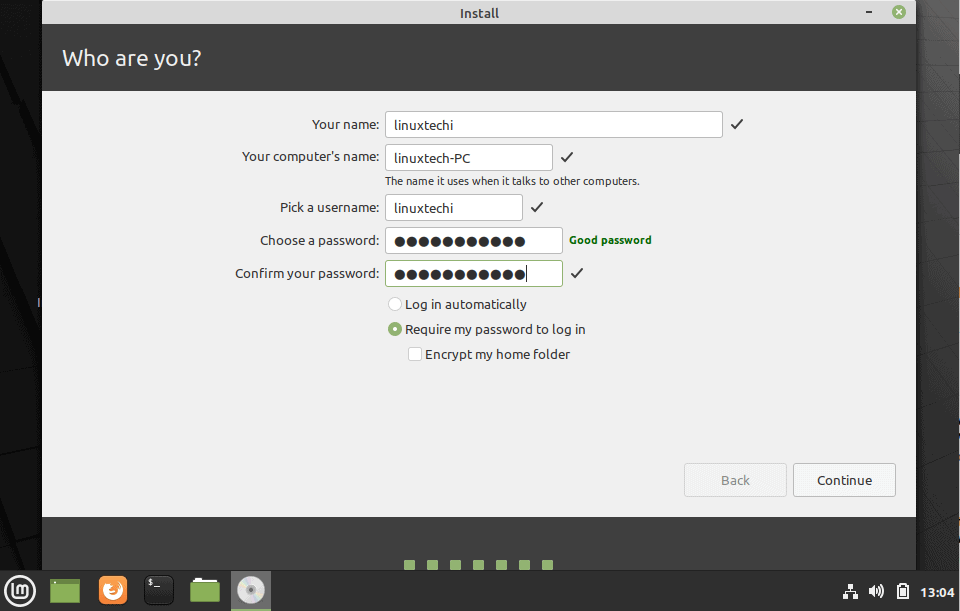
Thereafter, create a default user account by providing your username, your PC’s name and your preferred password. Then click ‘Continue’.
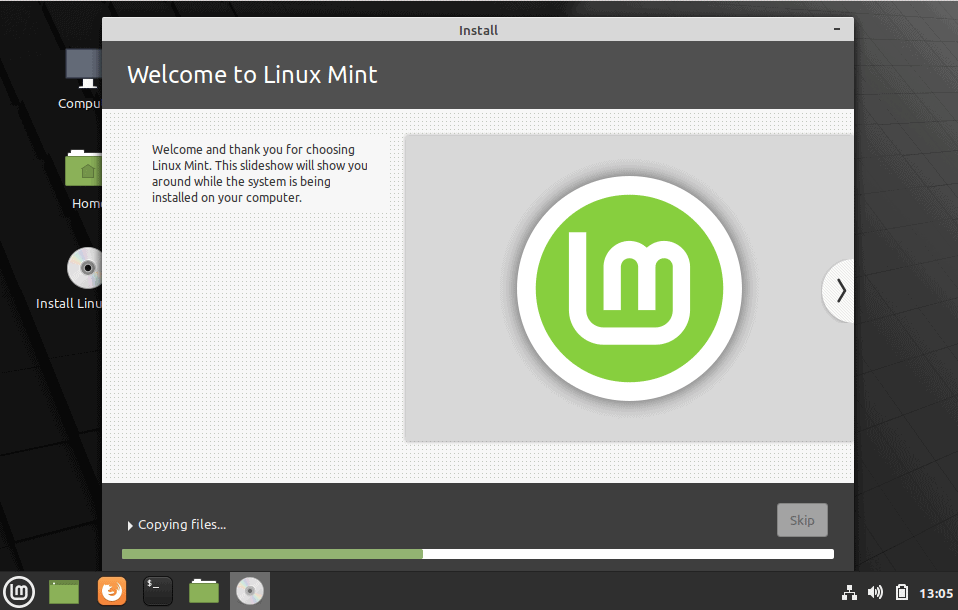
Step 7) Linux Mint 20 Installation begins
The installer will begin downloading, copying and installing software packages on your system. This will take a while, and this would be an awesome moment to take a break and grab a cup of tea.
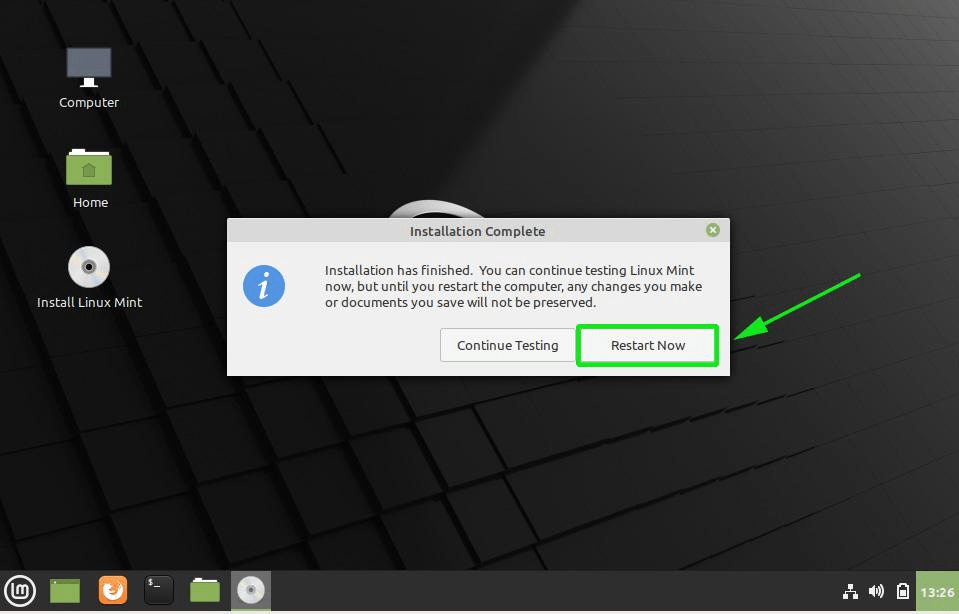
Once the installation is complete, click on the ‘Restart Now’ button to reboot the system.
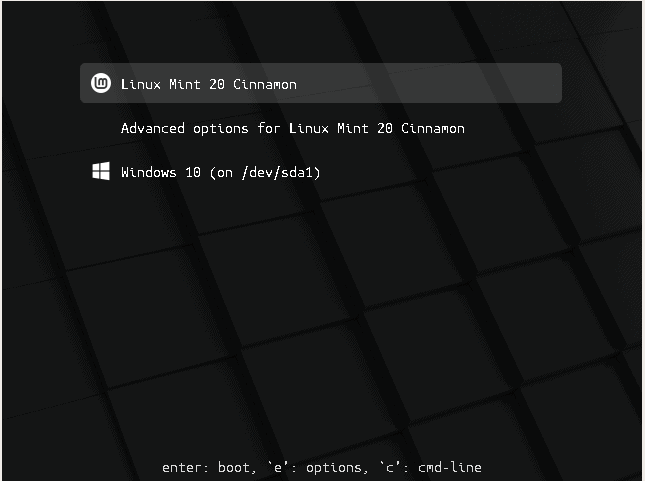
Step 8) Choose Operating System to boot (Windows or Linux Mint 20)
Upon rebooting, notice that you now have 2 operating systems you can pick to boot into: Linux Mint 20 and Windows 10. Feel free to scroll up and down using the up/down arrow keys to select the OS you want to boot into.
To boot into Linux, simply hit ‘ENTER’
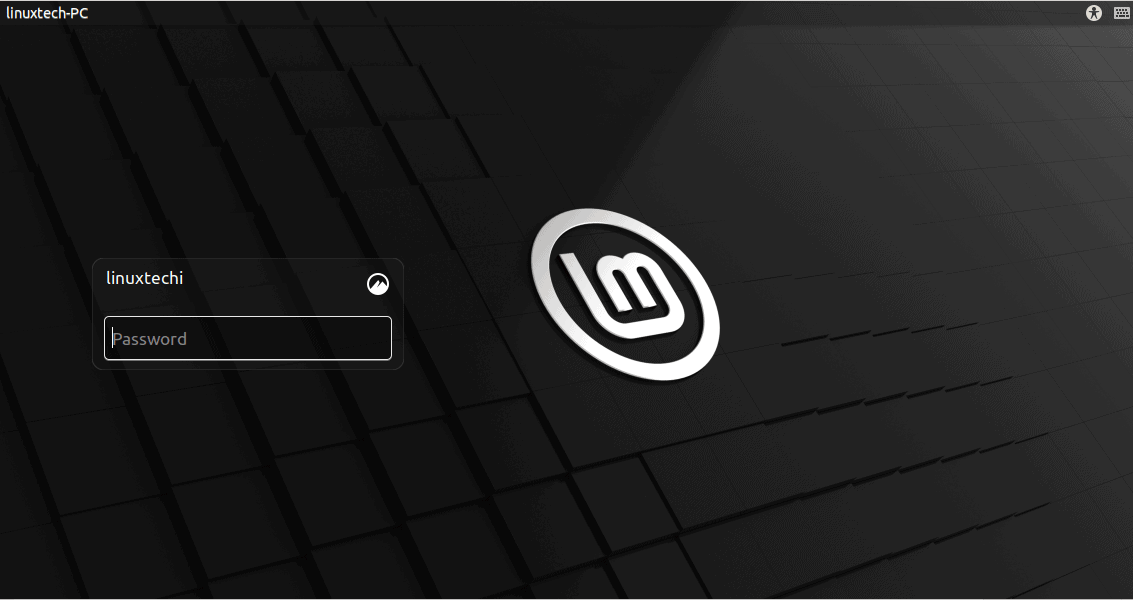
Provide your password and hit ‘ENTER’ to log into the system.
And this wraps up this guide on how to dual boot Windows 10 and Linux Mint 20. We do hope that you can now comfortably set up a dual boot system on your PC. Your feedback is much appreciated.


It keeps giving me a missing EFI partition error, what does this mean? do i skip it?
I got the same warning as the previous comment;
“No EFI System Partition was found. This system will likely not be able to boot successfully, and the installation process may fail.
Please go back and add an EFI System Partition, or continue at your own risk.”
Any advice would be very much appreciated, thanks.
Hey Andy,
In the bios UFEI mode is enabled then /boot/efi partition needs to be created to start and load the OS properly.
If Legacy bios mode is enabled then no need to create EFI partition.
I very much wanted to explore Linux Mint, I did virtual machines for a while at first and learned how to do that. I then wanted to take the next step and make my computer a dual boot system. Although I am more advanced than many out there with computers I am no expert so I followed these instructions. I have had Linux Mint 20 installed now for a week and have tried installing some software. I installed about 3 packages and now I get warnings that the root directory and the others suggested are full with little to no space. If this is so, then the install calls for too small of directories and you basically have a second machine that is incapable of handling more than a few programs. I am deeply disappointed that someone would put instructions for us (less computer literate) that don’t produce a real working machine. What is wrong with using the automatic partitioning that Linux offers? if you say use the empty space you already took from windows?
Hey John, thanks for reaching out.
In a dual boot setup, there are two options that are available. In this case, we have ‘Install Mint alongside Windows 10’ which does the automatic partitioning for you. This is most recommended for beginners as we stated in Step 5. The reason we decided to focus more on manual partitioning is that it allows you to define your own separate partitions. I’m sorry to hear about your predicament of the system getting filled up so fast. The recommended hard disk space requirement for Mint 20 is 15G. There’s no upper limit to how much space you can allocate to your Linux installation. May I know which packages filled up your system so fast?
After i installed linux mint everything works fine but I cannot see any WIFI connections anywhere I had my usb wifi adapter connected in my usb port but still can’t access internet through wifi but only through mobile usb tethering please help with this… I think the problem might be wifi adapter drivers which are from realtek rtl…
In windows wifi works fine