In this article, we will show you how to configure static ip address on Ubuntu 24.04 desktop step by step.
When you want a persistent IP address on your Ubuntu 24.04 desktop, then you must a configure a static IP address. Whenever we install Ubuntu then DHCP is enabled by default, and it will try to fetch the IP address from DHCP server if it is available over the network.
In Ubuntu Desktop 24.04, there are two ways to configure static IP address:
- Graphical User Interface
- Command Line
We will cover both the methods in this article.
Prerequisites
- Pre-Install Ubuntu 24.04
- Regular user with sudo rights
- Basic understanding of networks
Configure Static IP Address on Ubuntu 24.04 Using GUI
Login to your desktop, click on the network icon and then choose Wired option as shown below:
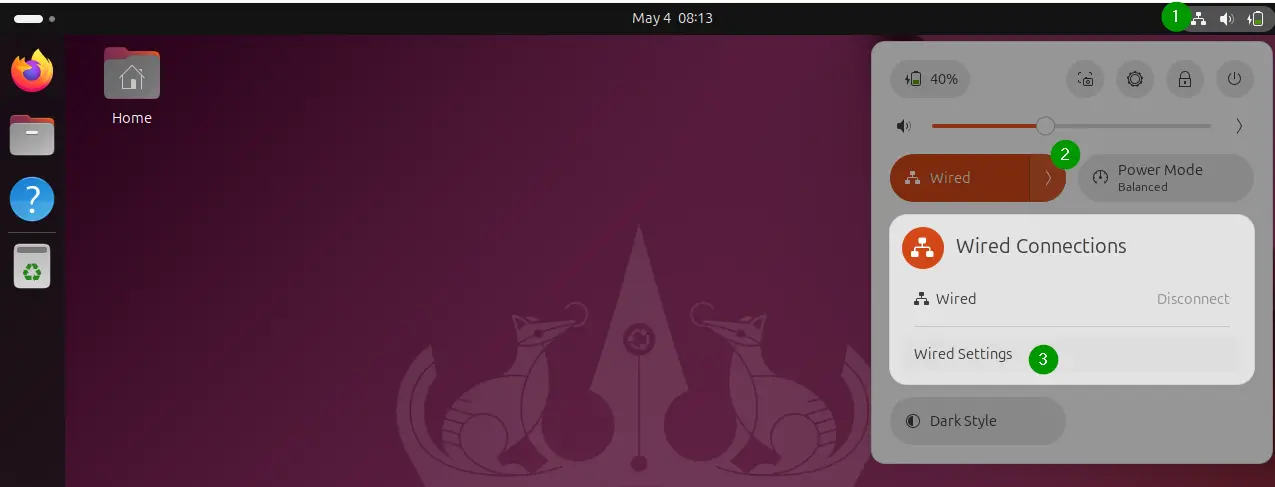
We will get the following window, click on “gearbox” icon
![]()
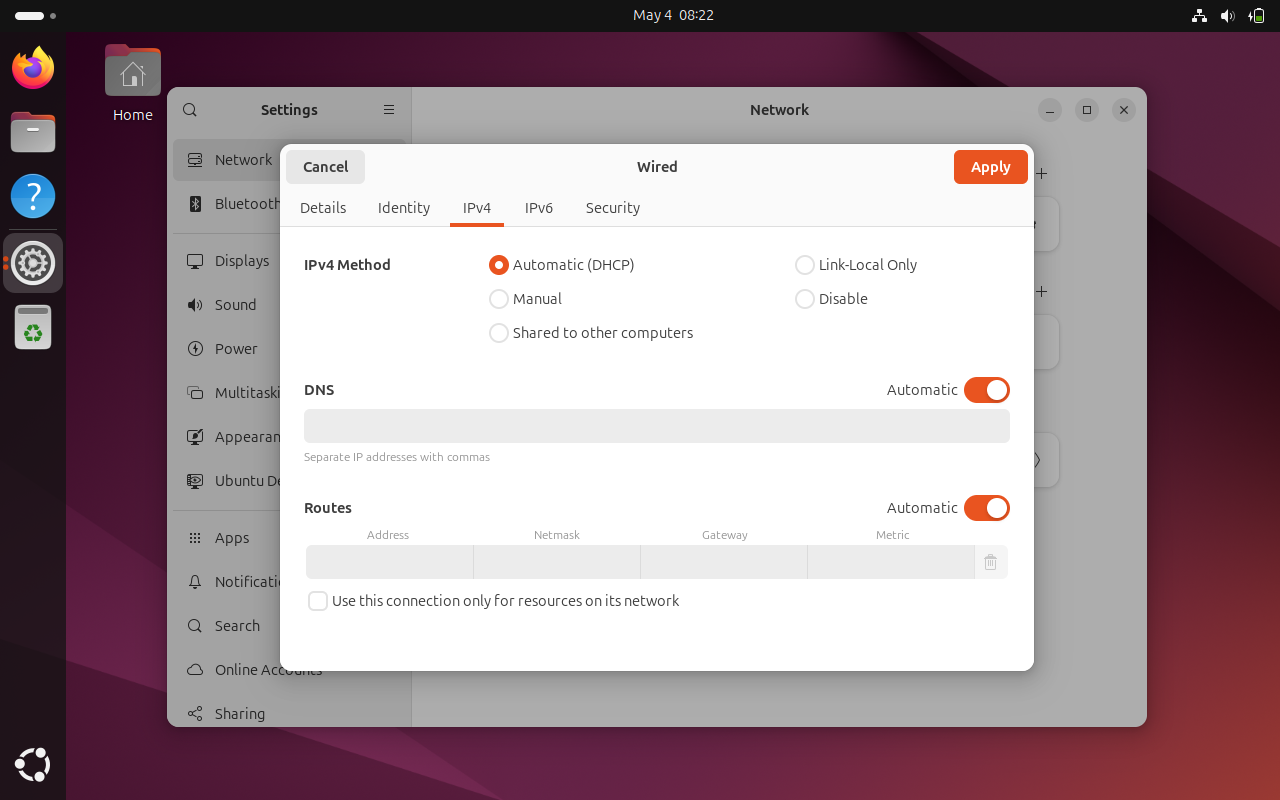
Go to IPv4 tab, there you will see that DHCP is enabled for automatic IP allocation.
Choose Manual option to configure static IP address and specify IP details (IP address, netmask, gateway and DNS IP) as show below:
Note: Change the IP details that suits to your network
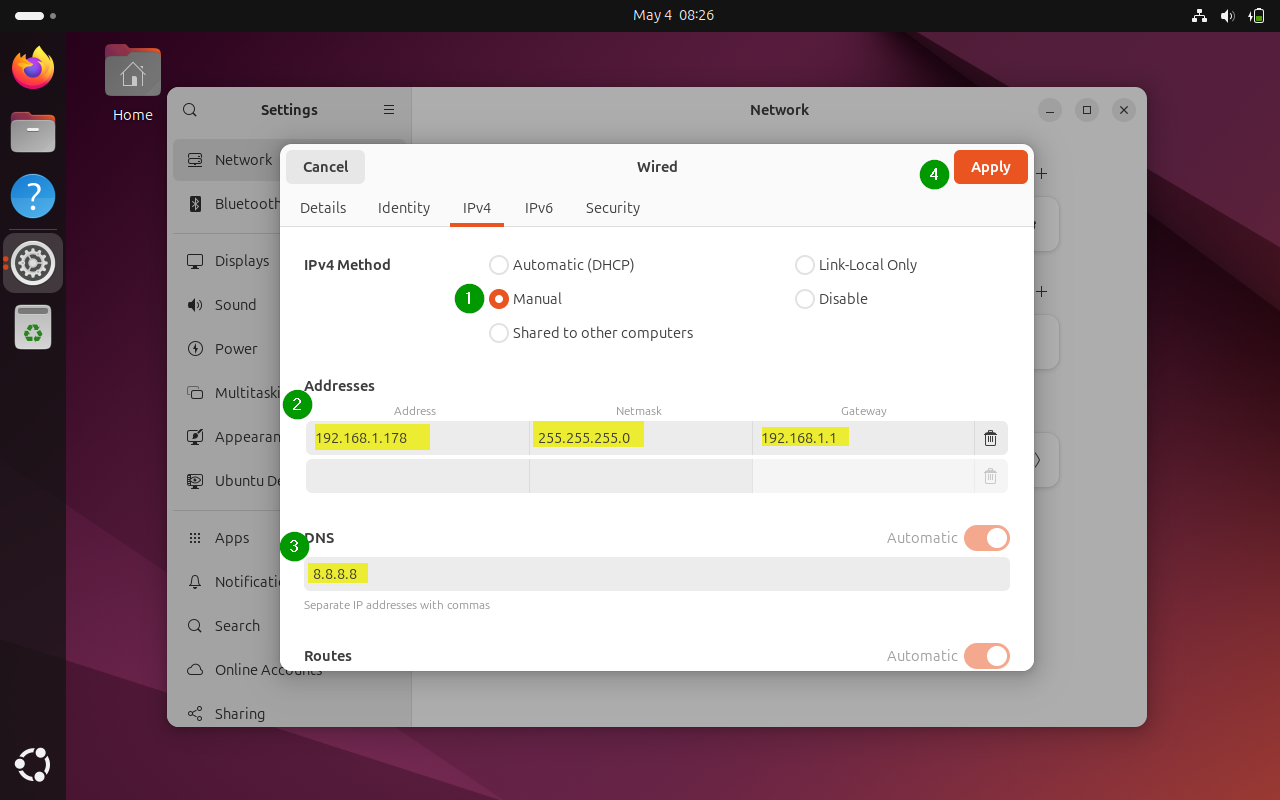
Click on Apply.
Next, disable and enable the interface to make above changes into effect.

Above screen confirms that we have successfully configured static IP address on our Ubuntu 24.04 desktop.
Configure Static IP Address on Ubuntu 24.04 Using Command Line
We can use netplan utility and its configuration file to assign the static ip on the interface (like ep0s3 or eth0).
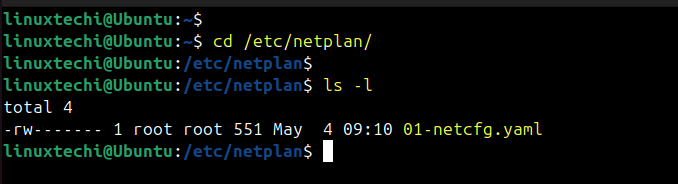
Netplan configuration file are placed in /etc/netplan directory. Under this directory there should be a file with name 01-netcfg.yaml, 50-cloud-init.yaml or may be else depending on your environment.
$ cd /etc/netplan
$ ls -l
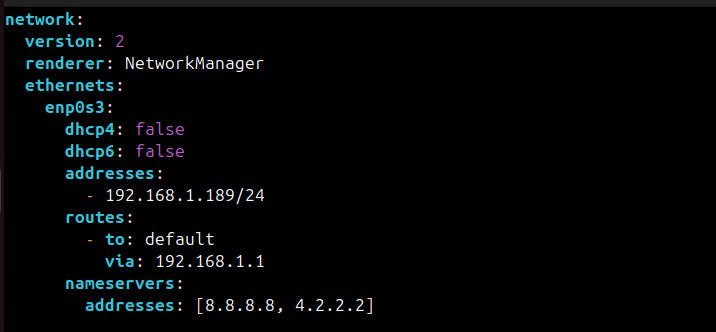
Edit netplan configuration file, in our case it is 01-netcfg.yaml
$ sudo vi 01-netcfg.yaml
network:
  version: 2
  renderer: NetworkManager
  ethernets:
    enp0s3:
      dhcp4: false
      dhcp6: false
      addresses:
        - 192.168.1.189/24
      routes:
        - to: default
          via: 192.168.1.1
      nameservers:
        addresses: [8.8.8.8, 4.2.2.2]
save and close the file.
Note: In above file, replace the IP address details and interface according to your setup. We have also used renderer as “NetworkManager” which instructs netplan to use NetworkManager as its backend. It is used for desktops and for the servers and headless environments use “networkd” instead of NetworkManager.
Set the permission on this file using chmod command,
$ sudo chmod 600 01-netcfg.yaml
To make above changes into the affect, run below netplan apply command.
$ sudo netplan apply
Next, verify the IP address and network connectivity.
$ sudo ip add show
$ sudo ip route show
$ ping google.com
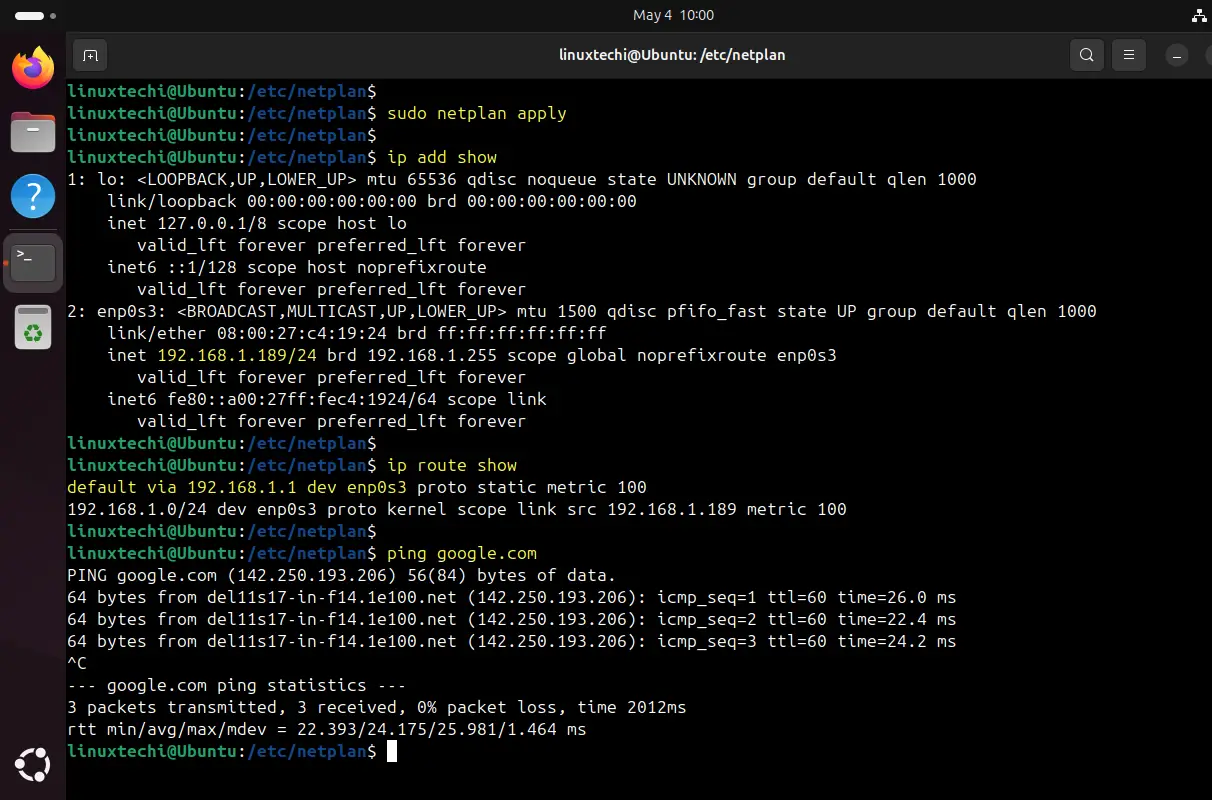
Perfect, output above shows that we have successfully configure static ip address using netplan utility.
That’s all from this article. We hope you have found it informative and useful, feel free to post your queries and feedback in below comments section.
Read Also : How to Install Git on Ubuntu 24.04