In this blog post, we will show you how to assign static ip address on Debian 12.
In the world of Linux, Debian remains one of the most popular distributions, known for its stability and versatility. One essential aspect of managing a Linux system is configuring network settings. Whether you’re setting up a server or just want a consistent IP address for your desktop, assigning a static IP address on Debian 12 can be a crucial task.
Prerequisites
- Pre-Installed Debian 12
- Sudo User with admin rights
There are different methods through we can assign static ip address on Debian 12.
Method1: Assign Static IP Address on Debian 12 Using GUI
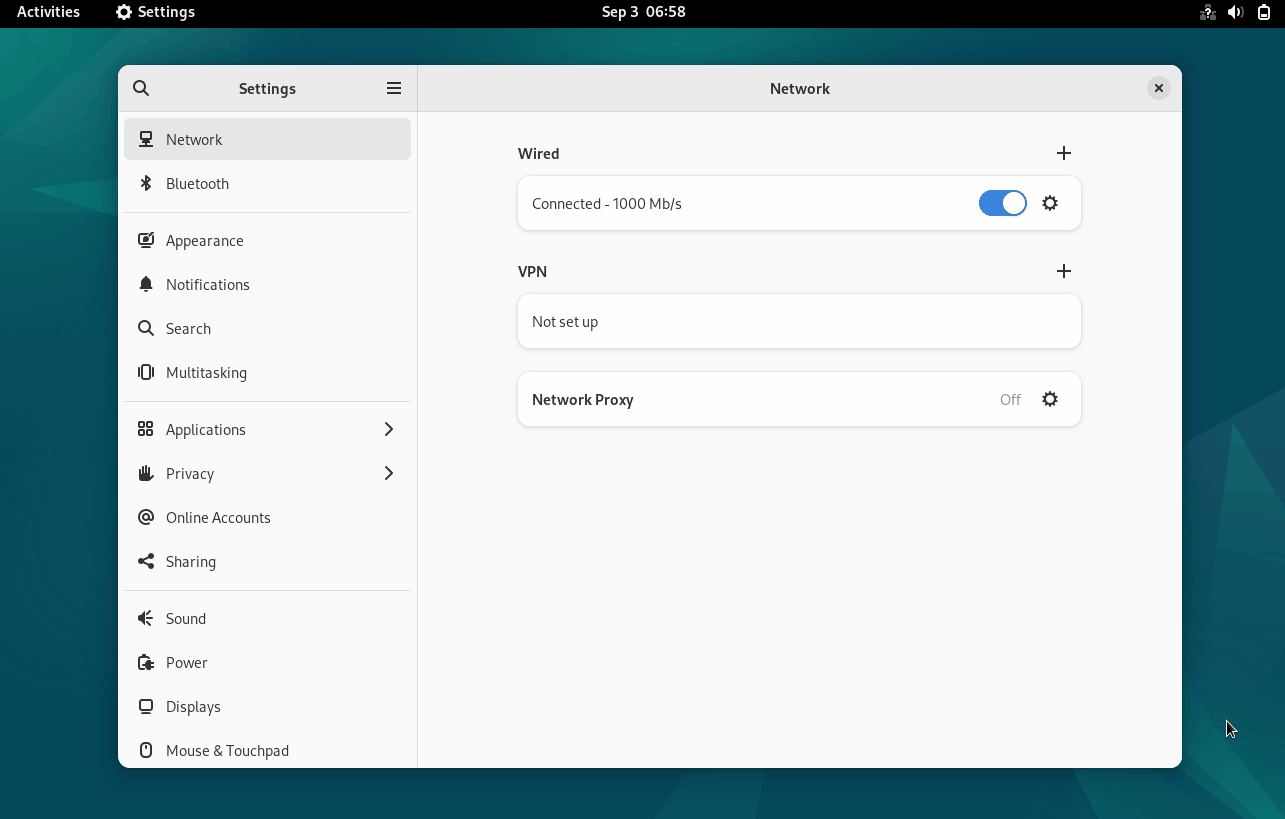
Login to your Debian Desktop environment, From Activity –> Search Settings –> Choose Network
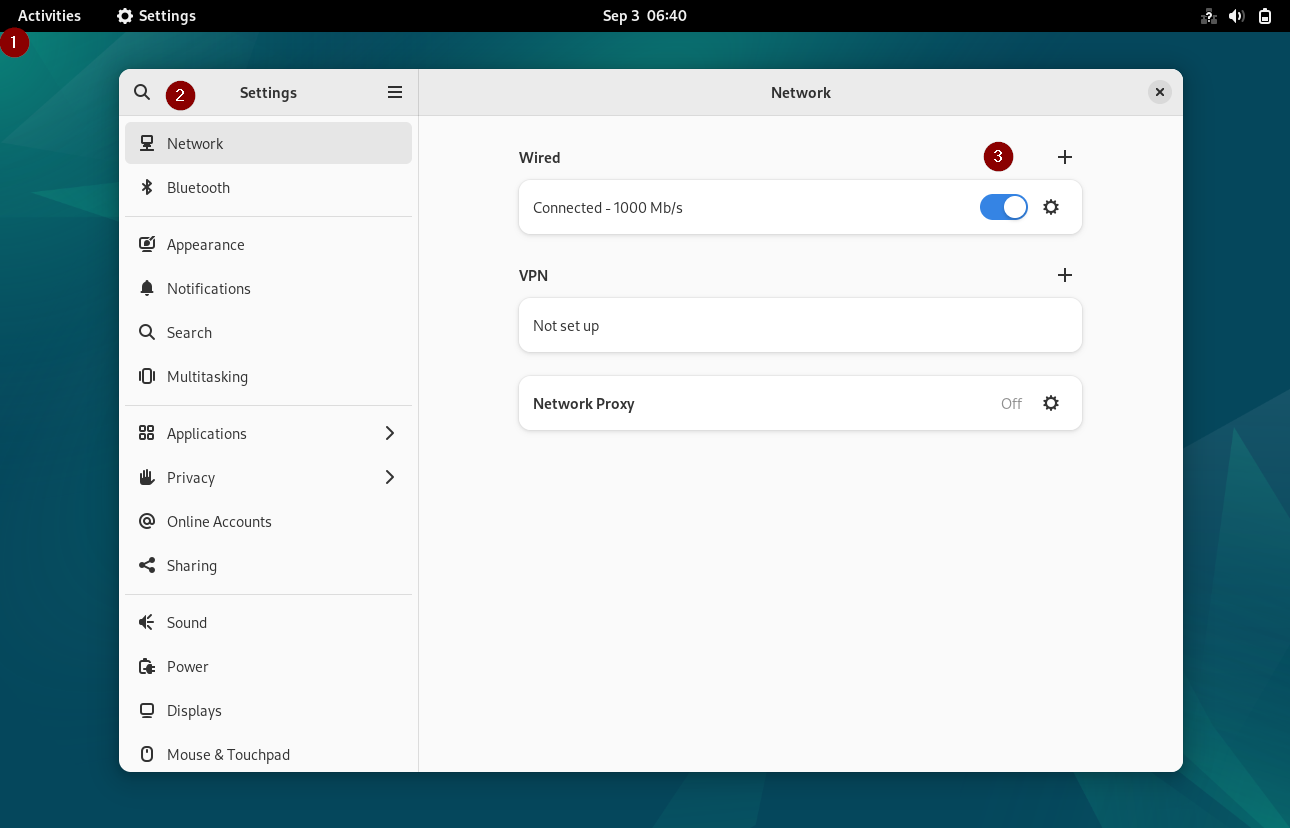
Click on Wired Settings and then we will get the following window,
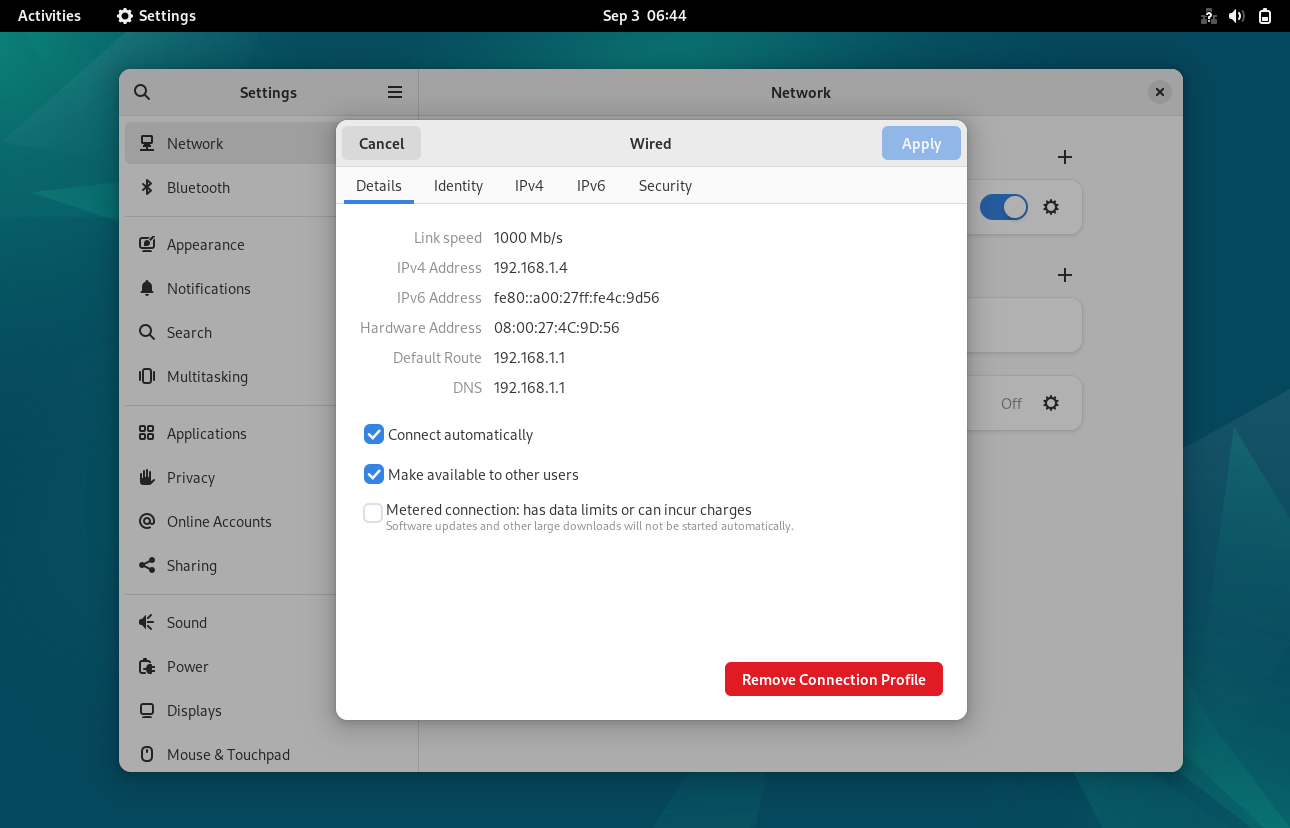
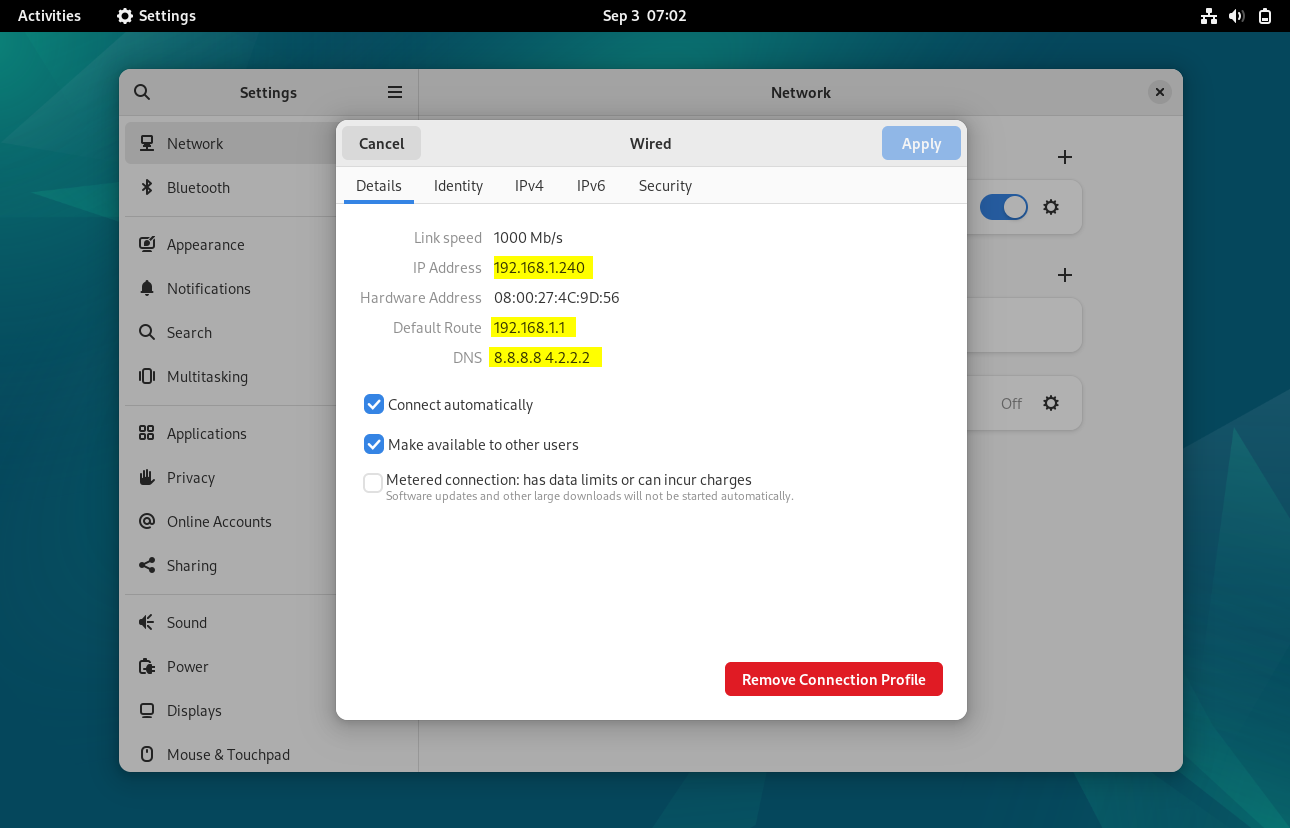
Note: To disable IPv6, go to IPv6 tab and choose ‘Disable’ option
Click on IPv4 Tab
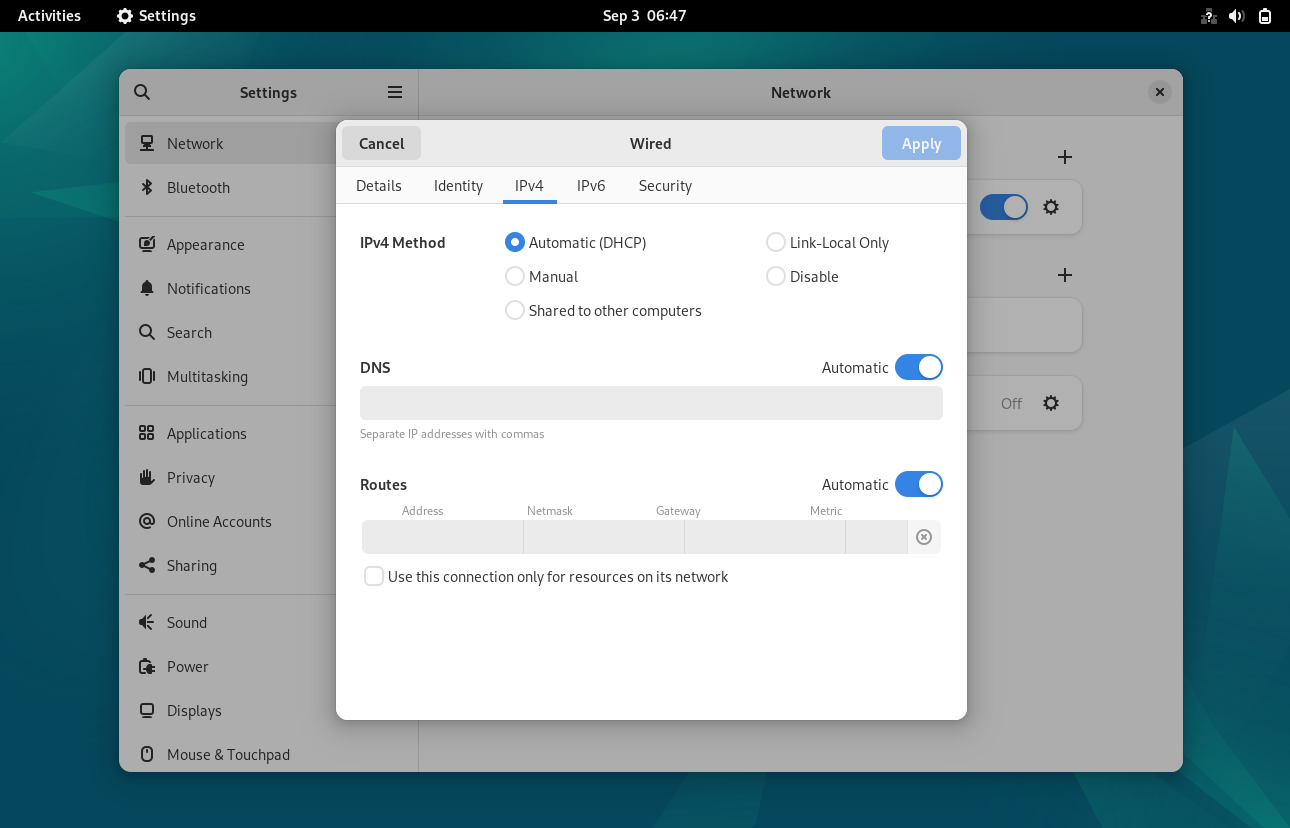
Above window shows that Automatic DHCP is enabled, so to Assign Static IP choose ‘Manual’ and then specify the IP details like IP address, netmask, gateway and dns server IP.
Important Note: To Specify the dns server IP first disable the automatic dns IP by toggling it.
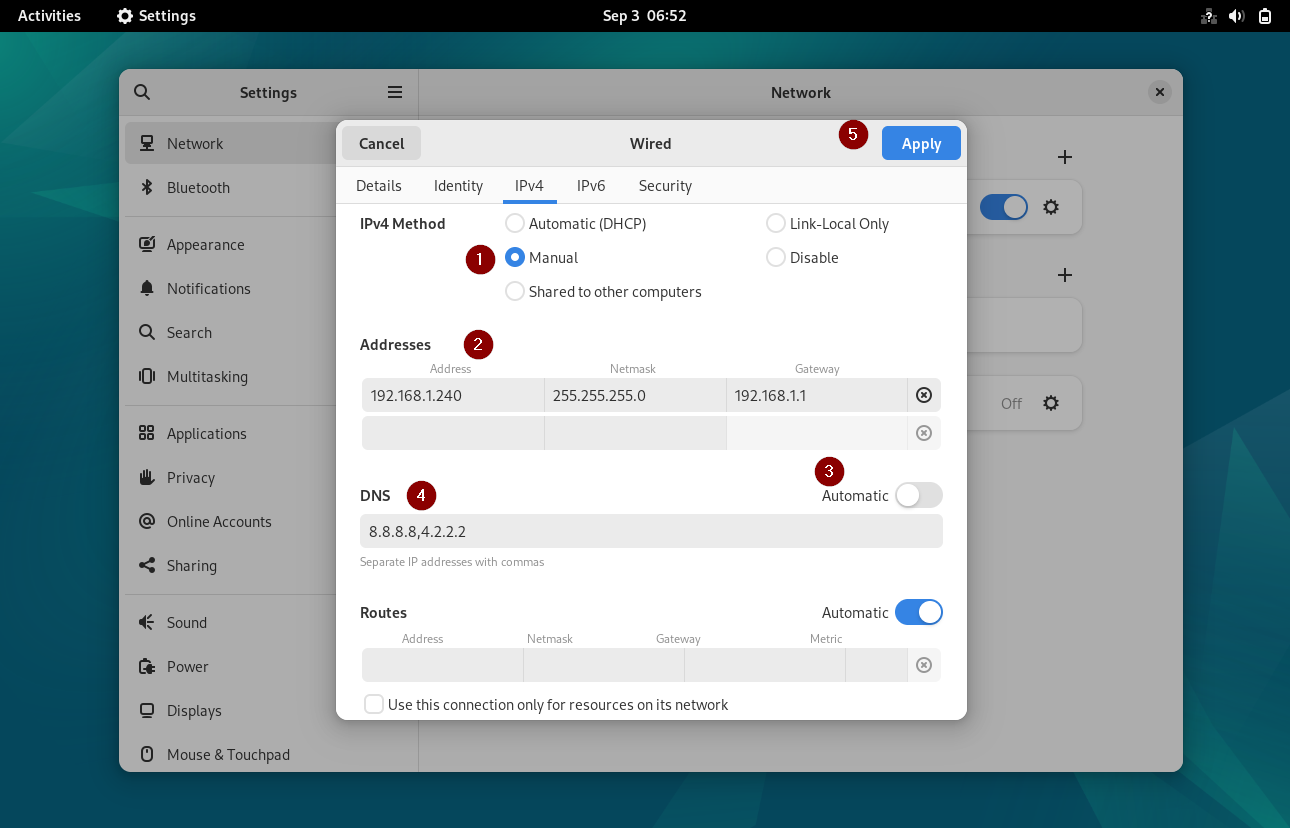
Click on Apply to save the changes.
Now, disable and enable the interface by toggling it so that new IP address is mapped to the Interface.
Now again click on wired settings to verify whether the new static ip address is assigned or not.
Perfect, above confirms that new static IP address is assigned successfully.
Method2: Assign Static IP Address on Debian 12 From Command Line
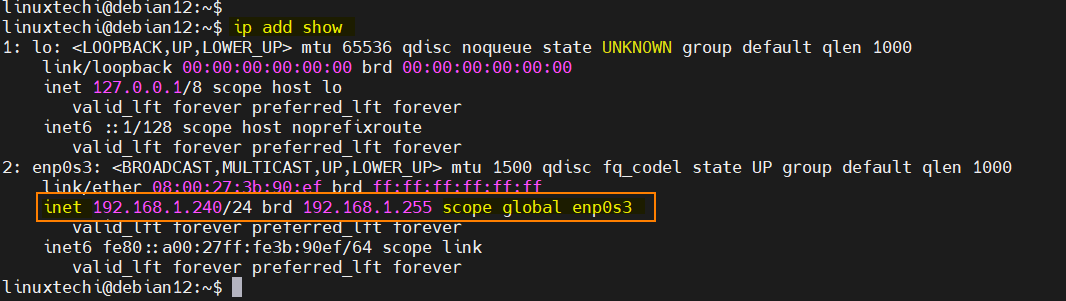
Open the terminal, check your current network configuration. You can do this by running the following ip command,
$ ip add show

This will display a list of network interfaces on your system. Note down the name of the interface you want to assign a static IP address to (typically, it’s ‘enp0s3‘ for Ethernet).
Next, run nmcli command to get connection name,
$ nmcli connection
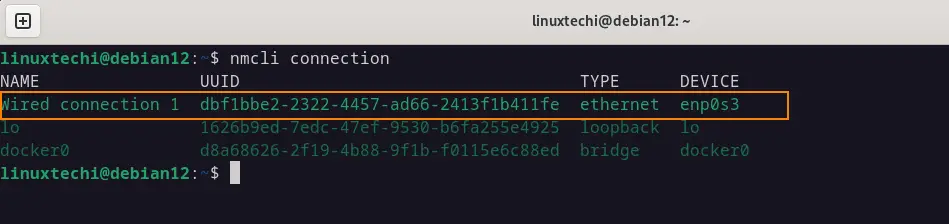
Once we get the connection name, run below nmcli command to assign static ipv4 address,
Syntax:
$ nmcli con mod ‘connection-name’ ipv4.address <IP-Address>
$ sudo nmcli connection modify 'Wired connection 1' ipv4.address 192.168.1.240/24
Set the gateway by running below
$ sudo nmcli connection modify 'Wired connection 1' ipv4.gateway 192.168.1.1
Change Configuration from DHCP to Manual , so that IP will be static and persistent, run
$ sudo nmcli connection modify 'Wired connection 1' ipv4.method manual
Set the DNS server IP by running below command,
$ sudo nmcli connection modify 'Wired connection 1' ipv4.dns '8.8.8.8'
Disable and enable the connection so that above changes come into the effect.
$ sudo nmcli connection down 'Wired connection 1'
$ sudo nmcli connection up 'Wired connection 1'

Now run IP Command to check IP address,
$ ip add show enp0s3
Output of above commands would look like below:

Perfect, above output confirms that static IP address has been assigned successfully on enp0s3 interface.
Assign Static IP Address on Minimal Installed Debian 12
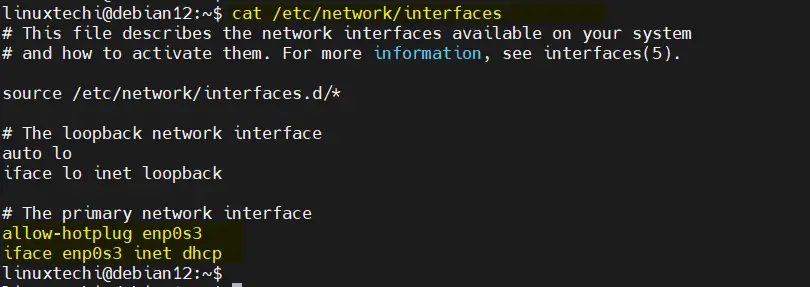
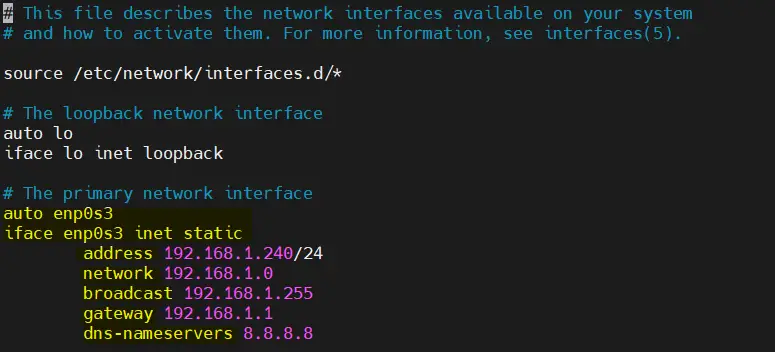
Whenever we install minimal Debian 12 then we will have only the CLI console and don’t have any nmcli utility. So, to assin static ip address we must edit the file ‘/etc/network/interfaces’.
$ cat /etc/network/interfaces
Edit the file and set the static IP address as shown below,
$ sudo vi /etc/network/interfaces
Replace the line ‘allow-htplug enp0s3’ with ‘auto enp0s3‘ and change dhcp parameter to static. Below is my sample file, change interface name and ip details as per your environment.
auto enp0s3
iface enp0s3 inet static
        address 192.168.1.240/24
        network 192.168.1.0
        broadcast 192.168.1.255
        gateway 192.168.1.1
        dns-nameservers 8.8.8.8
save & close the file.
To make above changes into the effect the restart the network service
$ sudo systemctl restart networking.service
Now, run ip command to verify the ip address,
$ ip add show
Output,
That’s all from this post. Please do share your feedback and queries in below comments section.
Conclusion
Assigning a static IP address on Debian 12 is a straightforward process that can greatly benefit your network stability and ease of access. By following the steps outlined in this guide, you can ensure that your Debian 12 system always has a consistent IP address, making it easier to manage and access your resources. Whether you’re configuring a server or just prefer having a stable address for your desktop, Debian 12 provides a user-friendly environment for all your networking needs.
Also Read: How to Install Kubernetes Cluster on Debian 12 | 11


Nice Guide. Appreciate it.
In case someone has used “sudo raspi-config” > Advanced Options > Network Interface Names > Would you like to enable predictable network interface names ?
pi@pi-san-rasp:~ $ sudo nmcli connection modify Wired\ connection\ 1 ipv4.addresses 192.168.1.10/24
pi@pi-san-rasp:~ $ sudo nmcli connection modify Wired\ connection\ 1 ipv4.gateway 192.168.1.1
pi@pi-san-rasp:~ $ sudo nmcli connection modify Wired\ connection\ 1 ipv4.method manual
pi@pi-san-rasp:~ $ sudo nmcli connection modify Wired\ connection\ 1 ipv4.dns ‘8.8.8.8’
pi@pi-san-rasp:~ $ sudo reboot
Excellent, thanks.