One of the common tasks of cloud administrator is to manage cloud images i.e uploading and downloading cloud images. In OpenStack cloud images are controlled and managed by image service known as glance. In most of the setup glance service is placed on the controller node and cloud images are stored at the location “/var/lib/glance/images“.
In this article we will see how to upload and download qcow2 cloud image in OpenStack environment. Though Cloud image can be managed from Horizon dashboard but as per my personal experience I always use commands from the terminal to manage cloud images. Below commands are tested on Mitaka and Newton OpenStack version.
Uploading a qcow2 cloud image in OpenStack via command line
Login to the server where the glance service is running, in my case it’s a controller node.
Source your keystone admin credentials using below source command
[root@controller01 ~]# source keystonerc_admin
Go to the folder where your have place cloud image qcow2 file.
[root@controller01 ~(keystone_admin)]# cd /opt/images/
[root@controller01 images(keystone_admin)]#
Syntax :
# openstack image create –disk-format qcow2 –container-format bare –public –file {Name-Cloud-Image}.qcow2 <Name-of-Image>
Example : Let’s assume I want to upload CentOS 7 qcow2 file.
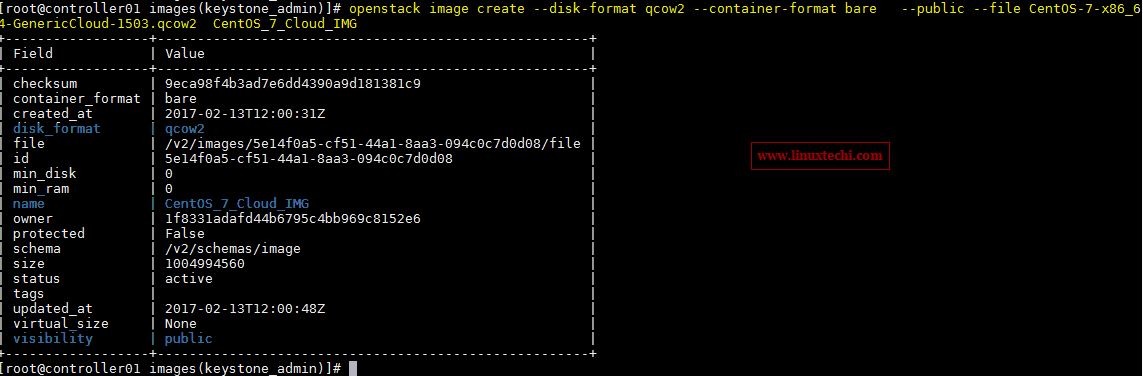
[root@controller01 images(keystone_admin)]# openstack image create --disk-format qcow2 --container-format bare --public --file CentOS-7-x86_64-GenericCloud-1503.qcow2 CentOS_7_Cloud_IMG
View the upload uploaded image using following command
[root@controller01 images(keystone_admin)]# openstack image list | grep CentOS_7_Cloud_IMG
| 5e14f0a5-cf51-44a1-8aa3-094c0c7d0d08 | CentOS_7_Cloud_IMG    | active |
[root@controller01 images(keystone_admin)]#
Deleting a Cloud Image in OpenStack
Syntax :
# openstack image delete <Image-Name-or-Image-ID>
We can get the Image id of cloud image of using beneath command :
[root@controller01 images(keystone_admin)]# openstack image list | grep CentOS_7_Cloud_IMG
| 5e14f0a5-cf51-44a1-8aa3-094c0c7d0d08 | CentOS_7_Cloud_IMG | active |
[root@controller01 images(keystone_admin)]#
Let’s assume i want to delete the “CentOS_7_Cloud_IMG ”
[root@controller01 images(keystone_admin)]# openstack image delete CentOS_7_Cloud_IMG
Or
[root@controller01 images(keystone_admin)]# openstack image delete 5e14f0a5-cf51-44a1-8aa3-094c0c7d0d08
Downloading a Cloud image from your OpenStack setup
Let’s assume i want to download rhel 6 Cloud image. So first get the image name and its id using following command
[root@controller01 var(keystone_admin)]# openstack image list | grep -i rhel*
| c0247a08-6a68-4bd2-ae3e-ca0e8f654dca | RHEL-6_6   | active |
[root@controller01 var(keystone_admin)]#
In the above output first field is the image id and second is Image Name and last field shows the status of cloud image
Syntax :
# glance image-download –file <Name-of-Cloud-Image> –progress <Image_ID>
Example :
[root@controller01 var(keystone_admin)]# glance image-download --file RHEL-6_6 --progress  c0247a08-6a68-4bd2-ae3e-ca0e8f654dca
[=============================>] 100%
[root@controller01 var(keystone_admin)]#
Above Command will download the RHEL-6_6 Cloud image in the Current working directory.
[root@controller01 var(keystone_admin)]# ll | grep RHEL
-rw-r--r--   1 root root 356646912 Feb 13 18:14 RHEL-6_6
[root@controller01 var(keystone_admin)]#
There are some scenarios where we want to make permanent changes to the existing cloud image so in that case we can download the cloud image, make the required the changes and upload the new version of Cloud image.
That’s all for this article. Please share your feedback and comments 🙂