In this post, we will learn tar command in linux with practical examples.
Tar command is used for creating archive of multiple files and directories into single archive file, extension of archive file will always be ‘.tar’. Tar can further compress the archived file using gzip and bzip2 techniques. Tar stands for ‘Tape archive’ and used to create and extract archive files from the command line. Tar can also be treated as command line backup and restore utility.
Syntax
# tar <options> <files>
Options:
- -c : create a new archive
- -f : Archive file name
- -t, –list : list the contents of an archive
- -x, –extract, –get : extract files from an archive
- -d, –diff, –compare : find differences between archive and file system
- –delete : Delete from the archive.
- -r, –append : append files to the end of an archive
- -v : Verbose output
- -u, –update : only append files newer than copy in archive
- -X, –exclude-from=file : exclude patterns listed in file
- -C, –directory=DIR: Change to DIR before performing any operations.
- -j, –bzip2 : Compress and extract archive through bzip2
- -J, –xz : Compress and extrach the archive through xz
- -z, –gzip : Compress and extract the archive through gzip
Note: hyphen ( – ) in the tar command while using options is optional.
Without any further delay, let’s jump into tar command examples.
1) Creating an archive file
Let’s create a tar file of /etc directory and ‘/root/anaconda-ks.cfg’ file, run
# tar -cvf archive.tar /etc /var/log/syslog
Above command will create a tar file with the name “archive.tar” in the current folder. Tar file contains all the files and directories of /etc folder and /var/log/syslog file.
In above command, ‘-c’ option specify to create a tar file, ‘-v’ is used for verbose output and ‘-f’ option is used to specify the archive name.
# ls -l archive.tar
-rw-r--r-- 1 root root 12554240 Oct 7 08:25 archive.tar
#
2) List content of archive file
Use ‘-t‘ option in tar command to view the content of tar files without extracting it.
# tar -tvf archive.tar
Listing a specific file or directory from tar file. In the below example, we are trying to list whether ‘syslog’ file is there in the tar file or not.
# tar -tvf archive.tar var/log/syslog
-rw-r----- syslog/adm 951215 2022-10-07 08:18 var/log/syslog
#
3) Append files to the archive
‘-r’ option in the tar command is used to append or add file to existing archive file. Let’s add /var/log/auth.log file to archive.tar, run
# tar -rvf archive.tar /var/log/auth.log
Verify whether file is appended or not, run
# tar -tvf archive.tar var/log/auth.log
-rw-r----- syslog/adm 52790 2022-10-07 08:30 var/log/auth.log
#
Note: In the Compressed tar file we can’t append file or directory.
4) Extract archive file
To extract an archive file, use ‘-x’ option in the tar command as shown below.
# tar -xvf archive.tar
Above command will extract all the files and directories of archive.tar file in the current working directory.
5) Extract tar archive to specific folder
In case you want to extract tar file to a specific folder or directory then use ‘-C’ option followed by path of a folder. Example is shown below
# tar -xvf archive.tar -C /tmp/
6) Extract specific file from tar archive
Let’s suppose we want to extract “/etc/netplan/01-network-manager-all.yaml” file from the archive under /tmp folder.
Syntax : # tar -xvf {tar-file } {file-to-be-extracted } -C {path-where-to-extract}
# tar -xvf archive.tar etc/netplan/01-network-manager-all.yaml
etc/netplan/01-network-manager-all.yaml
#
# ls -l etc/netplan/01-network-manager-all.yaml
-rw-r--r-- 1 root root 104 Aug 9 12:55 etc/netplan/01-network-manager-all.yaml
#
7) Create and compress archive file (gzip)
We can compress archive file while creating it, let’s assume that we want to create a tar file of /etc and /opt folder and also want to compress it using gzip tool. This can be achieved using ‘-z’ option in tar command. Extensions of such tar files will be either tar.gz or .tgz
# tar -zcpvf archive.tar.gz /etc/ /opt/
Or
# tar -zcpvf archive.tgz /etc/ /opt/
8) Create and compress archive file (bzip2)
Let’s assume that we want to create compressed (bzip2) tar file of /etc and /opt folder. This can be achieved by using the option (-j) in the tar command. Extensions of such tar files will be either tar.bz2 or .tbz
# tar -jcpvf archive.tar.bz2 /etc/ /opt/
Or
# tar -jcpvf archive.tbz2 /etc/ /opt/
9) Exclude specific file type while creating archive
Using “–exclude” option in tar command we can exclude the specific file type while creating archive file. Let’s assume we want to exclude the file type of html while creating the compressed tar file, run
# tar -zcpvf archive.tgz /var/ /opt/ --exclude=*.html
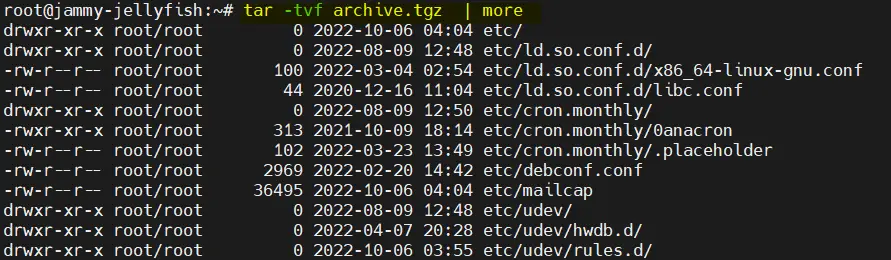
10) List the content of compressed archive (tar.gz or .tgz)
Contents of compressed archive with extension tar.gz or .tgz is listed by using the option ‘-t’. Example is shown below :
# tar -tvf archive.tgz | more
output,
11) List the content of compressed archive (tar.bz2 or .tbz2)
Content of tar file with the extensions .bz2 or .tbz2 is viewed by using the option ‘-t’. Example is shown below :
# tar -tvf archive.tbz2 | more
or
# tar -tvf archive.tar.bz2 | more
12) Extract compressed archive file (tar.gz or .tgz)
tar files with extension tar.gz or .tgz is extracted with option ‘-x’ and ‘-z’ as shown below,
# tar -zxpvf archive.tgz -C /tmp/
Above command will extract tar file under /tmp directory.
Note : Now a days tar command will take care compression file types automatically while extracting, it means it is optional for us to specify compression type in tar command. Example is shown below :
# tar -xpvf archive.tgz -C /tmp/
13) Extract compressed archive (tar.bz2 or .tbz2)
Archive files with extension tar.bz2 or .tbz2 is extracted using the option ‘-j’ and ‘-x’. Example is shown below
# tar -jxpvf archive.tbz2 -C /tmp/
Or
# tar xpvf archive.tbz2 -C /tmp/
14) Scheduling backup with tar command
There are some real time scenarios where we have to create tar file of specific files and directories for backup purpose on daily basis. Let’s suppose we have to take backup of whole /opt folder on daily basis, this can be achieved by creating a cron job of tar command. Example is shown below :
# tar -zcvf optbackup-$(date +%Y-%m-%d).tgz /opt/
Create a cron job for above command.
15) Create and compressed archive file with -T and -X option
In day to day activities, system admins might require to exclude and include files while creating archive using tar command. This can be achived by using include ( -T) and exclude (-X) file in tar command.
In tar command input file is specified after ‘-T’ option and file which consists of exclude list is specified after ‘-X’ option.
Let’s assume we want to archive and compress the directories like /etc , /opt and /home and want to exclude the file ‘/etc/sysconfig/kdump‘ and ‘/etc/sysconfig/foreman‘, Create a text file ‘/root/tar-include’ and ‘/root/tar-exclude’ and put the following contents in respective file.
# cat /root/tar-include
/etc
/opt
/home
#
# cat /root/tar-exclude
/etc/sysconfig/kdump
/etc/sysconfig/foreman
#
Now run the below command,
# tar zcpvf mybackup-$(date +%Y-%m-%d).tgz -T /root/tar-include -X /root/tar-exclude
16) View the size of .tar, .tgz and .tbz2 file
Use the following tar commands to view the size compressed archive files.
# tar -czf - data.tar | wc -c
427
# tar -czf - archive.tgz | wc -c
1450527
#
# tar -czf - archive.tbz2 | wc -c
1206287
#
17) Split big tar file into smaller files
In Linux like operating system big file is divided or split into smaller files using split command. Big tar file can also be divided into the smaller parts using split command.
Let’s assume we want to split ‘bigarchive.tgz‘ file into smaller parts of each 6 MB.
Syntax : split -b <Size-in-MB> <tar-file-name>.<extension> “prefix-name”
# split -b 6M bigarchive.tgz bigarchive-parts
Above command will split the bigarchive.tgz file into the smaller files each of size 6 MB in current working directory and split file names will starts from bigarchive-partsaa … bigarchive-partsag. In case if you want to append numbers in place of alphabets then use ‘-d’ option in above split command.
# ls -l bigarchive-parts*
-rw-r--r-- 1 root root 6291456 Oct 7 10:43 bigarchive-partsaa
-rw-r--r-- 1 root root 6291456 Oct 7 10:43 bigarchive-partsab
-rw-r--r-- 1 root root 6291456 Oct 7 10:43 bigarchive-partsac
-rw-r--r-- 1 root root 6291456 Oct 7 10:43 bigarchive-partsad
-rw-r--r-- 1 root root 6291456 Oct 7 10:43 bigarchive-partsae
-rw-r--r-- 1 root root 6291456 Oct 7 10:43 bigarchive-partsaf
-rw-r--r-- 1 root root 6291456 Oct 7 10:43 bigarchive-partsag
#
Now we can move these files into another server over the network and then we can merge all the files into a single tar compressed file using below cat command.
# cat bigarchive-parts* > bigarchive.tgz
#
That’s all from post, I hope you have learned tar command with above practical examples. Please share your queries and feedback in below comments section.
Also Read : How to Compare Files in Linux with diff Command


Tar is good command to compress the files.the great part of it is compress.I liked your examples while explaining.
Good examples
Very useful, thanks for sharing!
Looks like the -X param is ignored in Ubuntu 18.04 if you use it together with -T:
tar zcpvf mybackup-$(date +%Y-%m-%d).tgz -T /root/tar-include -X /root/tar-exclude
EDIT: In Ubuntu 18.04. it is important that the -X param is written before the -T param. Otherwise -X is ignored!