OpenStack is a Cloud Software that manage large pool of compute (hypervisors), storage ( block & swift ) and network resources of a data center. It provides a Dashboard where admins can create and manage Projects (Tenants ) and give appropriate access to the project members , further on Project members can create VMs (Virtual Machine).
In this article we will install latest version of OpenStack ‘Liberty’ on CentOS 7 using rdo repositories. As per my setup i am using followings on my CentOS 7 Machine
- Hostname = openstack.example.com
- IP address = 192.168.1.3
- netmask = 255.255.255.0
- Gateway = 192.168.1.1
- DNS = 192.168.1.254
Step:1 Set the hostname using hostnamectl command .
[root@localhost ~]# hostnamectl set-hostname "openstack.example.com"
[root@localhost ~]#
Step:2 Set the Selinux in Permissive Mode
[root@localhost ~]# setenforce 0
Edit the selinux config file ( /etc/sysconfig/selinux ) and set “SELINUX=permissive”
[root@localhost ~]# grep permissive /etc/sysconfig/selinux
SELINUX=permissive
[root@localhost ~]#
Step:3 Disable firewalld & NetworkManager Service
[root@openstack ~]# systemctl stop firewalld
[root@openstack ~]# systemctl disable firewalld
Removed symlink /etc/systemd/system/dbus-org.fedoraproject.FirewallD1.service.
Removed symlink /etc/systemd/system/basic.target.wants/firewalld.service.
[root@openstack ~]#
[root@openstack ~]# systemctl stop NetworkManager
[root@openstack ~]# systemctl disable NetworkManager
Removed symlink /etc/systemd/system/multi-user.target.wants/NetworkManager.service.
Removed symlink /etc/systemd/system/dbus-org.freedesktop.NetworkManager.service.
Removed symlink /etc/systemd/system/dbus-org.freedesktop.nm-dispatcher.service.
[root@openstack ~]#
Step:4 Enable rdo repository for liberty packages.
Use below commands to update the system and enable rdo repository
[root@openstack ~]# yum update -y
[root@openstack ~]# yum install -y https://www.rdoproject.org/repos/rdo-release.rpm
Step:5 Install OpenStack PackStack Package
[root@openstack ~]# yum install -y openstack-packstack
Generate the answer file using below command.
[root@openstack ~]# packstack --gen-answer-file=/root/answer.txt
Packstack changed given value to required value /root/.ssh/id_rsa.pub
Edit the answer file “/root/answer.txt” , set the following parameters and leave rest of parameters as it is.
# NTP Server
CONFIG_NTP_SERVERS=<NTP_Server_IP>

# Disable Demo Version
CONFIG_PROVISION_DEMO=n

# Set KeyStone Admin Password or Admin user Password
CONFIG_KEYSTONE_ADMIN_PW=<password>

# Config Horizon over SSL
CONFIG_HORIZON_SSL=y

# Disable Nagios
CONFIG_NAGIOS_INSTALL=n
Note : In case if you don’t have NTP server in your setup then you can leave NTP parameter as it is.
Step:6 Start OpenStack installation using answer file.
[root@openstack ~]# packstack --answer-file /root/answer.txt
Once the installation is completed , we will get below message.
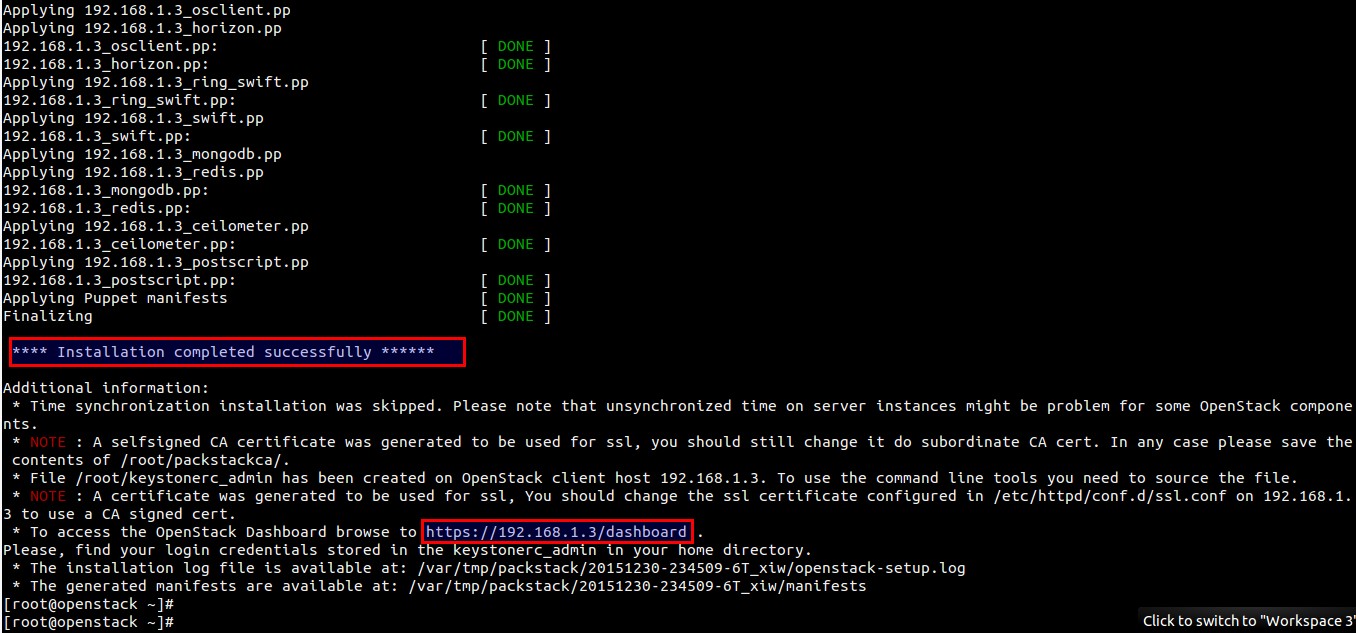
After the installation a new interface “br-ex” will be created and assign the IP addess of eth0 or enp0s3 to br-ex .
[root@openstack ~]# cd /etc/sysconfig/network-scripts/
[root@openstack network-scripts]# cp ifcfg-enp0s3 ifcfg-br-ex
[root@openstack network-scripts]# vi ifcfg-enp0s3
DEVICE=enp0s3
HWADDR="08:00:27:8E:EA:56"
TYPE=OVSPort
DEVICETYPE=ovs
OVS_BRIDGE=br-ex
ONBOOT=yes

[root@openstack network-scripts]# vi ifcfg-br-ex
DEVICE=br-ex
DEVICETYPE=ovs
TYPE=OVSBridge
BOOTPROTO=static
IPADDR=192.168.1.3
NETMASK=255.255.255.0
GATEWAY=192.168.1.1
DNS1=192.168.1.254
ONBOOT=yes
In above files please change the IP details, Hardware address and Device name as per your setup.
When we restart the network service , it will add “enp0s3” as a port in br-ex OVS bridge.
[root@openstack network-scripts]# systemctl restart network
[root@openstack network-scripts]#
Please take a reboot and check whether settings are persistent or not.
Step:7 Now Access OpenStack Dashboard.
When the installation is completed a dashboard link was provided on the screen , in My Case it is “https://192.168.1.3/dashboard”
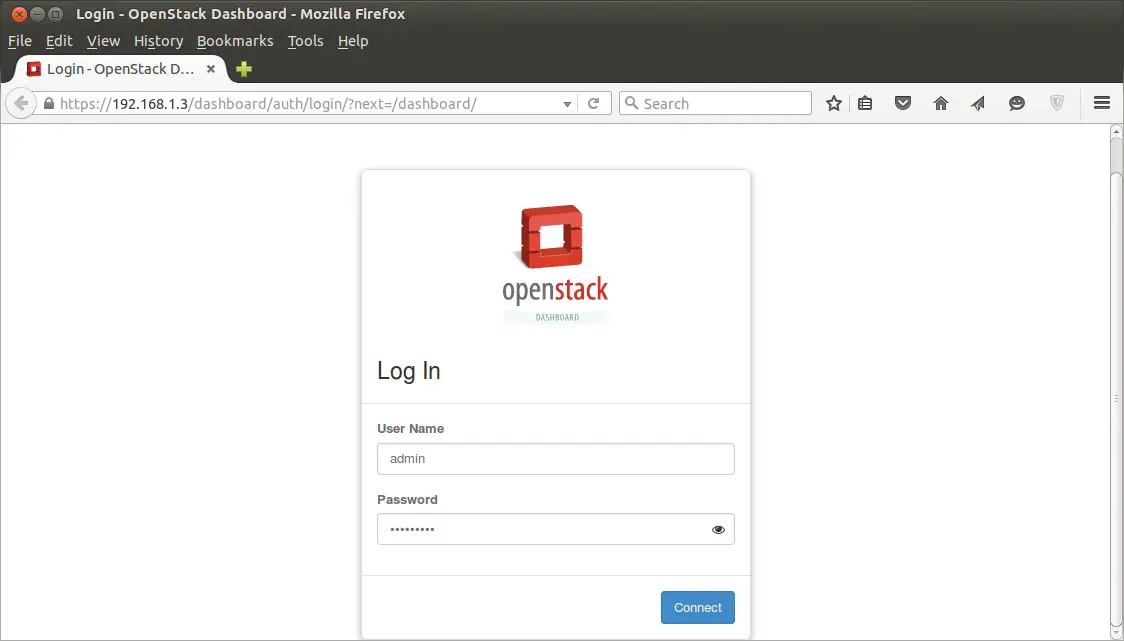
Use the user name as “admin” and password that we set for keystone admin user in answer file.
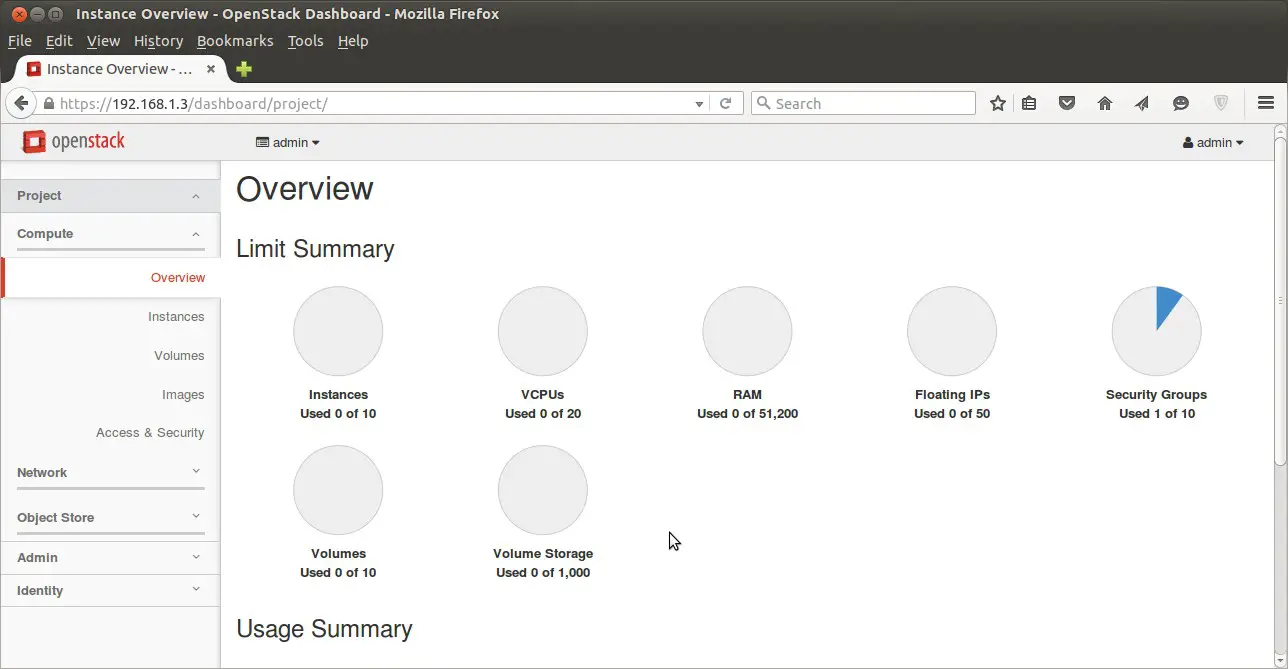
As we are able to login in Dashboard , so OpenStack installation part is completed. Now our next task is to “Launch an Instance from OpenStack Dashboard“
i am not able to access the dashboard, after installing openstack. the status is active for dashboard
Administrators will learn to use the docker command to start, stop, query, and list installed services. Containerizing services allows OpenStack to scale easily and quickly, to be more resilient, and to more easily handle configuration management and upgrades.
ERROR : Error appeared during Puppet run: 192.168.122.159_controller.pp
Error: Systemd start for openstack-nova-scheduler failed!
You will find full trace in log /var/tmp/packstack/20181123-111257-PlzWbP/manifests/192.168.122.159_controller.pp.log
I get this error. Could you please help?
I am facing this below error: how can I solve it????
[root@osboxes ~]# yum install -y openstack-packstack
RDO CentOS-7 – QEMU EV 18 kB/s | 18 kB 00:01
OpenStack Train Repository 288 kB/s | 4.4 MB 00:15
Error:
Problem: cannot install the best candidate for the job
– nothing provides PyYAML needed by openstack-packstack-1:15.0.1-1.el7.noarch
– nothing provides python-netifaces needed by openstack-packstack-1:15.0.1-1.el7.noarch
– nothing provides python-docutils needed by openstack-packstack-1:15.0.1-1.el7.noarch
(try to add ‘–skip-broken’ to skip uninstallable packages or ‘–nobest’ to use not only best candidate packages)
[root@osboxes ~]#
I got error : Error: ‘mount /srv/node/device1’ returned 32 instead of one of [0]
Please help, thanks in advance