As a continuation of Part-1, this part-2 has remaining features of Portainer covered and as explained below.
Monitoring docker container images
shashi@linuxtechi ~}$ docker ps -a
CONTAINER ID        IMAGE                 COMMAND             CREATED             STATUS   PORTS                             NAMES
9ab9aa72f015        ubuntu                "/bin/bash"         14 seconds ago      Exited (0) 12 seconds ago                  suspicious_shannon
305369d3b2bb        centos                "/bin/bash"         24 seconds ago      Exited (0) 22 seconds ago                  admiring_mestorf
9a669f3dc4f6        portainer/portainer   "/portainer"        7 minutes ago       Up 7 minutes   0.0.0.0:9000->9000/tcp      trusting_keller
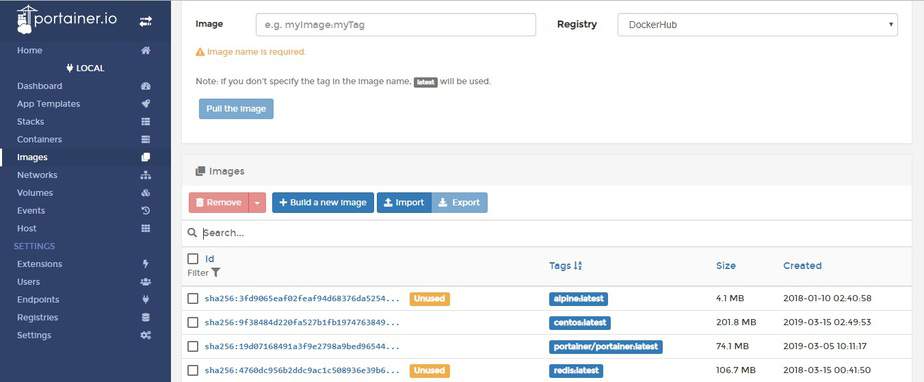
Including the portainer(which is a docker container image), all the exited and present running docker images are displayed. Below screenshot from Portainer GUI displays the same.
Monitoring events
Click on the “Events” option from the portainer webpage as shown below.
Various events that are generated and created based on docker-container activity, are captured and displayed in this page

Now to check and validate how the “Events” section works. Create a new docker-container image redis as explained below, check the docker ps –a status at docker command-line.
shashi@linuxtechi ~}$ docker ps -a
CONTAINER ID        IMAGE                 COMMAND                  CREATED              STATUS         PORTS                    NAMES
cdbfbef59c31        redis                 "docker-entrypoint.s…"   About a minute ago   Up About a minute         6379/tcp                 angry_varahamihira
9ab9aa72f015        ubuntu                "/bin/bash"              10 minutes ago       Exited (0) 10 minutes ago                            suspicious_shannon
305369d3b2bb        centos                "/bin/bash"              11 minutes ago       Exited (0) 11 minutes ago                            admiring_mestorf
9a669f3dc4f6        portainer/portainer   "/portainer"             17 minutes ago       Up 17 minutes         0.0.0.0:9000->9000/tcp   trusting_keller
Click the “Event List” on the top to refresh the events list,
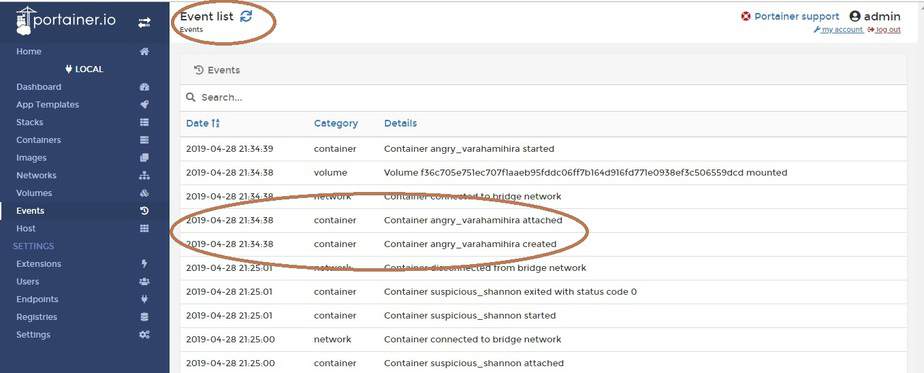
Now the event’s page also updated with this change,
Host status
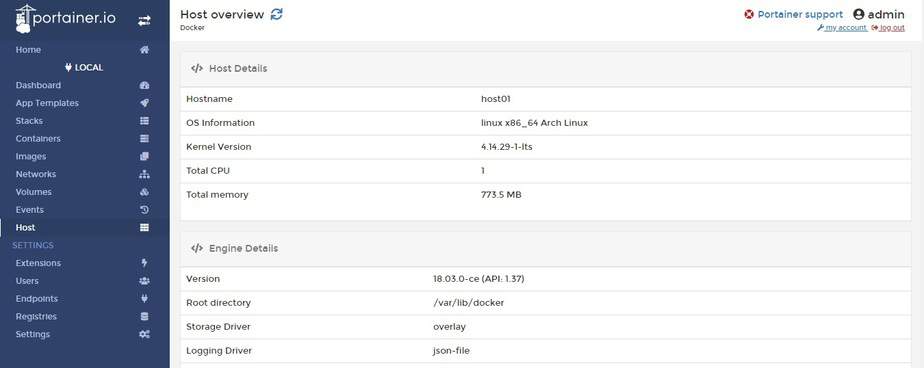
Below is the screenshot of the portainer displaying the host status. This is a simple window showing-up. This shows the basic info like “CPU”, “hostname”, “OS info” etc of the host linux machine. Instead of logging- into the host command-line, this page provides very useful info on for quick glance.
Dashboard in Portainer
Until now we have seen various features of portainer based under “Local” section. Now jump on to the “Dashboard” section of the selected Docker Container image.
When “EndPoint” option is clicked in the GUI of Portainer, the following window appears,
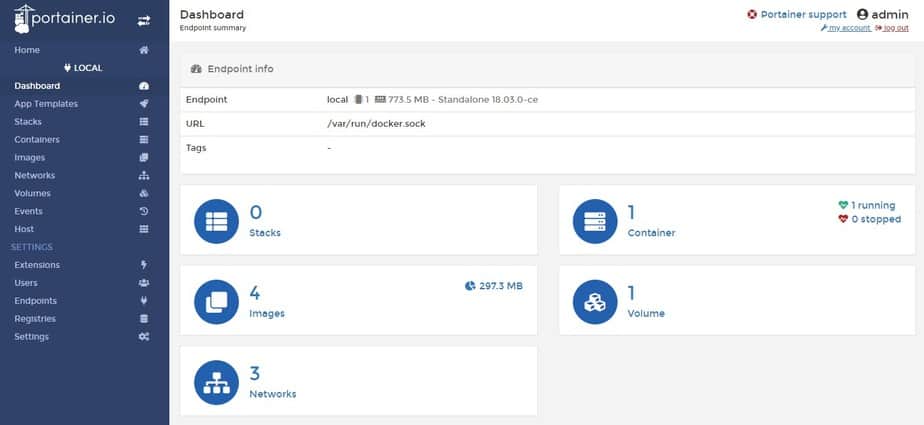
This Dashboard has many statuses and options, for a host container image.
1) Stacks: Clicking on this option, provides status of any stacks if any. Since there are no stacks, this displays zero.
2) Images: Clicking on this option provides host of container images that are available. This option will display all the live and exited container images

For example create one more “Nginx” container and refresh this list to see the updates.
shashi@linuxtechi ~}$  sudo docker run nginx
Unable to find image 'nginx:latest' locally
latest: Pulling from library/nginx
27833a3ba0a5: Pull complete
ea005e36e544: Pull complete
d172c7f0578d: Pull complete
Digest: sha256:e71b1bf4281f25533cf15e6e5f9be4dac74d2328152edf7ecde23abc54e16c1c
Status: Downloaded newer image for nginx:latest
The following is the image after refresh,
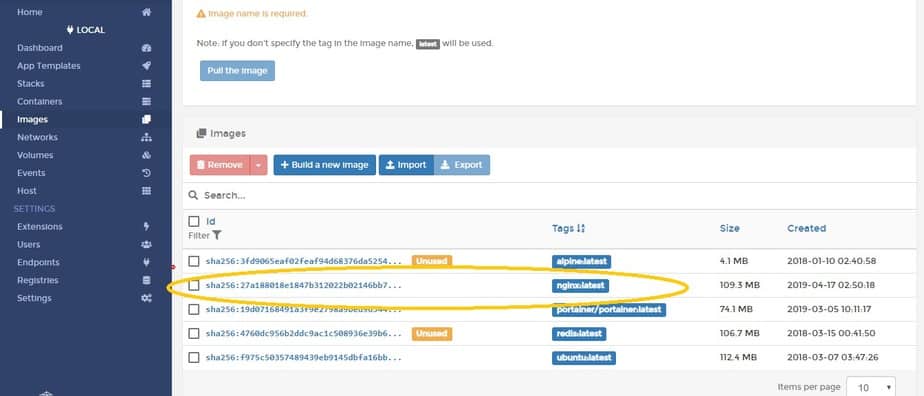
Once the Nginx image is stopped/killed and docker container image will be moved to unused status.
Note:-One can see all the image details here are very clear with memory usage, creation date and time. As compared to command-line option, maintaining and monitoring containers from here it will be very easy.
3) Networks: this option is used for network operations. Like assigning IP address, creating subnets, providing IP address range, access control (admin and normal user) . The following window provides the details of various options possible. Based on your need these options can be explored further.
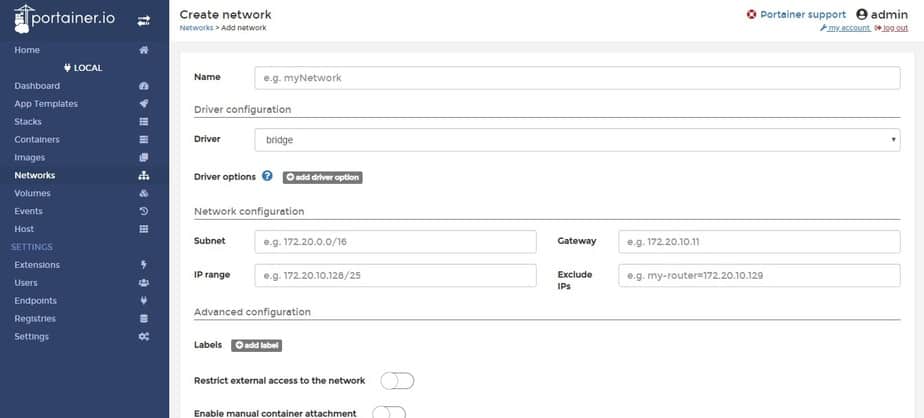
Once all the various networking parameters are entered, “create network” button is clicked for creating the network.
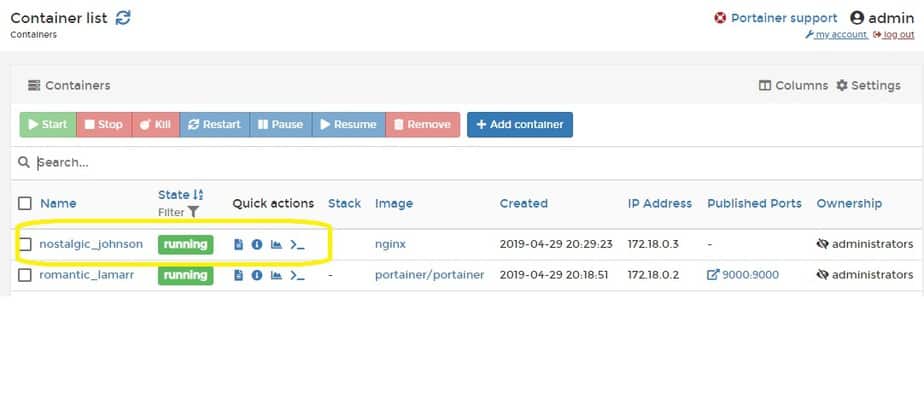
4) Container: (click on container) This option will provide the container status. This list will provide details on live and not running container statuses. This output is similar to docker ps command option.
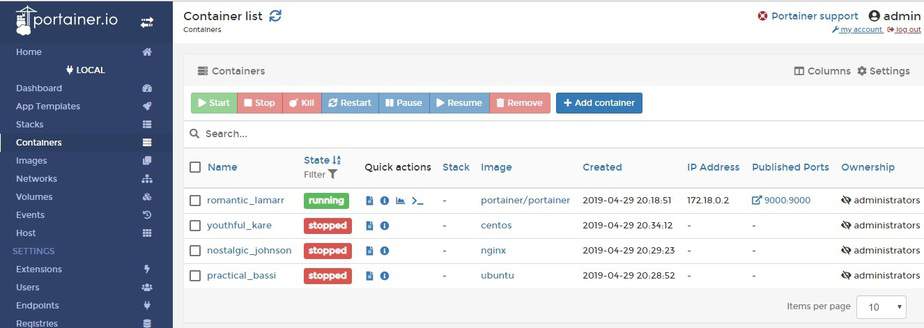
From this window only the containers can be stopped and started as need arises by checking the check box and selecting the above buttons. One example is provided as below,
Example, Both “CentOS” and “Ubuntu” containers which are in stopped state, they are started now by selecting check boxes and hitting “Start” button.
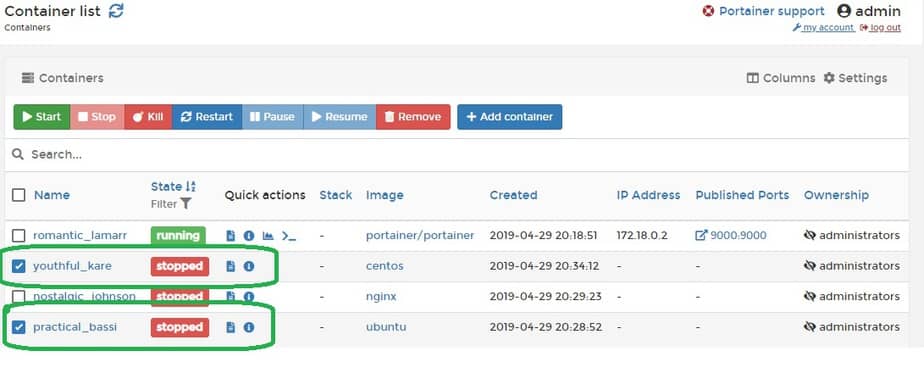
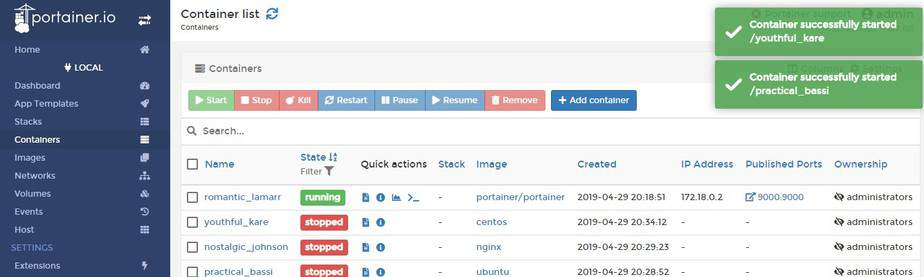
Note: Since both are Linux container images, they will not be started. Portainer tries to start and stops later. Try “Nginx” instead and you can see it coming to “running”status.
5) Volume: Described in Part-I of Portainer Article
Setting option in Portainer
Until now we have seen various features of portainer based under “Local” section. Now jump on to the “Setting” section of the selected Docker Container image.
When “Settings” option is clicked in the GUI of Portainer, the following further configuration options are available,
1) Extensions: This is a simple Portainer CE subscription process. The details and uses can be seen from the attached window. This is mainly used for maintaining the license and subscription of the respective version.

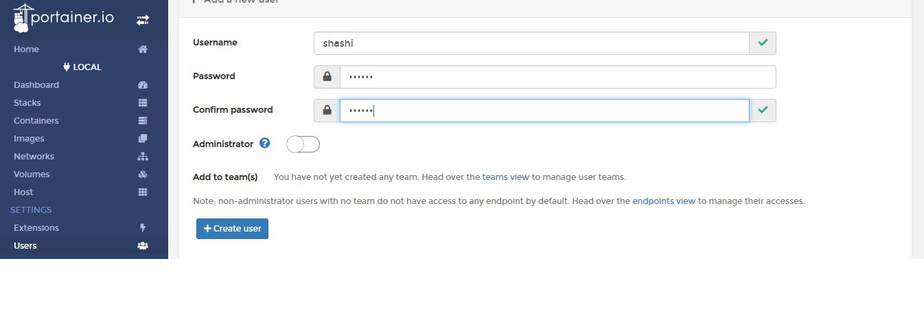
2) Users: This option is used for adding “users” with or without administrative privileges. Following example provides the same.
Enter the selected user name “shashi” in this case and your choice of password and hit “Create User” button below.
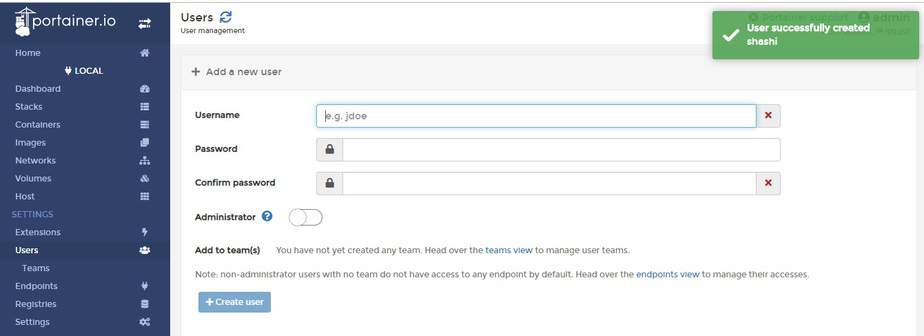
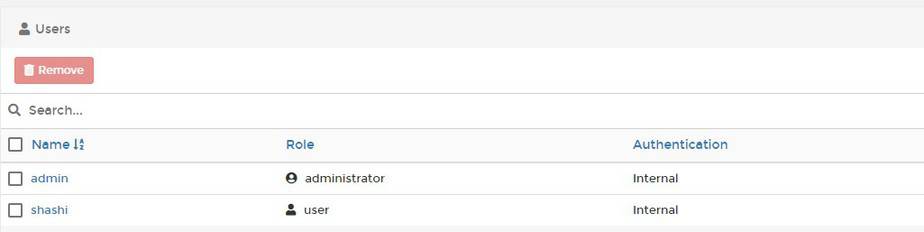
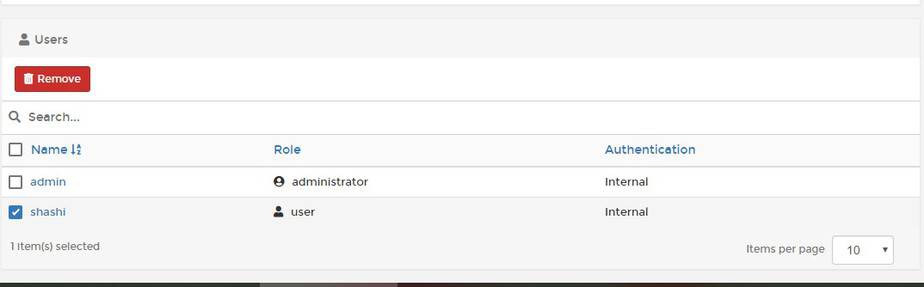
Similarly the just now created user “shashi” can be removed by selecting the check box and hitting remove button.
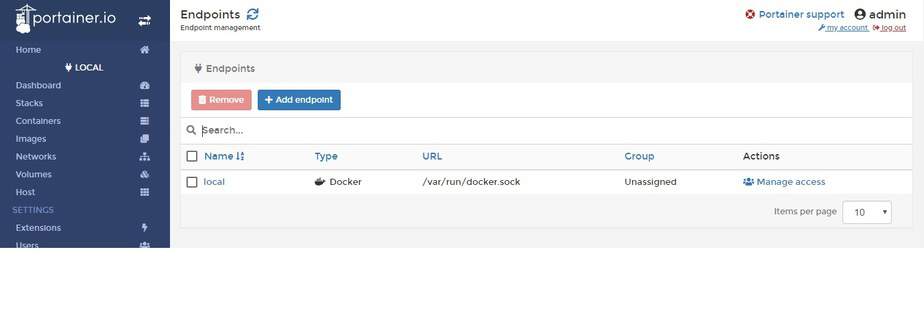
3) Endpoints: this option is used for Endpoint management. Endpoints can be added and removed as shown in the attached windows.
The new endpoint “shashi” is created using the various default parameters as shown below,
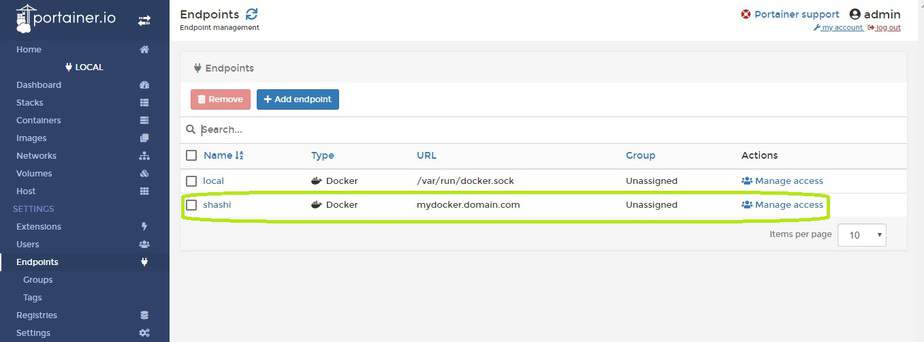
Similarly this endpoint can be removed by clicking the check box and hitting remove button.
4) Registries: this option is used for registry management. As docker hub has registry of various images, this feature can be used for similar purposes.

With the default options the “shashi-registry” can be created.
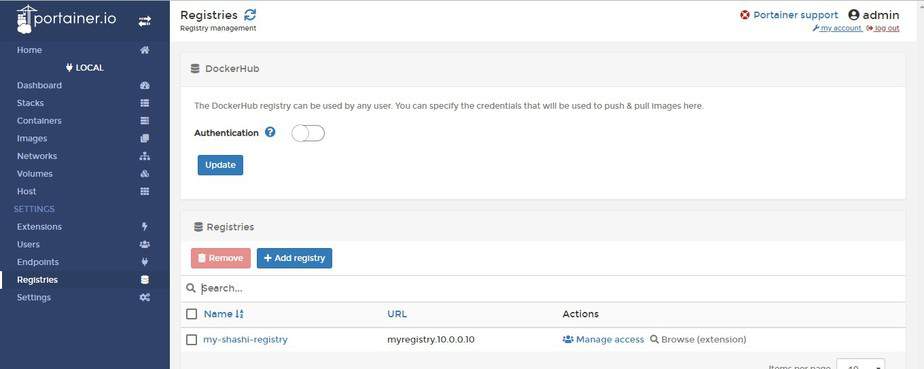
Similarly this can be removed if not required.
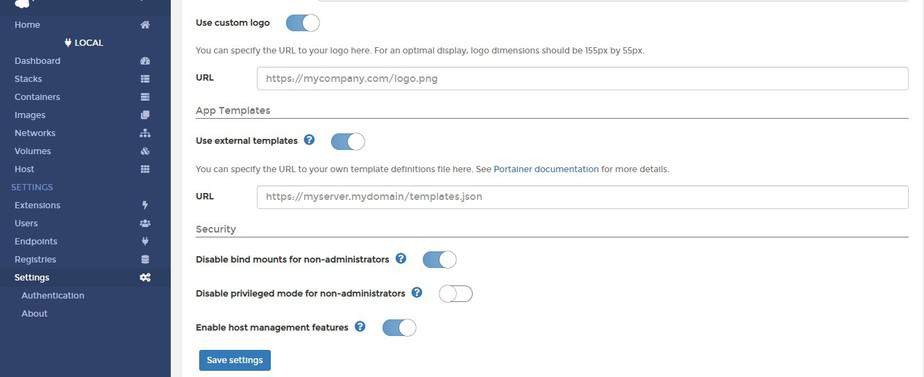
5) Settings: This option is used for the following various options,
- Setting-up snapshot interval
- For using custom logo
- To create external templates
- Security features like- Disable and enable bin mounts for non-admins, Disable/enable privileges for non-admins, Enabling host management features
Following screenshot shows some options enabled and disabled for demonstration purposes. Once all done hit on “Save Settings” button to save all these options.
Now one more option pops-up on “Authentication settings” for LDAP, Internal or OAuth extension as shown below”
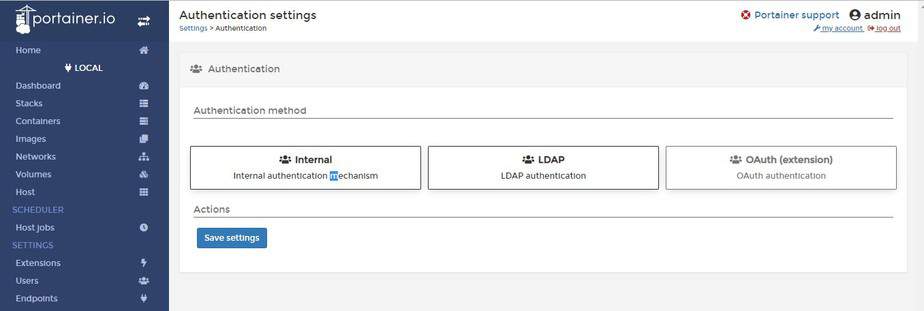
Based on what level of security features we want for our environment, respective option is chosen.
That’s all from this article, I hope these Portainer GUI articles helps you to manage and monitor containers more efficiently. Please do share your feedback and comments.