Manjaro Linux or simply called as Manjaro is a user-friendly, open source desktop operating system that is based on Arch Linux. The main objective in the development of Manjaro Linux is to provide a complete user friendly linux operating system. It is designed to be operated “straight from the word go” once installed with the help of its pre-installed software.
Some of its salient features that makes Manjaro Linux standout from other linux desktop distributions is its intuitive and easy to use user interface, simple installation system and the ability to detect hardware automatically along with various desktop configurability options. It also comes with a stable rolling release model and contains special bash scripts to advanced desktop configuration abilities and also for managing graphic drivers. The lively Manjaro community also provides great support for its users.
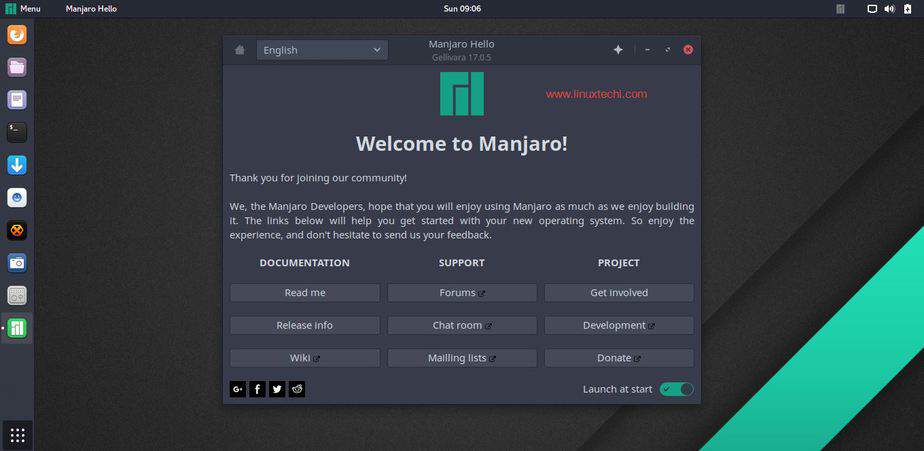
The Manjaro GNOME brings with it a nice and beautiful desktop environment with advanced features. The layout is neatly laid with the menus arranged perfectly on the left and the background theme also seems to be pretty cool. It is originally designed and developed to provide a simple and easy desktop environment with complete customization options along with a load of extensions available from https://extensions.gnome.org/. The calamares installer has been redesigned to provide an easy to install system which is pretty light as you won’t get many pre-defined apps except for Firefox and some minor application. No office apps comes with the package, but you can always add or remove apps using (Add/Remove Software) GUI.
Following are the minimum System requirements for Manjaro Linux 17.05:
- 1 GB RAM
- 1 GHz Processor
- 30 GB free hard disk size
- Bootable media ( ISO, DVD &s USB drive)
- Internet Connection (Optional)
Note: We can also try the Manjaro Linux in Virtual Box VM. First create a new virtual machine, define the VM name, compute resources like CPU , RAM and Hard disk Size and boot the VM with Manjaro 17.05 ISO file and follow the beneath steps
Installing Manjaro Linux 17.05 (GNOME Edition)
Installing Manjaro GNOME Linux 17.05 is pretty much simple with the easy to use calamares installer. It is extremely informative and helpful and installation can be completed within just minutes.
Step 1) Download Manjaro GNOME 17.05 desktop Edition
Download Manjaro 17.05 ( Gnome edition) 64-bit ISO file from its official web site:
https://manjaro.org/get-manjaro/
Burn the downloaded ISO file either into USB drive or DVD and make it bootable.
Step 2) Boot your system with the above created bootable media
We will get the window something like below:
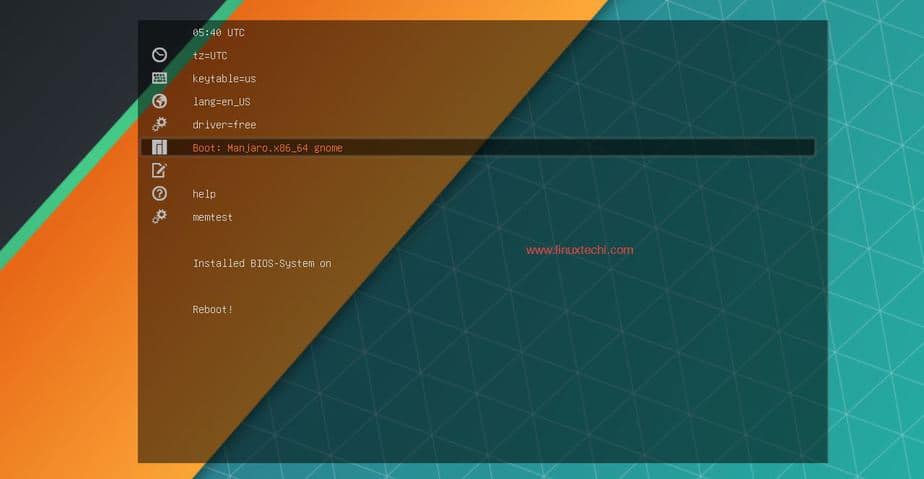
Select the option “Boot: Manjaro.x86_64 gnome” and then press enter. We will get the next window as shown in step3.
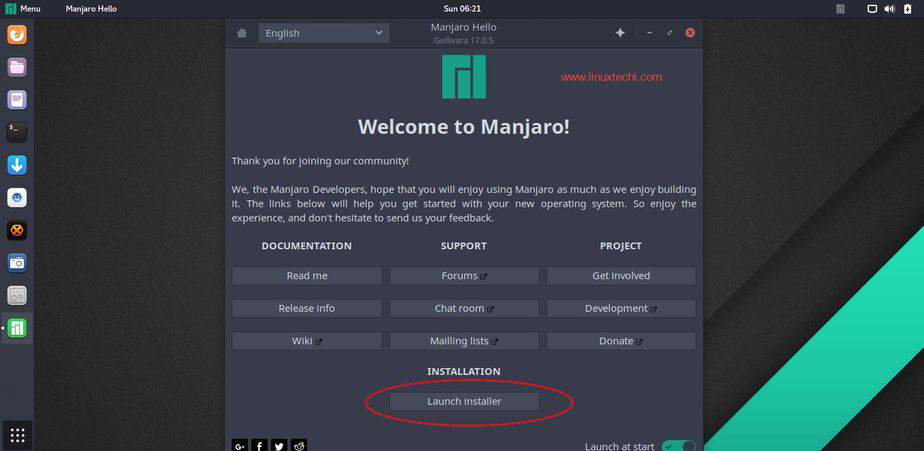
Step 3) Select “Launch Installer” Option
Step 4) Select your Language accordingly
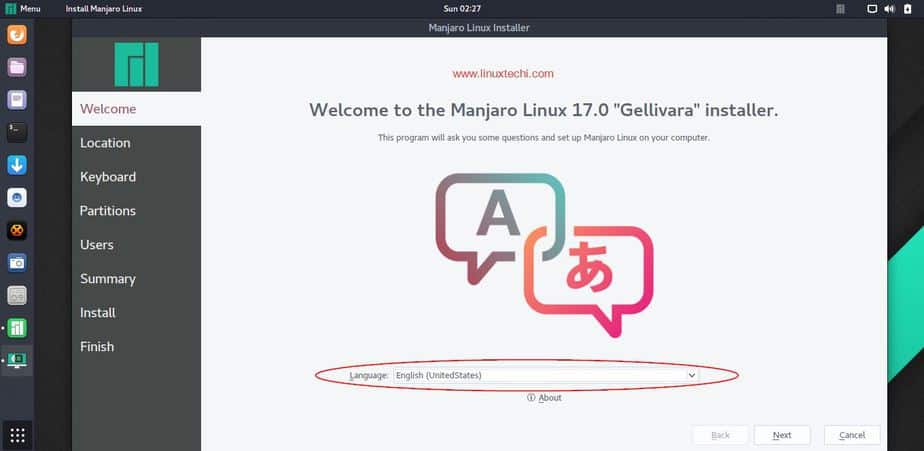
Click on Next
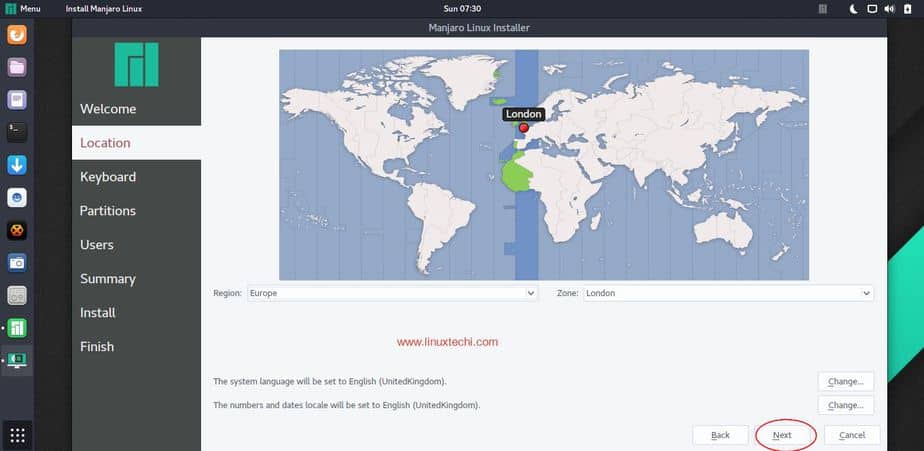
Step 5) In the next window, Select the Region and Zone accordingly and then click on Next
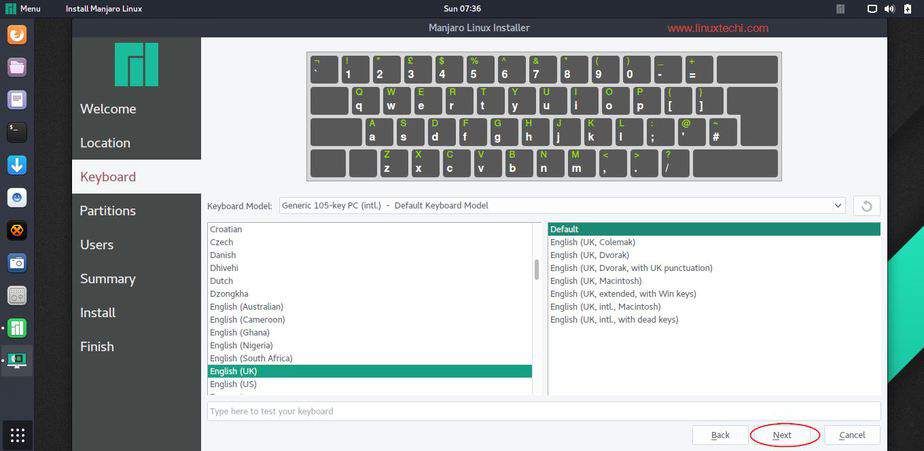
Step 6) Select your Keyboard layout as per your language and Setup
Step 7) Select Your Partition scheme either as automatic or manual partitions
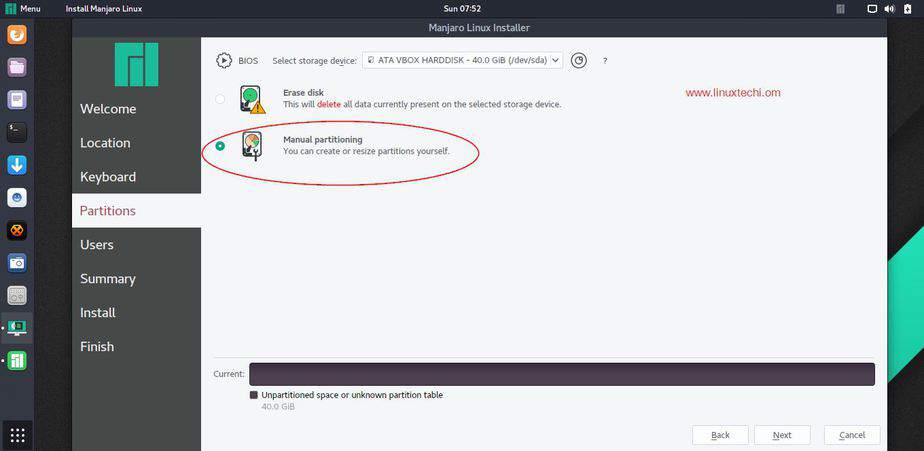
If you don’t want to create your own partition scheme or table then select the first option “Erase Disk“, it will delete all the existing data on disk and will create new partition table for Manjaro Linux automatically.
If you are planning to have own customize partition table, then select the second option “Manual Partitioning“, in my case I will be creating manual partition table on 40 GB hard disk with followings partitions.
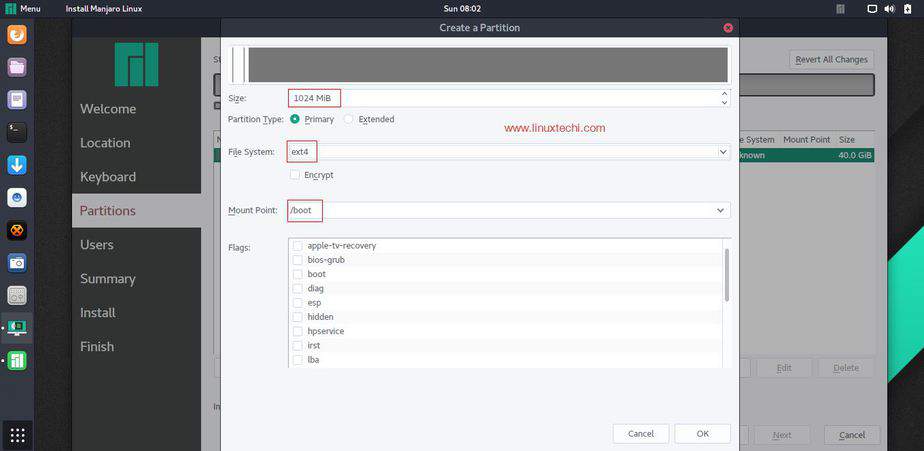
- /boot – 1 GB ( ext4 file system)
- / – 10 GB ( ext4 file system)
- /home – 20 GB ( ext4 file system )
- /var – 7 GB ( ext4 file system)
- Swap – 2 GB
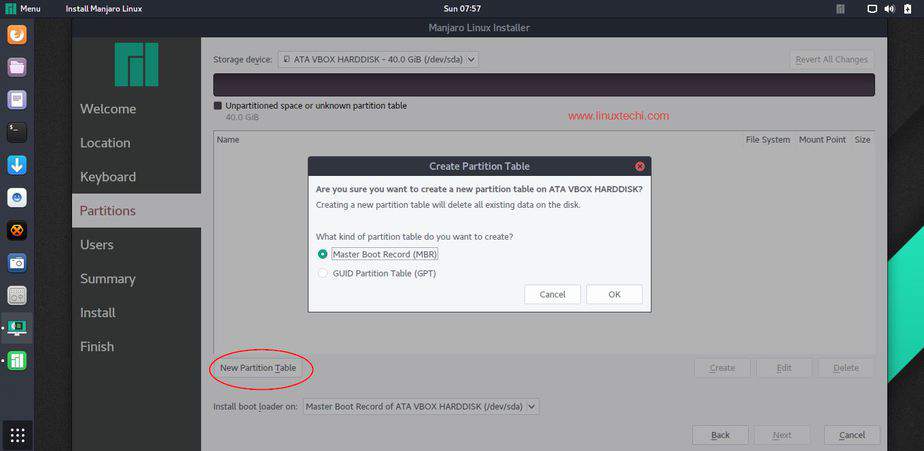
Create new partition Table and select partition table kind as “Master Boot Record (MBR)”
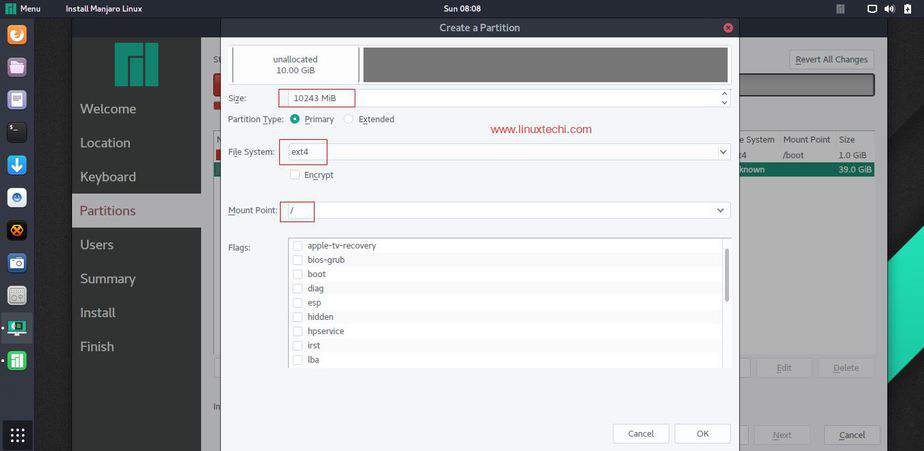
Now Select the disk and create our first partition as boot and specify the Size as 1 GB and /boot as mount point,
Create slash root (/) partition of size 10 GB with ext4 file system
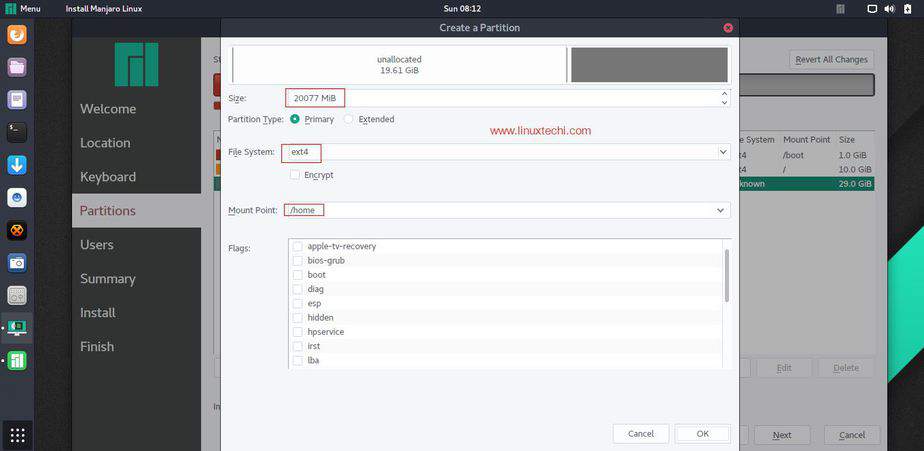
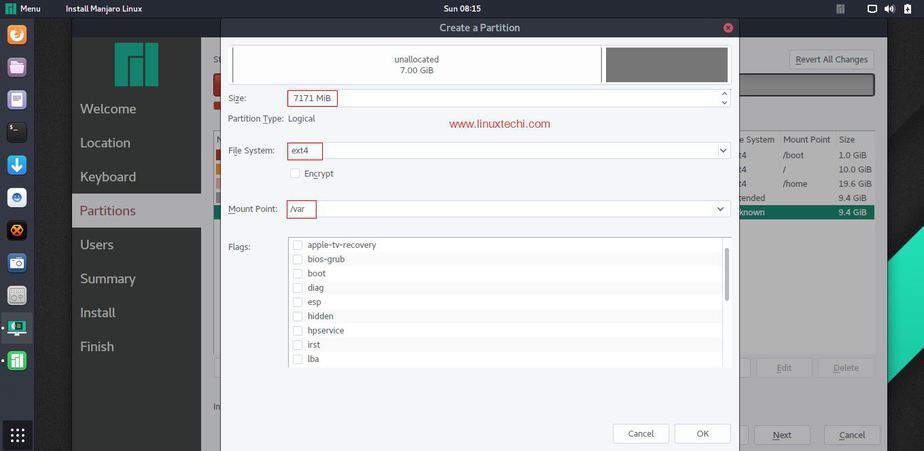
Similarly Create /home and /var partition of size 20 GB and 7 GB respectively
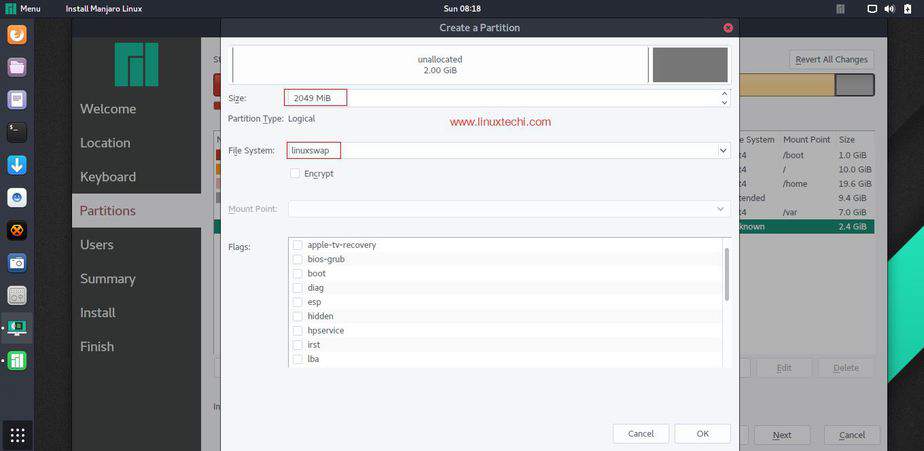
Now create Swap partition of Size of 2 GB
Once you are done with partitions, then your partition table should be something like below:
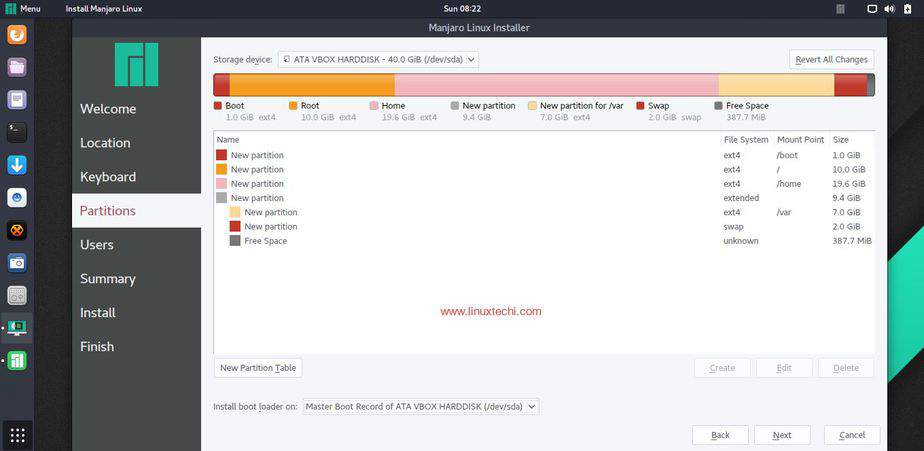
Click on Next
Step 8) Specify Local User Name, Password & Hostname
Here it is time to personalize your Manjaor GNOME Linux, so provide your name, name used to log in, name of the computer and password.
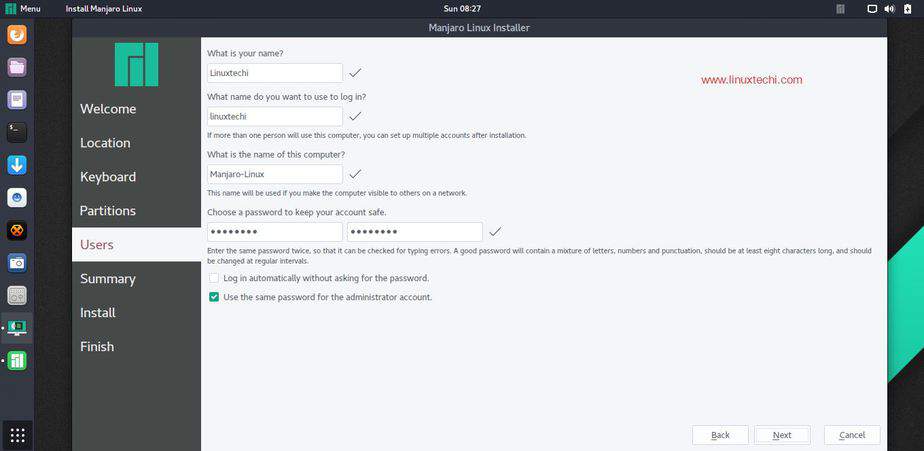
Click on Next to proceed further
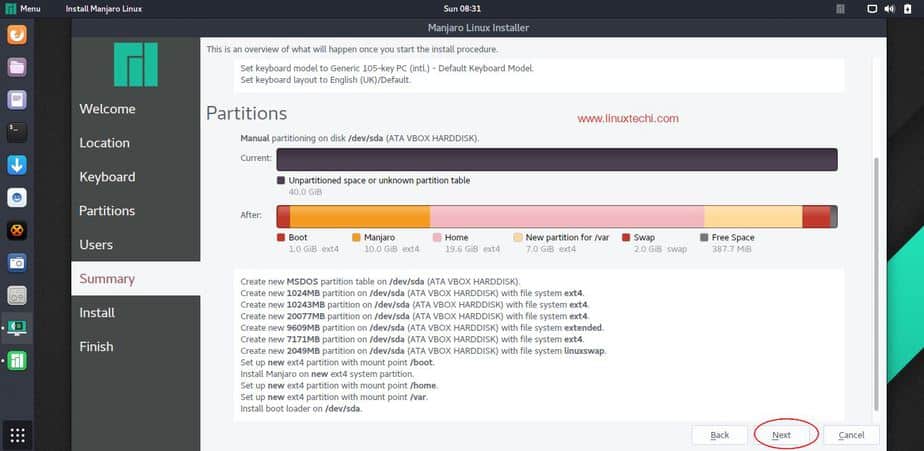
In the next window we will see overview of Installation summary, Click on Next
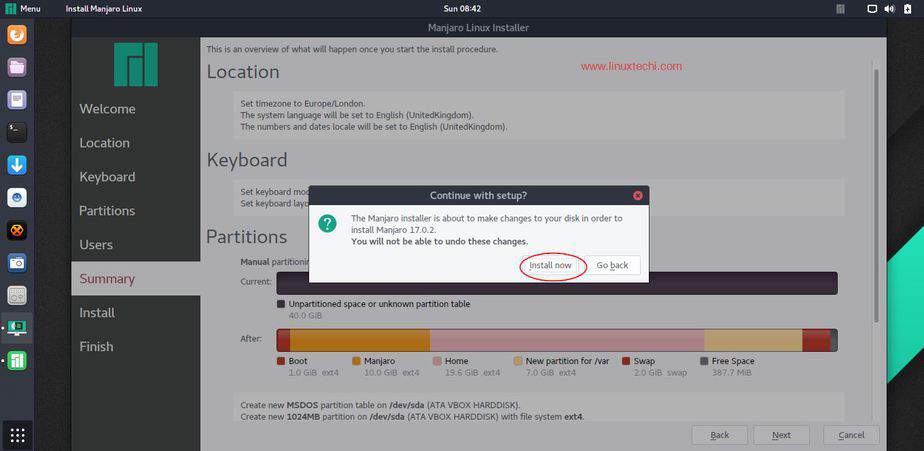
Click on “Install Now” option to accept the changes to the disk and to start the installation
Step 9) Installation of Manjaro GNOME 17.05 has been started and in progress
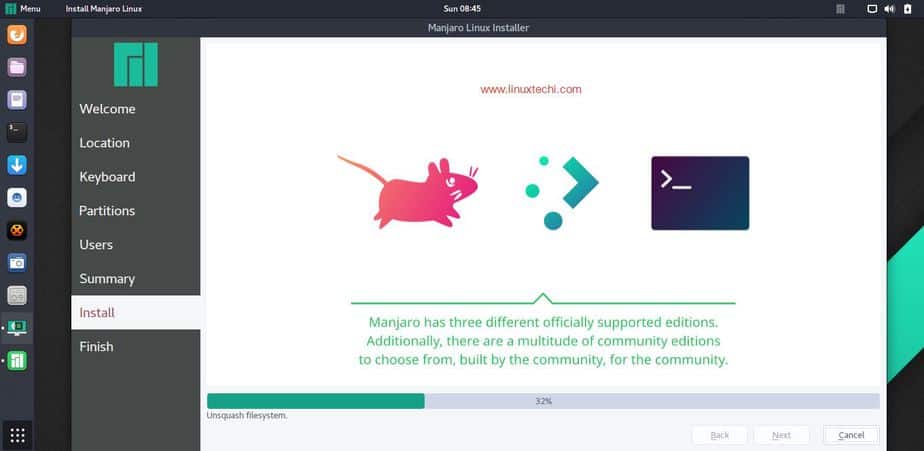
Once the installation has been completed successfully, installer will prompt us to restart the machine.
Step 10) Select “Restart Now” and then click on “Done” option to reboot your machine.

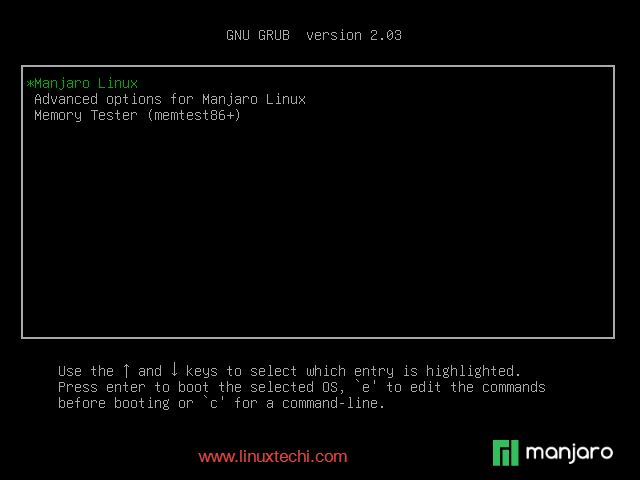
Step 11) Remove the Installation media and boot your machine with newly installed Manjaro 17.05
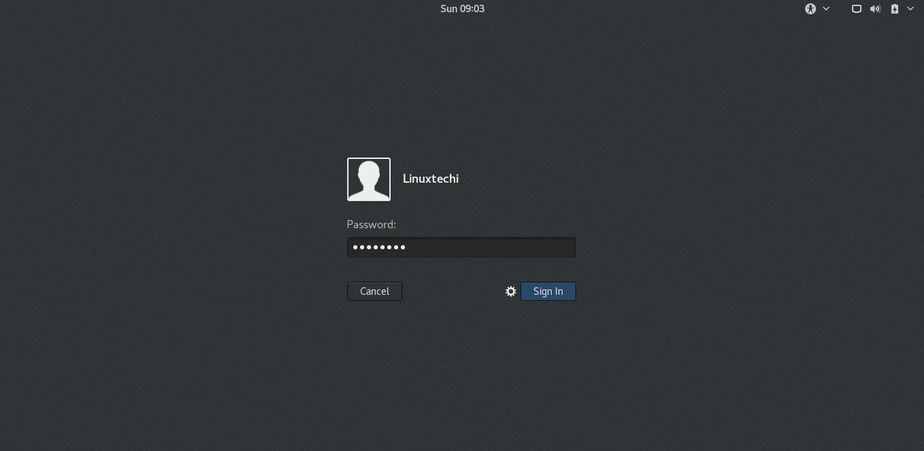
Use the same user name and its password whatever you specify during the installation, In my case user name is “linuxtechi”
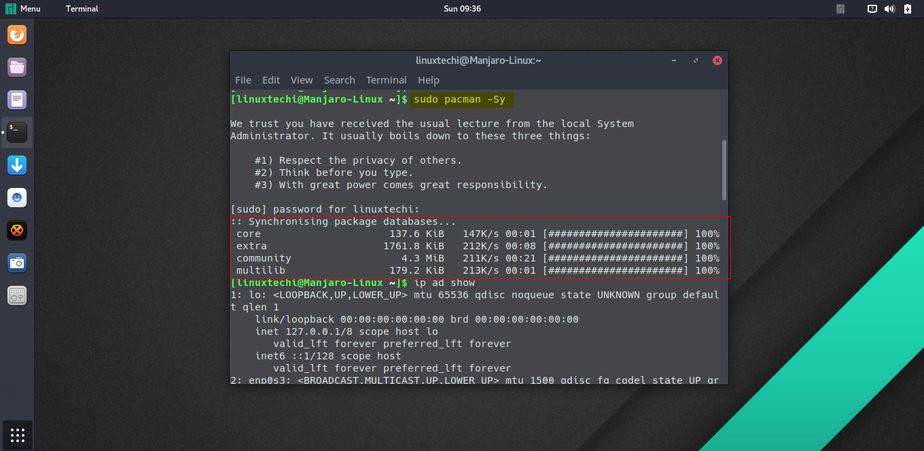
If you want to install any software, first we need to refresh packages database. In Manjaro Linux “pacman” is the command which is used to install, remove and update package database.
[linuxtechi@Manjaro-Linux ~]$ sudo pacman -Sy
Now You can you install software either from the command line using pacman or GUI ( Add/Remove Software)
To Install Package from command line using pacman
[linuxtechi@Manjaro-Linux ~]$ sudo pacman -S {pkg-name}
To remove package from command line using pacman without dependencies
[linuxtechi@Manjaro-Linux ~]$ sudo pacman -R vlc
Remove package along with its dependencies.
[linuxtechi@Manjaro-Linux ~]$ sudo pacman -Rs vlc
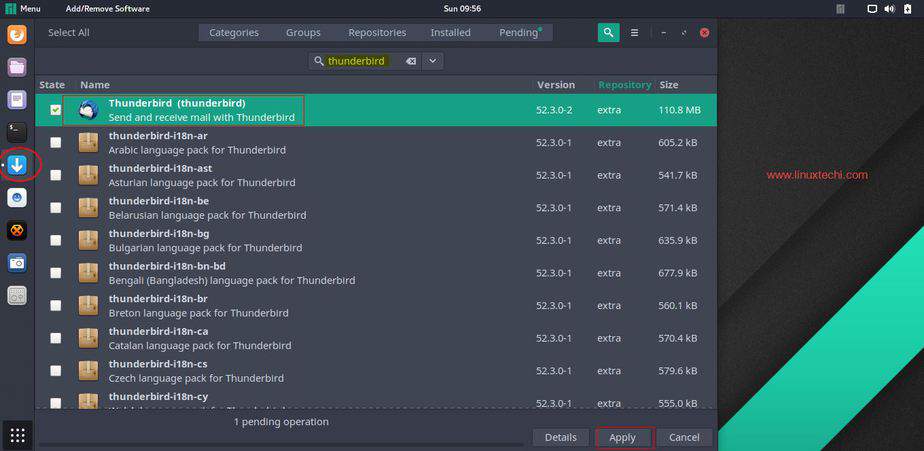
Installing and Remove Packages from GUI ( Add/ Remove Software)
Open Add / Remove GUI and search the package to be installed, in below example I am installing thunderbird. Click on apply to install the package
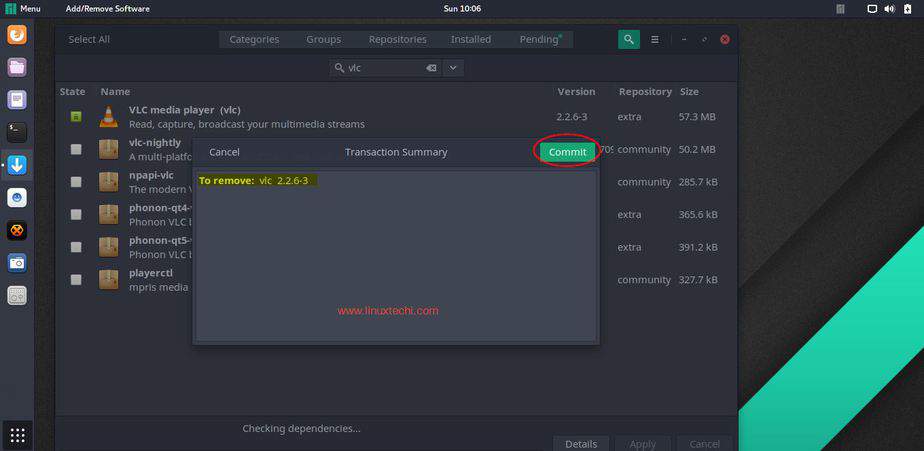
Similarly to remove the software
This concludes the Installation of Manjaro 17.05 (Gnome edition). Explore the Manjaro Linux and have fun 🙂
Please do not hesitate to share your feedback and comments.
man thanks a billion times. i was totally stuck here.