Zabbix is a free and open source monitoring tool which is used to monitor and track the availability & performance of servers, network devices and other IT assets which are on network.
Zabbix uses database like MySQL, MariaDB, Oracle and IBM DB2 to store its data. Zabbix web interface is written in PHP.
Some of its key features are listed below :
- Monitor everything which is on network like Servers, applications, database instance and network devices.
- Zabbix provides Web based administration interface.
- Monitoring CPU utilization of a particular process or a group of process ( proc.cpu.util)
- Using low-level discovery rules, zabbix can discover Vmware hypervisor ( ESXI ) and Virtual machines.
- Zabbix also supports agentless monitoring
- Monitoring of database servers like MySQL, PostgreSQL, Oracle and Microsoft SQL Server.
- Zabbix can also perform the task of capacity planning for your environment.
- Zabbix is Open Source so no cost involved and can be deployed on small and large environment.
- Hardware Monitoring using Zabbix via IPMI credentials.
- Network Device monitoring using snmp agents.
In this article we will install the latest version of Zabbix 4.4 on CentOS 7 machine. Below are the details of my server on which i will install Zabbix.
- Hostname = zabbix.linuxtechi.com
- IP Address = 192.168.1.7
- OS = CentOS 7
- SELinux = Enforcing
- Firewall = Running
Before Starting Installation, first update your system using below command :
[root@zabbix ~]# yum -y update
[root@zabbix ~]# reboot
Step:1 Enable Zabbix Repository
Zabbix package is not available in the default yum repository, so we will enable zabbix repository using below command.
[root@zabbix ~]# yum install https://repo.zabbix.com/zabbix/4.4/rhel/7/x86_64/zabbix-release-4.4-1.el7.noarch.rpm
Step:2 Install Zabbix Server, Database, Web Server and PHP packages
Use the below command to install rpm package of Zabbix server, Database Sever (MariaDB) , Web Server ( http) and PHP.
[root@zabbix ~]# yum -y install zabbix-server-mysql zabbix-web-mysql mysql mariadb-server httpd php
Step:3 Configure Zabbix Database.
Start the Database (MariaDB) service
[root@zabbix ~]# systemctl start mariadb
[root@zabbix ~]# systemctl enable mariadb
ln -s '/usr/lib/systemd/system/mariadb.service' '/etc/systemd/system/multi-user.target.wants/mariadb.service'
[root@zabbix ~]#
Use ‘mysql_secure_installation‘ command to set the root password of mariadb database and configure other parameters like ‘Remove anonymous users‘, ‘Disallow root login remotely‘ and ‘Remove test database and access to it‘
[root@zabbix ~]# mysql_secure_installation
Now create the Zabbix Database (zabbix_db) and database user (zabbix_user) and grant all privileges to the user on the Zabbix database.
[root@zabbix ~]# mysql -u root -p
Enter password:
Welcome to the MariaDB monitor. Commands end with ; or \g.
Your MariaDB connection id is 10
Server version: 5.5.47-MariaDB MariaDB Server

Copyright (c) 2000, 2015, Oracle, MariaDB Corporation Ab and others.

Type 'help;' or '\h' for help. Type '\c' to clear the current input statement.

MariaDB [(none)]> create database zabbix_db;
Query OK, 1 row affected (0.00 sec)

MariaDB [(none)]> grant all privileges on zabbix_db.* to zabbix_user@localhost identified by <new_password>;
Query OK, 0 rows affected (0.00 sec)

MariaDB [(none)]> flush privileges;
Query OK, 0 rows affected (0.00 sec)

MariaDB [(none)]> exit
Bye
[root@zabbix ~]#
Now import the database Schema using below commands,
[root@zabbix ~]# cd /usr/share/doc/zabbix-server-mysql-4.4.5/
[root@zabbix zabbix-server-mysql-4.4.5]# gunzip create.sql.gz
[root@zabbix zabbix-server-mysql-4.4.5]# mysql -u root -p zabbix_db < create.sql
Enter password:
[root@zabbix zabbix-server-mysql-4.4.5]#
Step:4 Edit Zabbix Server Configuration file
Edit the Zabbix Server’s config file (/etc/zabbix/zabbix_server.conf) and specify the database name for zabbix , database user name & its password.
[root@zabbix ~]# vi /etc/zabbix/zabbix_server.conf
...................................
DBHost=localhost
DBName=zabbix_db
DBUser=zabbix_user
DBPassword=XXXXXXX
...................................
Save & exit the file.
Configure PHP Setting
Set the below parameters in the PHP config file (/etc/php.ini )
[root@zabbix ~]# vi /etc/php.ini
................................
max_execution_time = 600
max_input_time = 600
memory_limit = 256M
post_max_size = 32M
upload_max_filesize = 16M
date.timezone = Asia/Kolkata
...............................
Allow the ports in the Firewall
[root@zabbix ~]# firewall-cmd --permanent --add-port=10050/tcp
success
[root@zabbix ~]# firewall-cmd --permanent --add-port=10051/tcp
success
[root@zabbix ~]# firewall-cmd --permanent --add-port=80/tcp
success
[root@zabbix ~]# firewall-cmd --reload
success
[root@zabbix ~]#
Start the Zabbix and Web Server Service and make sure it is enable across the reboot.
[root@zabbix ~]# systemctl start zabbix-server
[root@zabbix ~]# systemctl enable zabbix-server
ln -s '/usr/lib/systemd/system/zabbix-server.service' '/etc/systemd/system/multi-user.target.wants/zabbix-server.service'
[root@zabbix ~]#
[root@zabbix ~]# systemctl start httpd
[root@zabbix ~]# systemctl enable httpd
ln -s '/usr/lib/systemd/system/httpd.service' '/etc/systemd/system/multi-user.target.wants/httpd.service'
[root@zabbix ~]#
As Selinux is running in enforcing mode, so it is expected that zabbix service will not start properly, so set the following selinux rules
[root@zabbix ~]# yum install policycoreutils-python -y
[root@zabbix ~]# setsebool -P httpd_can_connect_zabbix on
[root@zabbix ~]# setsebool -P httpd_can_network_connect on
[root@zabbix ~]# setsebool -P zabbix_can_network on
[root@zabbix ~]# semodule -i zabbix-server.pp
[root@zabbix ~]# semodule -i zabbix_server_setrlimit.pp
[root@zabbix ~]# curl https://support.zabbix.com/secure/attachment/53320/zabbix_server_add.te > zabbix_server_add.te
[root@zabbix ~]# checkmodule -M -m -o zabbix_server_add.mod zabbix_server_add.te
checkmodule:  loading policy configuration from zabbix_server_add.te
checkmodule:  policy configuration loaded
checkmodule:  writing binary representation (version 19) to zabbix_server_add.mod
[root@zabbix ~]# semodule_package -m zabbix_server_add.mod -o zabbix_server_add.pp
[root@zabbix ~]# semodule -i zabbix_server_add.pp
After setting up selinux rules , restart zabbix service
[root@zabbix ~]# systemctl start zabbix-server
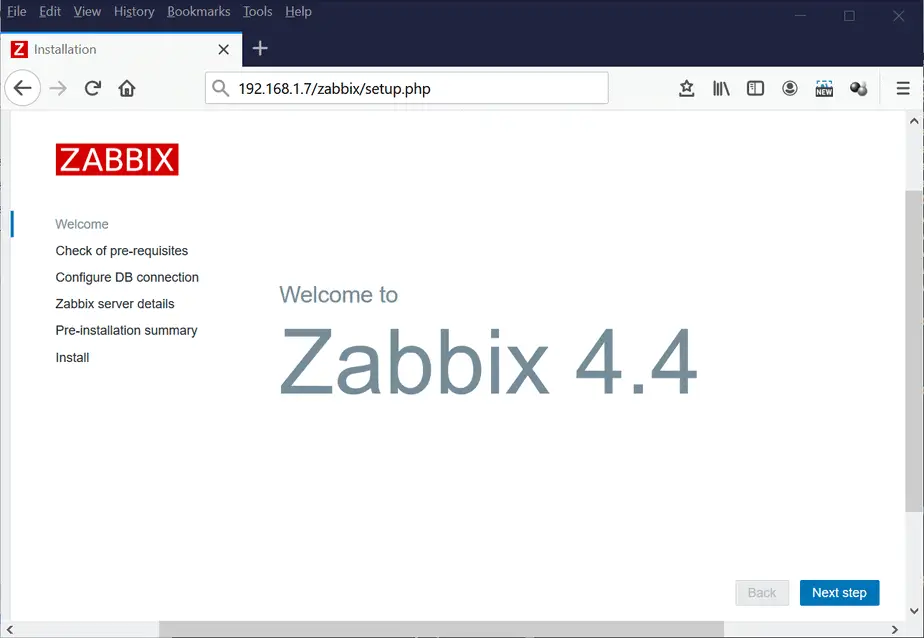
Step:5 Browse the Zabbix Web interface using below URL
http://192.168.1.7/zabbix/ or http://zabbix.linuxtechi.com/zabbix
Replace the IP address or hostname as per your setup.
Click on ‘Next step’
On this Step Zabbix Pre-requisites are checked and verified
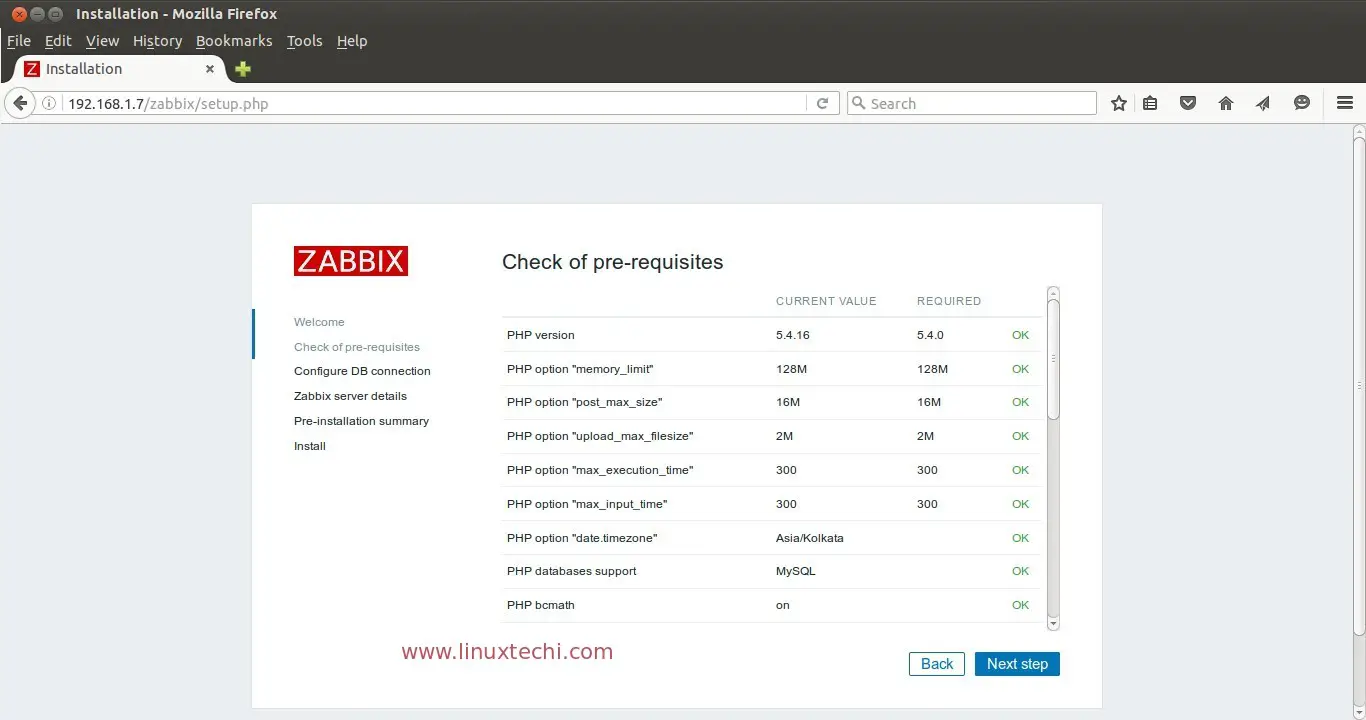
Click on ‘Next step’
Specify the Zabbix Database name, database user and its password.
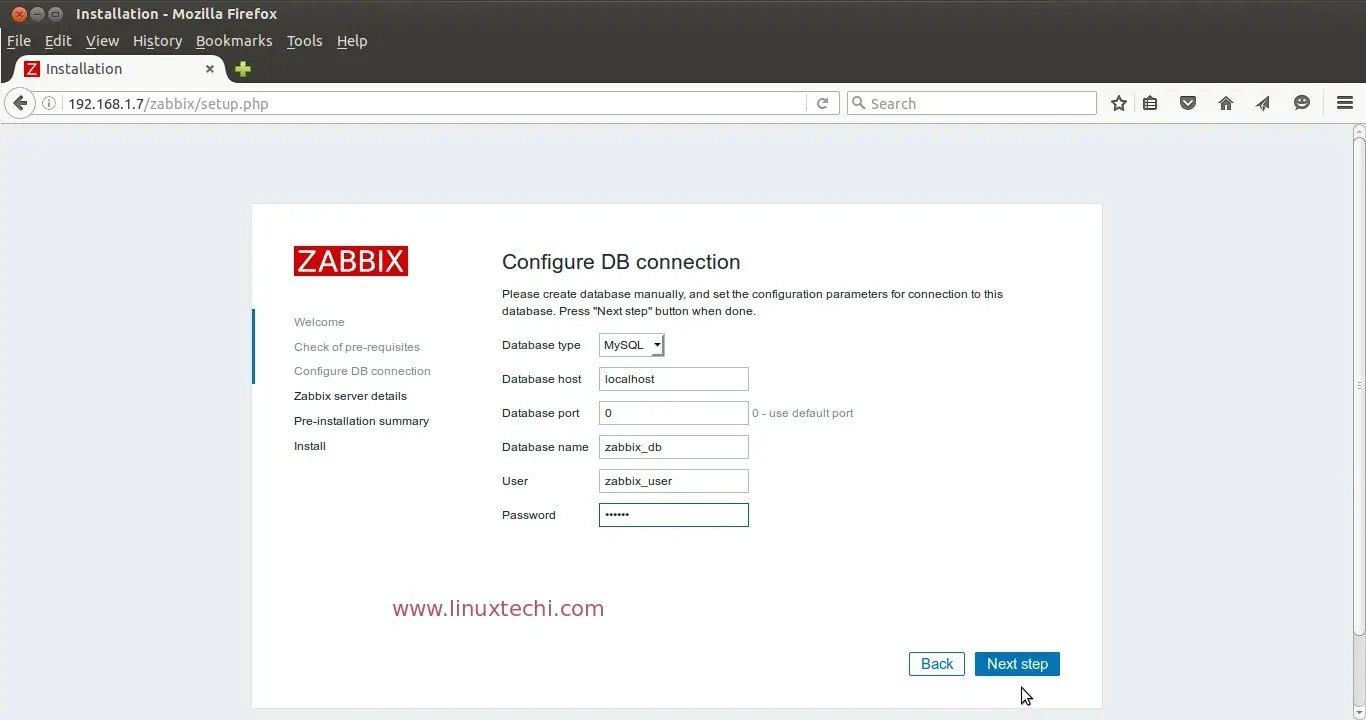
Click on ‘Next step’ to continue.
Specify the Zabbix Server details and Port number.
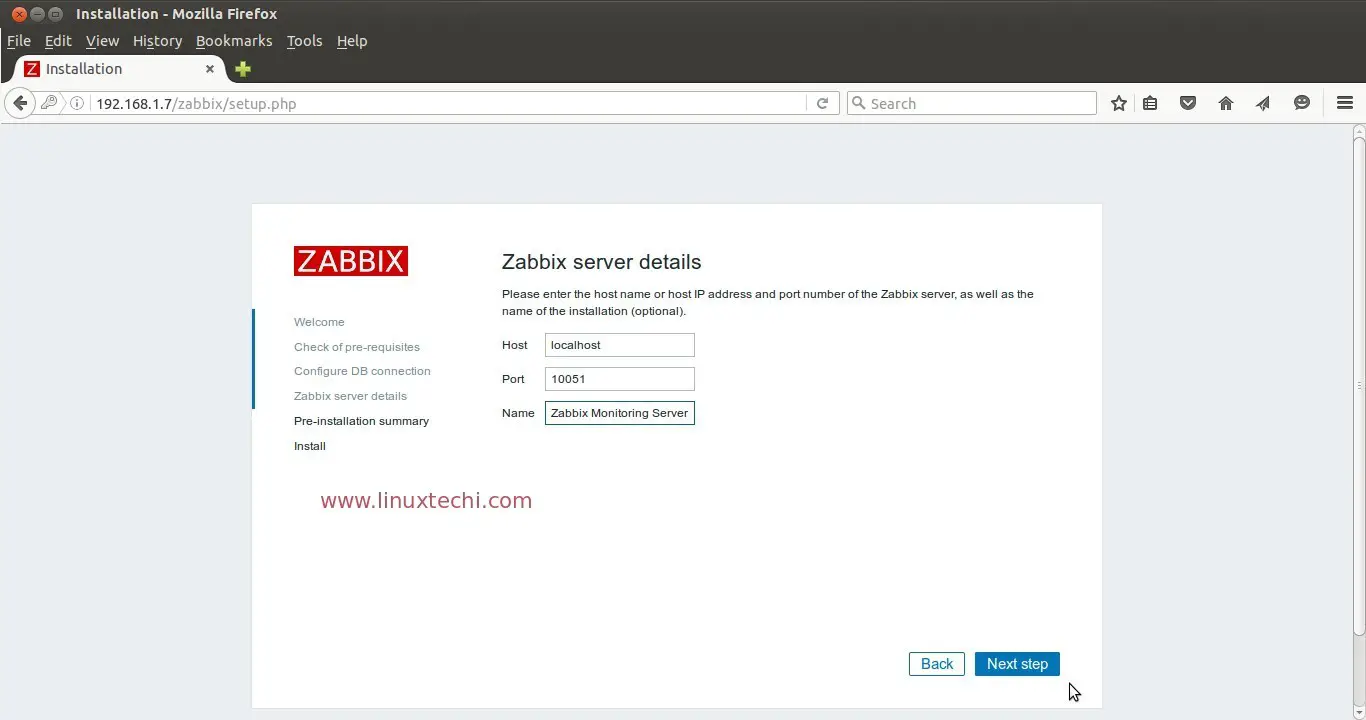
Click on ‘Next step’ to continue.
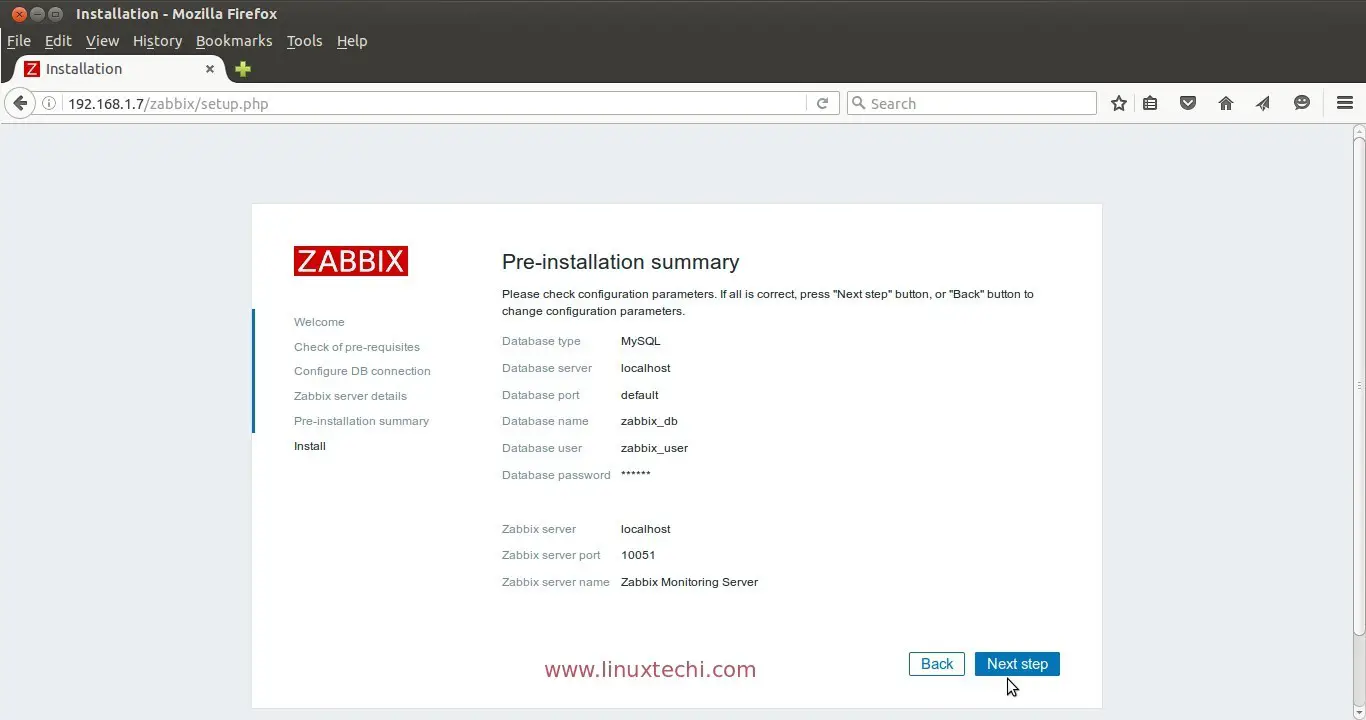
Pre-installation summary of Zabbix Servers, click on ‘Next step’ to continue.
As we can see that Zabbix installation is completed successfully
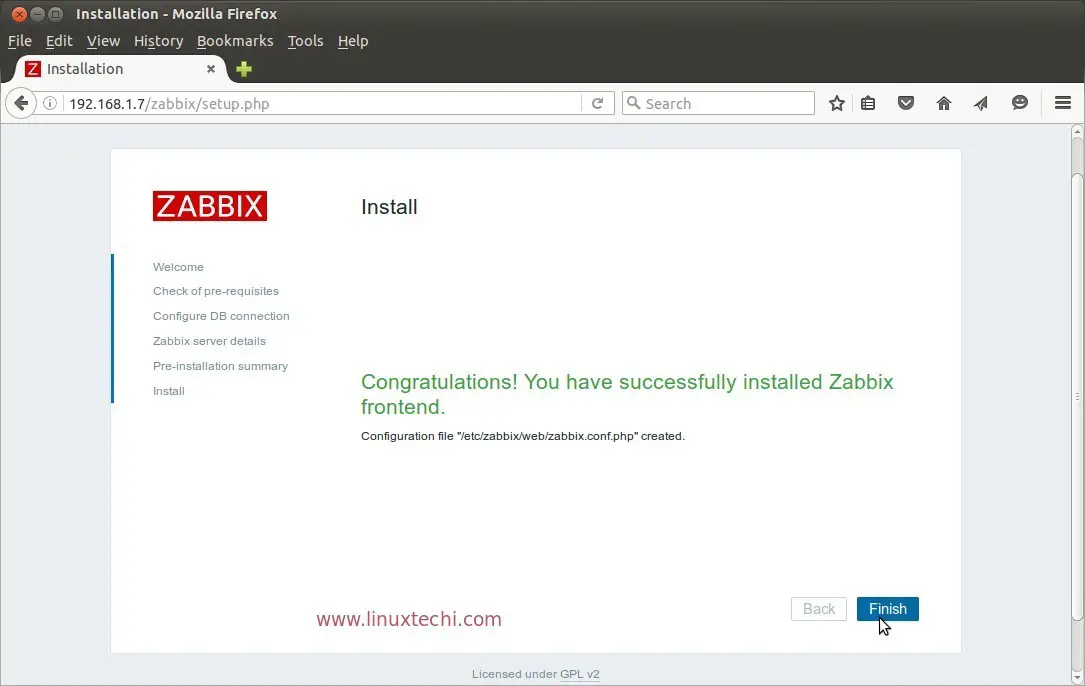
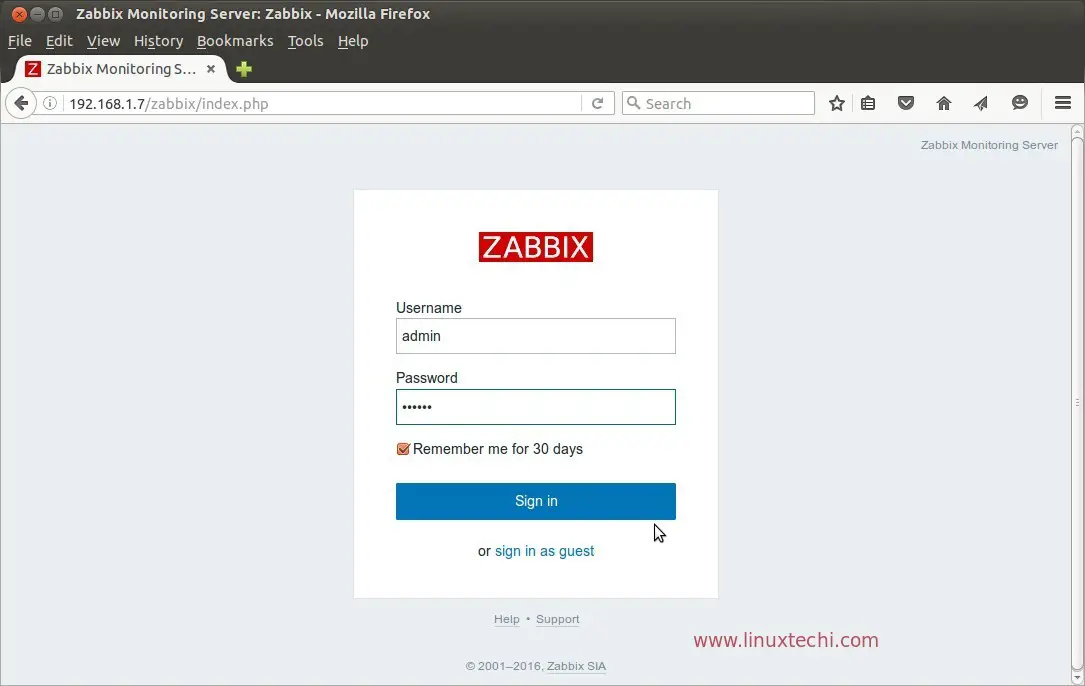
When we click on ‘finish’ , it will re-direct us to the Zabbix web interface Console.
Use user name as ‘admin‘ and password ‘zabbix‘
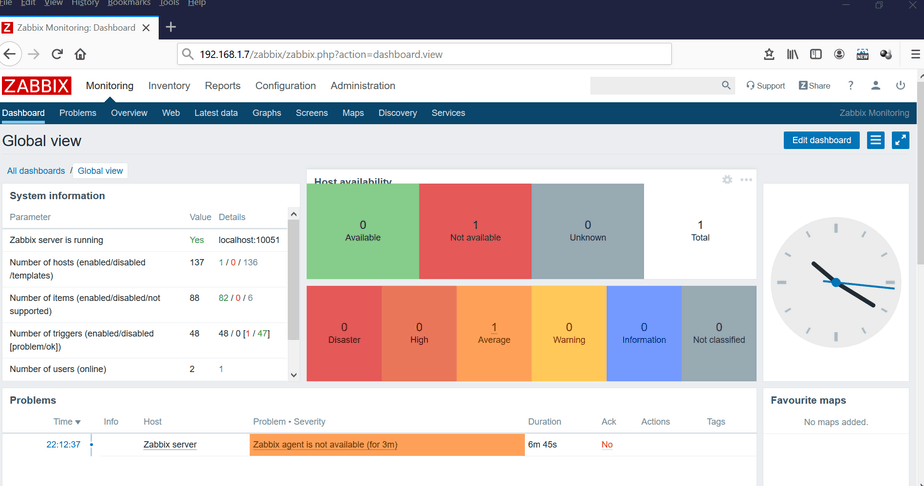
Zabbix Server Dashboard :
Step:6 Add a node to Zabbix Server for Monitoring.
Let’s assume i want to add my Ubuntu 16.04 Machine to Zabbix Server for monitoring. Login to the machine and perform the following tasks .
linuxtechi@cloud:~$ sudo apt-get install zabbix-agent
Edit the Agent file and specify the Zabbix Server address.
linuxtechi@cloud:~$ sudo vi /etc/zabbix/zabbix_agentd.conf
..................................
Server=192.168.1.7
ServerActive=192.168.1.7
Hostname=cloud.linuxtechi.com
..................................
Start Zabbix Agent Service
linuxtechi@cloud:~$ sudo systemctl start zabbix-agent
linuxtechi@cloud:~$ sudo systemctl enable zabbix-agent
Synchronizing state of zabbix-agent.service with SysV init with /lib/systemd/systemd-sysv-install...
Executing /lib/systemd/systemd-sysv-install enable zabbix-agent
linuxtechi@cloud:~$
Now Go to the Zabbix Web Interface .
Click on Configuration —> Hosts –> Create Host
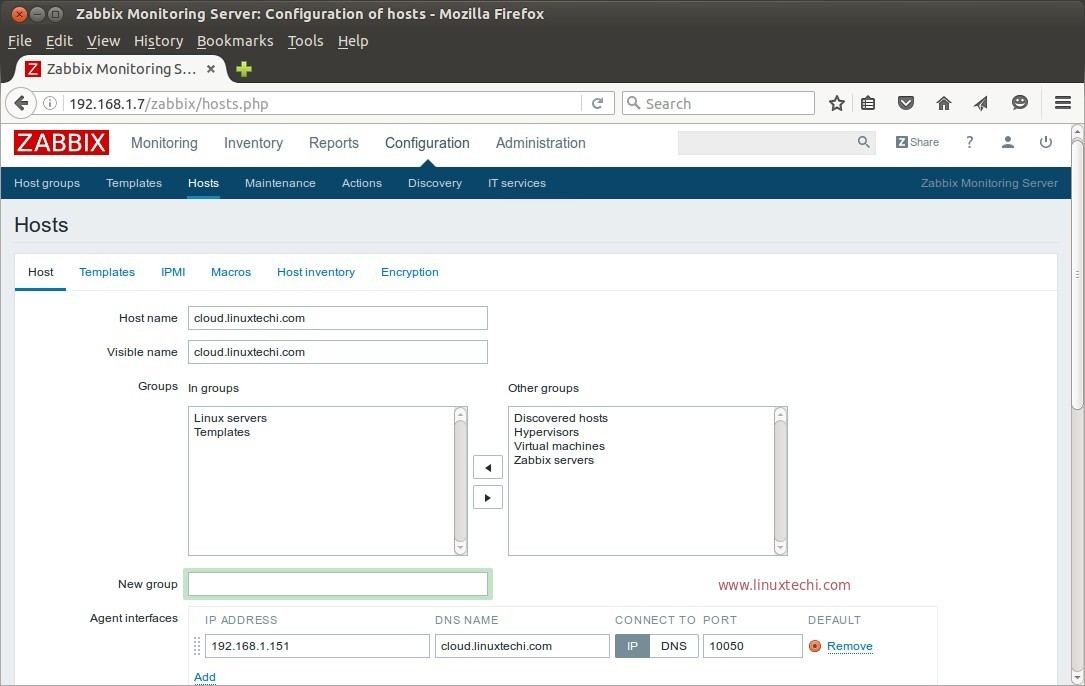
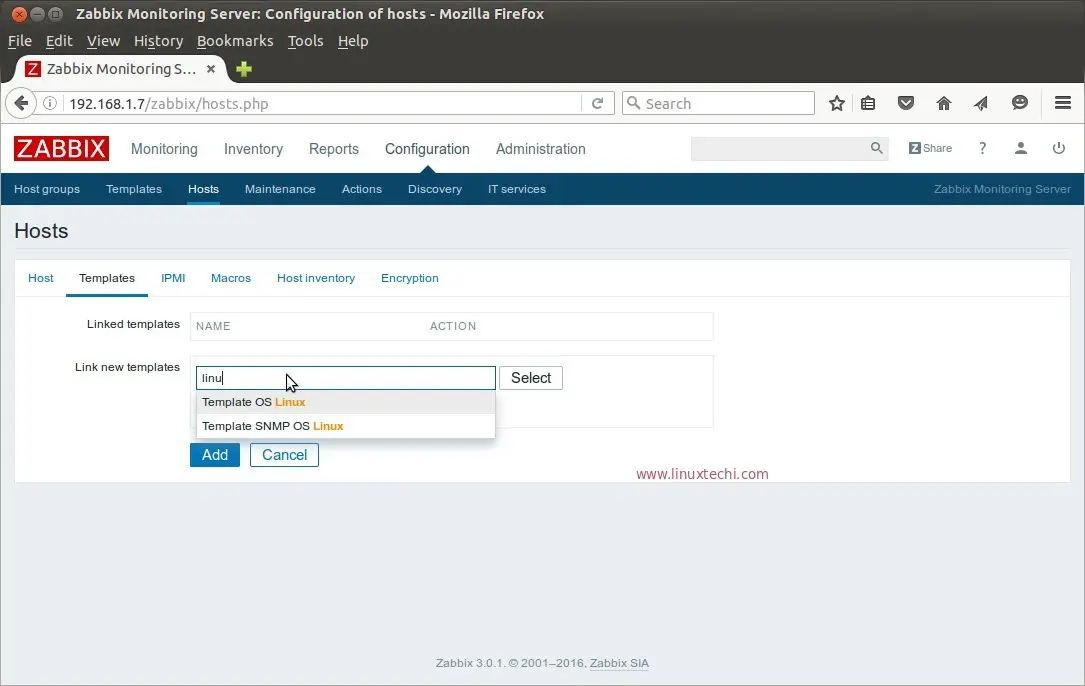
Specify the Host name, IP address and Group names. In Templates Tab, search appropriate templates and click on Add.
To View the events for all the hosts or a particular host, Click on Monitoring —> Triggers

That’s it, Basic Monitoring and Configuration is Completed. Explore the Zabbix and have fun 🙂
Also Read: How to Install Nagios Core 4 on CentOS 7 / RHEL 7
For zabbix 3.4 new selinux policies should be taken into account
https://www.zabbix.com/documentation/3.4/manual/installation/upgrade_notes_340#possible_issues_with_selinux
Hi ,
when i run the zabbix db configure in webconsole. i got error.
Cannot connect to the database.
Incorrect default charset for Zabbix database: “latin1” instead “UTF8”.
please anyone guide me
For creating Zabbix database try to use below command:
CREATE DATABASE zabbix_db CHARACTER SET utf8 collate utf8_bin;
Hi ,
when i run the zabbix db configure in webconsole. i got error.
Cannot connect to the database.
Unsupported charset or collation for tables:
CREATE DATABASE zabbix_db CHARACTER SET utf8 collate utf8_bin;