In this blog post, we will show you how to install squid proxy server on Ubuntu 22.04 step-by-step.
As a regular internet user, you might probably be wondering how best you can maintain your online privacy. One of the options is leveraging a VPN which encrypts your traffic and guarantees data privacy and anonymity. The other equally efficient option is using a Proxy server.
What is a Proxy Server?
A proxy server is a system or intermediary that sits between your computer and the internet, separating you from the websites that you visit. Proxy provides varying levels of privacy and security depending on your browsing needs or IT policy in your Company.
With a Proxy server, traffic flows from your device through the proxy server – which acts as an intermediary – to the target website. The web server on which the website sits responds to the request and sends back web traffic through the same proxy server, which then forwards the data from the website to you.
What is Squid Proxy Server?
Squid is an open-source, flexible, and fully-featured proxy server primarily used as a caching proxy. It’s highly customizable and offers an array of features such as traffic optimization, caching, load balancing, and IP anonymization.
Through caching, it optimizes web performance by caching frequently accessed web content and compressing traffic thus reducing network bandwidth. In addition, Squid proxy allows you to circumvent content restrictions imposed by governments i.e. access geo-restricted websites. Through the Access Control List feature you can control the websites that employees or other users can browse based on their URL or keywords. The Proxy can also be coupled with a VPN to provide an added layer of security.
Prerequisites
- Pre-Install Ubuntu 22.04 system
- Sudo User with admin rights
- Reliable Internet Connectivity
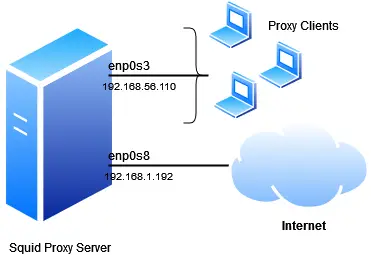
Lab Details:
With that out of the way, let’s deep dive into squid proxy server installation steps.
1) Update APT cache
To start, log into your server and update the local package index:
$ sudo apt update
The command updates the local software repository index and syncs the cache.
2) Install Squid Proxy Server on Ubuntu 22.04
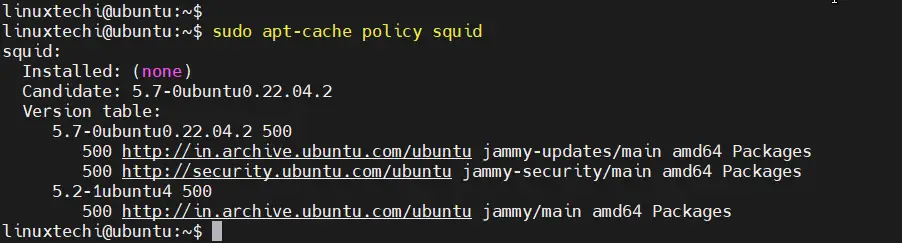
Squid is available on Ubuntu repositories. You can verify this using the following command:
$ sudo apt-cache policy squid
The command outputs crucial information such as whether the package is installed or not, the version (in this case version 5.7), and the URL of the repository.
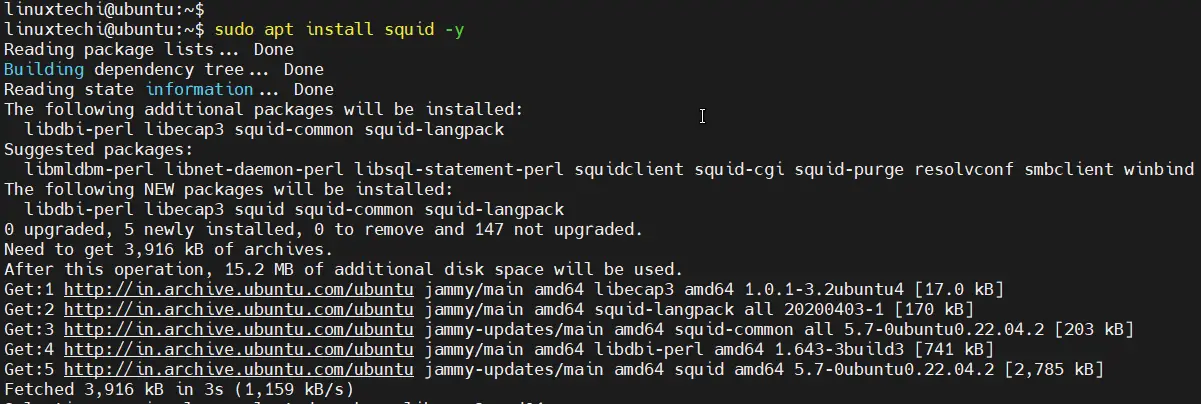
Next, use the APT package manager to install the Squid Proxy server.
$ sudo apt install squid -y
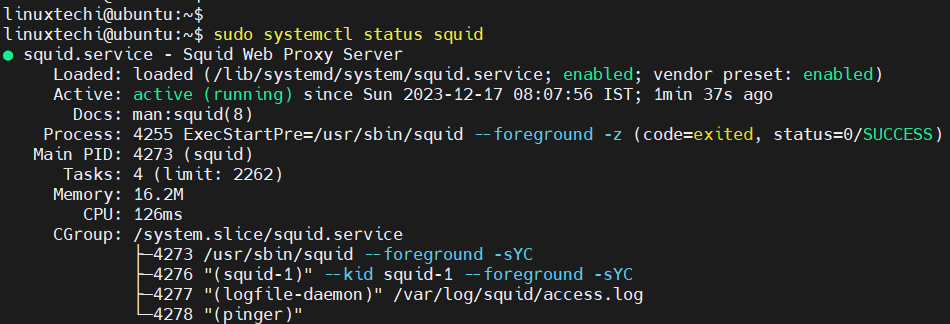
The Squid proxy server service starts automatically. You can verify using the command:
$ sudo systemctl status squid
By default, Squid Proxy runs on TCP port 3128. You can confirm by running the ss command as shown.
$ sudo ss -pnltu | grep -i 3128

At this point, we’ve successfully installed Squid Proxy Server. Let’s now go ahead and configure squid and its authentication for client systems.
3) Configure Squid for Clients
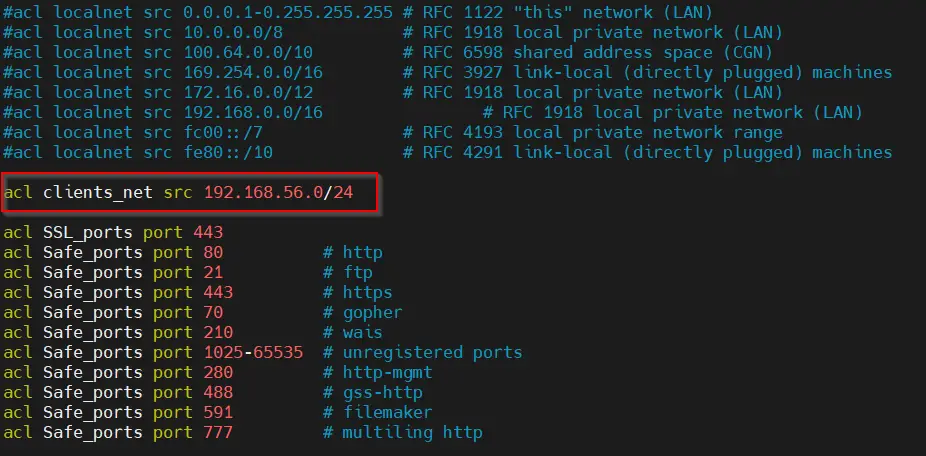
As shown in lab details section, our client’s network is “192.168.56.0/24”, so we will allow internet connection to this network via squid. Edit squid configuration file and add the following lines to it.
Note: In squid conf, ACL (Access Control List) define what will be allowed via squid.
$ sudo cp /etc/squid/squid.conf /etc/squid/squid.conf.bak
$ sudo vi /etc/squid/squid.conf
Comment out the default localnet ACL, starting from line number approximate “1333” and add new acl for your clients network as show below:
Next, define http_access and http_deny rule for your custom acl. Go the line number “1554” add the following lines.
………………
http_access allow clients_net
acl blocksites dstdomain /etc/squid/blocksites.txt
http_access deny blocksites
………………
Change the default squid port from 3128 to 8080, search http_port and set port as 8080 as shown below:
http_port 8080
save and close the file.
Create a /etc/squid/blocksites.txt file and add the web site domain which you want to block via squid.
$ cat /etc/squid/blocksites.txt
.facebook.com
.whatsapp.com
Restart squid service to make above changes into the affect.
$ sudo systemctl restart squid
4) Configure Basic HTTP authentication for Squid
In this section, we will configure basic HTTP authentication for client systems. This is the simplest authentication that comes with the HTTP protocol.
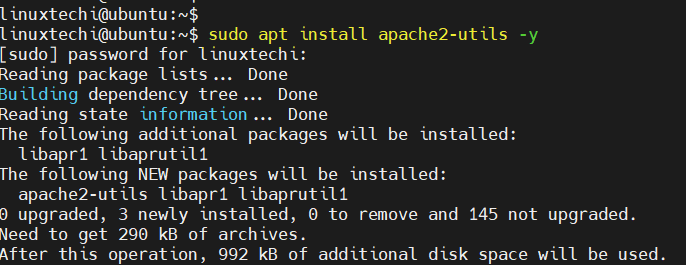
To set sail with creating authentication, install the apache2-utils package.
$ sudo apt install apache2-utils -y
Next, create a password file that will contain authentication details for the client. So, run the following command. Here, passwords is the name of the password file.
$ sudo touch /etc/squid/passwords
$ sudo chmod 777 /etc/squid/passwords
Next, generate the client’s password using the htpasswd utility. Here, alex is the username of the client.
$ sudo htpasswd -c /etc/squid/passwords alex
You will be prompted for the user’s password. Provide and confirm it.
To test the password file, run the command:
$ /usr/lib/squid/basic_ncsa_auth /etc/squid/passwords
When the command is executed, you will notice that the shell appears hung. So enter username password (Be sure to replace these with your respective username and password ). Then hit ENTER.
You will get ‘OK’ as the output.

Next, we are going to configure the Squid configuration file
$ sudo vi /etc/squid/squid.conf
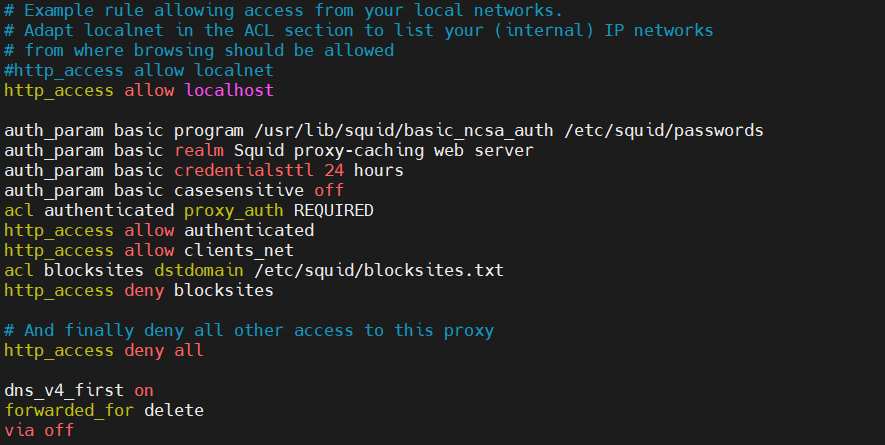
Then add the following lines. We will briefly discuss what they entail shortly.
auth_param basic program /usr/lib/squid/basic_ncsa_auth /etc/squid/passwords
auth_param basic realm Squid proxy-caching web server
auth_param basic credentialsttl 24 hours
auth_param basic casesensitive off
acl authenticated proxy_auth REQUIRED
http_access allow authenticated
http_access allow clients_net
acl blocksites dstdomain /etc/squid/blocksites.txt
http_access deny blocksites

# And finally deny all other access to this proxy
http_access deny all

dns_v4_first on
forwarded_for delete
via off
Save the changes and exit the Squid configuration file.
Let’s check out what some lines stand for.
- auth_param basic casesensitive off: Case sensitivity is disabled.
- acl authenticated proxy_auth REQUIRED: Requires authentication to the Proxy server.
- http_access allow authenticated: Allows authenticated clients HTTP access
- dns_v4_first on: Only IPv4 will be used to speed up the proxy.
- forwarded_for delete: Prevents forwarding of the http header which would expose your source to the destination.
- via off: Removes additional headers to avoid exposing the source.
5) Restart Squid Proxy
For the changes to come into effect, restart the Squid Proxy service.
$ sudo systemctl restart squid
Alternatively, you can reload Squid without restarting the service as shown.
$ sudo systemctl reload squid
In addition, verify whether Squid Proxy is running as expected.
$ sudo systemctl status squid
6) Configure Firewall Rule for Squid
If you are behind a firewall, be sure to open the Squid Proxy port that you have specified. In this case, we are opening port 8080.
$ sudo ufw allow 8080/tcp
$ sudo ufw reload
7) Test Squid Proxy Server
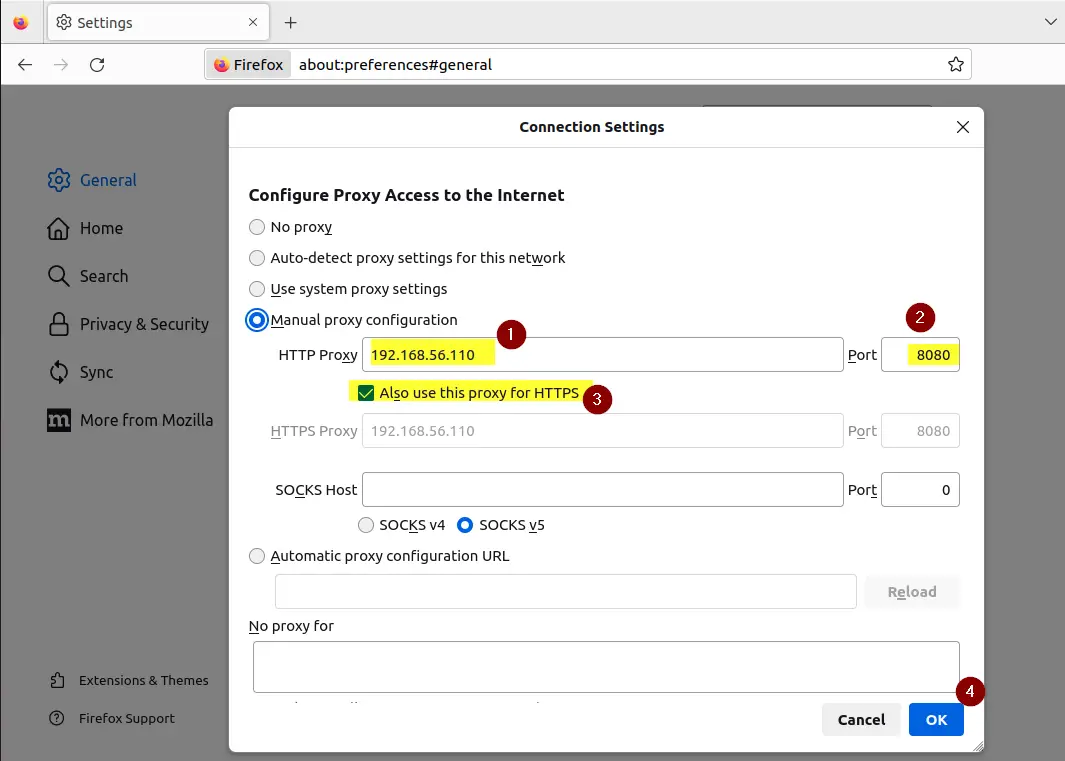
Let’s now put the Proxy Server to the test. To do so, head to a client system’s browser. In this example, we are using Firefox for demonstration.
Navigate to the ‘Network’ settings and head over to the Proxy settings section. Fill out the IP address of the Proxy Server and specify the port number. Additionally, select to use the proxy for HTTPS protocol which most sites use.
Then click ‘Ok’.
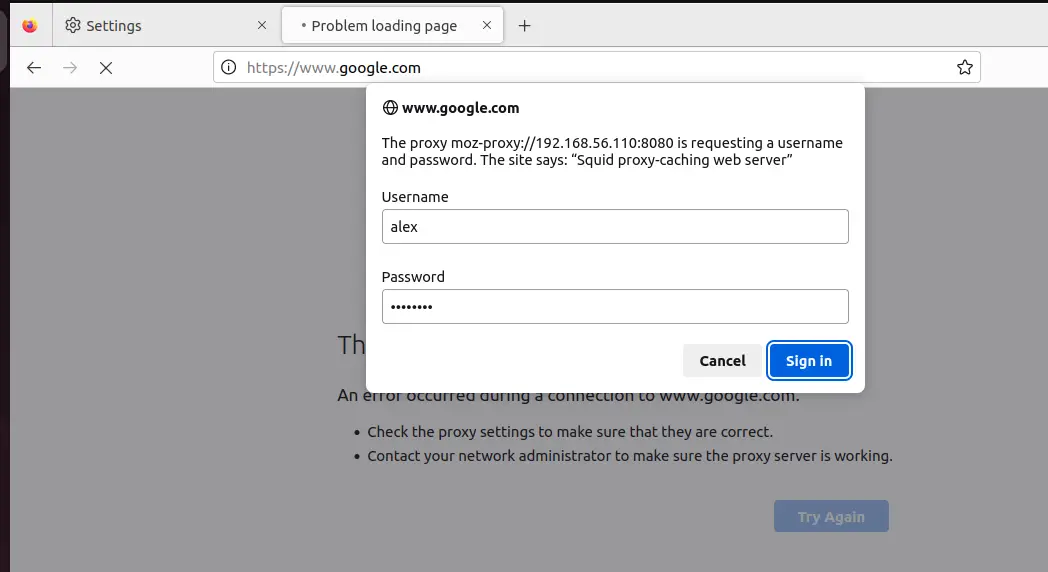
Now head over to your web browser and try to visit any site. A pop-up will appear prompting for the Squid Authentication credentials i.e Username and password configured in Step 4.
Provide the credentials and hit ‘Sign in’.
Your Firefox browser is now configured to use the Proxy Server. You can confirm this by heading to google.com and searching ‘What is my IP’.
You will notice that your IP is the same as the Proxy Server’s. This confirms that we have successfully connected to the proxy server.
Conclusion
A proxy server offer numerous benefits including anonymity, privacy, and access to geo-restricted websites. In this post, we have demonstrated how to install and configure Squid Proxy on Ubuntu 22.04 LTS. Feel free to post your queries and feedback in below comments section.