Mediawiki is an open-source wiki software that allows you to create online wikis quickly. It was mainly developed for use in Wikipedia and is currently being used in various Wikimedia websites like Wikidata, Wiktionary and Wikimedia Commons etc.
A wiki can be defined as Content Management System (CMS) or a website whose contents are editable from the web browser and its text is written using simplified markup language (known as ‘wiki markup’) or a rich-text editor. A wiki is differ from a blog or such system as the content is posted and created without any defined author and owner of the post.
In this post we will cover the installation steps of latest MediaWiki 1.37 on RHEL 8, Rocky Linux 8 and AlmaLinux OS 8.
Note : For MediaWiki ≥ 1.35, on RHEL systems php 7.4 or higher is recommended.
1) Install prerequisite OS packages
For mediawiki installation on Linux we must first install Web server (Apache) , PHP and Database ( MySQL / MariaDB ). If they are not installed on your system , please use the below commands to install,
$ sudo dnf module reset php
$ sudo dnf module enable php:7.4
$ sudo dnf install -y httpd php php-mysqlnd php-gd php-xml php-intl mariadb-server mariadb php-mbstring php-json
2) Start Web Server and Database Service
Run the beneath commands to start and enable apache web server and mariadb service
$ sudo systemctl start httpd
$ sudo systemctl enable httpd
$ sudo systemctl start mariadb
$ sudo systemctl enable mariadb
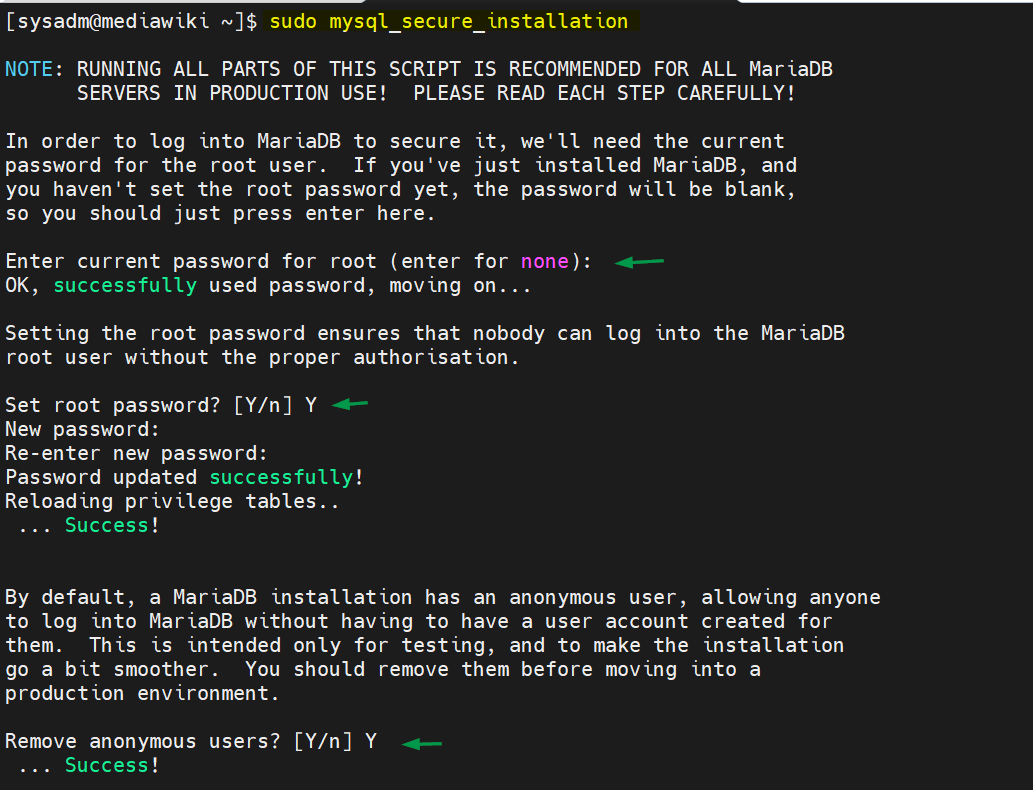
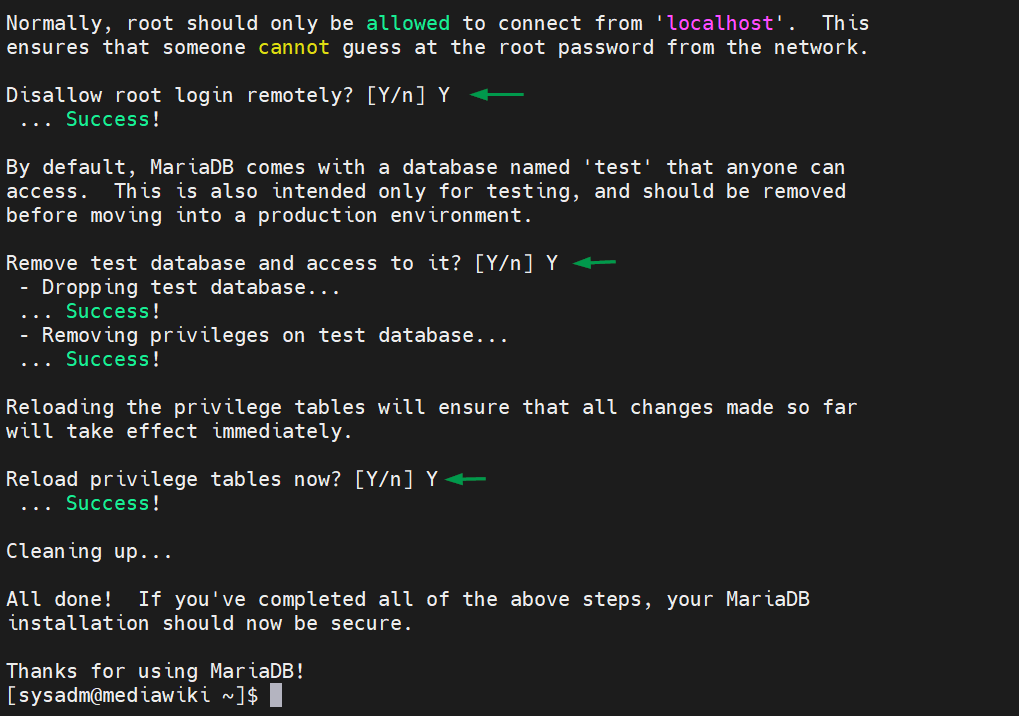
3) Secure MariaDB and Create Database for mediawiki
To Secure mariadb database, run following command,
$ sudo mysql_secure_installation
Now create database for mediwiki using following commands,
$ mysql -u root -p
MariaDB [(none)]> CREATE DATABASE mediawiki_db;
MariaDB [(none)]> GRANT ALL PRIVILEGES ON mediawiki_db.* TO 'wiki_user'@'localhost' IDENTIFIED BY 'P@ssWord@123#' WITH GRANT OPTION;
MariaDB [(none)]> FLUSH PRIVILEGES;
MariaDB [(none)]> exit;

Replace the database name, user name and its credentials in above commands as per your setup.
4) Download latest MediaWiki
At the time of writing this article, latest version of Mediawiki 1.37 was available. Please refer this link to get latest version of MediaWiki.
Use following wget command to download mediawiki 1.37,
$ wget wget https://releases.wikimedia.org/mediawiki/1.37/mediawiki-1.37.1.tar.gz
Extract the downloaded file using tar command.
$ tar -zxpvf mediawiki-1.37.1.tar.gz
Move mediawiki-1.37.1 to apache document root (/var/www/html)
$ sudo mv mediawiki-1.37.1 /var/www/html/mediawiki
5) Set the required permissions on mediawiki directory
Change the file and group owner of mediawiki folder using chown command
$ sudo chown -R apache:apache /var/www/html/mediawiki/
If SELinux is enabled on your system then apply below selinux rule on mediawiki folder,
$ getenforce
Enforcing
$
$ sudo restorecon -FR /var/www/html/mediawiki/
Before starting the installation, also make sure following firewall rules are in place ( This is only required when firewall is enabled on your system)
$ sudo firewall-cmd --permanent --zone=public --add-service=http
$ sudo firewall-cmd --permanent --zone=public --add-service=https
$ sudo firewall-cmd --reload
6) Start MediaWiki web based installation
To start the installation, type the following URL in the web broswer,
http://<System_IP_Address>/mediawiki/
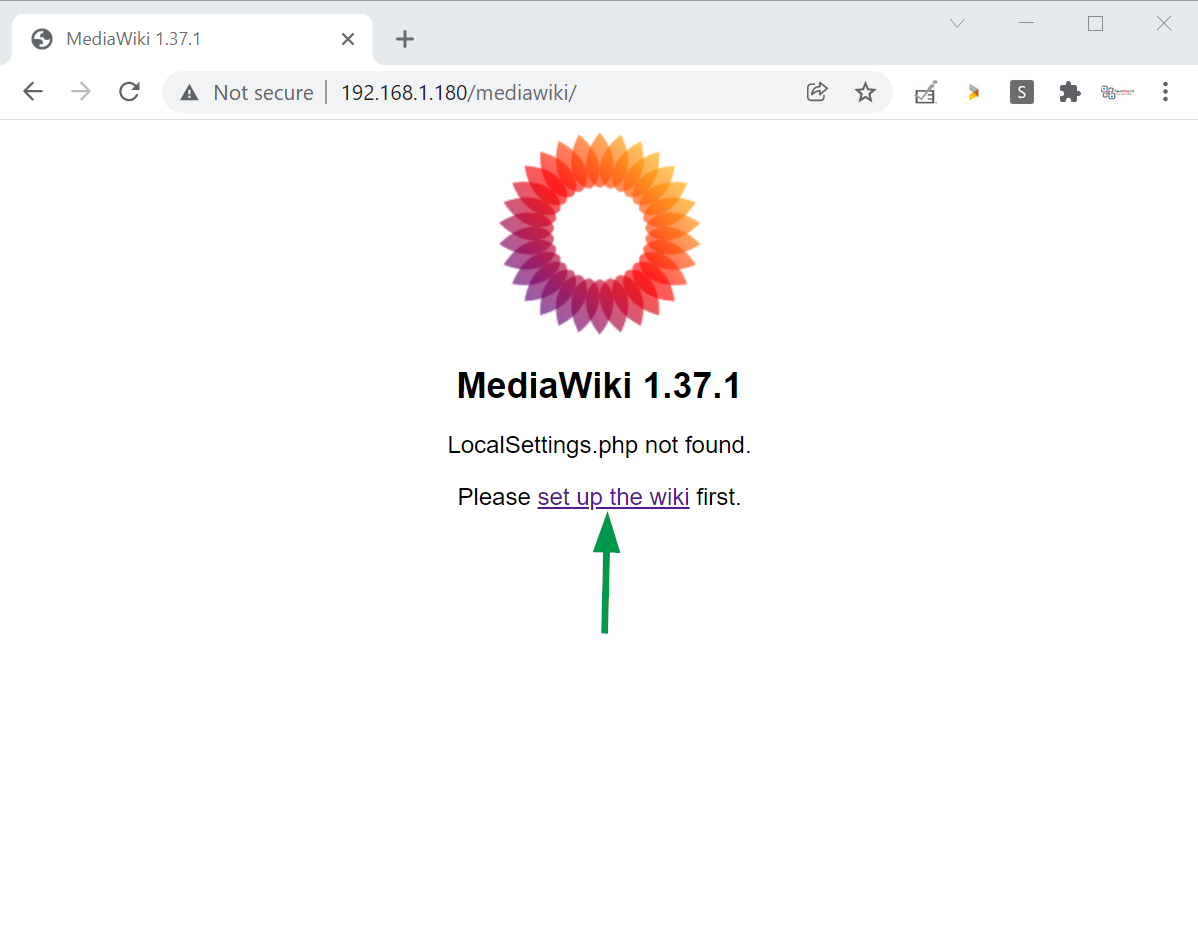
Replace the ip address as per your setup . Click on “Set up the wiki”
Define the Language for MediaWiki
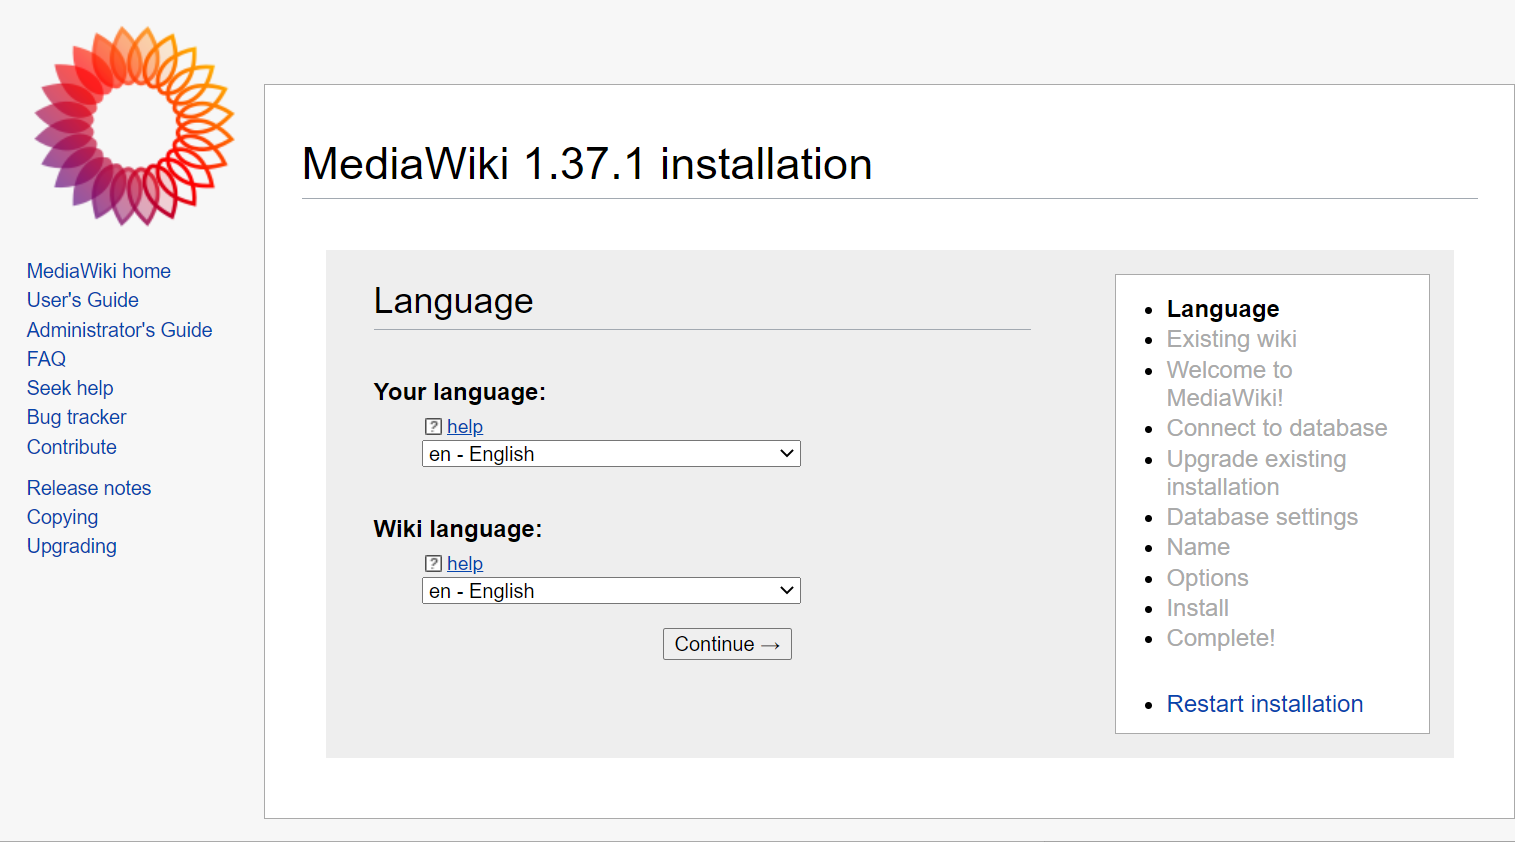
Click On Continue
MediaWiki Environment Setup Check
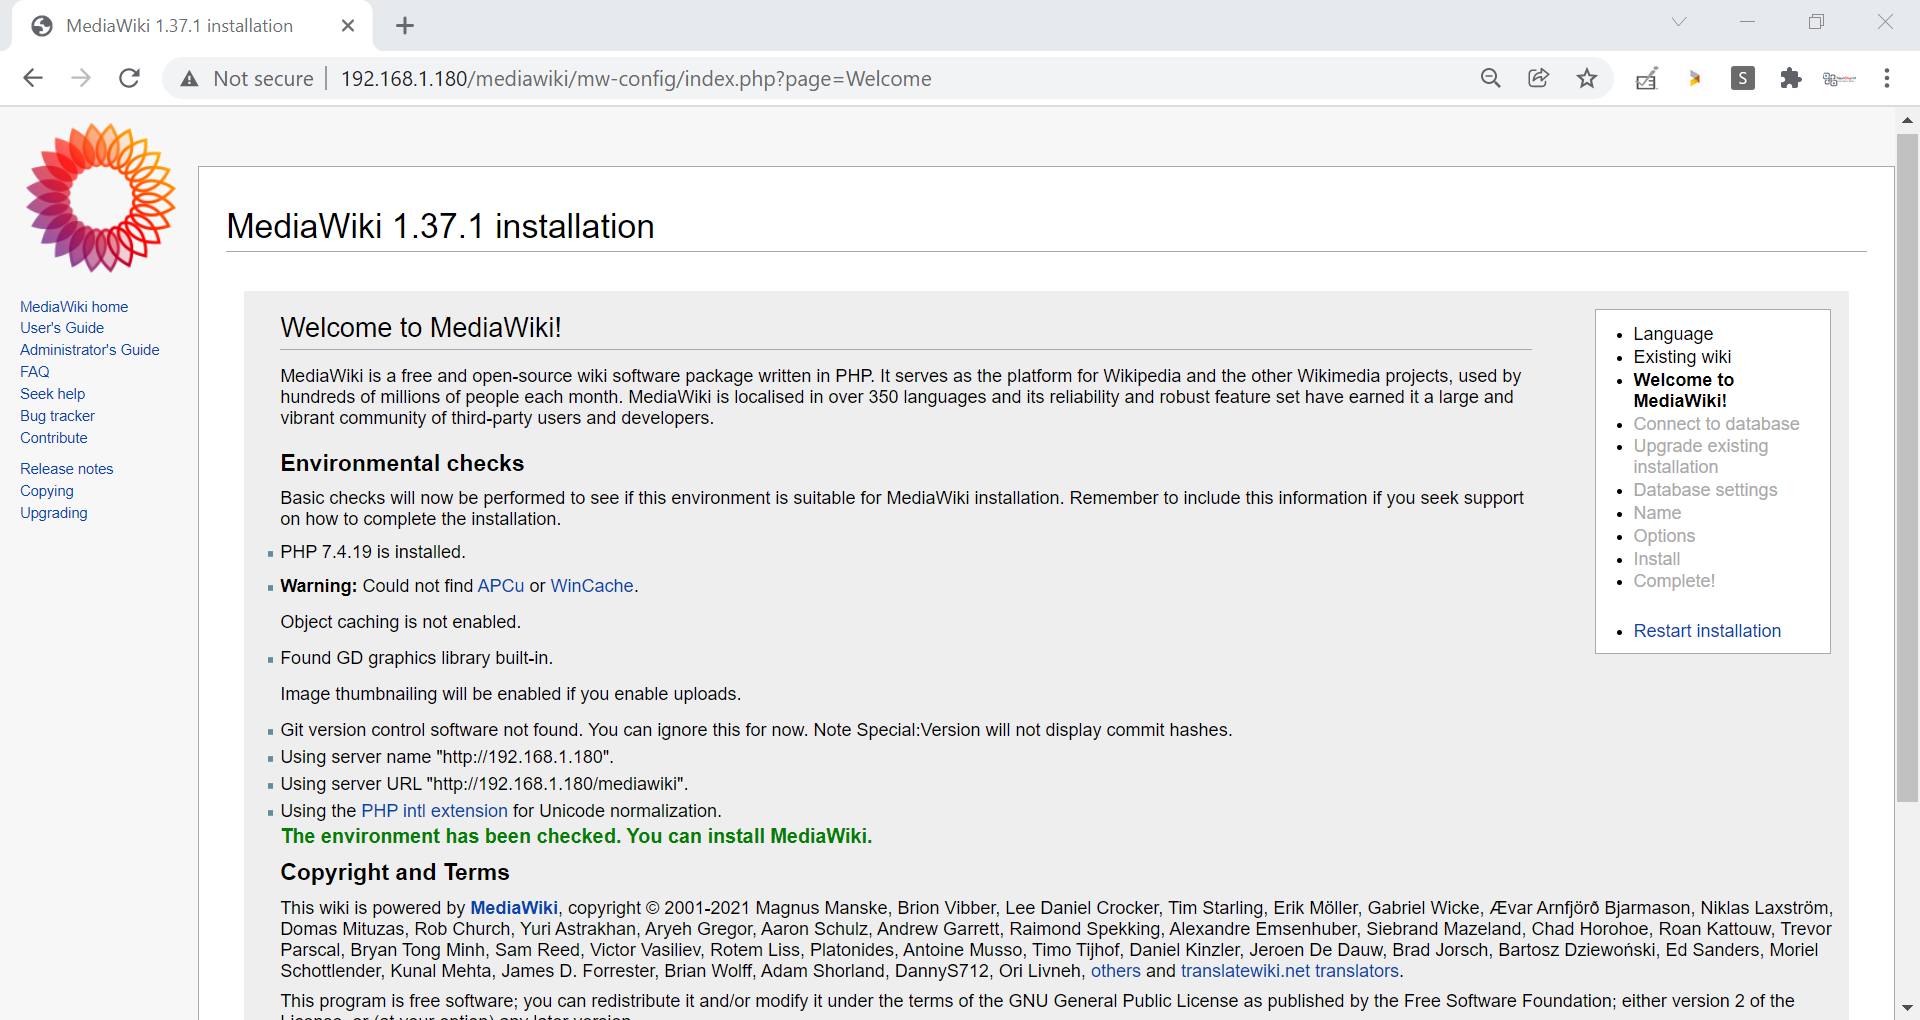
Click On Continue…
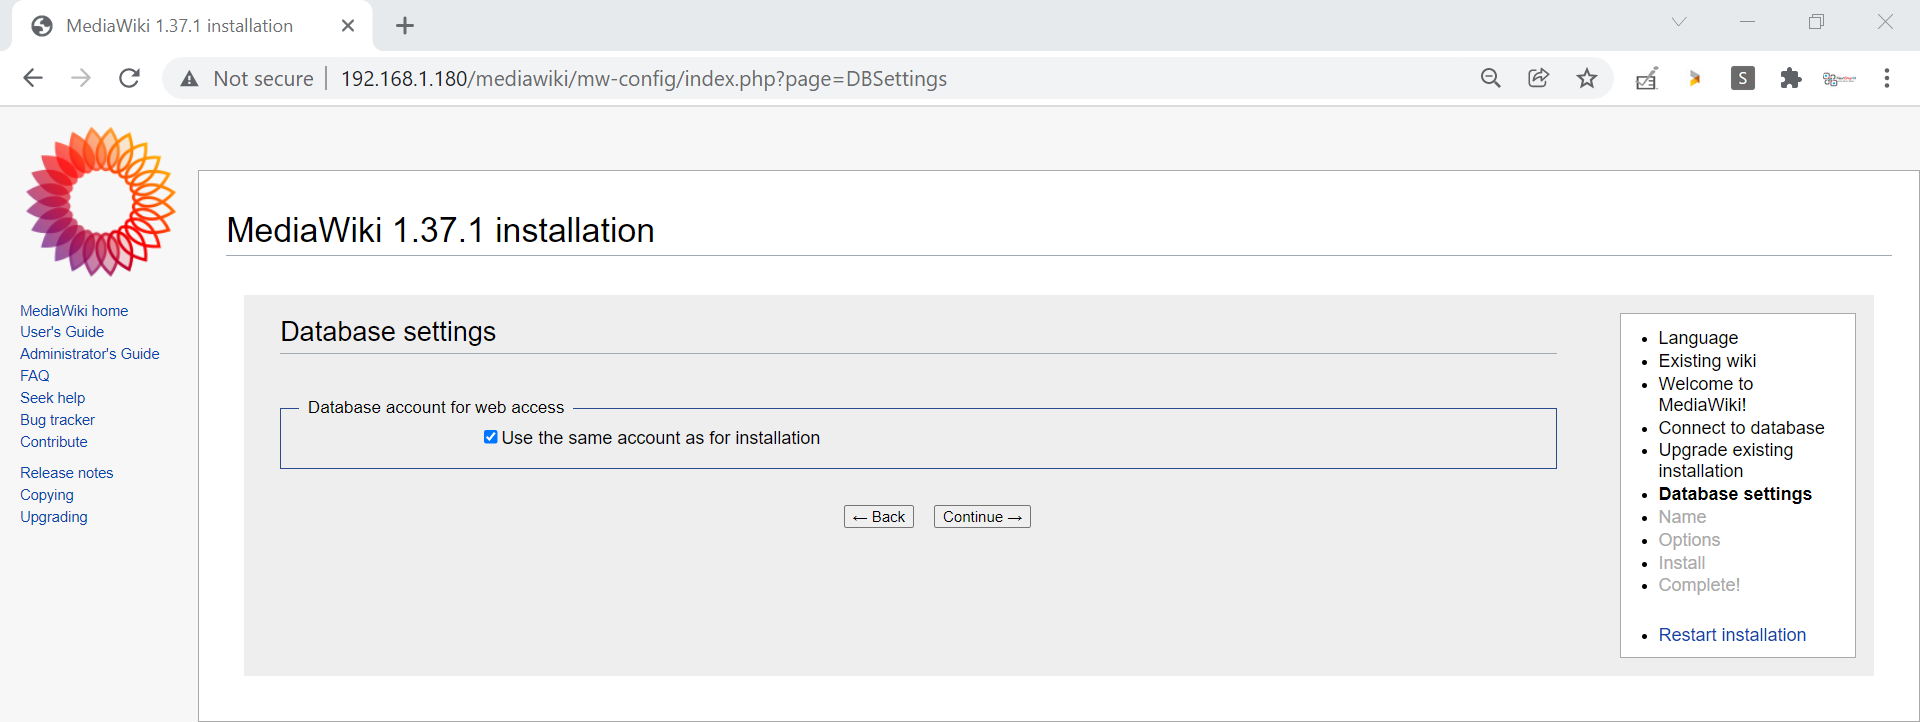
In the following window, specify Mediawiki database, database user name and password and the click on ‘Continue’
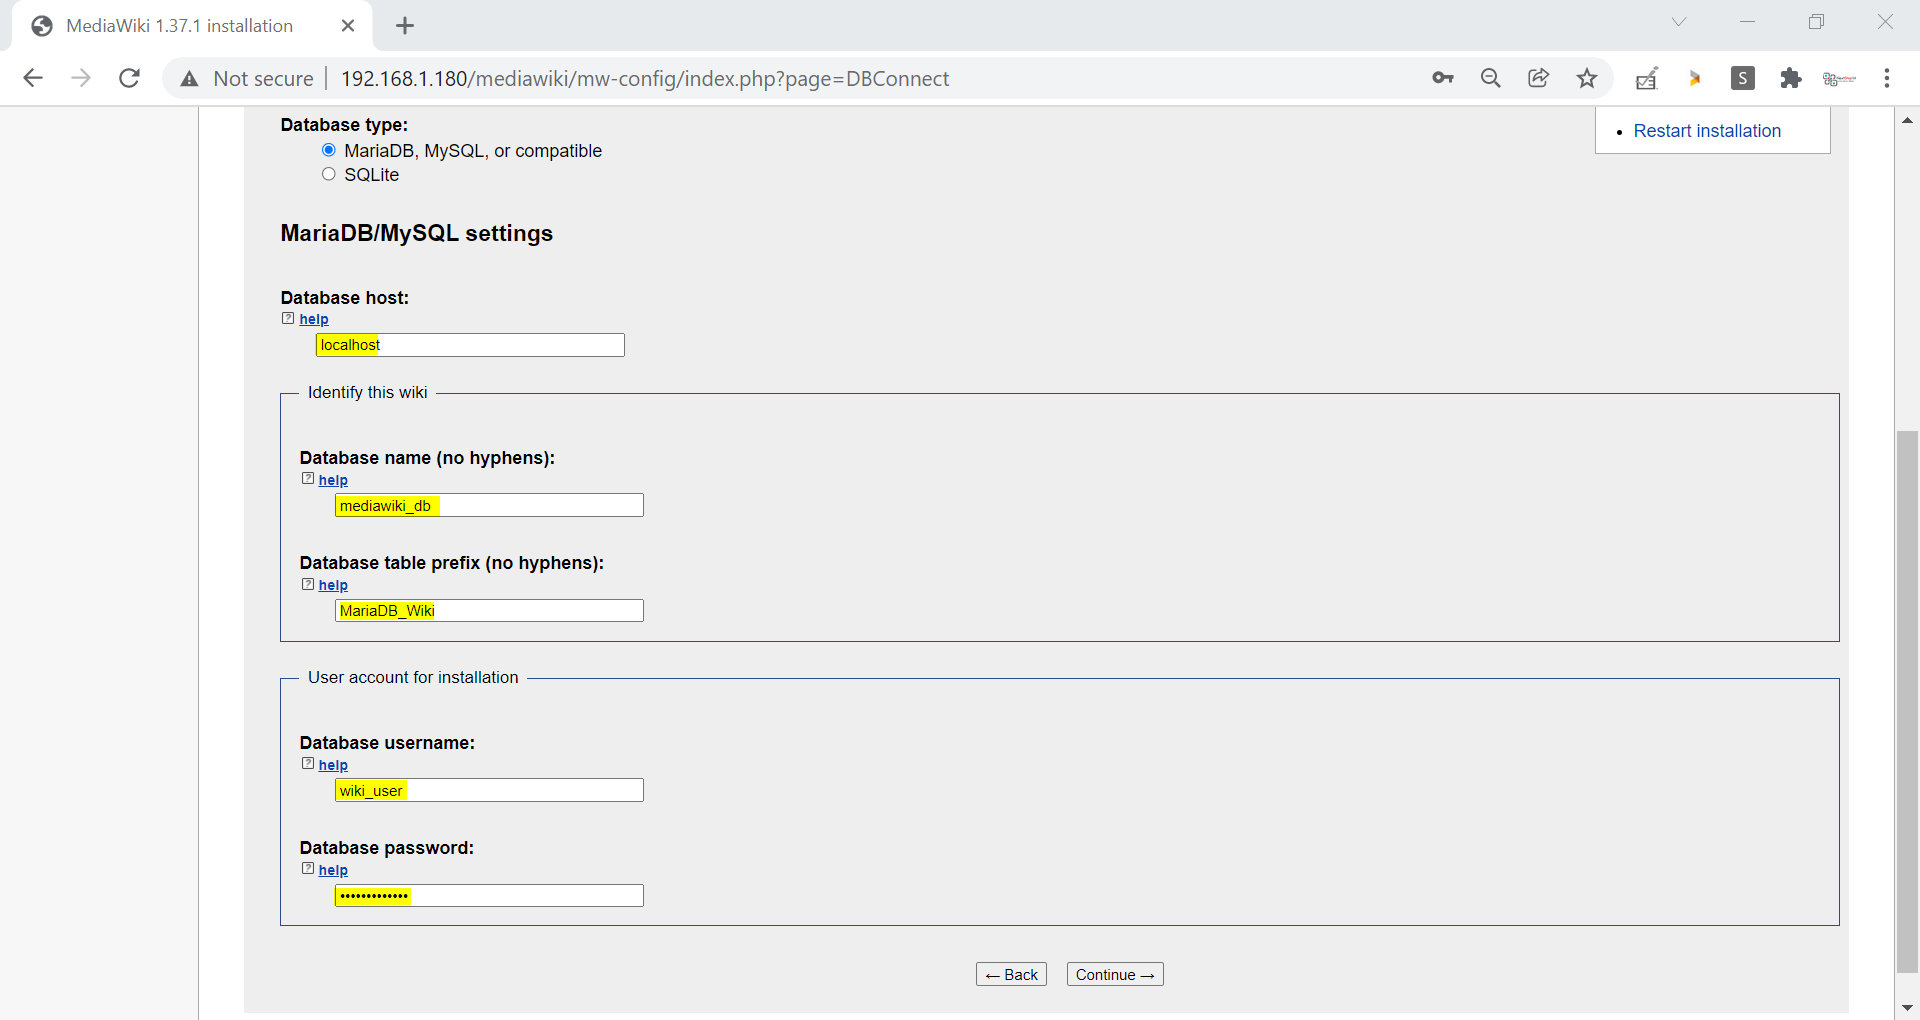
MediaWiki Database Settings
Specify the name of your Wiki and its administrator account
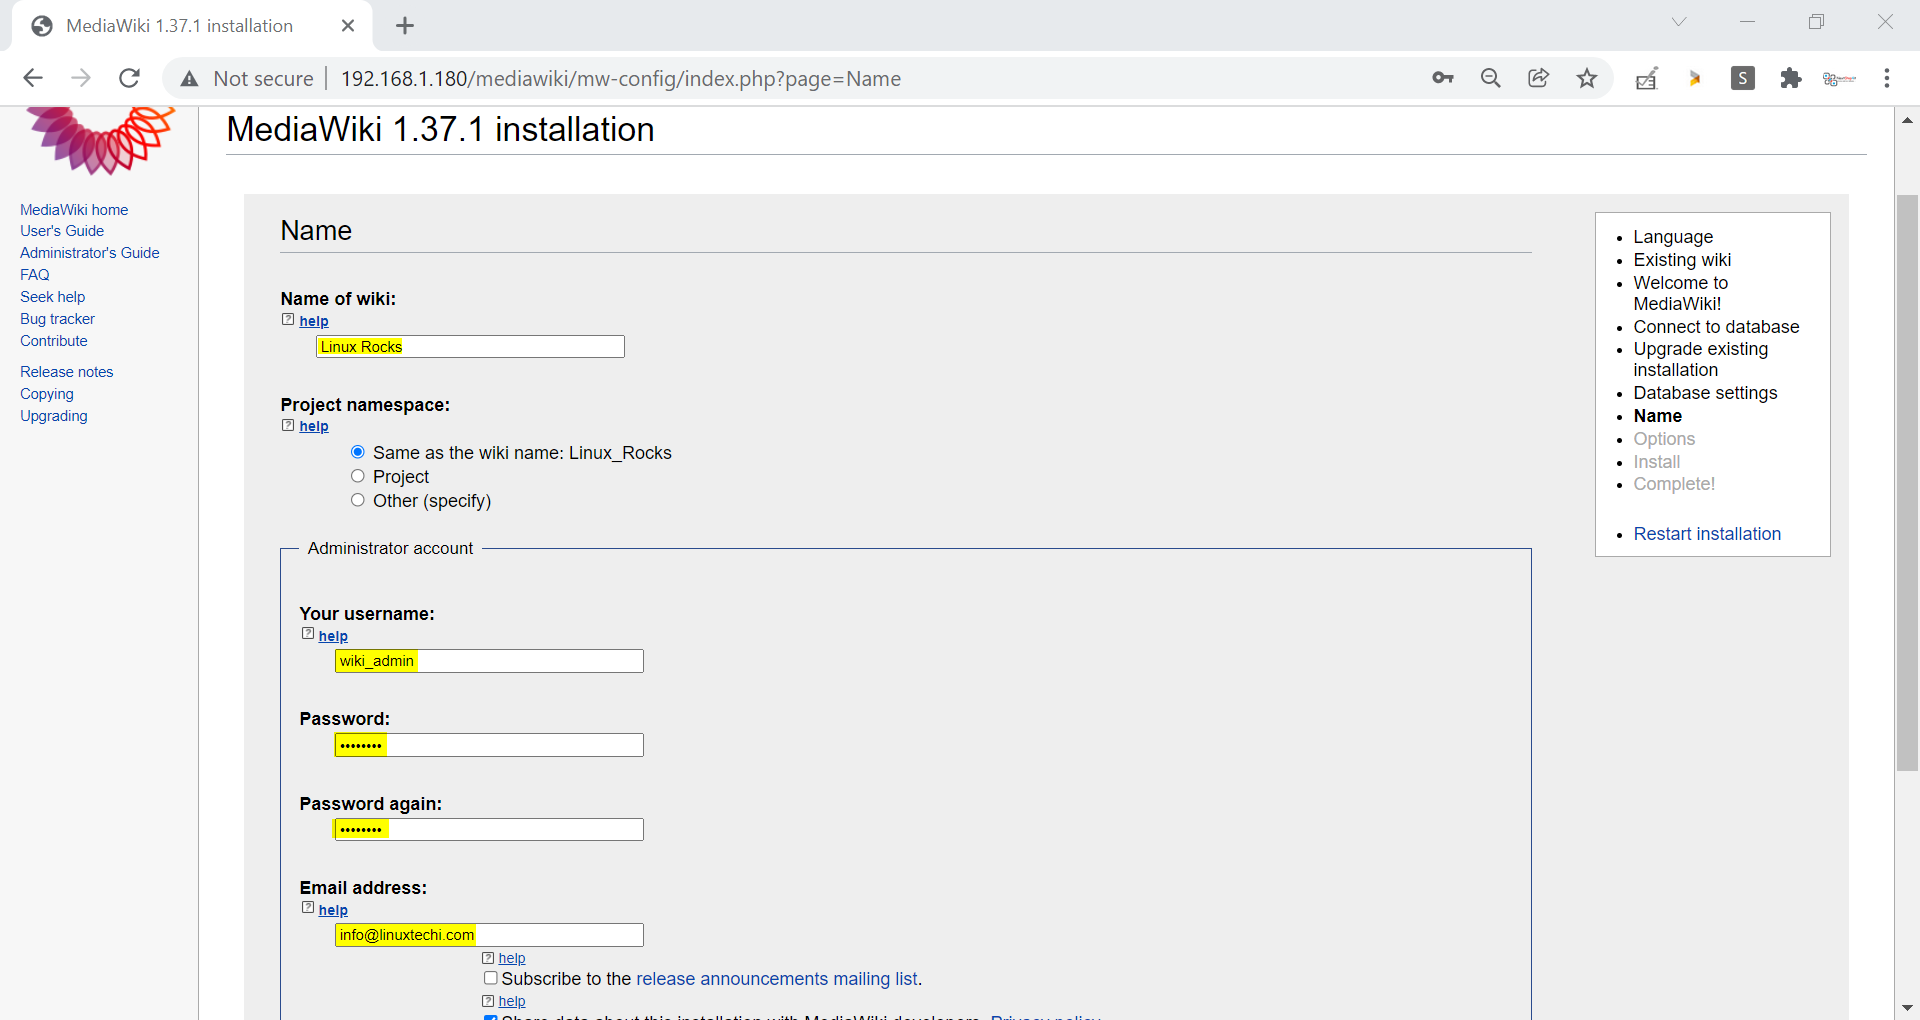
Click on Continue to proceed with the installation
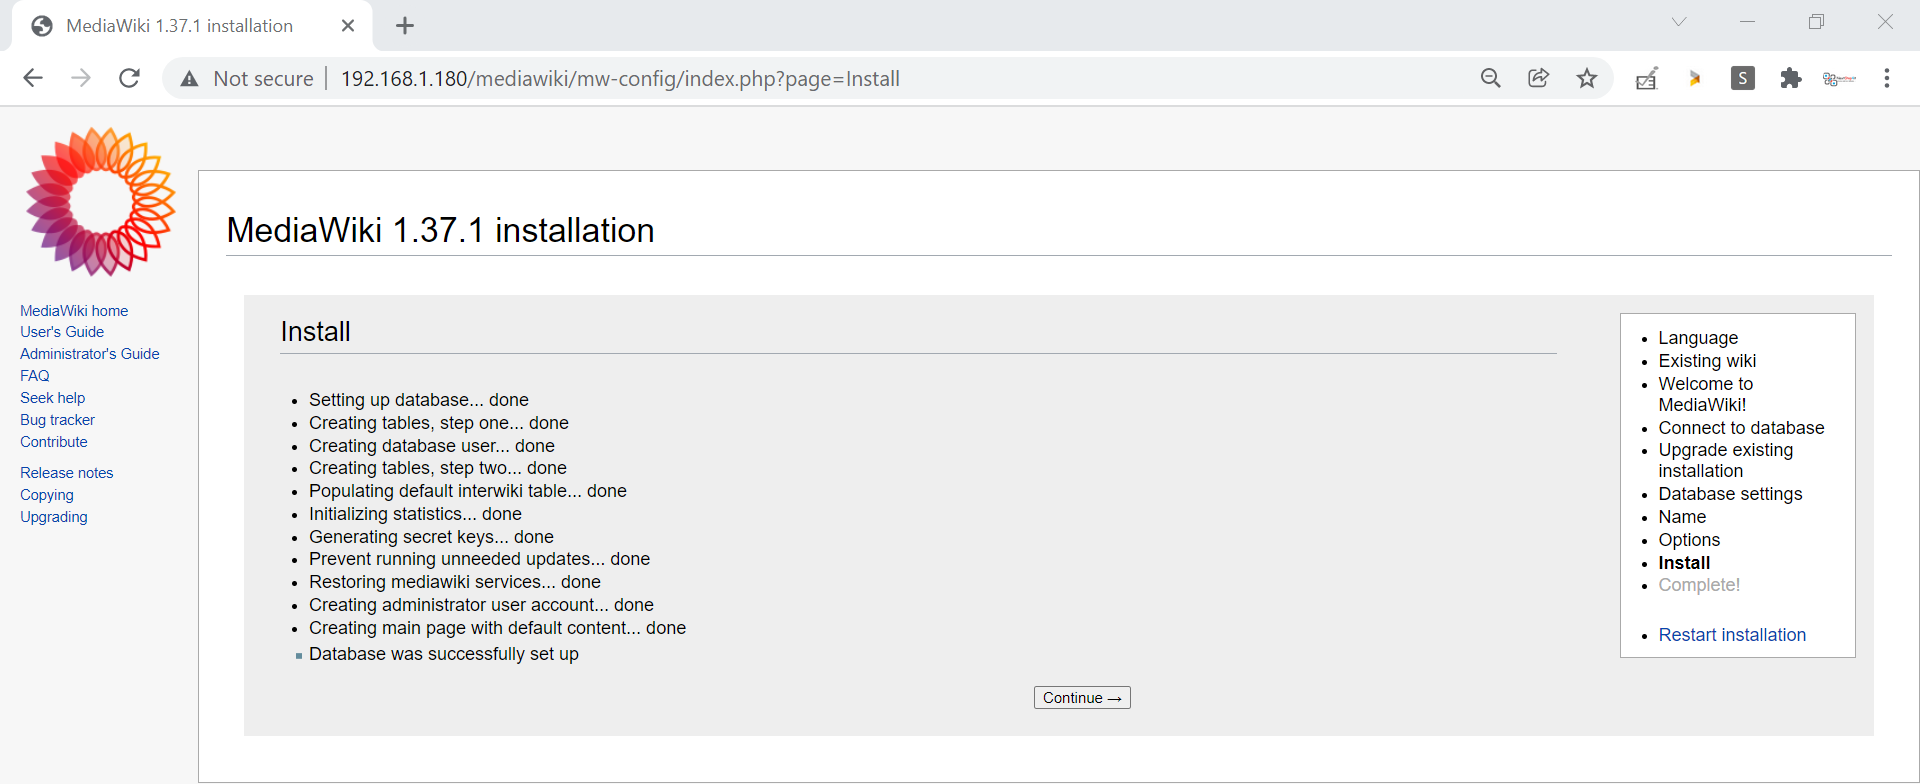
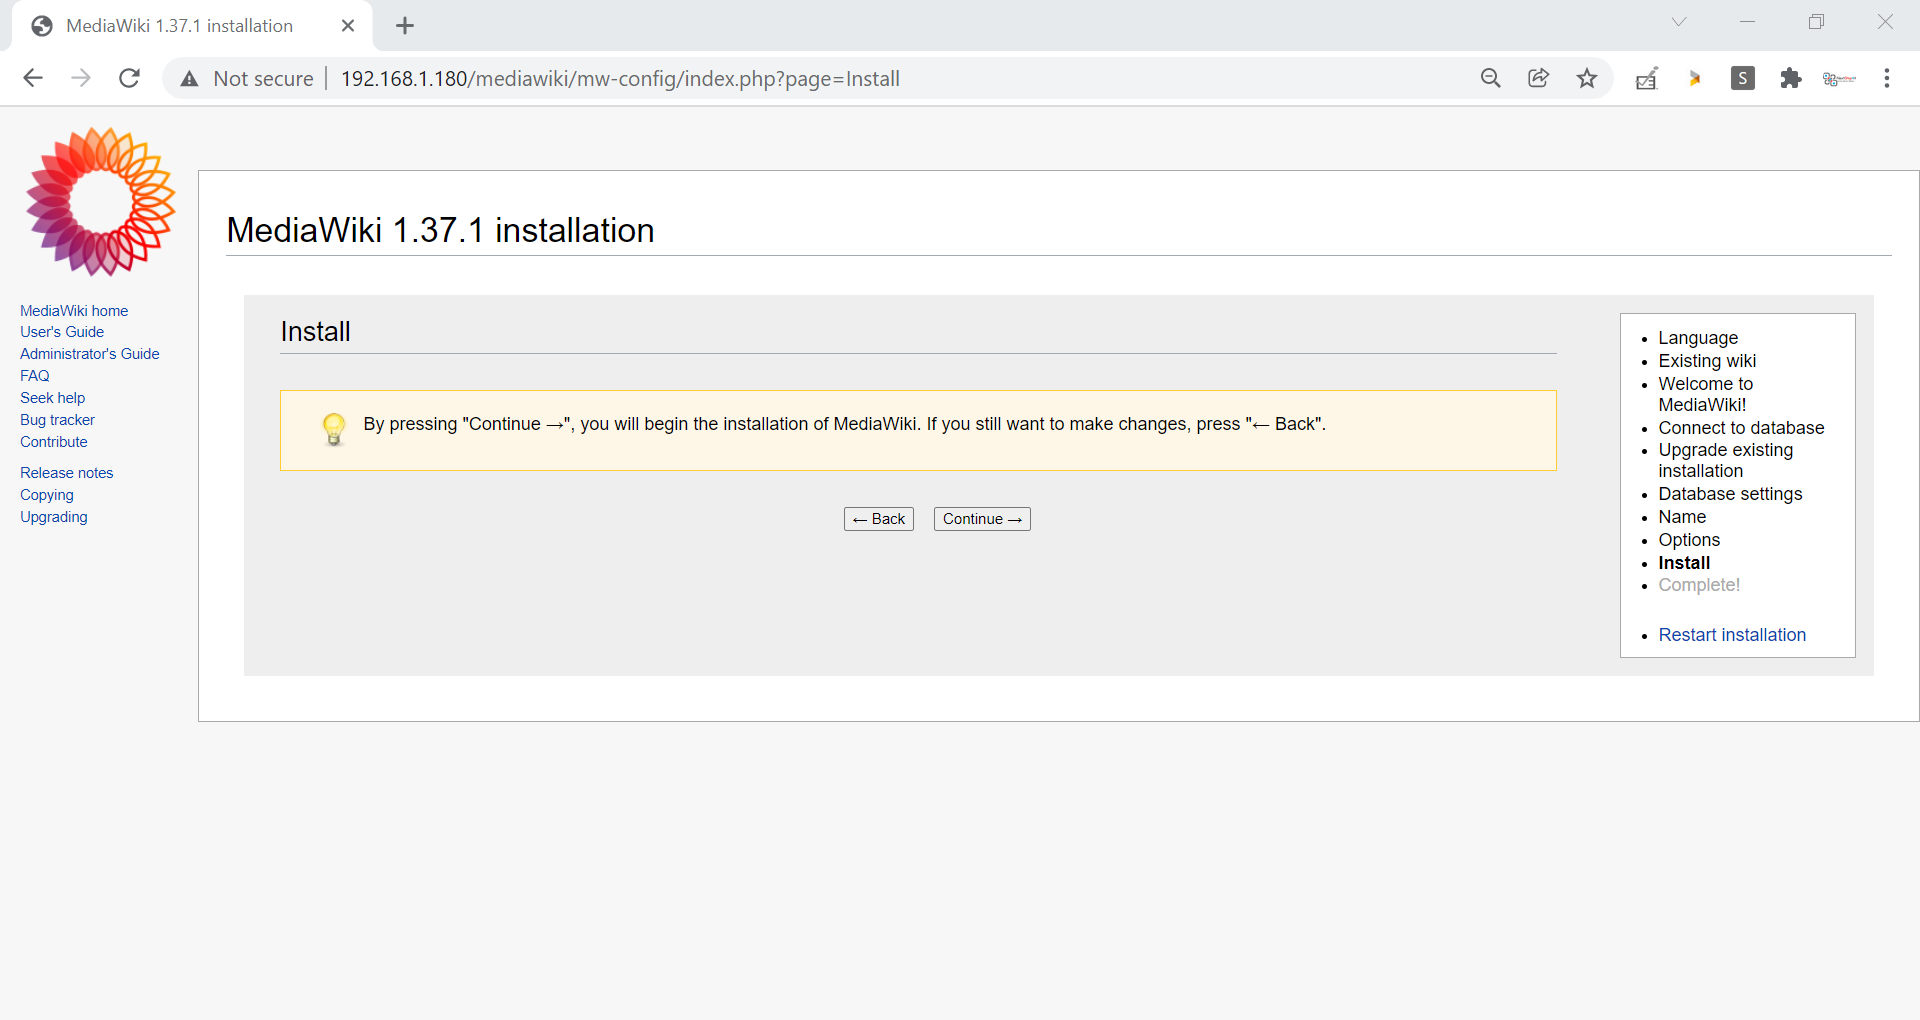
Choose ‘Continue’ to finish the installation

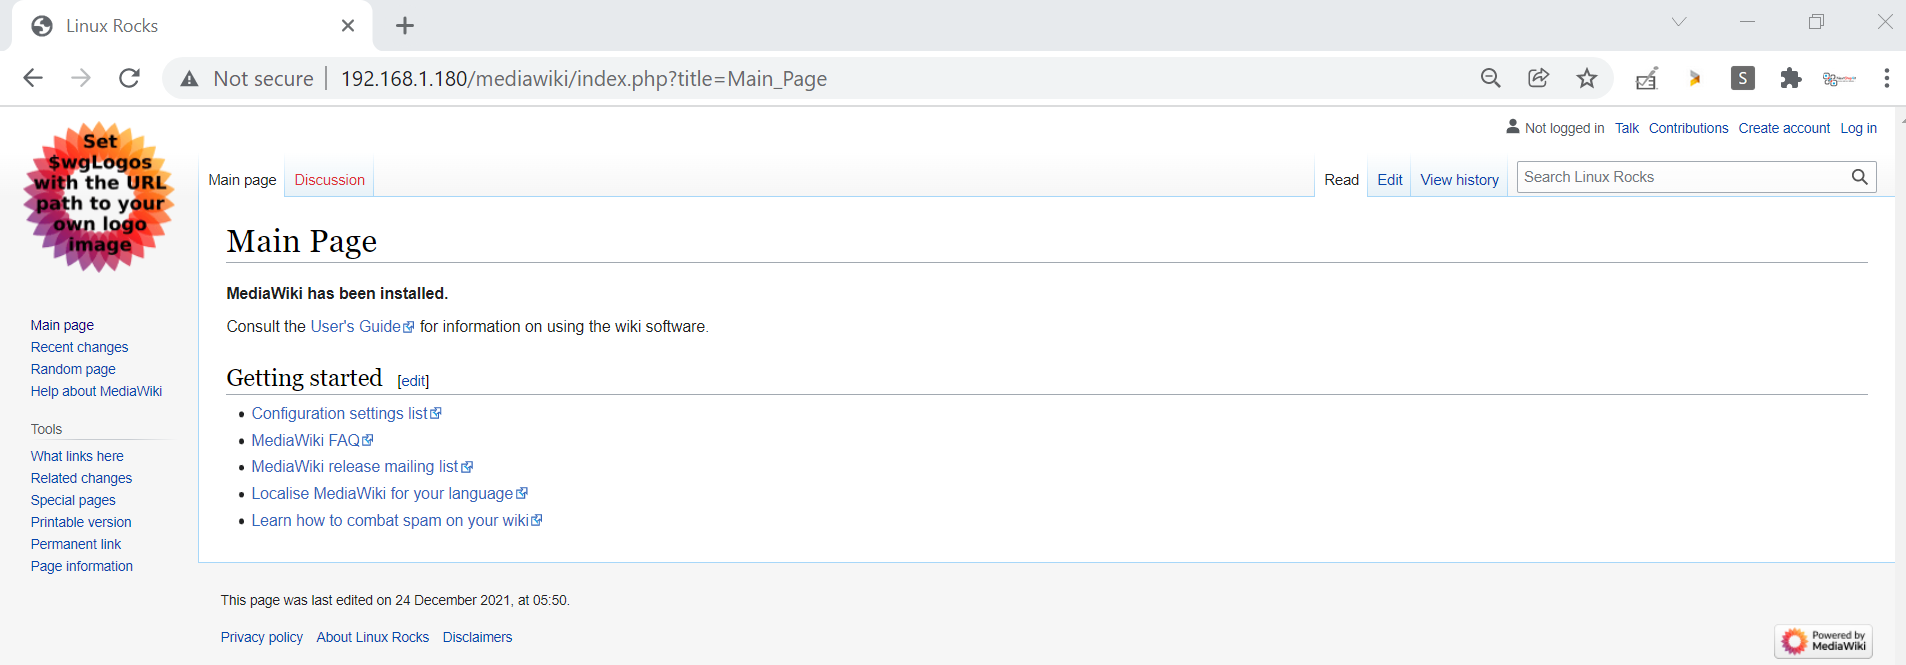
Abive window confirsm that MediaWiki installation is completed successfully. Now Download “LocalSettings.php” file and placed it under the mediawiki document root (/var/www/html/mediawiki/ )
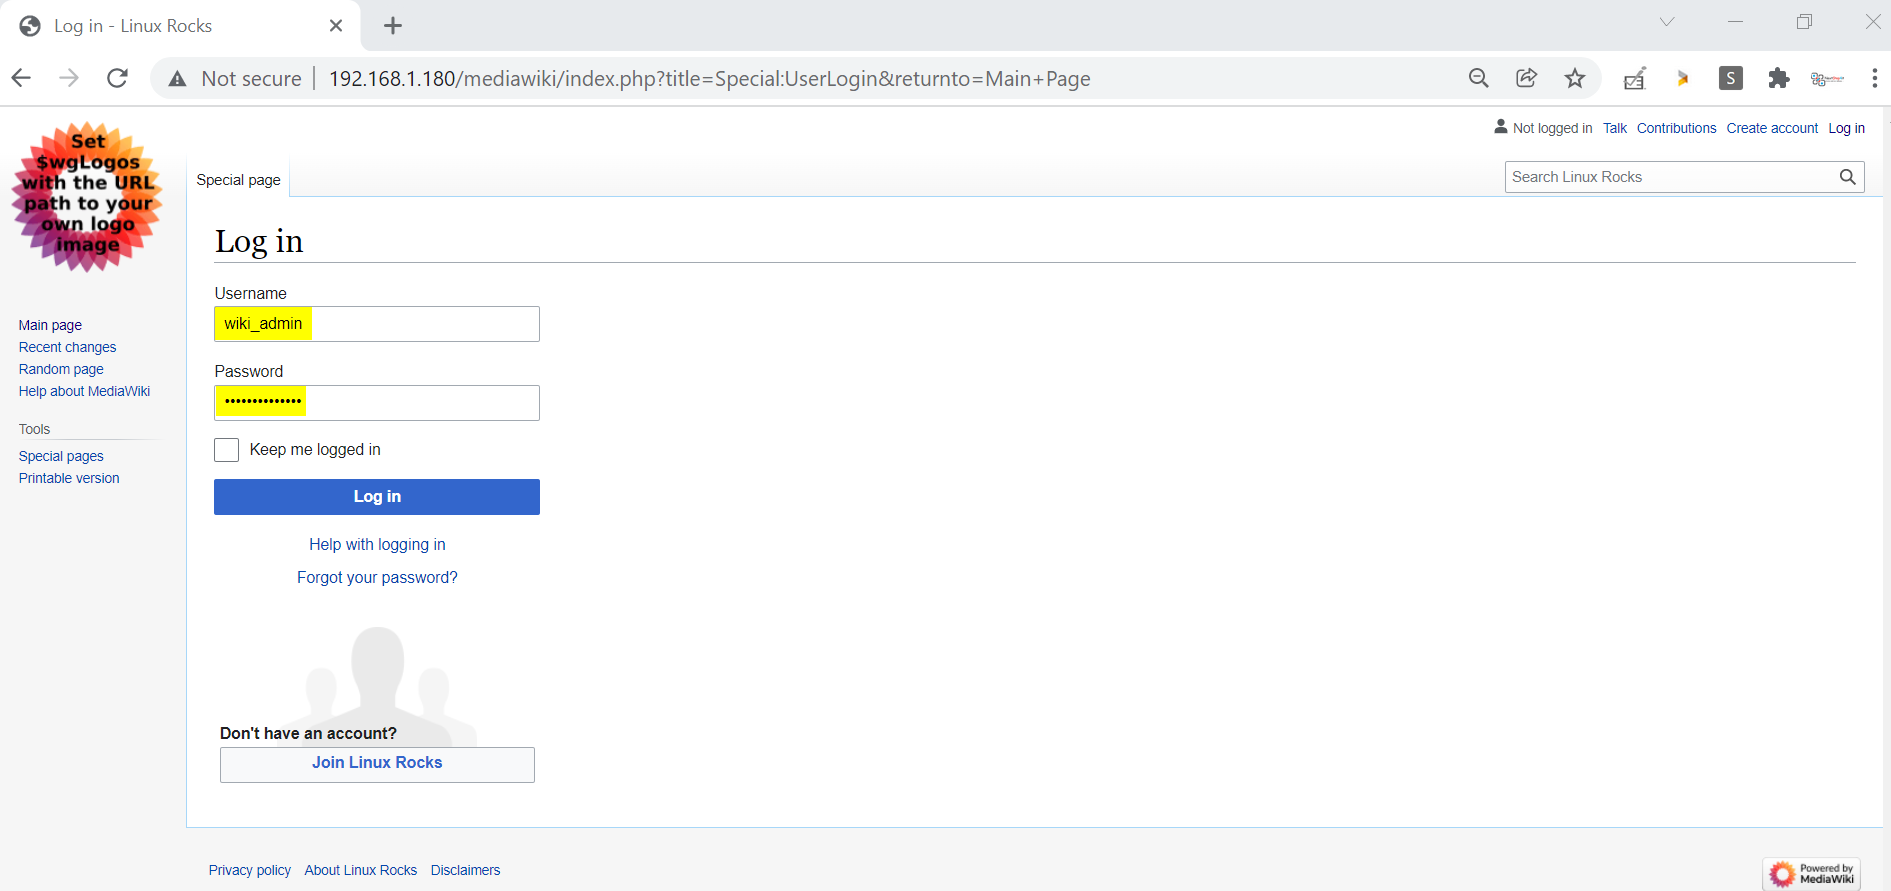
Now visit the Main page ( http://192.168.1.180/mediawiki/ and Login Admin Panel of Mediawiki.
Click on Log In . Enter the Admin Credentials that we have set during the installation.
That’s all from this post. I hope you have found it informative. Please share you comments and queries in below comments section.
This information made me feel better.Its tremendous to learn the basic installation of media wiki.Hope all will refer this to complete their successfull installation of mediawiki
This article is of great help. I’ve successfully installed my own wiki using this as a reference.
Thank you!!!!!
On my CentOS 7 system, I had to substitute mysqld with mariadb when I got “Nothing to do” (not found) : ie. yum install mariadb-server – hope this helps somebody. Thanks for this helpful reference
Is the process of installing mediawiki the same for shared hosting and cloud hosting platforms? I followed your tutorial and another tutorial (‘https://www.cloudways.com/blog/install-mediawiki/’ ) to install it. However, when i try to access the domain i am getting 500 internal server error.
mysql -u root -p
Which password we need to give. Root password not working.
Just ENTER. There is no password.
If we want to do offline installation, then can we download the .tar file of mediawiki on some other system and then transfer to the CentOS using USB?
Hi Raza,
Yes, You can do the offline installation.
1) Download mediawiki tar file and transfer it to target system
2) Use ‘yum downloader’ to download all dependencies and make a tar file and transfer it to target system
This is a really helpful.
I am trying to create a docker file with these set of steps and create an image out of it so that this can be deployed anywhere.
Can someone please help with they have tried this approach.
regards,
Anurag B.