Within a year of releasing Manjaro 18.0 (Illyria), the team has come out with their next big release with Manjaro 18.1, codenamed “Juhraya“. The team also have come up with an official announcement saying that Juhraya comes packed with a lot of improvements and bug fixes.
New Features in Manjaro 18.1
Some of the new features and enhancements in Manjaro 18.1 are listed below:
- Option to choose between LibreOffice or Free Office
- New Matcha theme for Xfce edition
- Redesigned messaging system in KDE edition
- Support for Snap and FlatPak packages using “bhau” tool
Minimum System Requirements for Manjaro 18.1
- 1 GB RAM
- One GHz Processor
- Around 30 GB Hard disk space
- Internet Connection
- Bootable Media (USB/DVD)
Step by Step Guide to Install Manjaro 18.1 (KDE Edition)
To start installing Manjaro 18.1 (KDE Edition) in your system, please follow the steps outline below:
Step 1) Download Manjaro 18.1 ISO
Before installing, you need to download the latest copy of Manjaro 18.1 from its official download page located here. Since we are seeing about the KDE version, we chose to install the KDE version. But the installation process is the same for all desktop environments including Xfce, KDE and Gnome editions.
Step 2) Create a USB Bootable Disk
Once you have successfully downloaded the ISO file from Manjaro downloads page, it is time to create an USB disk. Copy the downloaded ISO file in a USB disk and create a bootable disk. Make sure to change your boot settings to boot using a USB and restart your system
Step 3) Manjaro Live Installation Environment
When the system restarts, it will automatically detect the USB drive and starts booting into the Manjaro Live Installation Screen.
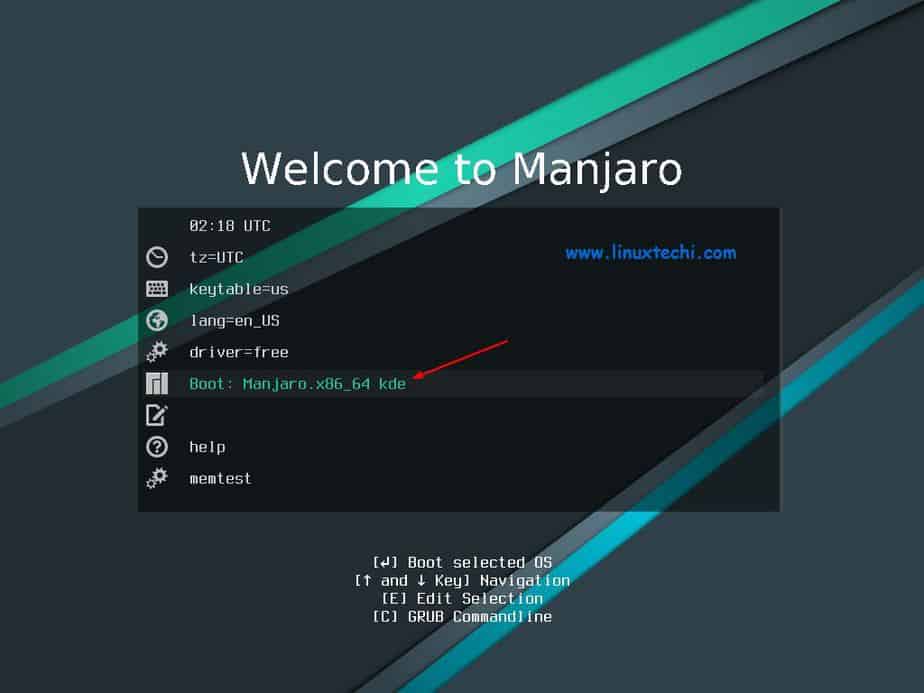
Next use the arrow keys to choose “Boot: Manjaro x86_64 kde” and hit enter to launch the Manjaro Installer.
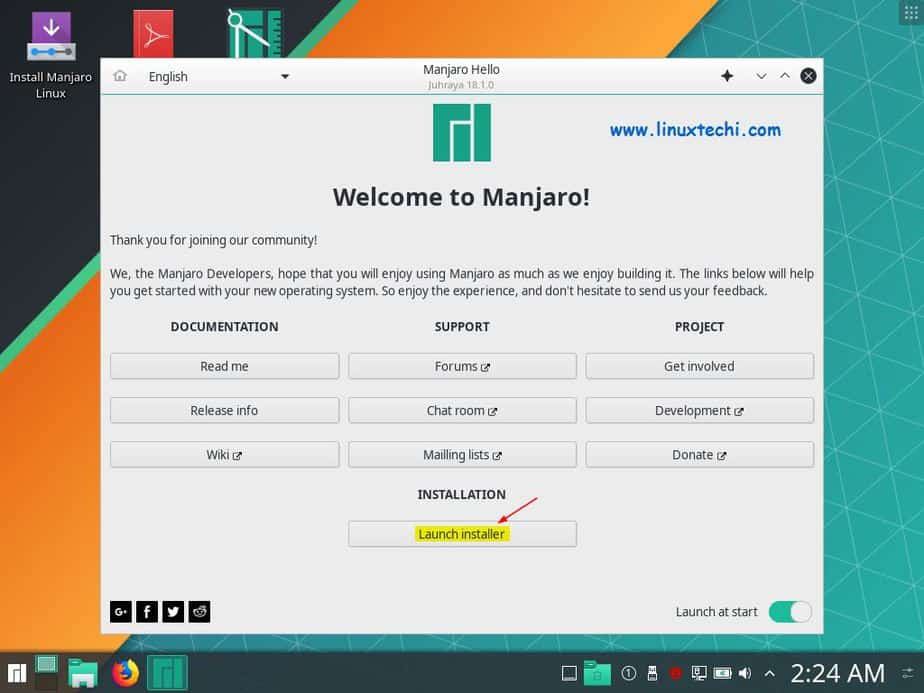
Step 4) Choose Launch Installer
Next the Manjaro installer will be launched and If you are connected to the internet, Manjaro will automatically detect your location and time zone. Click “Launch Installer” start installing Manjaro 18.1 KDE edition in your system.
Step 5) Choose Your Language
Next the installer will take you to choose your preferred language.
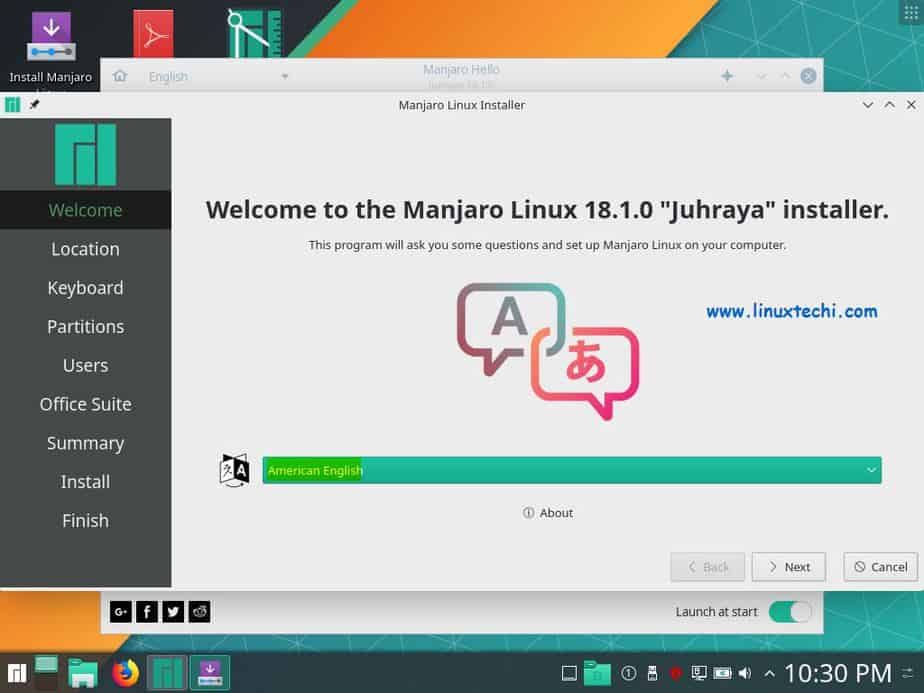
Select your desired language and click “Next”
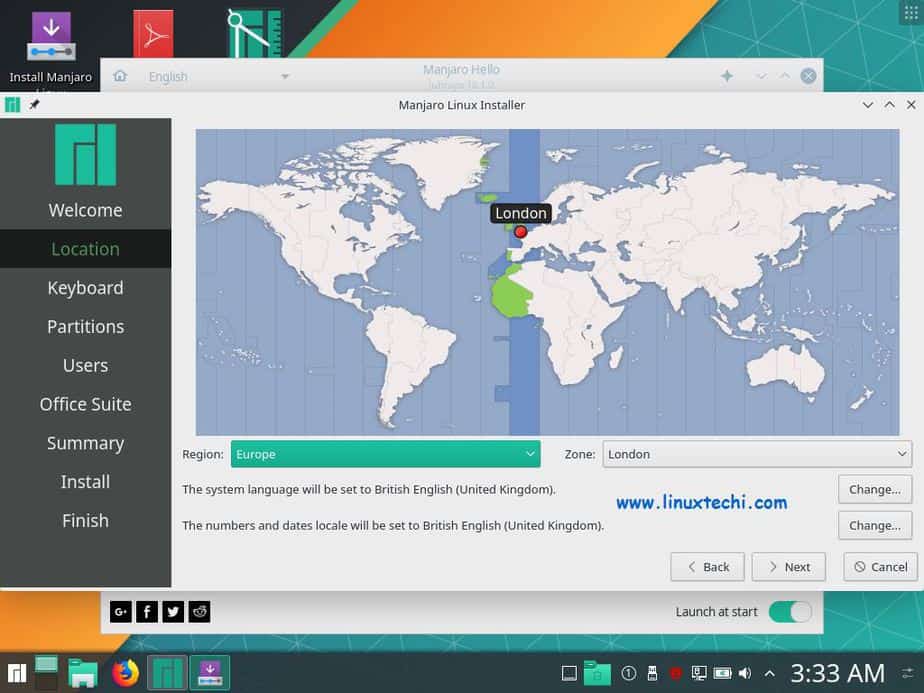
Step 6) Choose Your time zone and region
In the next screen, select your desired time zone and region and click “Next” to continue
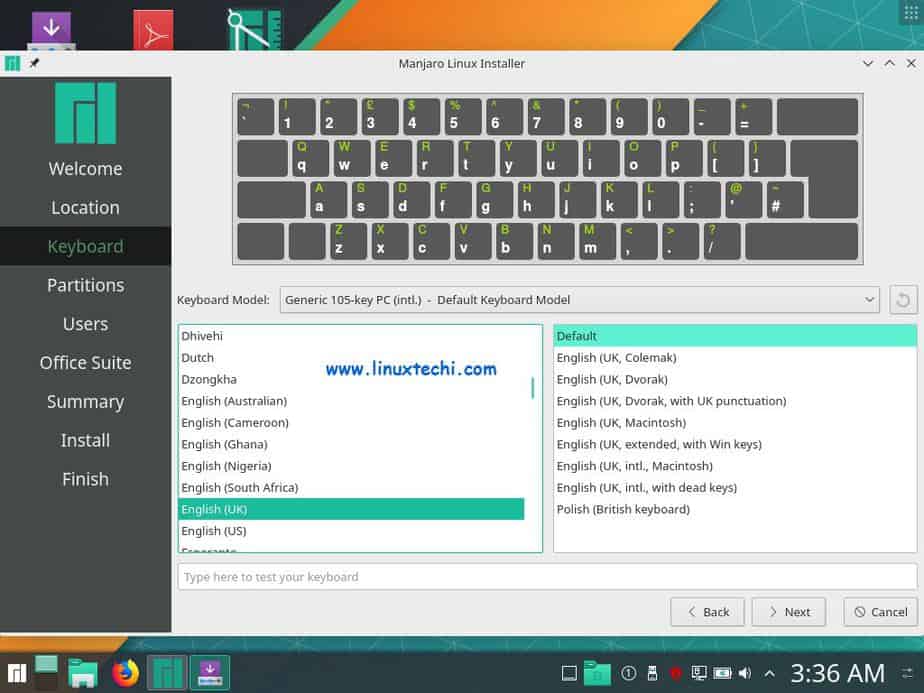
Step 7) Choose Keyboard layout
In the next screen, select your preferred keyboard layout and click “Next” to continue.
Step 8) Choose Partition Type
This is a very critical step in the installation process. It will allow you to choose between:
- Erase Disk
- Manual Partitioning
- Install Alongside
- Replace a Partition
If you are installing Manjaro 18.1 in a VM (Virtual Machine), then you won’t be able to see the last 2 options.
If you are new to Manjaro Linux then I would suggest you should go with first option (Erase Disk), it will automatically create required partitions for you. If you want to create custom partitions then choose the second option “Manual Partitioning“, as its name suggests it will allow us to create our own custom partitions.
In this tutorial I will be creating custom partitions by selecting “Manual Partitioning” option,
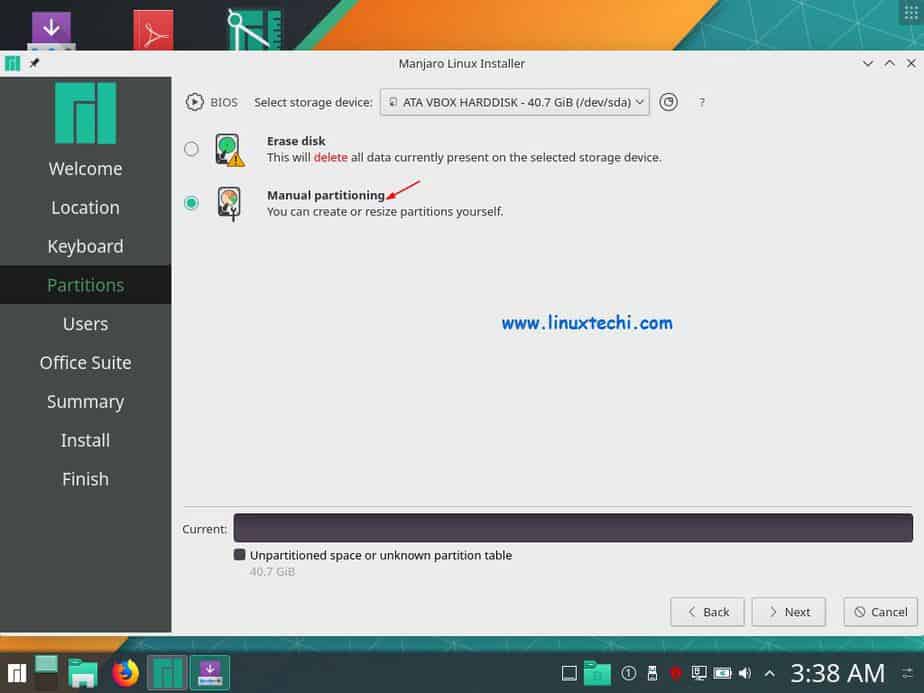
Choose the second option and click “Next” to continue.
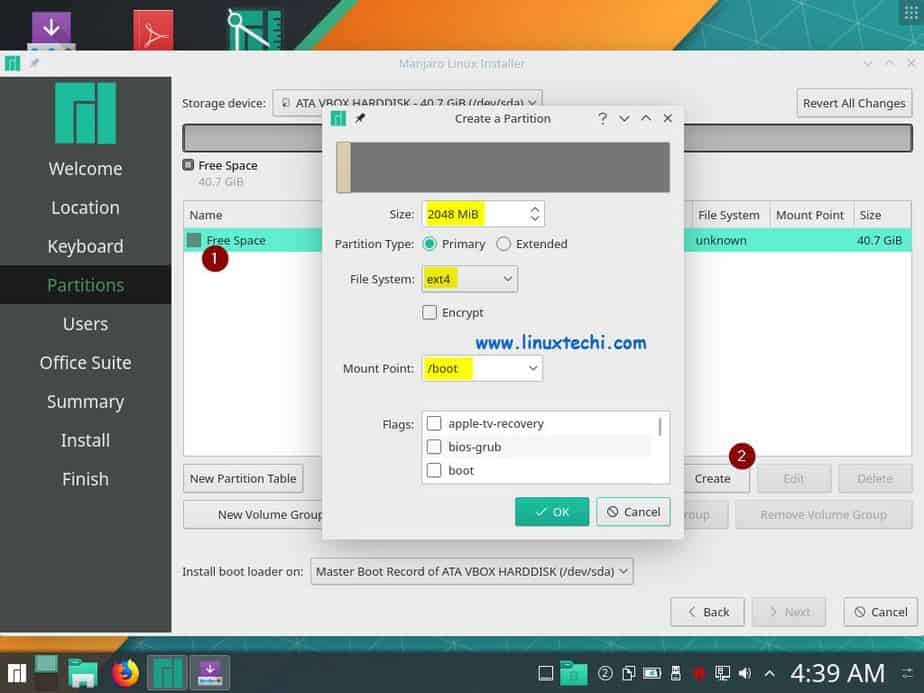
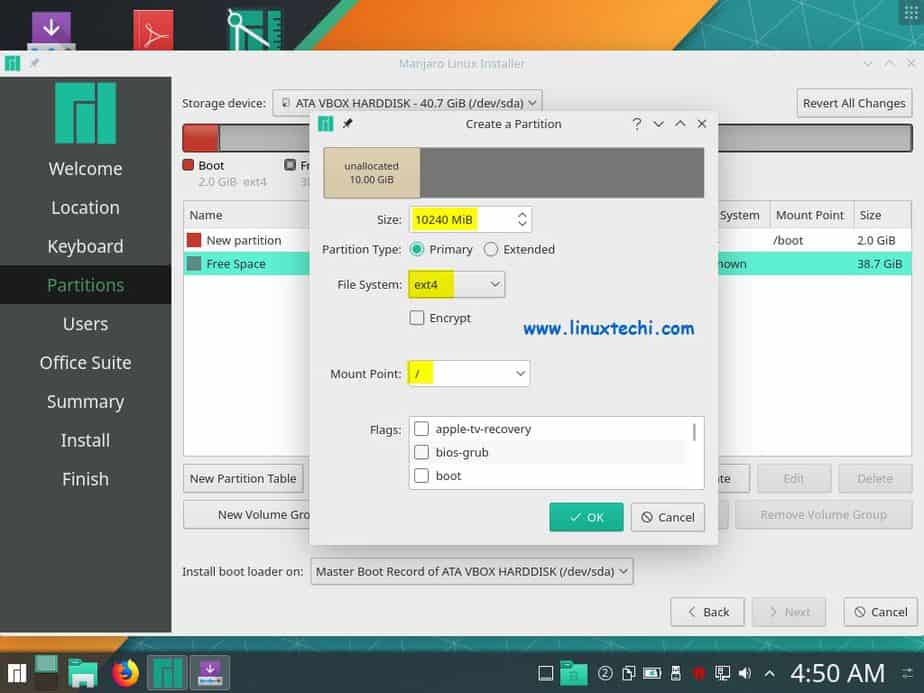
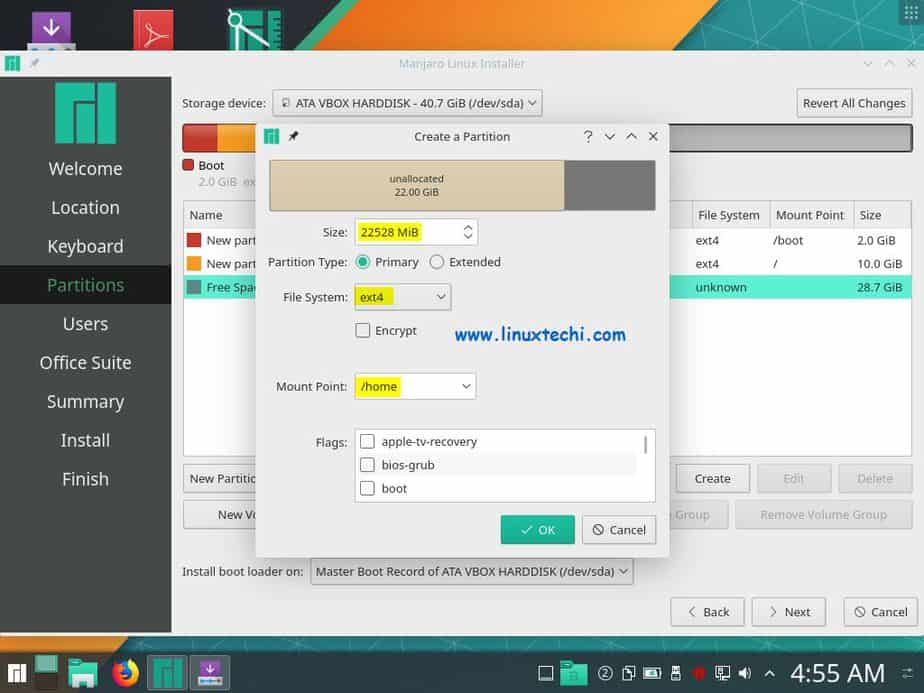
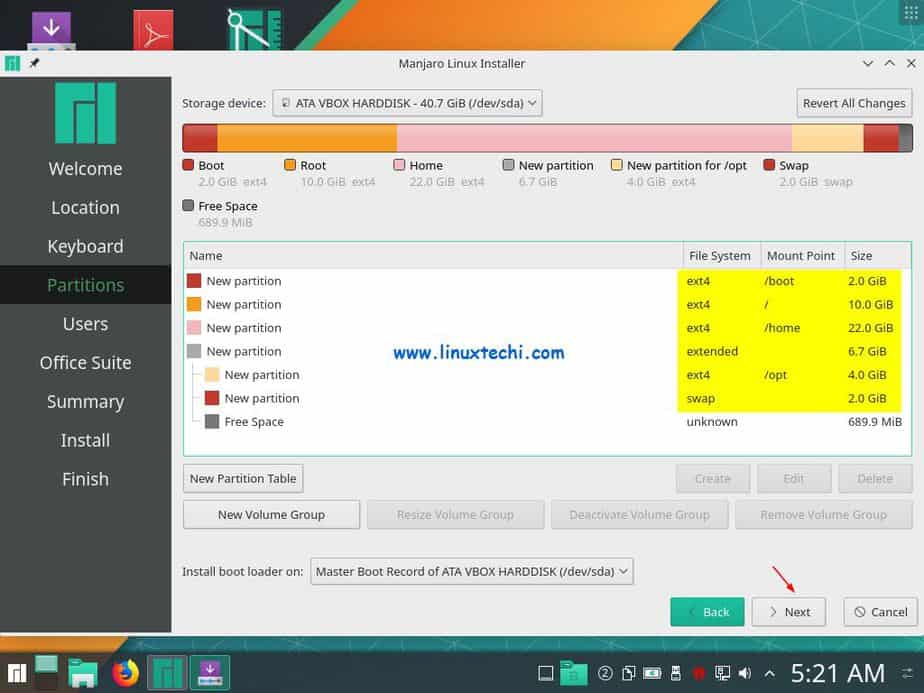
As we can see i have 40 GB hard disk, so I will create following partitions on it,
- /boot – 2GB (ext4 file system)
- / – 10 GB (ext4 file system)
- /home – 22 GB (ext4 file system)
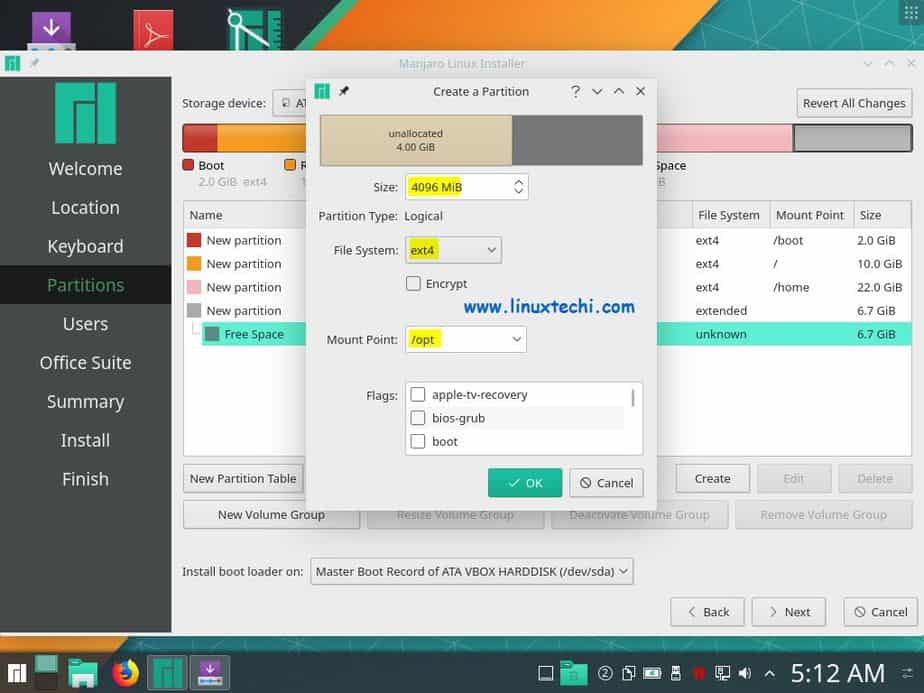
- /opt – 4 GB (ext4 file system)
- Swap – 2 GB
When we click on Next in above window, we will get the following screen, choose to create a ‘new partition table‘,

Click on Ok,
Now choose the free space and then click on ‘create‘ to setup the first partition as /boot of size 2 GB,
Click on OK to proceed with further, in the next window choose again free space and then click on create to setup second partition as / of size 10 GB,
Similarly create next partition as /home of size 22 GB,
As of now we have created three partitions as primary, now create next partition as extended,
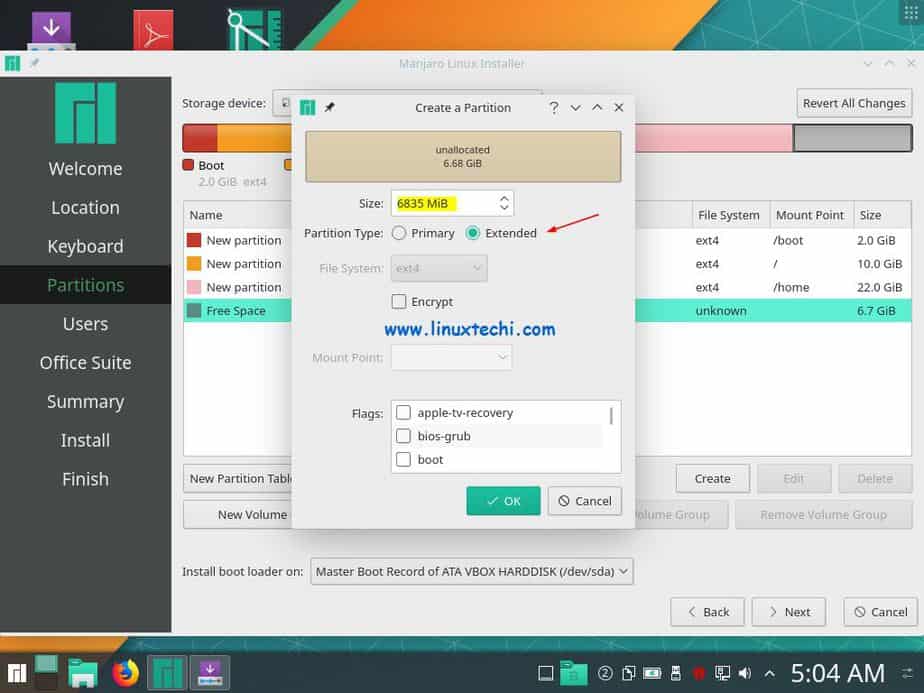
Click on OK to proceed further,
Create /opt and Swap partition of size 5 GB and 2 GB respectively as logical partitions
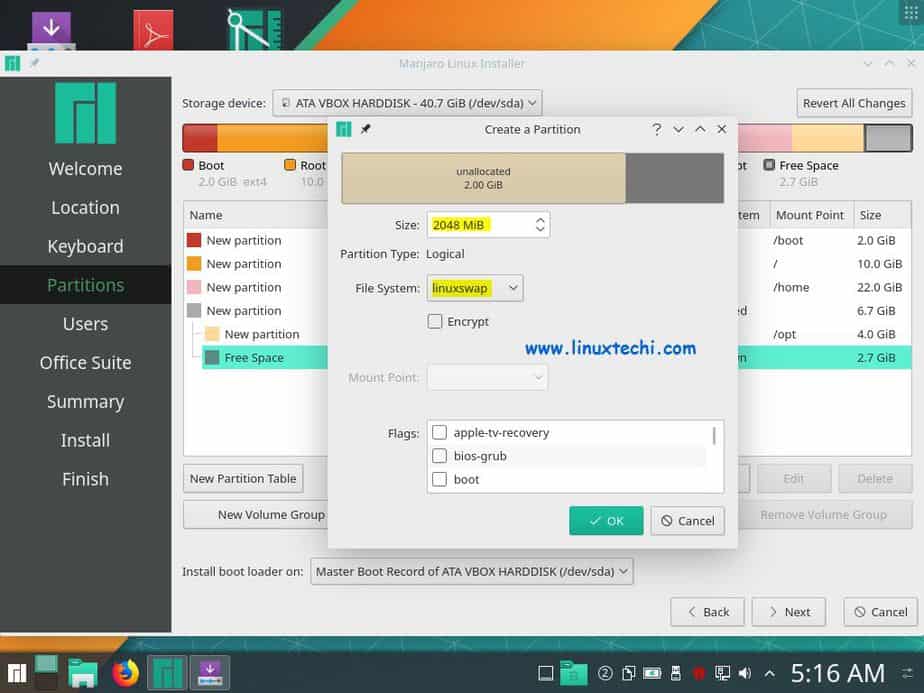
Once are done with all the partitions creation, click on Next
Step 9) Provide User Information
In the next screen, you need to provide the user information including your name, username, password, computer name etc.
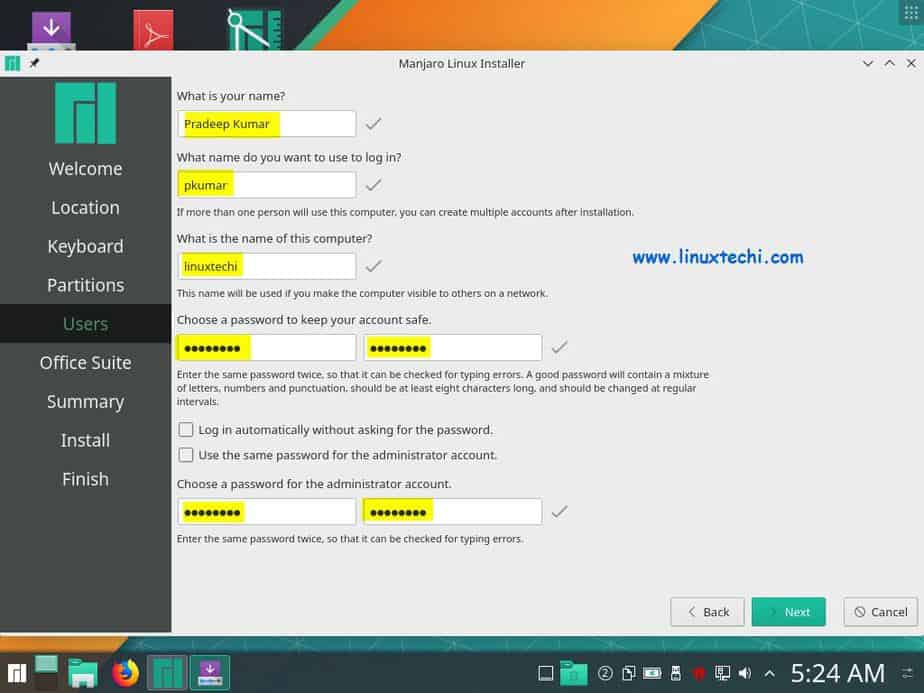
Click “Next” to continue with the installation after providing all the information.
In the next screen you will be prompted to choose the office suite, so make a choice that suits to your installation,
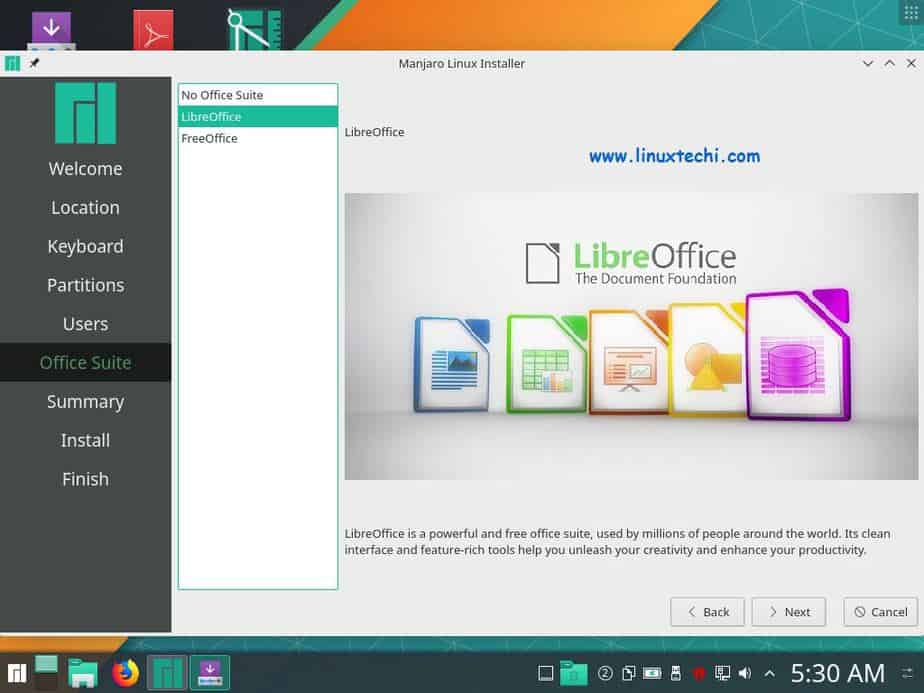
Click on Next to proceed further,
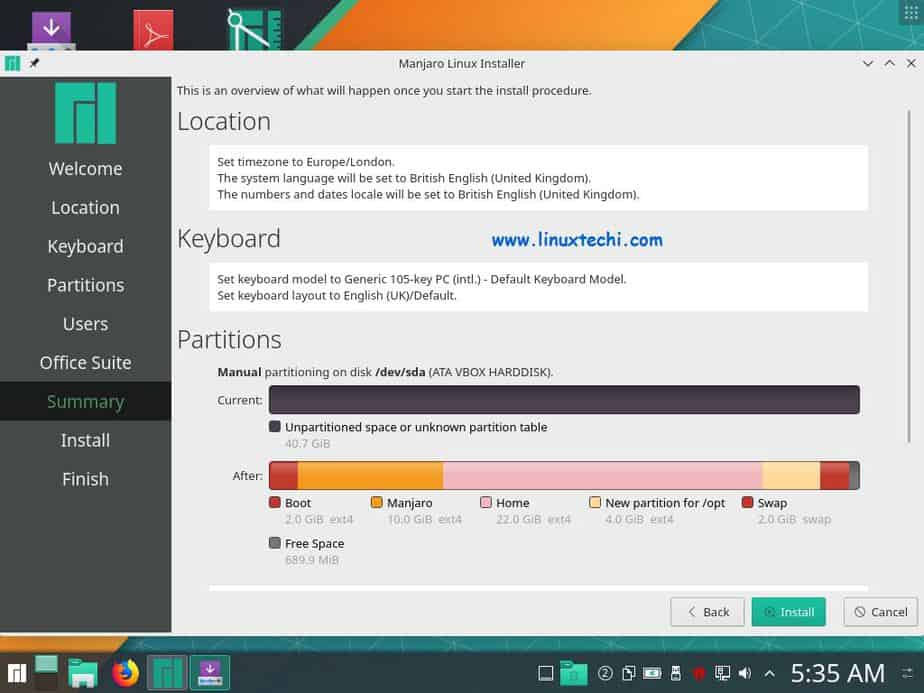
Step 10) Summary Information
Before the actual installation is done, the installer will show you all the details you’ve chosen including the language, time zone, keyboard layout and partitioning information etc. Click “Install” to proceed with the installation process.
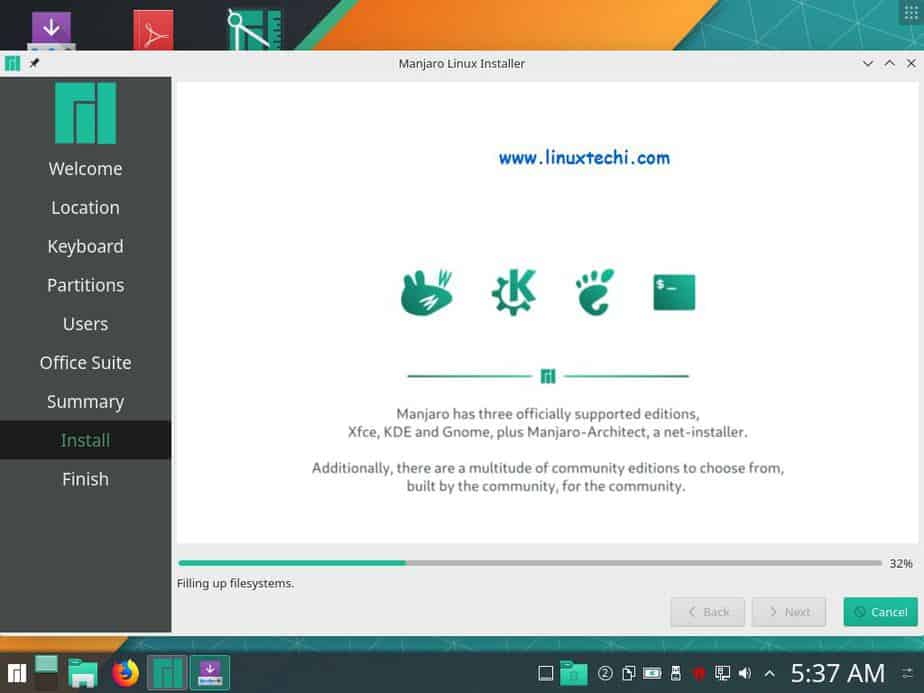
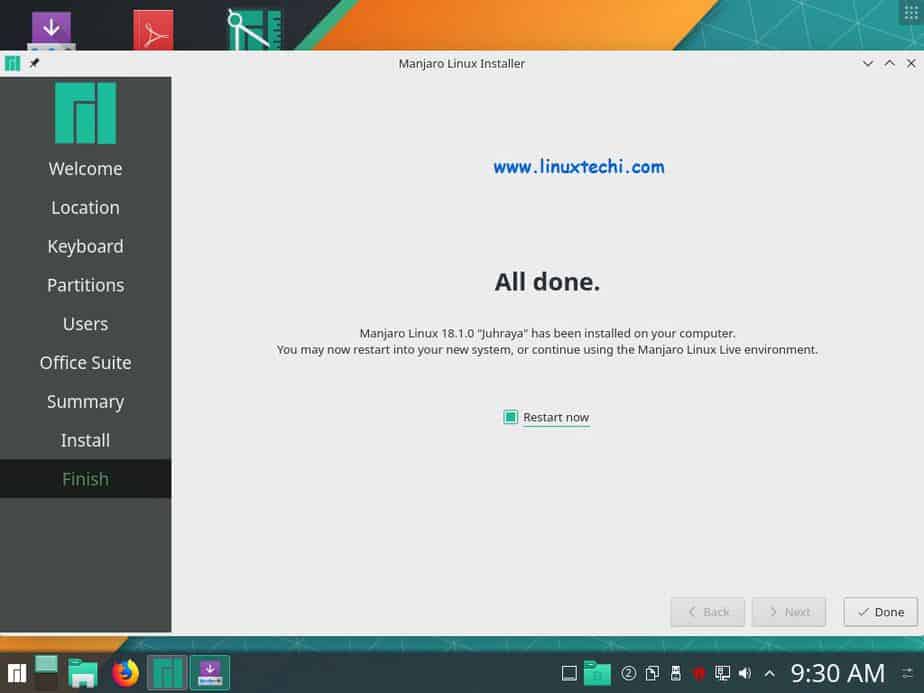
Step 11) Install Manjaro 18.1 KDE Edition
Now the actual installation process begins and once it gets completed, restart the system to login to Manjaro 18.1 KDE edition ,
Step:12) Login after successful installation
After the restart we will get the following login screen, use the user’s credentials that we created during the installation
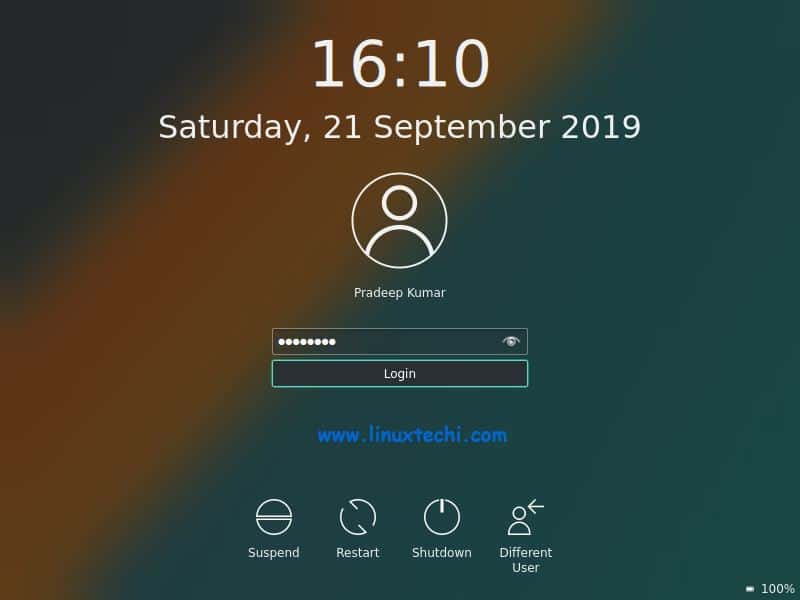
Click on Login,
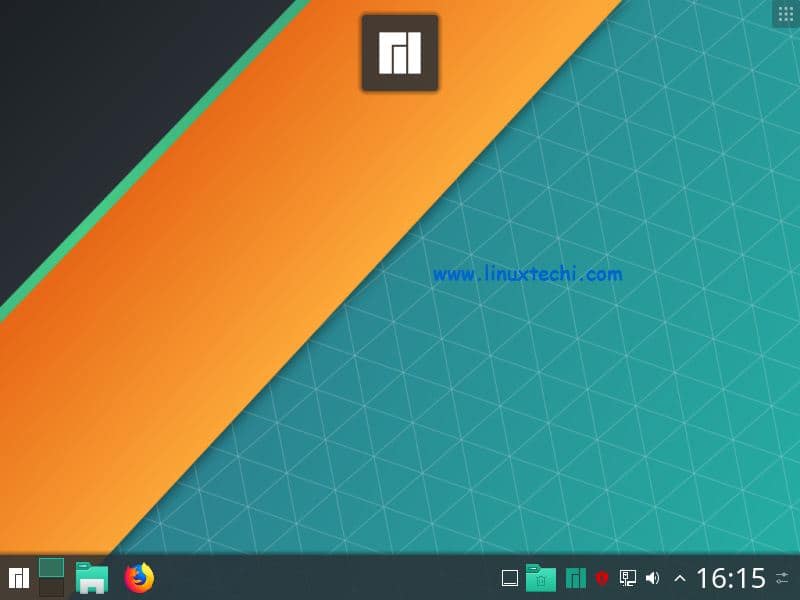
That’s it! You’ve successfully installed Manjaro 18.1 KDE edition in your system and explore all the exciting features. Please post your feedback and suggestions in the comments section below.


Good tutorial.
Only question is: do the partitions include a persistent section to save data?
What must be done to ensure changes are saved. Thanks!
Hey I’m a little new to this all too! That /Home directory will be your files, so adjust that size as you see you may need! However if you are dual booting that will NOT be available in Windows
Hi Matt,
/Home directory will not be available in your Windows OS if you have dual boot it.